
Sulman
-
Posts
184 -
Joined
-
Last visited
Reputation Activity
-

 Sulman got a reaction from Falaise in CM:BN Screenshot Thread #2
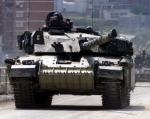
Quite. He wasn't so lucky the next turn, though. The Stug disappeared from LOS momentarily and then reappeared to make a successful shot. I had worked two other M5s into a flank position though (figuring he didn't reorient himself) and crept them forward. It took a lot more AP this time. Many penetrating hits (over two turns) before the vehicle caught fire. It made no attempt to fight back this time. The late model Stug IIIG is a little tougher I guess. The points from getting all of them were vital for the victory though.
Note the 37mm AP holes. He actually rotated 180 degrees trying to run to safety (I'm not actually sure, maybe trying to spot the shooter, or perhaps some crew were dead by this point) and there were a couple in the other side too. Tough old thing. Coming from CMSF2/BS, i am still surprised when penetrating hits don't do much. In the modern titles they're nearly always an 'emotional event'.
-
 Sulman got a reaction from Lethaface in CM:BN Screenshot Thread #2
Playing through 'Bumper Cars' in the Courage and Fortitude campaign I was getting quite despondent. The clock was running and my left flank platoon had bitten off more than it could chew and I couldn't get anything to support them, such is the maze-like nature of the map.
My platoon HQ then spotted two Stugs. "Great", I thought as I have no medium or heavy tanks, just a handful of M8s and M5s. But I did manage to sneak a nearby m5 into a field with LOS to the two stugs. To my astonishment it nailed both of them, one with a single shot causing a catastrophic explosion, and the other other with a penetrating flank shot. The 2nd stug backed up and faced the little stuart and I thought 'Game over', but to my surprise the Stuart just kept up the fire, and to my astonishment scored several penetrating hits to the frontal armour, knocking out the Stug. A real lesson to me not to underestimate the light tank's 37mm gun. Then a third Stug emerged and the little Stuart drove it off with several shots, receiving no incoming fire the whole time.
Despite turning to face the threat, I do not believe the Stugs ever got a spot on the Stuart. Cheered me right up, i can tell you. What a great little tank.
-
 Sulman got a reaction from Vergeltungswaffe in Those jonesing for CM in the 80s will love this
Long ago an ex-armour officer told me NATO were terrified in the early 60s of the sheer volume of pretty good tanks (T-55) the Soviets could field in the Fulda Gap, but this capability ('tank gap' with apologies to Dr. strangelove) was mitigated fairly quickly with qualitative measures on NATO's behalf like HESH and Chad Krupstahl's finest. Also the shine was taken off the T-series reputation fairly quickly in the middle east against numerically inferior opposition. Well trained crews in good equipment would be more than a match for the Soviet threat. Israel's contribution to modern tank doctrine is understated.
-

 Sulman got a reaction from George MC in TF-Thunder Campaign: Into the Valley
That's probably it. Difficult to avoid, imho. You've not got nearly enough infantry to clear out the AT teams the hard way, so at some point HE is going to be involved.
I did well in the following mission - a cakewalk in comparison - so I'm in a much better mood!
-
Sulman got a reaction from George MC in TF-Thunder Campaign: Into the Valley
Once the hilltop squads could not see any more targets on the high ground that observed the exits, I had to make a decision: Move infantry down onto the plain, or push the tanks? I might be wrong, but I just wasn't confident moving infantry off just yet -
There's very little cover on the map The squads lacked frepower No support assets I could not roll the Bradleys out of defilade yet until the area near the exit was clear. I took a gamble and thought the Abrams should be able to make it with a bit of luck, so I moved them up and they immediately found infantry a couple of hidden Kornet teams. Thankfully, the only cost was minor track damage (slowed it down a little) to 1 Abrams I moved onto the rise to cover the NW high ground in case there were units that had not revealed themselves.
I decided it was safe to pack up my infantry into the Bradleys and roll them down the hill. The risk seemed to have greatly reduced and they had plenty of support from the tanks. You can see the ENY observation posts clearly in this picture, but the contacts are old (they're all dead or ineffective at this point):
No other AFV would take damage for the rest of the mission. Progress was slow towards the exit because the TAC-AI kept changing orientation to deal with threats. one would not quit until it had obliterated an infantry squad hiding in a building. The AI changes which keep infantry in defensible terrain longer were brought sharply into relief on this map; I could not get any units to flee. They fought to the bitter end.
There's a point in every CM2 game vs the Ai when you know it's basically over, and you're just running down the clock. All my units (less 1 abrams) exited without incident, but shis mission did not go the way i had hoped. After my problems with Nightstalkers resulted in having to take a defeat I was disappointed to encounter another.
It is what it is, but I must admit I felt a little short-changed and didn't fully understand the accounting. The Syrians got 300pts for casualties inflicted, and 1900 for reasons I didn't see - they weren't listed in the breakdown. I am not going to retry the mission, because at my level I think this is about the best I could do on what is a very dificult map. There's not a lot I could do differently, I think my basic strategy was fine. The right flank of the map is also a possibilty but you've still got to deai with all those AT-14 teams (at least six) that have flank shots.
Oh well, onwards and upwards!
-
Sulman got a reaction from George MC in TF-Thunder Campaign: Into the Valley
Although the briefing mentioned minimising collateral damage, the Syrian units didn't seem to care about this, and politely asking them to leave buildings so they could be shot at didn't work either , so the bushmaster HE did its thing: This is a typical sight on this map: An AT-14 positioned near a window (or the remains thereof..)
A note about these units, I am unsure of their skill level but they are bloody hard to kil. The gunner usually goes down quick, but the asst. gunner usually survives the most diabolical incoming fire. This actually led to the platoon commander's loss - I sent the HQ unit forward at the same time the squads moved up, and as they approached the pinned unit the Bradley let go some HE, unfortunately killing the LT. This wasn't area fire, the Bradley was reacting to a spot on the asst. gunner, and he used the big boom stick.
With my platoon squads up I issued fire arcs to stop them immediately engaging ENY units they saw, and on the villa below the hilltop what did they see?
You can appreciate the difficulty with this map. That's 2 AT teams on that roof, with one being an AT-14.
I wanted to smack it with that squad, but I was well aware from the previous game that the northernmost AT-14 team would support them, and I hatched a plan to use my Bradley as bait a big stick. In no way did I want to lose that Bradley, but I realised the foundations of this hilltop house were on a raised berm, so the Bradley would have some protection. I moved it forward:
He was a little far forward as you can see from the picture, so I moved him back. They actually hit with a Kornet and it damaged the TOW launcher, but the Bushmaster sang and pinned them. With that done my squad were free to engage the rooftop team on the closer house:
Both this building and the much further one engaged by the Bradley had good observation on the exit road, so they had to be dealt with. Around this time I realised that I'd actually lost an Abrams to fire from the farm, very early on. Because they weren't moving I had failed to keep an eye on them, and when cycling through units (I do this as a sanity check to ensure I've not forgotten anybody) I found a crew cowering in a garden.
It had been hit between the roadwheels on the right hand side. It looked otherwise undamaged. I was annoyed with myself for not realising it was exposed but this is part of the game too.
More to come!
-
Sulman got a reaction from George MC in TF-Thunder Campaign: Into the Valley
Once the infantry platoon got near the complex at the top of the hill, I set them fire arcs and moved them in a roughly 80m line to the edge of the treeline. They immediately got engaged by the building occupants and returned fire. This went on for a turn or so and nobody was getting anywhere. I did not want to try and assault the building as this did not go well before, I really needed more firepower to decisively evict or kill the occupants. I had no crewed machine guns, so my attention wandered to the M2s waiting below the hill. I'd seen Syrian APCs trundling around this type of terrain in many previous battles, so perhaps I could use my Bradleys to supplement my base of fire?
The M242 Bushmaster is devastating against infantry, but the Brads do not survive anti-tank environments very well, but I had to risk it. I ordered a single M2 to move alongisde my platoon line. He parked up and immediately destroyed the AT-14 team on the rooftop:
As often happens, the mere presence of an AFV caused another ATGM team to reveal themselves (my infantry never spotted them) but they to did not last long, facing the collective fire of my platoon and the solo Bradley. No casualties so far.
-
Sulman got a reaction from George MC in TF-Thunder Campaign: Into the Valley
I thought I'd try a little recap of my 2nd attempt at this map. The first did not go well and I decided to give it another go. Fresh of my success with 'Dagger Fight' which ended in a Total Victory when the computer surprisingly threw in the towel, I thought this would be a nice change of pace. First, the briefing:
Generally, CM2 briefings have a lot of hidden clues. This one is vague and really once you start this mission you'll want to punch the intelligence officer. The map is anything but clear. Combined with the fact you have a Coy of tanks you know things are about to get spicy. The farm is merely one of many locations with ENY activity, so yes, it's one of those. The scenario 'ATGM Ambush' is good training for this mission. This is essentially the same thing on a much bigger scale.
The map, and some general ideas about strategy, with a caveat:
1st Attempt:
My original strategy was to dismount my mech inf platoon, get them up the hill and occupy the buildings circled in yellow. I did achieve this, but at quite high losses to one of the squads. I mistakenly - stupidly - thought I would have some arty assets later as there is an FO, and my plan was to get him in that building which could observe the map exit where there would no doubt be plenty of ENY units.
I did not count on a couple of things:
How hard it would be to dislodge the few infantry in that building, occupied by apparenlty the world's toughest ATGM crew. The whole northern portion of the map being lousy with ENY. Mutual support for ENY in this hilltop complex from the high ground to the N and NE. ATGMs as a close-support-weapon (devastating, and new to me) One syrian ATGM squad displaced about 80m to a nearby field and started pounding the building with missiles. I lost a whole squad to ATGM fire when the building collapsed, and the others only survived when I hid them deep in the complex, which rendered them ineffective. I rushed a bradley up the hill but left it's right flank just momentarily exposed and it got deaded by ATGM fire from the NE. I decided to push the tanks forward and they got so beat up mid-way through I decided to think about it and try again. No shame in admitting you get it wrong occasionally.
If at first you don't succeed...
I thought my general idea of clearing the nearby hilltop was fairly sound, especially if my inf had javelins (they did!) they could use against the Northern ATGM teams. I needed to be very careful to keep them in defilade once they were up there. I was really missing some LMG support too. They would have been very handy.
v
The 'suspicious activity' reported by the lead tank (as per the brief) is just out of the frame on the right, a small farm complex. Now, bit of a moan from me; I do not like missions that have your units starting in danger. The farm is ~250m away, which puts the lead elements easily in range even from RPG fire.
Like most players I like to do a little 'walk' around the map at truppen level, you can see that at 3x magnification two of my M1s are easily visible at their start line from a rooftop just down the road:
Starting T1 I sent my infantry up the hill, classic two up, one back formation with a Bradley watching over them. I was well used to CMBN where scrub and woodland usually held small units waiting along avenues of approach:
My lead M1s immediately (and somewhat predictably) picked up targets in the farm complex and further north - ATGM teams - and engaged them effectively.
Although potentially vulnerable in this position, I think they were generally out of harm's way and did not want to move them just yet. They also took out a lone sniper on the nearby hilltop that was near my infantry but had no LOS to them.
More to come!
-
 Sulman got a reaction from A Canadian Cat in CMFB (Unofficial) Screenshot Thread
Sometimes you get lucky and pull off the sort of stunts you curse the AI for. This 75mm M4 got sent on a rat run to try and get behind a Tank Destroyer that I knew was keyholed on this street. Against my expectations. the Sherman rolled over the short brick wall and put an AP round where the sun doesn't shine 😆
As soon as that was done, the Turret swung left and engaged a Panther(!!) at emerging from the intersection at the top of the street. 2 hits on the side of the turret, and it was ablaze.
A highlight of what was a very tough scenario.
-
Sulman got a reaction from Lethaface in CMFB (Unofficial) Screenshot Thread
It is, I'm getting more into the WW2 titles (CMSF1 &2 were my main playground) and I'm very impressed with the effort put into the scenarios. I looked at Singling on Google Earth and was so impressed how well the terrain is represented in game. Also the colour palette captures that grey Winter vibe absolutely perfectly.
-
Sulman got a reaction from Lethaface in CMFB (Unofficial) Screenshot Thread
Sometimes you get lucky and pull off the sort of stunts you curse the AI for. This 75mm M4 got sent on a rat run to try and get behind a Tank Destroyer that I knew was keyholed on this street. Against my expectations. the Sherman rolled over the short brick wall and put an AP round where the sun doesn't shine 😆
As soon as that was done, the Turret swung left and engaged a Panther(!!) at emerging from the intersection at the top of the street. 2 hits on the side of the turret, and it was ablaze.
A highlight of what was a very tough scenario.
-
 Sulman got a reaction from jtsjc1 in CMFB (Unofficial) Screenshot Thread
Sometimes you get lucky and pull off the sort of stunts you curse the AI for. This 75mm M4 got sent on a rat run to try and get behind a Tank Destroyer that I knew was keyholed on this street. Against my expectations. the Sherman rolled over the short brick wall and put an AP round where the sun doesn't shine 😆
As soon as that was done, the Turret swung left and engaged a Panther(!!) at emerging from the intersection at the top of the street. 2 hits on the side of the turret, and it was ablaze.
A highlight of what was a very tough scenario.
-
 Sulman reacted to IICptMillerII in Those jonesing for CM in the 80s will love this
This is a great document by Grau, but it is important to note that it is about modern Russian doctrine, not Soviet. There are significant differences between the two. Modern Russian doctrine is quite different than Soviet doctrine.
-
 Sulman got a reaction from DerKommissar in 2 tanks, one sabot?
I was playing a TF Thunder scenario with a lot of close range encounters. This was about 150m and there was an enormous explosion and 3 smoke columns. I could not see the vehicle behind the targetted tank, just its smoke. I guessed it was either an IED car or a BMP, but the review showed this...
Note the hit decal over the first road wheel, there is one on the second tank (you can't see it) on the right hand side.
I'd heard of this happening but had never seen it. very impressive.
-
 Sulman got a reaction from Saint_Mattis in 2 tanks, one sabot?
I was playing a TF Thunder scenario with a lot of close range encounters. This was about 150m and there was an enormous explosion and 3 smoke columns. I could not see the vehicle behind the targetted tank, just its smoke. I guessed it was either an IED car or a BMP, but the review showed this...
Note the hit decal over the first road wheel, there is one on the second tank (you can't see it) on the right hand side.
I'd heard of this happening but had never seen it. very impressive.
-
 Sulman got a reaction from landser in TF-Thunder Campaign: Into the Valley
I thought I'd try a little recap of my 2nd attempt at this map. The first did not go well and I decided to give it another go. Fresh of my success with 'Dagger Fight' which ended in a Total Victory when the computer surprisingly threw in the towel, I thought this would be a nice change of pace. First, the briefing:
Generally, CM2 briefings have a lot of hidden clues. This one is vague and really once you start this mission you'll want to punch the intelligence officer. The map is anything but clear. Combined with the fact you have a Coy of tanks you know things are about to get spicy. The farm is merely one of many locations with ENY activity, so yes, it's one of those. The scenario 'ATGM Ambush' is good training for this mission. This is essentially the same thing on a much bigger scale.
The map, and some general ideas about strategy, with a caveat:
1st Attempt:
My original strategy was to dismount my mech inf platoon, get them up the hill and occupy the buildings circled in yellow. I did achieve this, but at quite high losses to one of the squads. I mistakenly - stupidly - thought I would have some arty assets later as there is an FO, and my plan was to get him in that building which could observe the map exit where there would no doubt be plenty of ENY units.
I did not count on a couple of things:
How hard it would be to dislodge the few infantry in that building, occupied by apparenlty the world's toughest ATGM crew. The whole northern portion of the map being lousy with ENY. Mutual support for ENY in this hilltop complex from the high ground to the N and NE. ATGMs as a close-support-weapon (devastating, and new to me) One syrian ATGM squad displaced about 80m to a nearby field and started pounding the building with missiles. I lost a whole squad to ATGM fire when the building collapsed, and the others only survived when I hid them deep in the complex, which rendered them ineffective. I rushed a bradley up the hill but left it's right flank just momentarily exposed and it got deaded by ATGM fire from the NE. I decided to push the tanks forward and they got so beat up mid-way through I decided to think about it and try again. No shame in admitting you get it wrong occasionally.
If at first you don't succeed...
I thought my general idea of clearing the nearby hilltop was fairly sound, especially if my inf had javelins (they did!) they could use against the Northern ATGM teams. I needed to be very careful to keep them in defilade once they were up there. I was really missing some LMG support too. They would have been very handy.
v
The 'suspicious activity' reported by the lead tank (as per the brief) is just out of the frame on the right, a small farm complex. Now, bit of a moan from me; I do not like missions that have your units starting in danger. The farm is ~250m away, which puts the lead elements easily in range even from RPG fire.
Like most players I like to do a little 'walk' around the map at truppen level, you can see that at 3x magnification two of my M1s are easily visible at their start line from a rooftop just down the road:
Starting T1 I sent my infantry up the hill, classic two up, one back formation with a Bradley watching over them. I was well used to CMBN where scrub and woodland usually held small units waiting along avenues of approach:
My lead M1s immediately (and somewhat predictably) picked up targets in the farm complex and further north - ATGM teams - and engaged them effectively.
Although potentially vulnerable in this position, I think they were generally out of harm's way and did not want to move them just yet. They also took out a lone sniper on the nearby hilltop that was near my infantry but had no LOS to them.
More to come!
-
Sulman reacted to BrotherSurplice in Task Force Thunder AAR
Grand, hope you enjoy it 😁
Thks bby ❤️
Yes, the quality of life improvements from the new engine are really nice. And the presence of actual fortifications makes missions like this much more interesting. I agree about the mines, it was highly irritating that I kept my breach team squatting on top of the things for the whole battle and they only spotted one little patch.
Thanks, glad you're enjoying it.
-
Sulman reacted to BrotherSurplice in Task Force Thunder AAR
Right, let's get cracking.
Our first mission is a nice simple one. The invasion of Syria is beginning and TF Thunder is leading the charge. Our target is an old fortress watching the Syria-Iraq border. My forces for this mission are a mech-heavy company team from my battlegroup.
Our mission is to occupy the barracks and HQ building of the border fort and to secure the border crossing by destroying the Syrian forces garrisoning the crossing point.
The enemy is a reserve infantry battalion, dug in and supported by static T-55/T-54 tanks. The enemy positions have little to no depth, companies in line and platoons in line. They have mined the only crossing point. The battalion is lightly armed and likely to be poorly trained and led. Their tanks are a serious threat to my Strykers but pose little threat to my tanks. The mines will need to be cleared and the Syrian tanks will need to be eliminated or neutralised before I make my assault on the fort.
The AO is roughly 1km x 1km and the terrain is not complex, a flat desert dominated by a few key terrain features.
Most important is the border berm, running north-south. This completely blocks movement and (obviously) provides concealment. The only opening lies south of my start line where a highway cuts through the berm and as previously mentioned, has been mined by the Syrians. Luckily for me, however, some kind souls have built ramps sloping up my side of the berm. This turns a previously onerous obstacle into a ready-made hull-down firing position with excellent sightlines and fields of fire. This is an advantage that I will be making great use of.
The fort dominates the Syrian position. The buildings provide cover and concealment for infantry and provide clear sightlines across the entirety of the Syrian half of the AO. The buildings are likely to be occupied by Syrian HQ units and rifle squads. Care will have to be taken when occupying this objective, as while the Syrian reservists are no match for my riflemen in a firefight, they may be able to inflict casualties by lying in wait inside the buildings and setting point-blank ambushes. Much of my fire will have to be concentrated on this objective.
Behind the Syrian positions, a dry Wadi leads north-west to south-east. This could provide shelter from observation and direct fires. The Wadi would be a decent place for a quick reaction force to reinforce the Syrian positions. It will have to be placed under observation as I make my attack.
The conditions are fine, with clear weather, warm temperature, dry ground and a light wind coming from the west. Helpfully, the Syrians are also being hit by a moderate E-warfare effort.
My troops consist of A Company (a Stryker rifle company), reinforced by an armoured platoon from B Company. On the field at deployment, I have 1st Platoon of A Company, 1st Platoon of B Company, the Mobile Gun System Platoon and the Company HQ Platoon. The Company HQ Platoon has a breach team of engineers for clearing the mines at the berm opening. The 2nd and 3rd Platoons of A Company will gradually reinforce, arriving in approximately ten and twenty minutes, respectively. Our fire support is extensive. Along with the two 120mm mortar sections (two tubes to a section) of the battalion artillery, we will have an entire 155mm howitzer battery (three two-gun sections) available when they have completed their counter-battery missions. Also available to me is an RQ-7B Shadow UAV for observation.
I have a powerful force, my fire support is extensive, the terrain gives me a great advantage and my enemy is of poor quality. If I keep things simple and sensible, there should be no question of victory.
The next instalment will be much sooner than this one was, as I have already played the mission, taken my screenshots and made my notes. Watch this space!
-
 Sulman got a reaction from BrotherSurplice in Task Force Thunder AAR
I found the mines frustrating in this mission, as I thought they were sub-optimal from a mission design point of view. You can mark them with engineer squads, but this won't stop your vehicles from setting them off. You can cheese it by crawling along the right edge of the berm opening but this has to be done with extreme care.
I put my AFVs on overwatch (you can park them right on the berm - it's dark and the Syrians won't see them - and sent the crunchies on foot. The abundant artillery makes this mission easy though; it can be won without going near the objective.
I'm looking forward to the next one, as I found that pretty tricky.
-
Sulman got a reaction from BrotherSurplice in Task Force Thunder AAR
I'm working through TF Thunder myself. I don't know what it is about CMSF2, but the reworked maps and subtle engine differences add up to a very different experience, imho. Really enjoying it.
-
 Sulman got a reaction from c3k in ATGMs (and RPGs) an order of magnitude too powerful
I don't know about an order of magnitude; that is a lot.
They are difficult at times. There's a scenario in TF Thunder's campaign (5?) where you are hunting manpads, the briefing says to be quick and remember your armour is impenetrable to small arms, but if you roll your Strykers in within 500yds they'll get cooked, and fast. You must screen.
Screening however is difficult and very time consuming. On urban maps where every single building can hide an AT team it's a tactical nightmare.
As for RPG-29/AT-14 effectiveness, the internet is full of videos from Syria and Turkey showing tanks getting opened up like they're paper. In fact it's videos from Syria that made me think BF had got it right. Cities are no places to be rolling vehicles around, especially when every man-jack has a bloody RPG under his bed.
-
Sulman reacted to MikeyD in 'ATGM Ambush' Experiences?
Bradley tends to survive HEAT hits to the sides better than frontal hits. That makes a difference in this particular scenario. Its the difference between an immobilized vehicle still able to lay fire down on the suspected attacker and a burning vehicle that occasionally cooks off stowed rounds, suppressing the infantry around it.
-
 Sulman got a reaction from IICptMillerII in First impressions
I'm impressed. I've been looking forward to it for a long time, as I played CMSF more than anything else.
Despite what I knew from CMBS and CMBN I was quite surprised how differently some familiar scenarios play out. 'Ambush at Al Fubar' is an old favourite of mine and I actually found it quite difficult; gone is the ability of your troops to simply press on through fire, and urban fighting feels a lot nastier. The tendency for units to run for it when artillery falls makes some interesting situations; and the battlefield generally feels a lot more dangerous.
It's also very smooth on my Macbook Pro.
The frist time I heard the loading screen music a huge smile came across my face.
-
_insignia_1987.thumb.png.637a86f5e2913e1589e261783a858045.png) Sulman got a reaction from Howler in First impressions
Sulman got a reaction from Howler in First impressions
I'm impressed. I've been looking forward to it for a long time, as I played CMSF more than anything else.
Despite what I knew from CMBS and CMBN I was quite surprised how differently some familiar scenarios play out. 'Ambush at Al Fubar' is an old favourite of mine and I actually found it quite difficult; gone is the ability of your troops to simply press on through fire, and urban fighting feels a lot nastier. The tendency for units to run for it when artillery falls makes some interesting situations; and the battlefield generally feels a lot more dangerous.
It's also very smooth on my Macbook Pro.
The frist time I heard the loading screen music a huge smile came across my face.
-
 Sulman got a reaction from tpr in First impressions
I'm impressed. I've been looking forward to it for a long time, as I played CMSF more than anything else.
Despite what I knew from CMBS and CMBN I was quite surprised how differently some familiar scenarios play out. 'Ambush at Al Fubar' is an old favourite of mine and I actually found it quite difficult; gone is the ability of your troops to simply press on through fire, and urban fighting feels a lot nastier. The tendency for units to run for it when artillery falls makes some interesting situations; and the battlefield generally feels a lot more dangerous.
It's also very smooth on my Macbook Pro.
The frist time I heard the loading screen music a huge smile came across my face.


_insignia_1987.thumb.png.637a86f5e2913e1589e261783a858045.png)