
Hardradi
-
Posts
137 -
Joined
-
Last visited
Reputation Activity
-

 Hardradi reacted to Bil Hardenberger in CMSF 2 BETA AAR #2 – Syrian Probe (Quick Battle)
MINUTE 3
2nd Squad on my far left (2nd Platoon) received a sound contact as it moved up towards its position.
This gif has been sped up by 50%:
The image below shows final positions... I believe (and I am not sure as I really dislike the standard icons, so difficult to tell unit/vehicle types apart) that this is a light armor vehicle. I assume (and I was taught to never assume) that Ian is reconnoitering this area in order to determine how I am deploying. If he doesn't have a dismounted team nearby, he might not know my BMPs are on the other side of the ridge. That enemy vehicle was definitely moving, I do wonder if its alone. Perhaps I can expect a scout team to poke its head over the ridge in front of my squad.
In the 1st Platoon zone the T-62M moved past the advancing infantry and took a couple shots, both hit the upper floor of the large building in the Farm Objective... I am slowly getting closer to the ridge and my infantry should be able to sight into the objective next turn.
Time is slightly compressed in this gif, the tank reload took several more seconds to complete than is shown.
-
Hardradi reacted to Bil Hardenberger in CMSF 2 BETA AAR #2 – Syrian Probe (Quick Battle)
SETUP & INITIAL ANALYSIS
This view from my side of the map shows the two main terrain features on the map, what I am calling Snake Ridge and Star Hill. Note how close the initial objectives are to my start position. That makes me very nervous.
In the background of the above image, you can see the four positions where I dropped my TRPs. These are what I think could be the main Hull Down positions for Ian to use against me. They are labeled HD1 to HD4. With those TRPs in position (slightly on the reverse slope) I can either smoke them or make targeting that position easier. If he has ATGM positions on them, I can drop HE quicker and more accurately.
From the other side of the ridge, you can see how close those first objectives are to my Assembly Area (AA). This could be a major problem as Ian can, and probably will have units as close to Snake Ridge and Star Hill that I am.. and his positions on the right side of this image could be so close to Snake Ridge over there that I could immediately be in trouble.
A nightmare scenario for me would be if he bought a Company of Leopards and rushed my troops before they could jump off and while loaded. he could feasibly end this game in the first couple of turns. Wouldn't be sporting, but hey.. things happen. If he seizes the right end of Snake Ridge in the early turns, again this could be a very short game.
The terrain from Snake Ridge all the way through the rest of Ian's AO is pretty flat. So a close defense would make sense.
The red line indicates where I suspect the Forward Edge of the Battle Area (FEBA) lies. It could be closer, it could be farther back. Regardless, the initial turns could be scary and edge of your seat stuff. We'll also see how sporting or ruthless Ian can be.
You can see from the below that my AA sits behind a high ridgeline, this is Snake Ridge. Star Hill is very clear in this GIF as well.
The following image shows the proximity of the first objective. I am not normally one to instantly go for objectives, but I suspect he will have a unit of some sort there, so first task is to find out. I will dismount the infantry platoon assigned this sector and move them on foot to the ridge to peek over the top. They will be on Hunt orders in case he sends a vehicle or two over the top as well.
Star Hill from my lines. I will be sending the AT-13 Platoon (-) to this position in order to look down on the initial objective.
-
Hardradi reacted to Bil Hardenberger in CMSF 2 BETA AAR #2 – Syrian Probe (Quick Battle)
Even though the other BETA AAR is still going on, I expect it will end very soon. I had already promised to take IanL on in a second game to fill the time, so here 'tis. I hope it fills the time left until release.
BACKGROUND
A NATO attack is in progress and they are making massive gains. In an attempt to slow them down high command has decided that a spoiling attack is required. We are the tip of that spear. Our task is to Probe into the assigned sector on the flank of the NATO attack and determine the strength of the Canadian flank security force in front of us and if possible, destroy it or force it to withdraw. Our force will not be reinforced unless successful, so if we fail, another unit will become the spearhead for the main attack.
Hopefully that will suffice to set the stage for what we are doing in this action. Ian and I are playing a Quick Battle (QB) Medium Probe, with me as the Syrians on the attack, force selection for both sides was Mixed (Infantry, Mech Infantry, and Armor are all okay to purchase) with no restrictions set for either side.
I do not expect an easy time of it, as the Canadians are tough and Ian is no slouch tactically. He even uses some of the same movement techniques I use so I expect this to be a hard struggle
ORDER OF BATTLE
My purchases:
MAIN BODY
This element will be my main combat element in this action. They will be tasked with capturing early objectives, ascertaining enemy strength and capabilities, and recovering the enemy Order of Battle.
A Company Mechanized Infantry on BMP-2s
Company HQ Element Tanks are intended for anti-infantry support ZSU-23-4 is mainly for AA support, but also is intended to be used in an anti-infantry role
1st Platoon Will have one AT-13 team attached
2nd Platoon Will have one AT-13 team attached
COMBAT SUPPORT
120mm Mortar Battery with FO Also purchased four TRPs
AT 13 Platoon One of the two sections will be assigned to the Main Body, one AT team per platoon Note: truck was purchased specially to carry the remaining section and the HQ element
AT 14 Platoon One of the two sections will be assigned to the Reserve, both AT teams in the Mech Infantry platoon Note: truck was purchased specially to carry the remaining section and the HQ element
RESERVE - This force will be husbanded until needed, or until I can identify the main enemy positions
Airborne Mechanized Infantry Platoon on BMP-3s Will have one complete AT-14 section attached
Tank Platoon on T-72M1 TURMS-T Technology Note: These tanks feature the TURMS-T computerised fire control system by Galileo Avionica. It will be interesting to see how that helps in action.
-
Hardradi reacted to Baneman in CMSF2 - UK-Germany Beta AAR
Hello all, I'm back, sorry about the delay in the entertainment. I, at least, the NHS.
I will hopefully have another instalment to post tomorrow, although by now I'm sure you've read all about it from the Bil's side.
-
Hardradi reacted to Baneman in CMSF2 - UK-Germany Beta AAR
A view of "What the Uncons saw" - this is how I have all the spots on Bil's vehicles behind the hill - this is what Uncons A can see. I have in fact left this RPG teams to watch that direction constantly.
Another shot ( looking the other way ) to show the scale - the range from the Infantry Recce team to the Uncon A area is 1500m+ and the Fennek HQ is chucking grenades at about 1900m.
Those unhappy with the size of maps need have no fears
Bil's uncons near the mosque appear to be changing direction and moving towards the Uncon A fight. I move up one of the bakkies to try to get between them
The Sacrificial Lambs head further - the road is raised, so they are trying to stay low by running inside the olive grove
-
Hardradi reacted to Baneman in CMSF2 - UK-Germany Beta AAR
Turn 4:
Infantry movement is spotted on Apprehension Height and my Fennek fires a few bursts of grenades at them ( the shot is zoomed so appears a bit foreshortened - the range is about 600m )
We have good cause for this Apprehension...
Unfortunately, even at 600m, the GMG on the Fennek does not appear to be very accurate. Even the closest rounds aren't enough to make him duck
And at the end of the turn, he launches ...
-
Hardradi reacted to Baneman in CMSF2 - UK-Germany Beta AAR
The Watcher in the Woods has LoS to some of the buildings occupied by the enemy, so I order him to shoot them up a tad, hopefully this will get Bil's guys to duck for a bit.
I get one of my MG-bakkies close enough to see and take a few pot shots at some of Bil's guys near the centre mosque
And I move the German Fennek HQ to a position where it can see and hopefully lob some grenades on the same units which have been seen crossing open ground.
The range is close to maximum though. ( this picture doesn't show all my units because, unfortunately for me, we're playing on Iron which I personally dislike - mostly because I have to keep remembering to deselect units to see other units or take screenshots )
The Sacrificial Lambs and their backup Scimitar reached their destination - now I want them to grab the Touch objective - against Bil, I think it's wise to get as many "easy" points as possible ( I originally drove up to the zone, but I obviously needed to be more "in it" than the vehicle could get without crushing the wall, so this is a dismount order )
The Puddlers reach and cross the irrigation canal - they will now lurk in this defile against any infantry incursion down from the heights
I also get the Orchard Scimitar to put some MG fire on the hills - note that the enemy icons shown are all spots from my Uncons who can largely see behind the hills
-
Hardradi reacted to Baneman in CMSF2 - UK-Germany Beta AAR
Left Flank :
This shows the situation on my left flank. 2 Units have almost reached the dig site with backup and overwatch following up. German Fennek on the left - now titled "Puddlers" - is going to press on much further because ...
I discover by looking further back that it seems Bil has a bridge he must cross with the bulk of his forces ( I make an assumption that he did not have a deployement zone on this side of the river ). This is likely to slow him down since I'm sure he's not going to swan around with single units. Thus I reckon I have another turn of largely unobserved movement available.
- Also, when I woke up to turning labels on, it seems that Apprehension Height (aka Hill 41.1 ) and Worry Ridge ( aka Hill 42 ) do have designations. They may be a little hard to read, so I've added them to my labels.
Accordingly, the Puddlers will attempt a crossing of the river as shown.
A closer view - the sides of the river are fairly steep and if the Fennek doesn't bog, it will remain in the ravine as a surprise to any infantry that may try to run forward that far.
-
Hardradi reacted to Bil Hardenberger in CMSF 2 – US-SYRIA BETA AAR
MINUTE 10
LAV-AT #5 sat still in its hulldown position and waited to get a spot... I was hoping it would be able to get a shot on the Leo, however a Marder came trundling forward next to the Leo... the LAV instantly saw it and sent a missile on its way. If you watch closely, right before the TOW is loosed the ammo from the LAV-AT destroyed last turn goes up in a fireball.
Right before the missile hit, the Marder spotted my hulldown LAV-AT and sent some cannon rounds their way which all went high. I think the very small footprint of that launcher is going to be hard to hit (that’s my hope anyway). The missile however hit the mark and that is scratch one Marder. He won’t like that result and I can only hope it still had its infantry squad in the back.
LAV-AT #5 did spot the Leo for a few seconds after hitting the Marder, but lost the spot soon after. Of course the LAV-AT couldn’t fire anyway as it was reloading.
The LAV-AT carries two missiles in its launcher and this was the second one this vehicle has fired, so it immediately went into reload mode after firing and this was in progress as the turn came to an end. Next turn I will pull this vehicle back over its ridge to complete reloading, then move forward one more time in an attempt to bag that Leo.
The Scimitar opposite T-90 #2 of course popped smoke and withdrew to safety.
T-90 HQ never spotted anything while it was in position, but it did receive a laser warning, popped smoke and withdrew. These Syrians are a challenge to use effectively, most of the time they can’t spot worth a damn... in the rare event that they do spot, they miss. They have missed every shot fired so far.
This image shows my current dispositions, the enemy situation has become muddled as few vehicles are now firmly spotted.
The situation in and around DUMAYR isn’t great, the fighters I was moving towards DUMAYR are staggered and spread out from the river bank to their original start positions. Most are exhausted, tired, panicked, etc. I just want them over the river and in cover for now.
REINFORCEMENTS
The Main Body arrived in zone
M1A1SA Section (x2 Tanks) D Company Mech Infantry on M2A3 Bradley (x13 M2A3 and x1 BFIST) The remainder of the SP Mortar Battery (x2 M1064A3 and x2 HMMWV) Battalion CO on HMMWV
Now I have some serious firepower to engage Baneman with. Of course this means that his main body will also have arrived and the British Army are no pushovers, though I think my US Army forces have a slight edge. It’ll be down to who uses them more effectively.
I have a two stage plan that I have been waiting to implement and now that these troops are on the board those plans are getting implemented. It will take several turns to get everything into position.
It will get very deadly now in this area of operations. Stay tuned.
-
Hardradi reacted to A Canadian Cat in Canadian Defense - CMSF 2 BETA AAR #2 (Quick Battle)
METT-T: Terrain
The map we are fighting on is pretty big with lots of interesting terrain and places to hide. Below is the map with some key terrain marked with a red flag and camera views marked with a yellow triangle followed by pictures from those views.
Map View #1
Map View #2
Map View #3
Map View #4
Map View #5
Map View #6
Map View #7
Map View #8
Map View #9
https://www.lesliesoftware.com/imagehost/upload/2018/07/19/20180719142614-26f57bc4.jpg
Map View #10
And finally the views from the Enemy approach road.
Map View #11
Map View #12
Map View #13
Map View #13 Camera raised so you can see the objective behind the hill.
-
Hardradi reacted to A Canadian Cat in Canadian Defense - CMSF 2 BETA AAR #2 (Quick Battle)
Initial situation
This AAR is being played using the Quick Battle system from the v4 engine in the new version of Shock Force. We are playing a Red probe with Bil taking the Syrians vs Canadians commanded by myself. The back story we decided on is that the NATO advance is proceeding well and the Canadian battle group has been assigned to flank protection for the main advance. D Company has been directed to take up positions around a village on the main East West road in the area.
Taking the walk through the village to meet with the local elders was something that Capt. Leslie actually enjoyed. The security situation for these types of meetings was much better here than in Afghanistan where, as a platoon commander, often had to provide security for the CO in one of these meetings. Over there it was always a nerve racking time. Here, today, his men had taken up their positions already and there was no love for the Assad regime around here. There was no love for the Assads anywhere actually – even in the enclave where his family drew the most support it was based on fear not love. So his walk today was pretty safe. Walking through the village reminded him of the last time he was in Syria. When he was just a boy visiting his father who was stationed on the Golan Heights as a UN Observer. Back then this trip to Syria was an exciting event. He got to fly on Hercules from Germany to Damascus where his Dad’s apartment was. The trip had made an impression. Not just the Roman ruins and the amazing castle Krak des Chevaliers (and having lived in the UK a few years earlier he knew castles) but it was really the people that impressed him the most. They were so friendly and open. It was this trip and listening to his father tell the stories of visiting with security guards on his way home each night that cemented in him the certain knowledge that you can go anywhere in the world and the regular people you meet are more like you then they are different.
This meeting was just a formality but an important one. They would not be here for long and the Canadians had no mandate to provide any kind of assistance this was just to introduce the force that would be on their door steps for a while and point out that most likely nothing eventful would happen today, tomorrow or the next day. Capt. Leslie had put off this meeting for a hour because he had to spend time on the radio sorting out their artillery support. They were not expecting any action and so had only been assigned only a battery of light artillery and some Battalion mortars but he wanted to make sure they were ready with solutions plotted just to be sure. For some reason there had been a delay. Usually the artillery guys were ready before his FO was but today somehow the assignments had been confused and no battery thought they were supposed to be on call for D Co.. He had the reputation not as a rising star but a solid cross the t’s dot the i’s find a solution get it done officer. And he had done so again. Other officers liked him because he did his homework and was fair even when he was pushing for something. He didn’t make a big production but he didn’t back down either. He remembered his Dad used to say “not everyone can be a rising star, those stars need good officers to get their jobs done”. His Dad’s other advice when he joined up as a junior officer was “always listen to your Sergeants and Warrant Officers, they are the ones that have the experience know how to help you find solutions and keep you from screwing up”. He had taken the advice to heart.
Force selection:
The Quick Battle system is still not complete so don’t read much into what you see other than the happy path I will describe J. As you can see the usual points panel is there along with the selected force’s flag and available branches. The various units might still need tweaking in the QB list and single vehicles and teams is not officially complete and the points might change. All the usual caveats apply. No one has tested the auto pick force make up yet – although the three times I used it during testing it actually did a good job. At any rate before release this stuff will be tweaked some more.
Similar to the CMBS game there are combined force battle groups available. That is where I will start:
Defending in a Medium Probe lets you purchase about a mechanized company or so. I start with paring back to D Company and a platoon of tanks. Then I do something I started doing recently – renaming the top commander on QB battle field after myself. I think it is more fun to think of yourself down there in the game. Hopefully no one thinks it is too arrogant since I have never served as more than a truck driver but I’m adding a little colour this time based on an alternate reality where I joined up back in university like I very nearly did.
Now the hard choices. I am pretty certain that Bil will be bringing armour to this and those T72s are every bit as deadly to the Leos as the Leos are to the T72s. That means I need to be able to handle enemy armour. So, to get the points room to have some support I chose not give up a tank but instead gave up a platoon of infantry. Therefore the basic force is two platoons of infantry and one troop of tanks.
With that I’ll settled I chose to keep two of the battalion’s AT LAVs, one battery of mortars and a sniper team. Never leave home without your sniper team.
-
Hardradi reacted to Bil Hardenberger in CMSF 2 – US-SYRIA BETA AAR
MINUTE 6
The Fennek near the old farm didn't really stand a chance:
The LAV-AT will withdraw next turn.
I’ll pull it back until the other LAV-AT can join it in this area, then I will push them forward together.
Team 2’s BMP-2 will be withdrawing from this sector next turn to join the other BMP-2. It should be spotting from this position, but can see nothing.
Sadly, the Scimitar that was penetrated last turn successfully withdrew under a smoke screen. It was unlucky that my LAV only got a few rounds off last turn... it gave Baneman time to extricate the wounded Scimitar.
There is one more Scimitar in this area, though I have not seen it in several turns. The contact icon has been stationary for a few minutes at least. I am pushing a couple of LAVs into positions to try to get a spot.
Frustratingly Baneman was able to rush the Fennek he had at Farm 002 right under the eyes of the LAV-AT I have overwatching this area. The LOS on this map is complicated and he found the perfect seam to move down that was out of my LAV-AT’s view.
The only Advance Guard reinforcement I spotted was this Leo 2A4. So he will have two of those and he may be using them as a team, at least that’s what I would do, so the other one may be near this one.
Most of my spots are coming from the DRT on Hill 42.0.
Baneman’s technicals are starting to move towards my fighters near the Monastery. It’s interesting that none of my units on KT2 can spot them... I’ll see if I can fix that next turn.
The BMP-2 should be able to spot that area.
Definitely not impressed with the Syrian vehicles or units (i.e ATGM Team) so far in this battle, they need to get their sh*t together. Right now I am fighting with one arm tied behind my back... I expect that will change once the US Mech Company and tanks arrive with the main body, but for now I need to be careful with the forces I have on hand. The Marines are doing the main punching right now… hopefully the Syrians will be able to contribute in a meaningful way soon.
This should be fun... two more LAV-25s join the LAV that shot up the Scimitar from last turn. This is a sweet position, it is masked from the majority of Baneman's force and it closes off a major route to KT2.
I know I promised you a SITMAP this turn but I decided to hold off on that until I get more information about his Advance Force. I hope the following suffices to give you an idea as to how the enemy positions stand:
Finally, we have our first entry in the Blood BoardTM!!
PIR: Will the enemy Mechanized Force attempt to seize KT 2? It does not appear Baneman is trying to attack KT2 yet, but he could be building a Support by Fire (SBF) position to support such an attack. PIR: What is the force composition of the enemy Advance Guard? Have only spotted one Leopard 2A4 so far. PIR: Where are the enemy tanks? The spotted enemy Leopard 2A4 tank is in the KT1 line possibly providing fire support. -
Hardradi reacted to Bil Hardenberger in CMSF 2 – US-SYRIA BETA AAR
MINUTE 5
Team 2’s ATGM that was in flight last turn missed high again… I think all the incoming fire threw off their aim so they missed both of those shots and in my opinion that is a realistic result. Baneman opened up on them with several Scimitars this turn, however the team was able to pull back over the ridge no worse for wear. The AT-7 is still partially deployed, an advantage of moving just one action spot, resetting will take far less time. They do have three missiles left... next time I use them I need to find a better, more keyholed position, preferably away from the prying eyes of those damned Fenneks.
One lucky SOB (composite image to show the missile's path):
The BMP 2 is now re-manned and I will be moving them toward a firing position next turn to attempt to engage a Scimitar further in depth.
LAV-25 4 moved into a keyhole position and at the end of the turn spotted, fired at and penetrated the Scimitar near the ruined farm (Weapon Mount penetration). I don’t think it is knocked out yet, so next turn I will be pouring it on. The Fennek right next to it spotted my hulldown LAV almost immediately and fired a salvo of grenades, but they went long. Damn that thing has amazing optics. Drives home that I need to take them out as quickly as I can. The Scimitars in comparison do not seem to spot my units very well at all.
At the end of the turn the LAV-AT attached to Team 2 got a firm spot on the Fennek near the ruined farm. It was taking aim as the turn ended. I doubt they will miss like the AT-7 team did, fingers crossed. Killing the Fenneks is now a priority task.
The dismounted recon platoon is closing in on OBJ GARNET. They are looking for a covered route to move towards the enemy positions.
At Farm 002 the Fennek that dismounted last turn remounts. That vehicle is useless without its crew and loses all the advantages its optics give him, guess he realized that.
In DUMAYR, Baneman continues to throw his teams forward. I am going to abandon my positions near the Monastery and move my fighters to South DUMAYR and let them join the fight for that objective.
The Monastery and Village Charlie are not as important as DUMAYR and I’d like to concentrate against the unit he has engaged there and eliminate it. With a little luck he could find himself squeezed between my two irregular forces. Team 1’s BMP-2 will be providing some support fire into the enemy held buildings across from my teams in an attempt to reduce some of the pressure.
In other news, my Advance Guard arrived in the AO. I am actually wishing I had another five minutes for the recon battle... it is just now starting to develop and get interesting. With my Advance Guard will also come his… and he can deploy his forward far faster than I, so could, in theory achieve fire superiority before I can get into position. KT-2 does provide the highest ground in the AO so that is an advantage for me... but it will be tricky bringing my combat power to bear without exposing them. I also expect a linear artillery barrage on KT2 in the near future... maybe before the main body arrives so I need to prepare for that as well.
Advance Guard
I have five turns before the main body arrives so I would like to commit the Advance Guard to action as soon as possible. My intent is to attrit the enemy recon force and the enemy Advance Guard to such a degree that when the main bodies arrive I will have a leg up. I feel like the battle in EA1 is the key to this battle. Whoever wins that fight will have freedom of maneuver.
I will try to target my mortars on KT1 if possible.
The T-90SA platoon will be quickly moving over the bridge to support the LAVs that are engaging the enemy recon elements and to be in a central position in order to react to where they are needed.
The BMP-3 platoon will disembark their infantry and then the vehicles will move en-masse to the north edge of the KT2 ridgeline. I want them to engage the enemy with their ATGMs, if possible one part of the enemy force at a time. I would love to eventually get them down to the plain between KT1 and KT2 to take the fight to the enemy but that might have to wait for the main body to arrive.
The dismounted infantry platoon will move down the gully and move toward the river. Once close they will await orders. My intent with them is to drive as deep as possible under cover toward the river, and cross it if possible to support the irregulars in DUMAYR. It will take a few turns for them to get moving as they need to disembark, split, remount one of the teams to allow the BMP-3s to operate at full efficiency, and only then can they head out.
Can't wait to play with these guys:
Once the BMP-3s arrive at the ridgeline I will pull the LAV-ATs from the teams they are supporting and attach them to the BMP-3s. The Syrian Recon Platoon dismounted elements will remain where they are for now and continue their dismounted recon and harassment role. The BMP-2 #2 will be moving to join its brother so they can cooperate as a team, mainly against the enemy DUMAYR irregular fighters.
Next turn I will include a SITMAP to show all friendly and enemy unit positions (known and suspected).
-
Hardradi reacted to c3k in CMSF 2 – US-SYRIA BETA AAR
I don't usually quote an entire post, especially one as large as this, but an exception is certainly warranted.
@Bil Hardenberger, you have surpassed your usual high high standards with this one! Embedded gifs (or whatever magickry you used) highlighting the action? Outstanding.
Great overview, perspectives, command analysis, etc.
Now, I have to give Baneman some credit: expending his uncons to make you expend your ammo is a BRILLIANT tactic. Do your Uncons have grenades? Knives? Nearby rocks?
In a serious vein, if your Uncon defensive position is running low on ammo, what is your plan for them?
-
Hardradi reacted to MeatEtr in DRUMS OF WAR TOURNAMENT *MID JAN LAUNCH*
Hope I'm not getting ahead of myself, but I went ahead and picked out my award. I'm going with a Porsche 911 Carrera GTS in flashy red. It's only about $120k, surely Steve at @Battlefront.com can afford to give this as a tourney award right? 😀
P.S. I am serious... and don't call me Surely! 🤪
-
Hardradi reacted to MeatEtr in DRUMS OF WAR TOURNAMENT *MID JAN LAUNCH*
Raising this thread from the grave! 😀 So wasn't battlefront suppose to give some kind of an award to the victor of this tourney? I ask because @Bootie from FGM hooked me up with a kool swag plaque! 🤙
-
Hardradi reacted to IICptMillerII in I Don't Read the Dev Updates BINGO!
In honor of the imminent release of CMSF2, I figured I would get a heads start on the time honored tradition of complaining about every new release by making it into a fun game!
I give you, CMSF2 BINGO!
All in good fun of course.
-
Hardradi reacted to Bil Hardenberger in CMSF 2 – US-SYRIA BETA AAR
MINUTE 4
Team 2’s AT team finished setting up its AT-7, aimed at the Scimitar near the ruined farm and let fly… the missile just skimmed the turret but hit the ground well beyond…
…immediately the accompanying Fennek spotted the team and fired a few volleys of grenades at this team. None hit, but the grenades were churning up the ground as they moved closer and closer toward the end of the turn.
The AT team fired a second missile that is still in the air at the end of the first turn. I will be pulling them out of the line next turn... hopefully they get out okay… if not, that’s okay too as long as he loses the Scimitar. I’m on the edge of my seat…
Neither of my vehicles in this team got a spot this turn... I will be pulling the BMP out of the line next turn in order to re-mount one of the scout teams as noted last turn. The LAV-AT will stay where it is for now, I expect Baneman will move a vehicle or two next turn near the ruined farm, and that might help the LAV-AT spot one or both of them.
Team 1’s BMP did pull off the line this turn, and will now wait for the Recon Platoon leader team to remount next turn.
The Fennek at Farm 2 dismounted this turn and entered the buildings. It does not look like he wants to push beyond the farm at this point... he is happy to sit in place and provide support fire with the Scimitar towards my UNCONs near the Monastery.
Two of the four LAVs in my reaction force will be moving forward into keyhole positions next turn, hoping to get a spot or two on a Scimitar or Fennek. This movement is in preparation for my Advance Guard which is just one minute out.
The dismounts from this platoon are starting to move out on a route reconnaissance toward OBJ GARNET. The other two LAVs are being held back in reserve.
In DUMAYR, Baneman is pushing his irregulars hard toward mine and it continues to cost him. My teams are going to get critical on ammo very soon though, so he might be able to get an advantage. I am switching my teams in this area to control their own fire. I should have noticed the small amount of ammo they carried from the start. I’ll try to provide them some support by fire from my positions near KT2, but to be honest, the action in DUMAYR is a side-show right now and I am not intent on pushing forward at all there.
My final Technical did extricate itself, so that will help some and it is moving to the sound of guns in DUMAYR-North.
PIR: Will the enemy militia/fighters attempt to seize DUMAYR? His assault is picking up steam, but it has cost him a lot of casualties to this point. I estimate he has lost 9 or 10 fighters (maybe one or two more) to 3 of my own. PIR: Where are the enemy Technicals? I finally get some contacts on his technicals, they are presently located near the built up area at the western most bridge. -
Hardradi reacted to benpark in Snowy Trees Mod
Now up at CMMODS III:
http://cmmodsiii.greenasjade.net/?p=3533&preview=true
-
Hardradi reacted to LiveNoMore in Shall try to start an unofficial screenshots thread?
Failed bombing run against a Panther Turret bunker and the AA gun protecting it.
-
Hardradi reacted to benpark in CM Community Map?
Making historical maps is somewhat challenging, but fun. Fictional is another way to go when you are figuring out how to make certain areas look good and offer game play opportunities (a gentle rise in a hill, etc). I do those (generally ending up as QB maps) when I get tired of doing the historical stuff.
Welcome to the new world of "I need this book for research". Which becomes piles of interesting, wildly specific books.
My own particular order of research (project dependent)- contemporary maps and photographs, personal experience (you have walked the area personally), then to personal contemporary accounts from books, modern day Google Earth and this tool to fill in any mysteries.
I do mainly WW2 stuff, so obviously if the battle is in CMBS, there may be more actual footage of the battle unfolding (chaotic and first person-based as that may be, it can still be informative as to the state of the terrain). This is also true for WW2 stuff, but the chance of finding footage actually from the battle is far more slim.
If I could give myself some advice when I first started with the Editor, I'd say approach things in the following order (will differ, depending on person!):
1. Research, accumulate as much information and imagery as possible to understand the action depicted, and the terrain itself.
2. Figure out the map sizing based upon one of the images (from a source like a map or an aerial image). What the purpose of the map is will help determine this as far as sizing. I generally do huge maps, but if you are doing something small/medium, consider adding some "extra" for maneuver if appropriate.
3. Create Editor Overlay(s). I might end up with 5-6 for one map, but that is serious overkill for most projects. I use Photoshop, and will have Layers for every source. Generally any period maps (in their own Layers), any aerial imagery from the period depicted, and then a GE image for any areas that may need clarification. Some of these I mark up if needed for ease of organization. One note- I may consider rotating the map to keep roadways at the correct angle for CM roads. That will save some serious agony later.
4. Create the blank map, sized to the area depicted.
5. Sketch the roads out. I adapt slightly to avoid "see-saw" roads and fences, etc. This is my one general concession to the Game. Engine. As long as you don't deviate too far, things should line up pretty closely with any map you have. If you rotated themap slightly, the road issue should be as minimized as possible given the tools.
6. Next I do heights based upon the heightmap Editor Overlay. I adjust slightly around roads, and often raise them in rural areas by 1. Railways get a bump of 2 sometimes if shown as "raised" on the source map. Check 3D view often, and adjust as needed. This can be time-consuming, but the work pays off if you put it in.
7. Sketch out any fields, forests, swamps or other large swaths of terrain. I have started using one tile of "Dirt" around fields. It seems to look realistic, and also allows me to sketch the fields out, then fill them in and plan it out a bit beforehand. This where you have to start mixing the historical with the creative stuff a bit. The fun stuff.
8. Trees in forests. I use a large mix, depending on the region. Look at GE Street View, and just observe nature to see how a forest grows. Generally smaller scrub, then the larger stuff. But some pine forests start more abruptly. I'm lucky to know a few forestry people, so I ask them weird questions based upon regional growth from time to time. You may find yourself on some obscure Estonian forestry website before you know it.
I only do the areas that I have sketched out with Light Woods or Heavy Woods. Don't feel you have to fill in EVERY tile with a tree. I often mix in tree-less tiles in forested areas with Dirt, Tall Yellow Grass and Red Rocky Ground (and others as needed based upon look and region)
9. Start dropping houses. Google Earth Street View and contemporary images will be helpful here. For CMFB, I think I traveled Stavelot, Noville and the other maps that I am forgetting now in Street View a million times. Along with looking at as many images of particular street corners in towns, etc to see HOW it looked as possible.
10. The final details. Put up fences, trees in areas where they grow in non-Woods terrain (around houses, etc)
11. 3D view. Look for problems. You should be doing this quite often during the entire process to be sure you are on track with making it look "right".
-
Hardradi reacted to benpark in CM Community Map?
As you proceed, these may be helpful sources in no particular order (I'll add more when I'm at my Home Base).
1. Using GE eye level on the ground also helps give a basic understanding of LoS and the "lay of the land". You have this one wrapped up.
2. Combatintman found this topo tool, if you missed it in the other thread:
http://contourmapcreator.urgr8.ch/
This tool is a huge help (especially for complex terrain), but should be used with any other sources you can find
3. I subscribe yearly to the NCAP, which houses a massive trove of aerial images made by RAF Reconnaissance flights. This is my "go to" for period overlays (sometimes overlaid with GE images, and maybe other sources like period maps- using as many sources as possible). Good for Overlays. Link:
https://ncap.org.uk/
4. Perry-Castaneda Map Library- a decent source for a wide range of map regions. Just be sure to check the scale is useful (see here for explanation of what these look like: http://www.compassdude.com/map-scales.php). Around 1:24,000 is my general target size. Lower is great, but so rare for that one region you seek that you may as well see a unicorn later in the day.
5. Mapster- A good source for maps of Poland, eastern Germany and NW Russia/SU (and maybe a little Baltic areas as well, can't recall)
http://igrek.amzp.pl/mapindex.php?cat=GR100
6. Geoportail- Maps of France. There may be a historical overlay baked in to the site, haven't used it since CMMG, though!
https://www.geoportail.gouv.fr/carte/
7. BYU Library- 1:25,000 Maps of Germany
https://lib.byu.edu/collections/german-maps/
8. Old Maps Online- Just like the title says. More general, but you can find some fill-in-the-gaps stuff here:
http://www.oldmapsonline.org/
9. My personal favorite- Old Hapsburg era to ww2 era maps with a sychronized view (for comparing two maps!):
https://mapire.eu/en/synchron/europe-19century-secondsurvey/?bbox=-1772192.4014695496%2C4866535.559953655%2C4440609.257549576%2C7801717.446104423&layers=osm%2C158%2C164&right-layers=osm
10. A good source for a variety of WW2 aerial imagery and maps:
http://www.wwii-photos-maps.com/new_home_page_-_071216_002.htm
More than a few dead links as well, sadly. I see the great source a few of us used for MG for Dutch maps is now dead (http://erfgoedenlocatie.nl/resultaten/watwaswaar/#cC-Om-6-1-1v-1), but they have transferred the collection (instructions in Dutch, needs to be investigated further now..).
-
Hardradi reacted to Artkin in CM Community Map?
Thank you, I appreciate that!
Sorry about pretty much disregarding this. I forgot to say that I had crossed over this a couple times but never looked into it enough to see the size. I've been on a couple scenariodepot map runs since I've gotten CM and I usually look for a blatant HUGE MAP .
I downloaded it and I'll give it a try. Honestly I haven't let myself play any CM yet though.
-
Hardradi reacted to Artkin in CM Community Map?
This is how far I've gotten on Donetsk. Sheesh this is a lot of work. I plan on modeling it as exact as I can. This place is 10x more brutal than previously modeled. All credit will go to original author after I change 90% of the map = )
Everything North of the airstrip is done. The south side of it is pretty dense. Feels like Fallujah. Buildings super tightly packed, tall, lots of windows. High walls surrounding just about every house. I am very excited.
And this is the overlay I'm using.
The houses are remnants of the previous author's work. They will soon be deleted and replaced with 2-3x the density.
First thing to accomplish is roadwork. Then the elevations. Following the manual included with CMBS.
-
Hardradi reacted to Baneman in CMSF2 - UK-Germany Beta AAR
At the end of the turn, the Puddlers have almost reached the stream/irrigation ditch/canal.
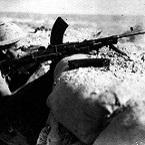
Not a lot else happened in this part of the map, so here's a close up of the "Something New" - knowing little about the various equipment ( like amphibious capabilities), it took me a long time in the editor to conclude that this is a BMP-2. If it's not ... be kind
Uncons A encounter the first enemy when they occupy a building. They see and target some desperate looking men charging across the open ground. Sadly, although they cause one casualty, their aim is atrocious and that's all they achieve ( you'd think that they'd do better at that range ). They are then taken under fire by a group that made it into a ditch and another lot in the opposite building. They take a casualty themselves and end the turn cowering. This area is going to be a tough fight and it's too far away for almost any support.
All I can say to Uncons A is, "Be Pure ! Be Vigilant ! Behave !"
( if anyone gets that quote, I will be utterly gobsmacked - and probably only long-term UK residents have a chance ).
