

ncc1701e
-
Posts
669 -
Joined
-
Last visited
-
Days Won
12
Posts posted by ncc1701e
-
-
6 hours ago, Bil Hardenberger said:
This may not be a bad thing if your units can support each other. for example if your units on the flanks can support the unit you have in the objective with fire then you are okay.. but if they can't, if the terrain blocks lines of sight to the terrain the enemy has to move through.. if your flank units are too far away to be effective... if they get engaged and are unable to provide support fire, if your plan is to use each small force independently, then you could be in trouble.
I always try to maintain a reserve.. however in these small fights you often can't afford that... maybe keeping a few BAR teams and your mortars back as a reserve would have helped, but I doubt it. A reserve should be a capable force, capable meaning that it can be used to counterattack an enemy force as required. You could have kept one full squad in reserve.. and maybe should have, but in this case I don't think its a big deal.
The big deal for me, is that you have separated your platoon over a wide area and I suspect they cannot support each other... I probably would have sent scouts on those flank hills (two man teams) to provide early warning of an enemy flank approach, and then used the rest of the platoon in a command push towards the objective. To secure it, take up defensive positions and defend against the enemy attack that will most likely come. Make him attack you and you will be in the favorable position. If you have to attack Objective 2, which is what it looks like is developing, then he will have the internal lines and can reinforce any threatened position.
I would have probably only placed scouts and maybe support units (BAR teams and mortars) on the flanks.. but they have to be able to be close enough to provide effective fire support on the approaches between the two objectives, and most importantly be able to support your main force.
If you are going aggressive and only have a small force in Objective 1 and are planning on assaulting objective 2 from multiple positions, then good for you, and it will be fun when you get close.
Thanks for the good advices. Alas, the battle is over but still I am learning for next time. Your concern is valid. My squads are too spread and can support each other. I was willing to hide as much as possible my moves on the flanks and to perform a double envelopment.
-
5 minutes ago, IanL said:
And you will probably remember next time.
Oh yes!
 6 minutes ago, IanL said:
Looking good BTW - well done screen shots. One tip - if you press <shift><esc> the game pauses but with out the notice at the top of the screen. In any given turn if you do that once then the VCR controls in the UI will continue to work without that notice showing up.
Thanks for the tip, will do for the next AAR. This battle is now over but I won't tell the outcome now...
-
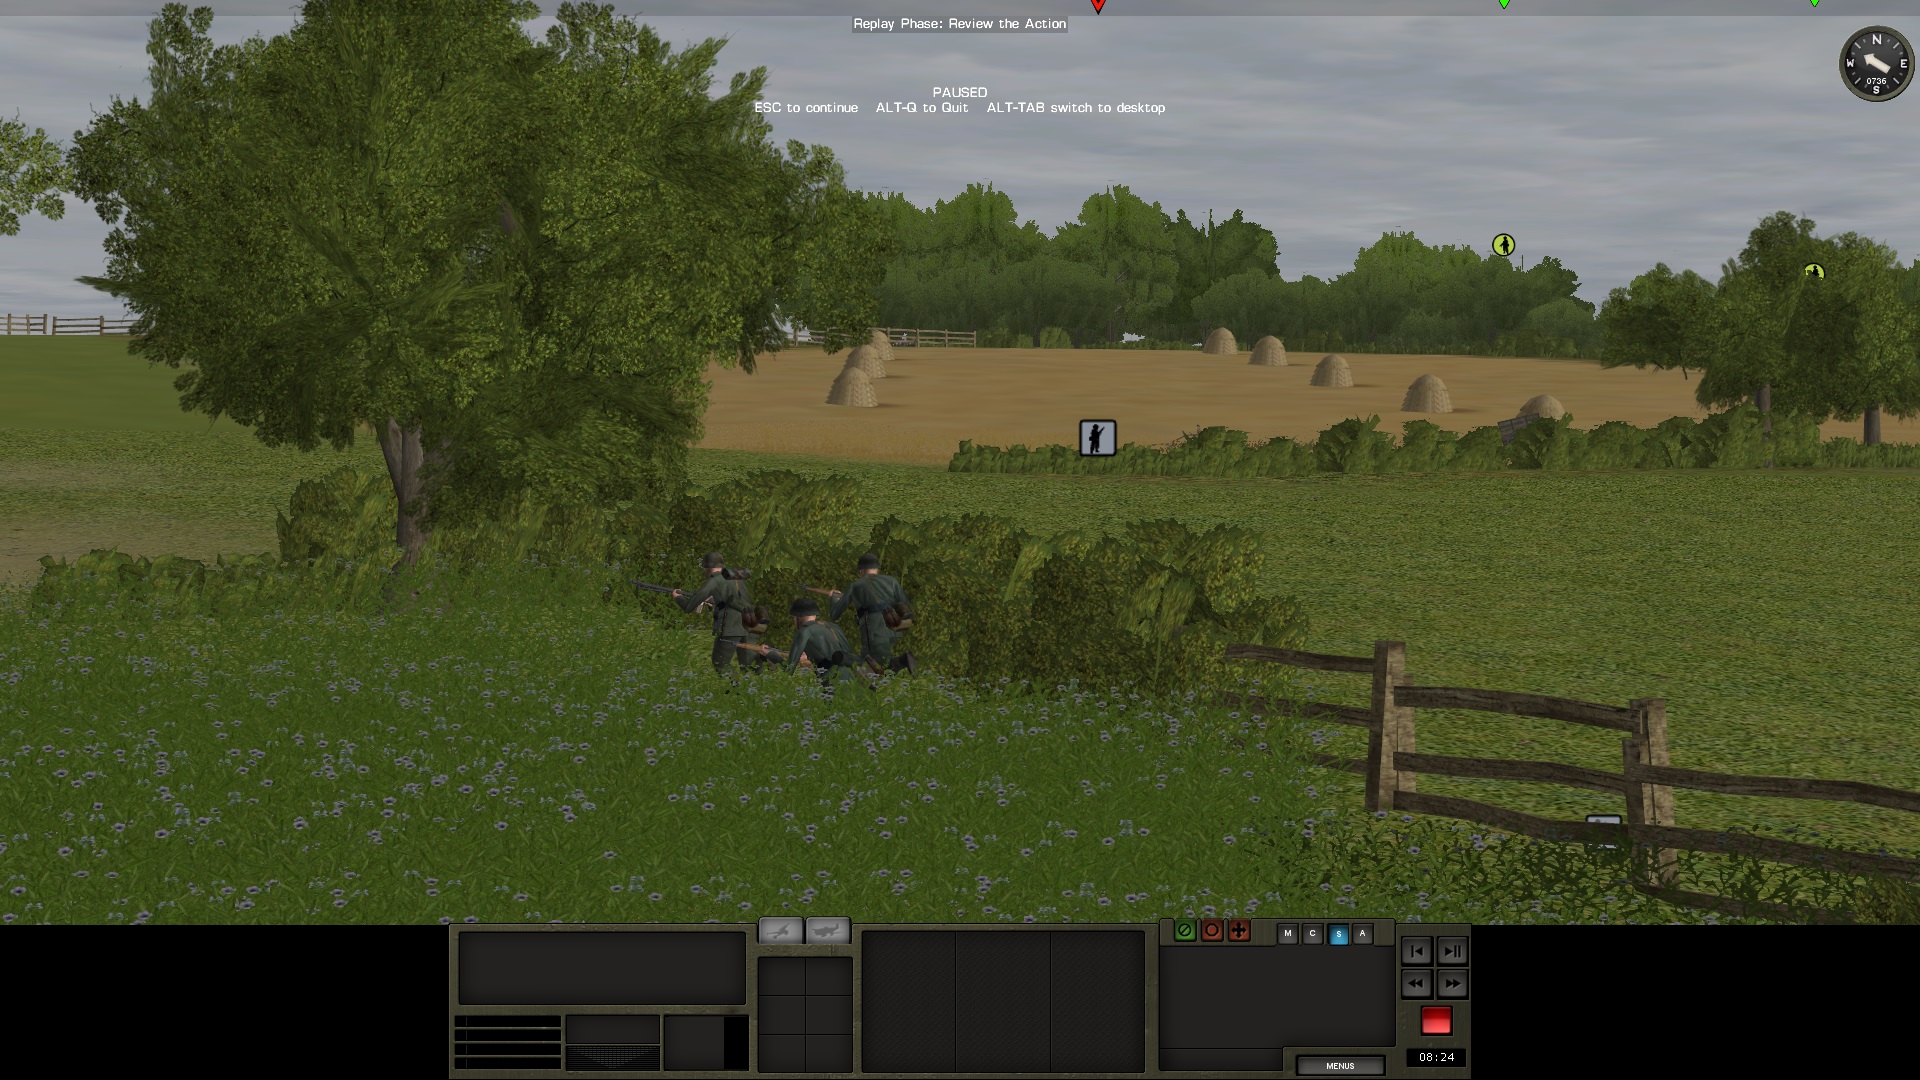
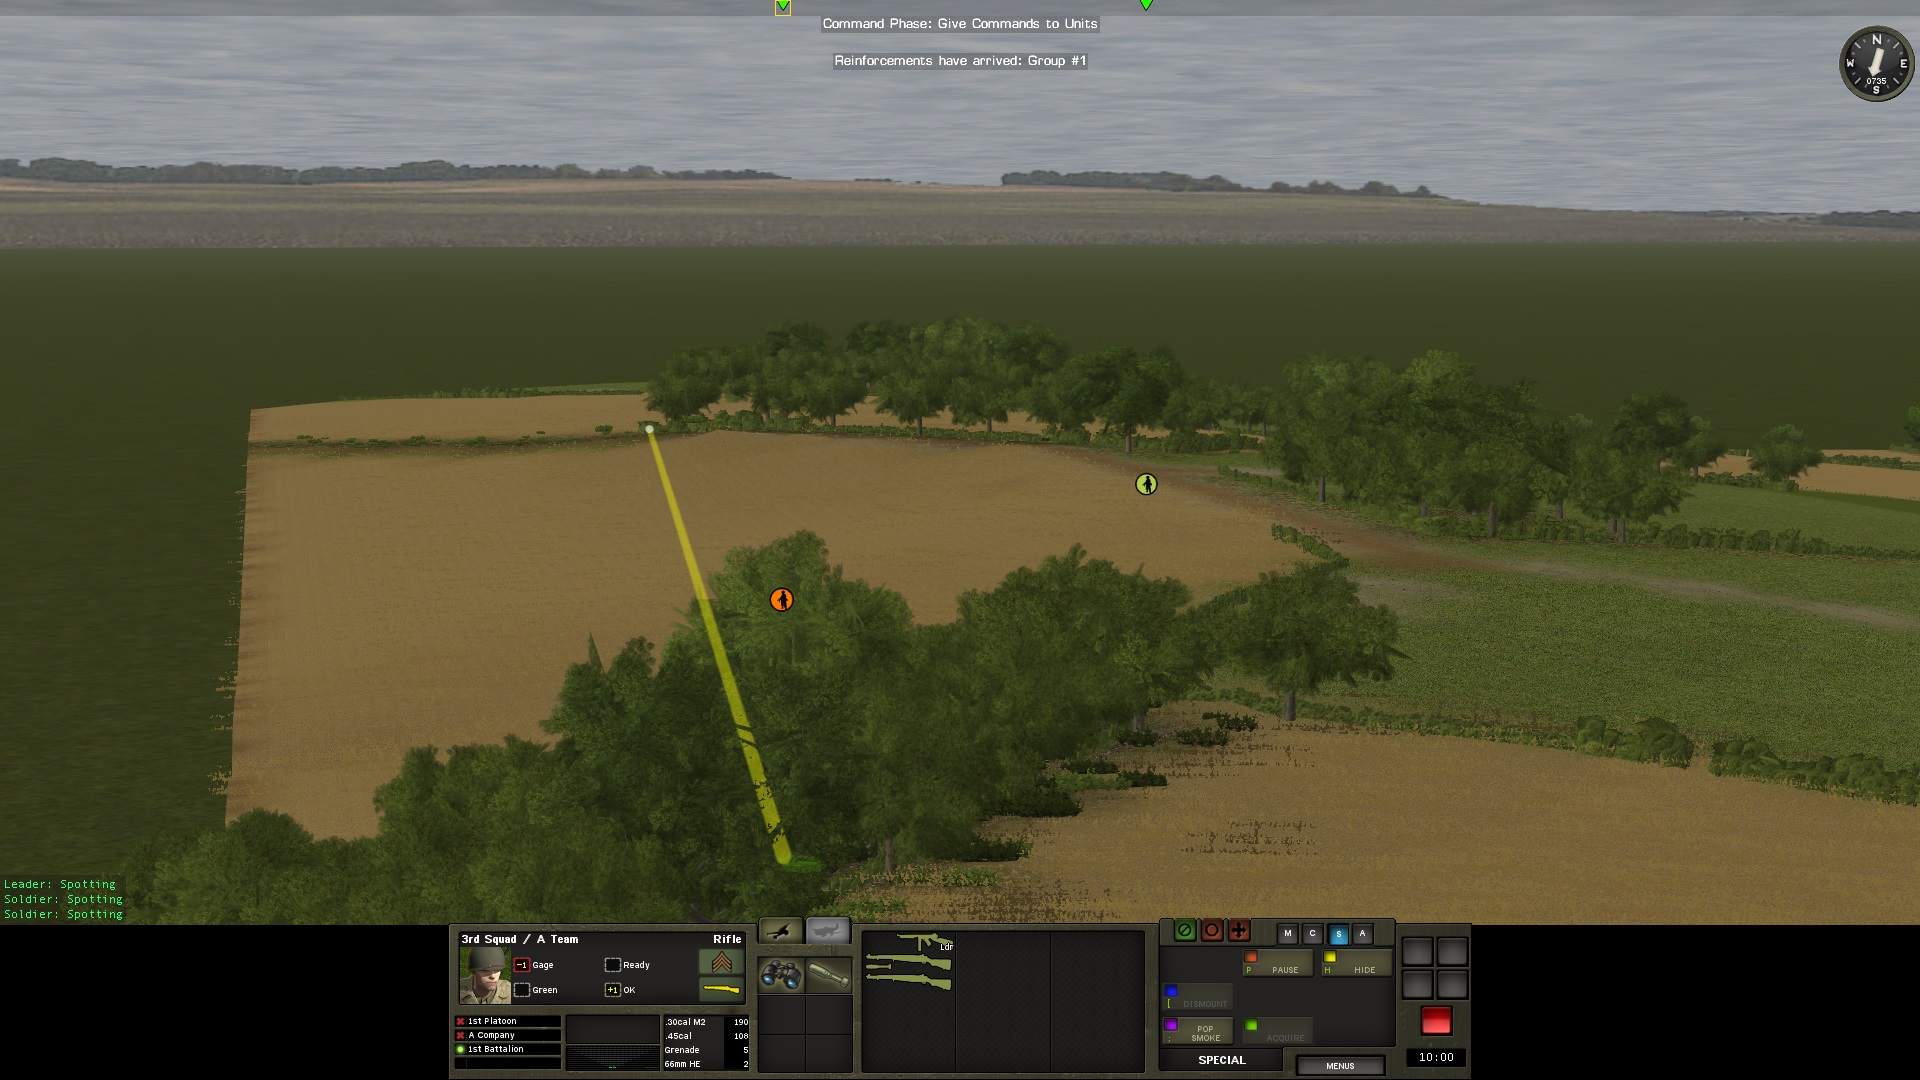
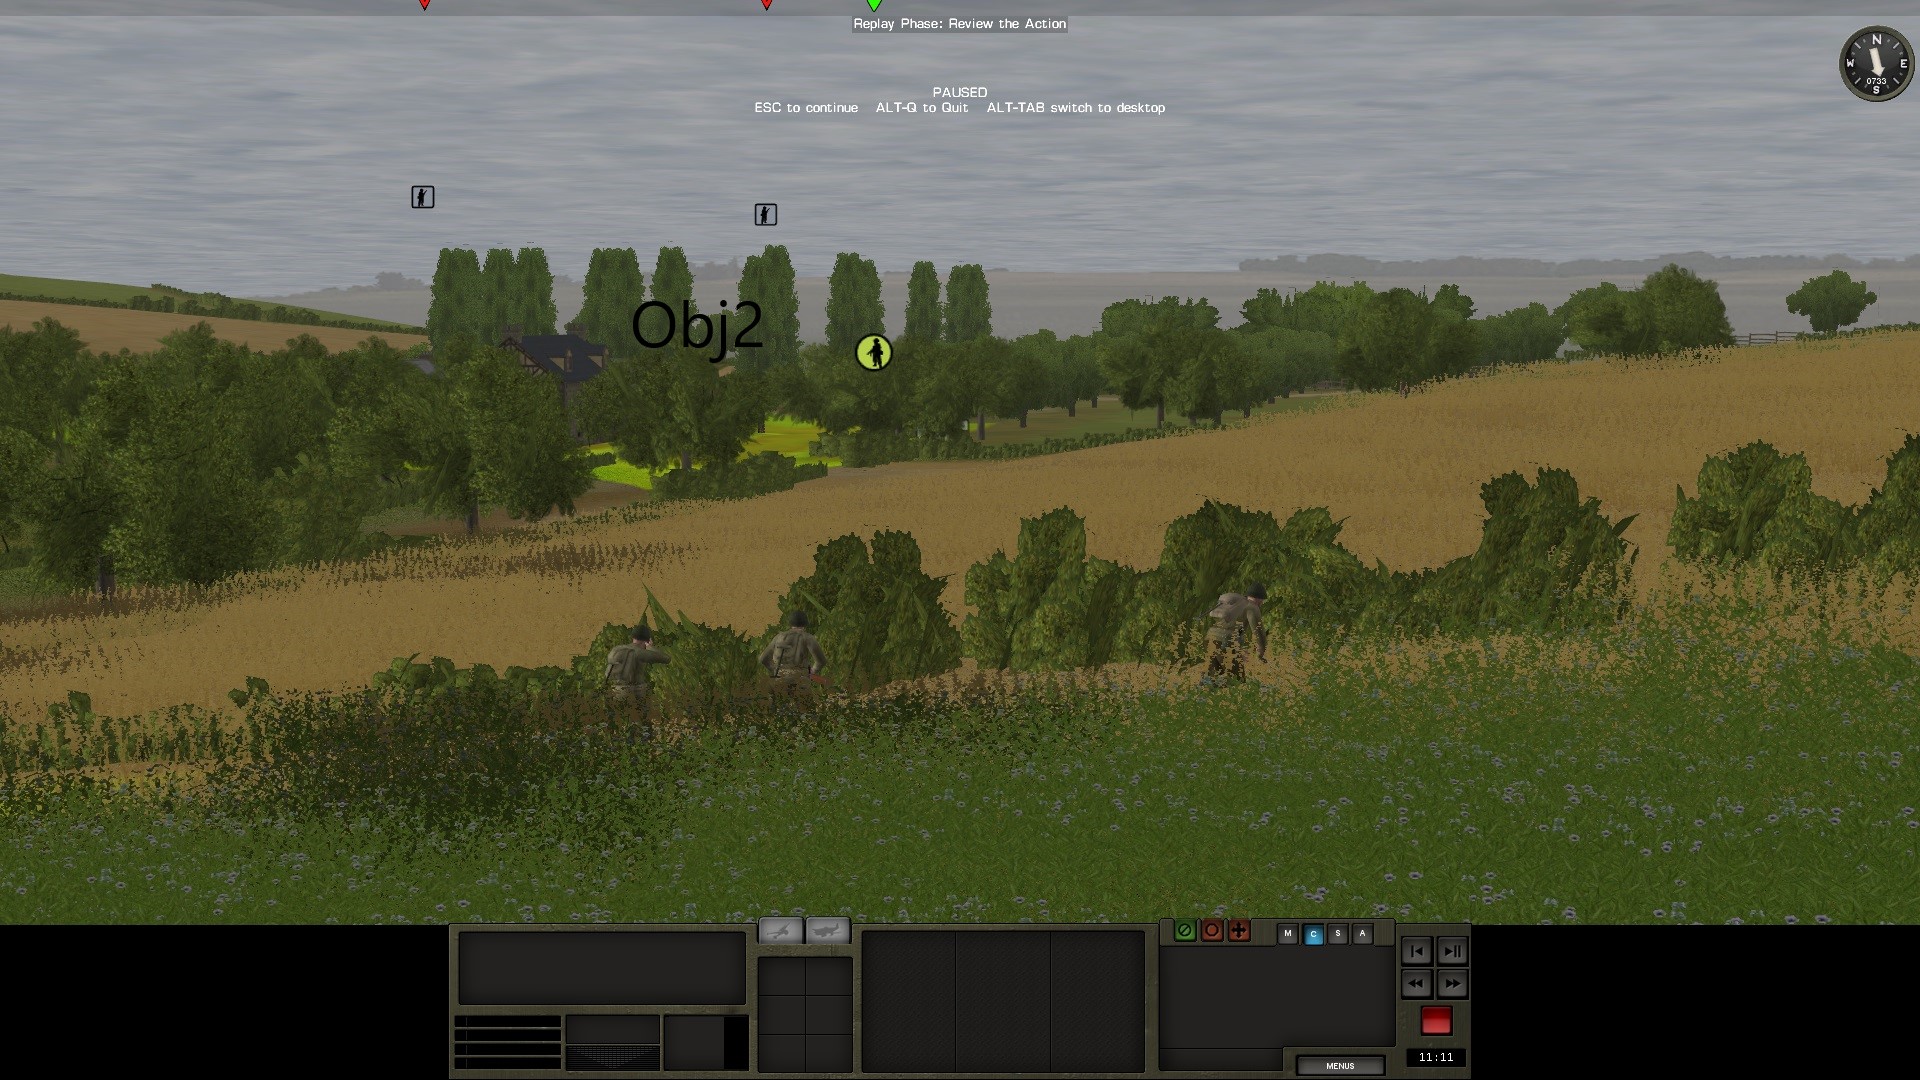
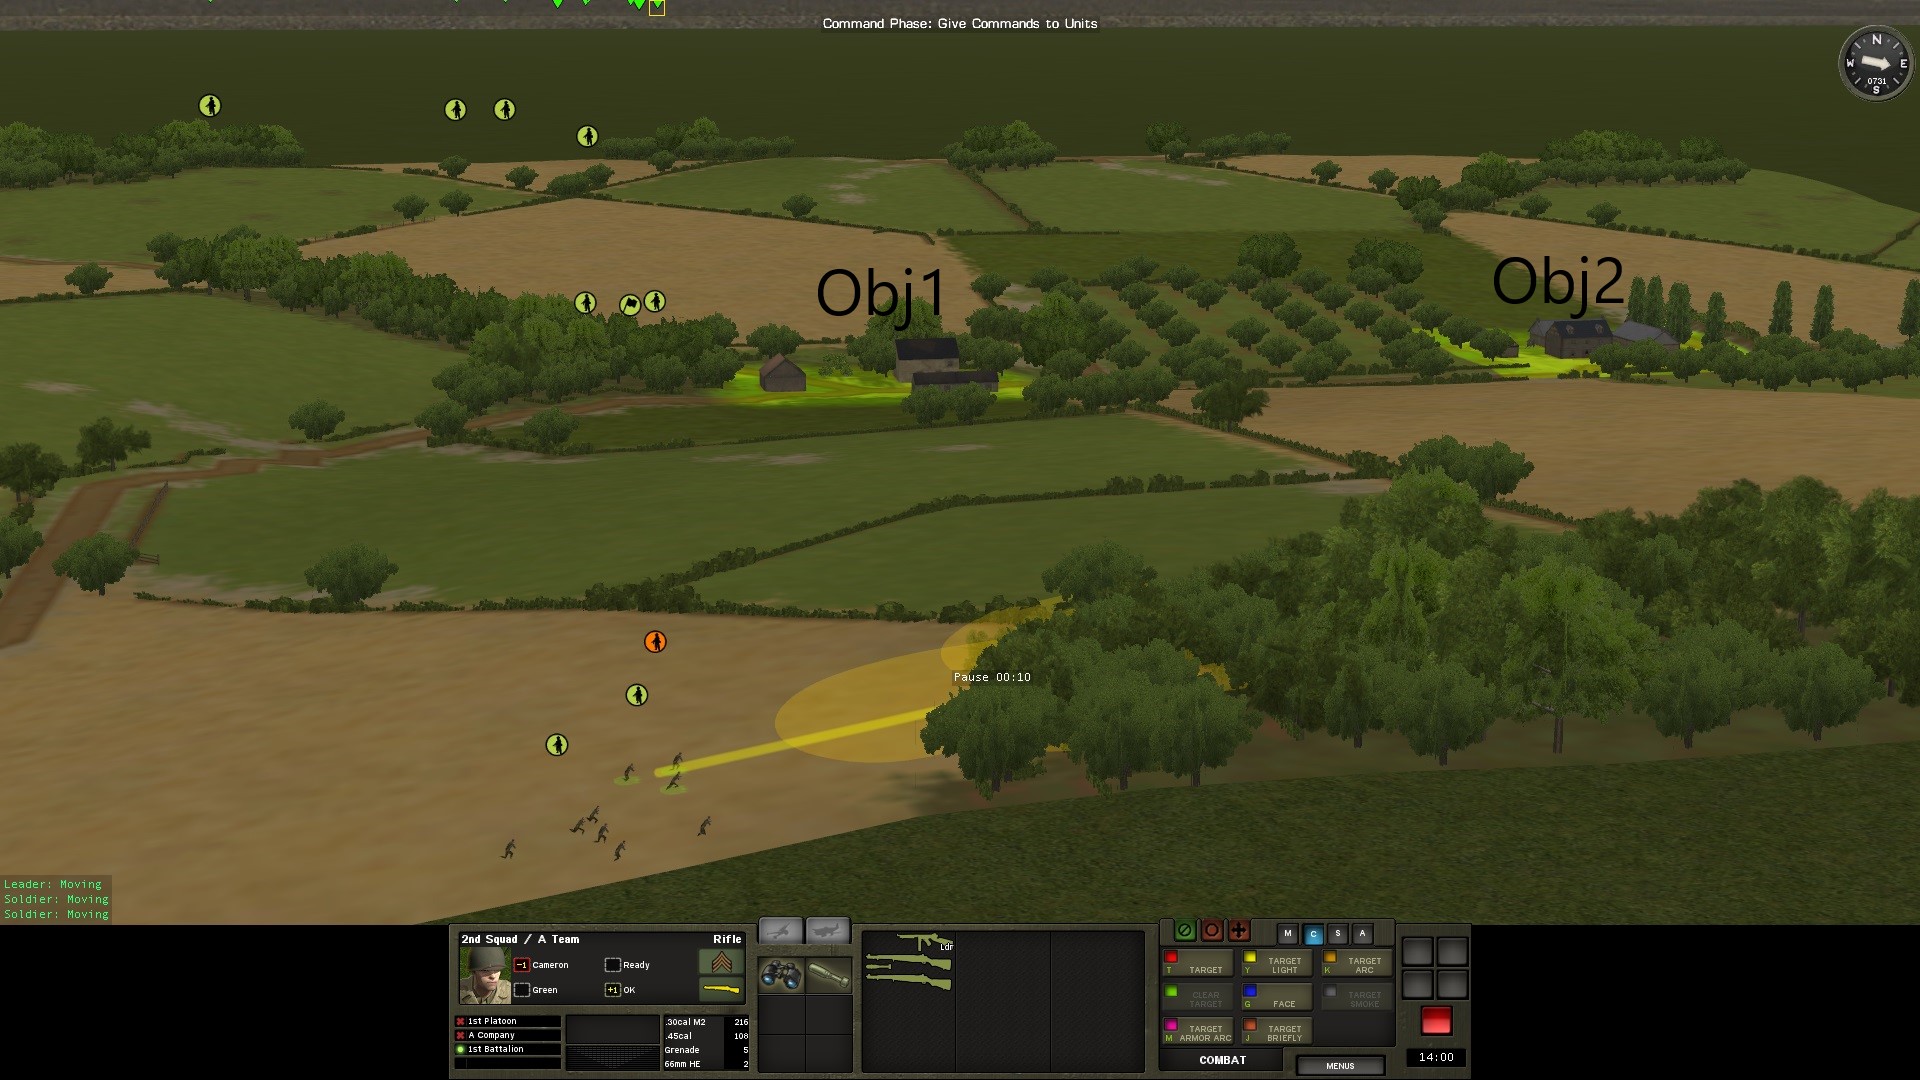
MINUTE 8
My 60mm mortar is now deployed and luckily enough for me has spotted the German progressing to my right wing. I order them to do an area fire on their last know position. Since the 60mm mortar has no radio, I am obliged to keep my HQ near from them for spotting. But, here, as I said, I was lucky with our house rules.
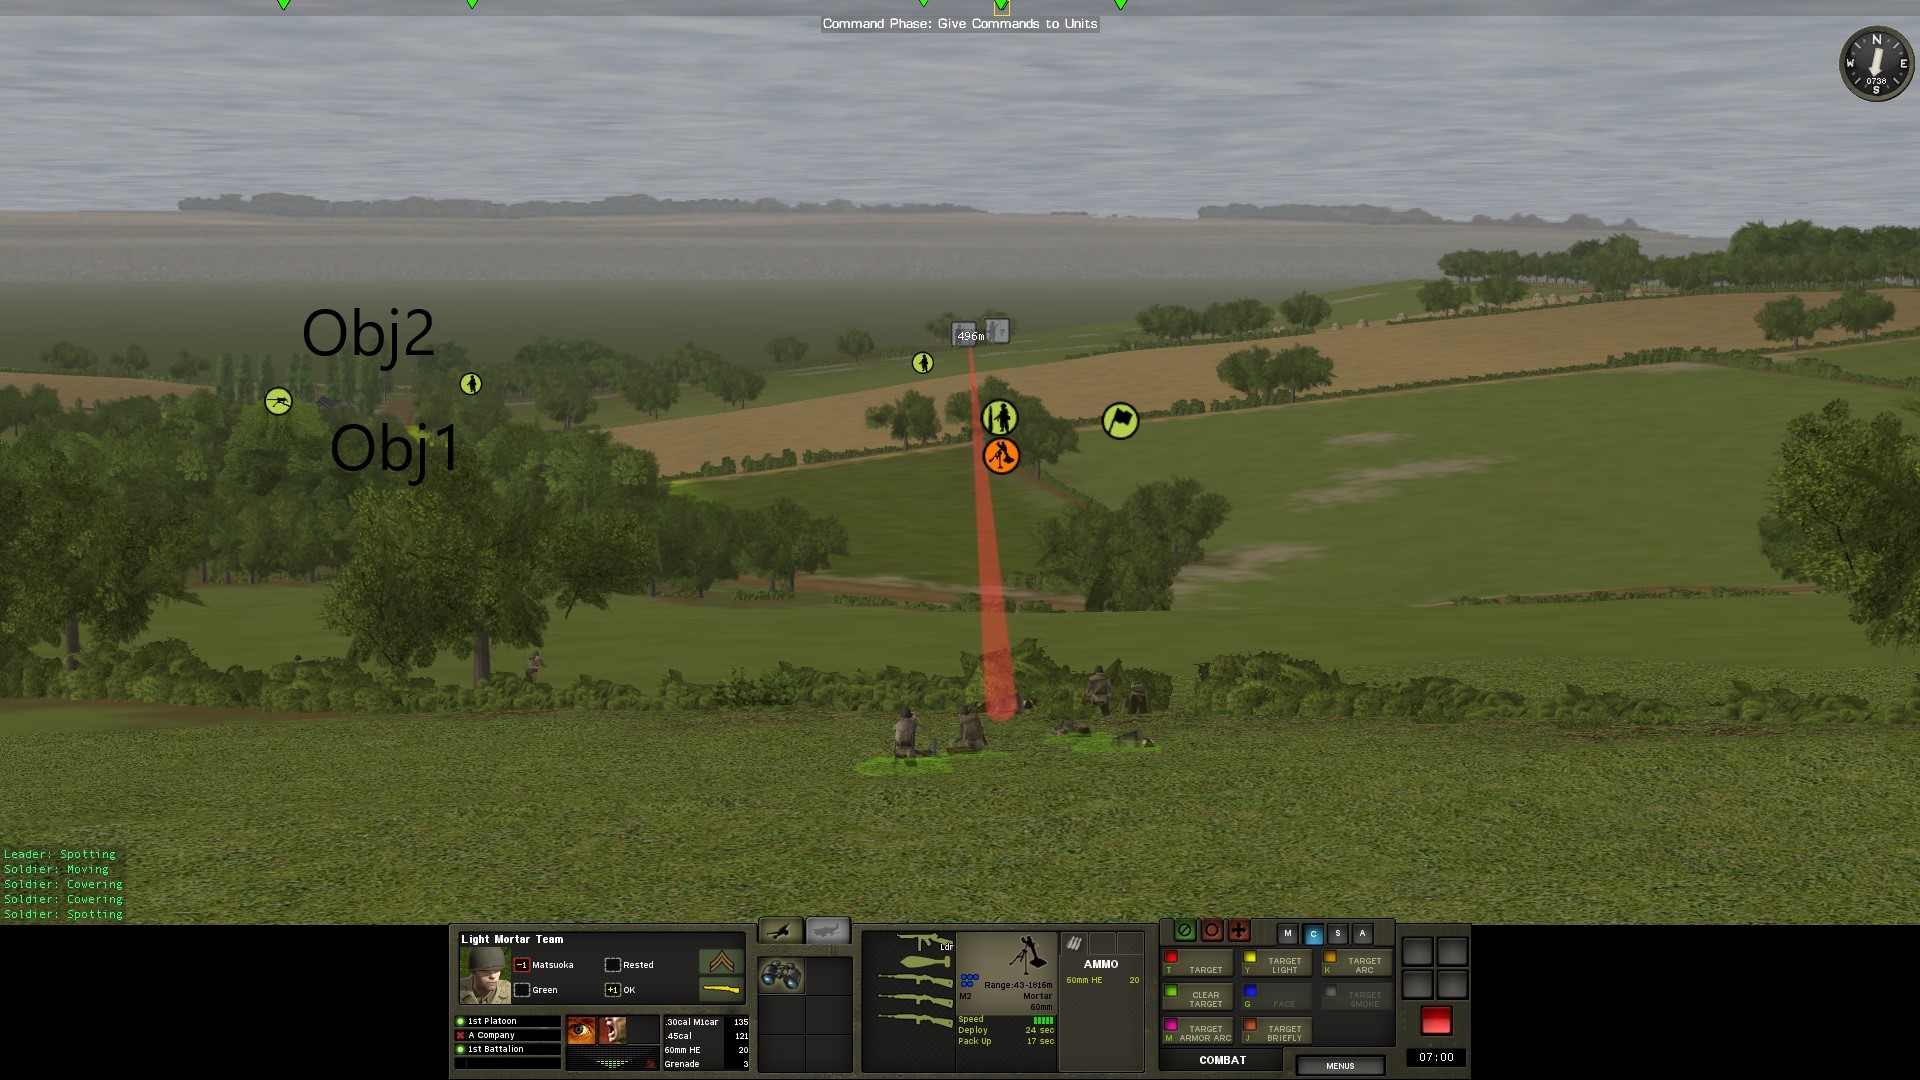
On the left, the team that was in reserve is now moving forward.
On the right, in the woods, my men are tired. They won't last long.
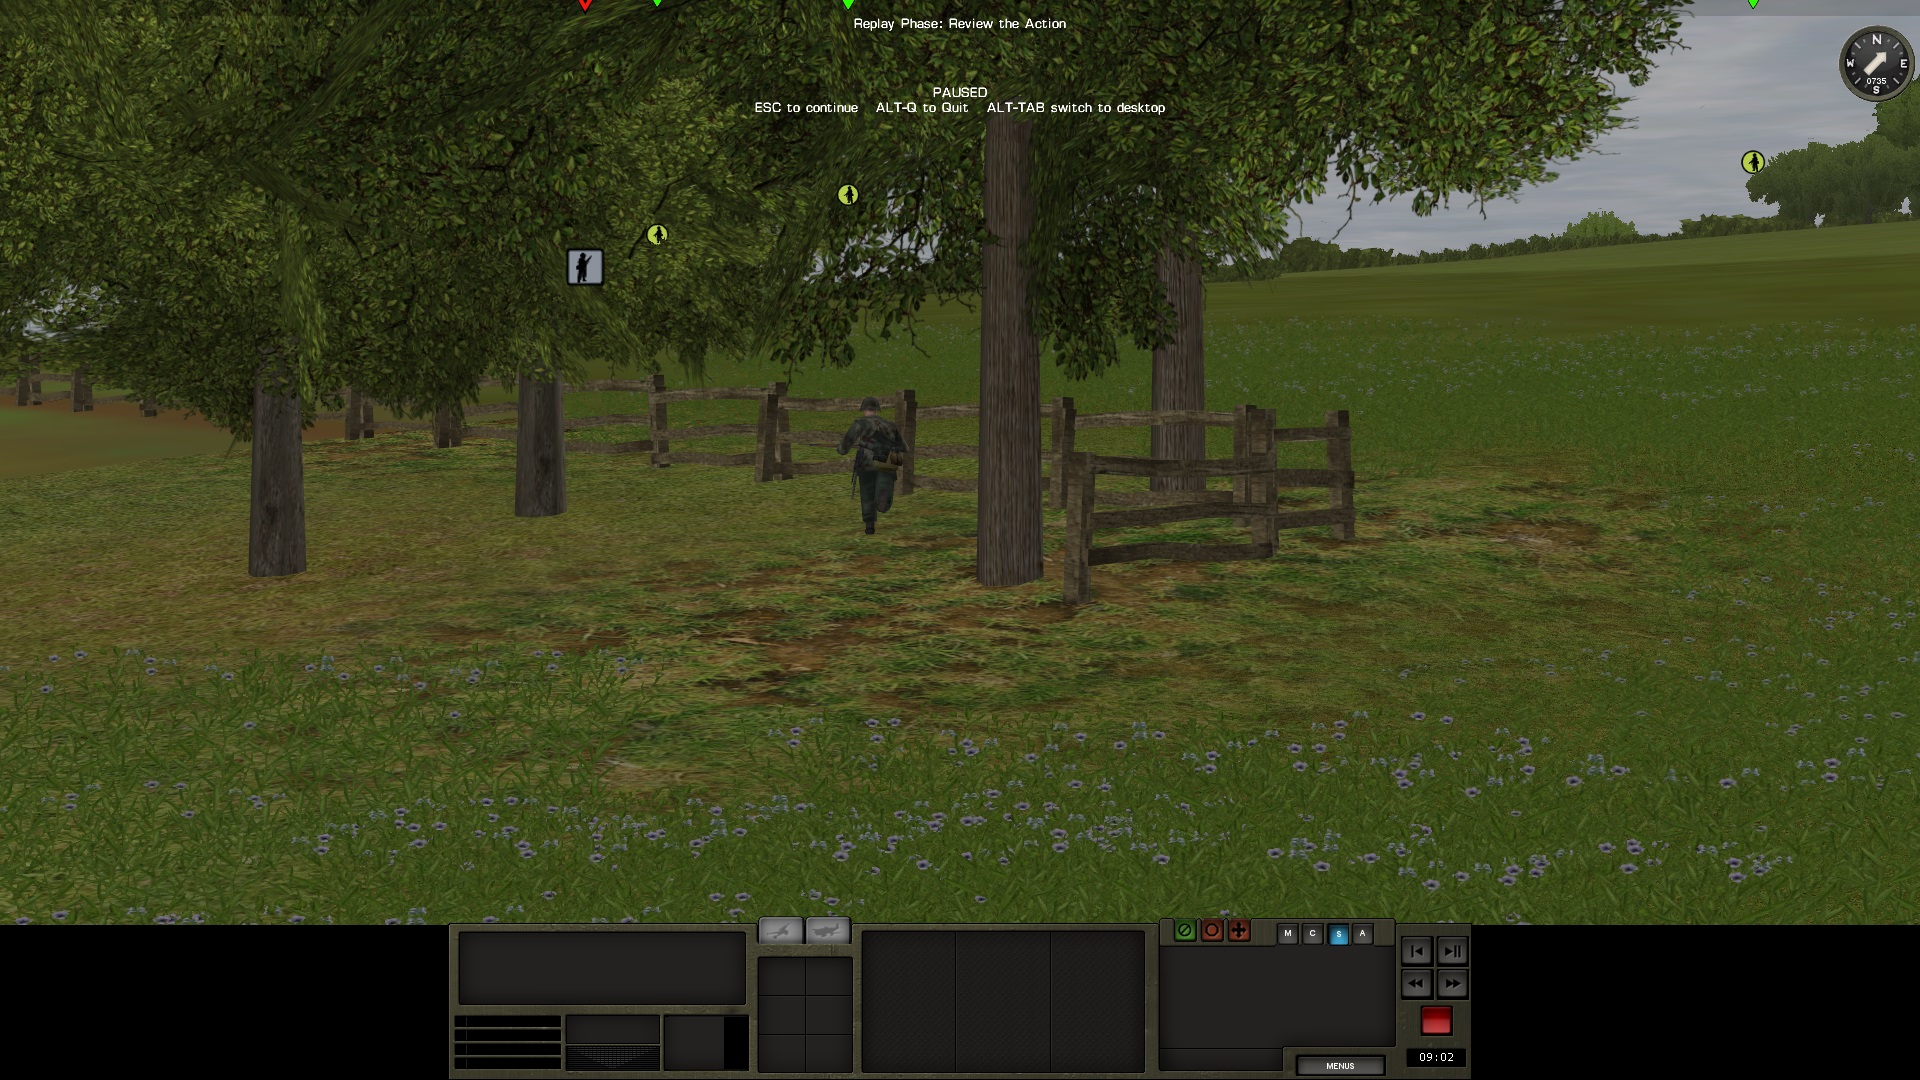
MINUTE 9
I have stopped all progression. My men are resting. I think green troops are not a gift. Are regular troops more enduring?

-
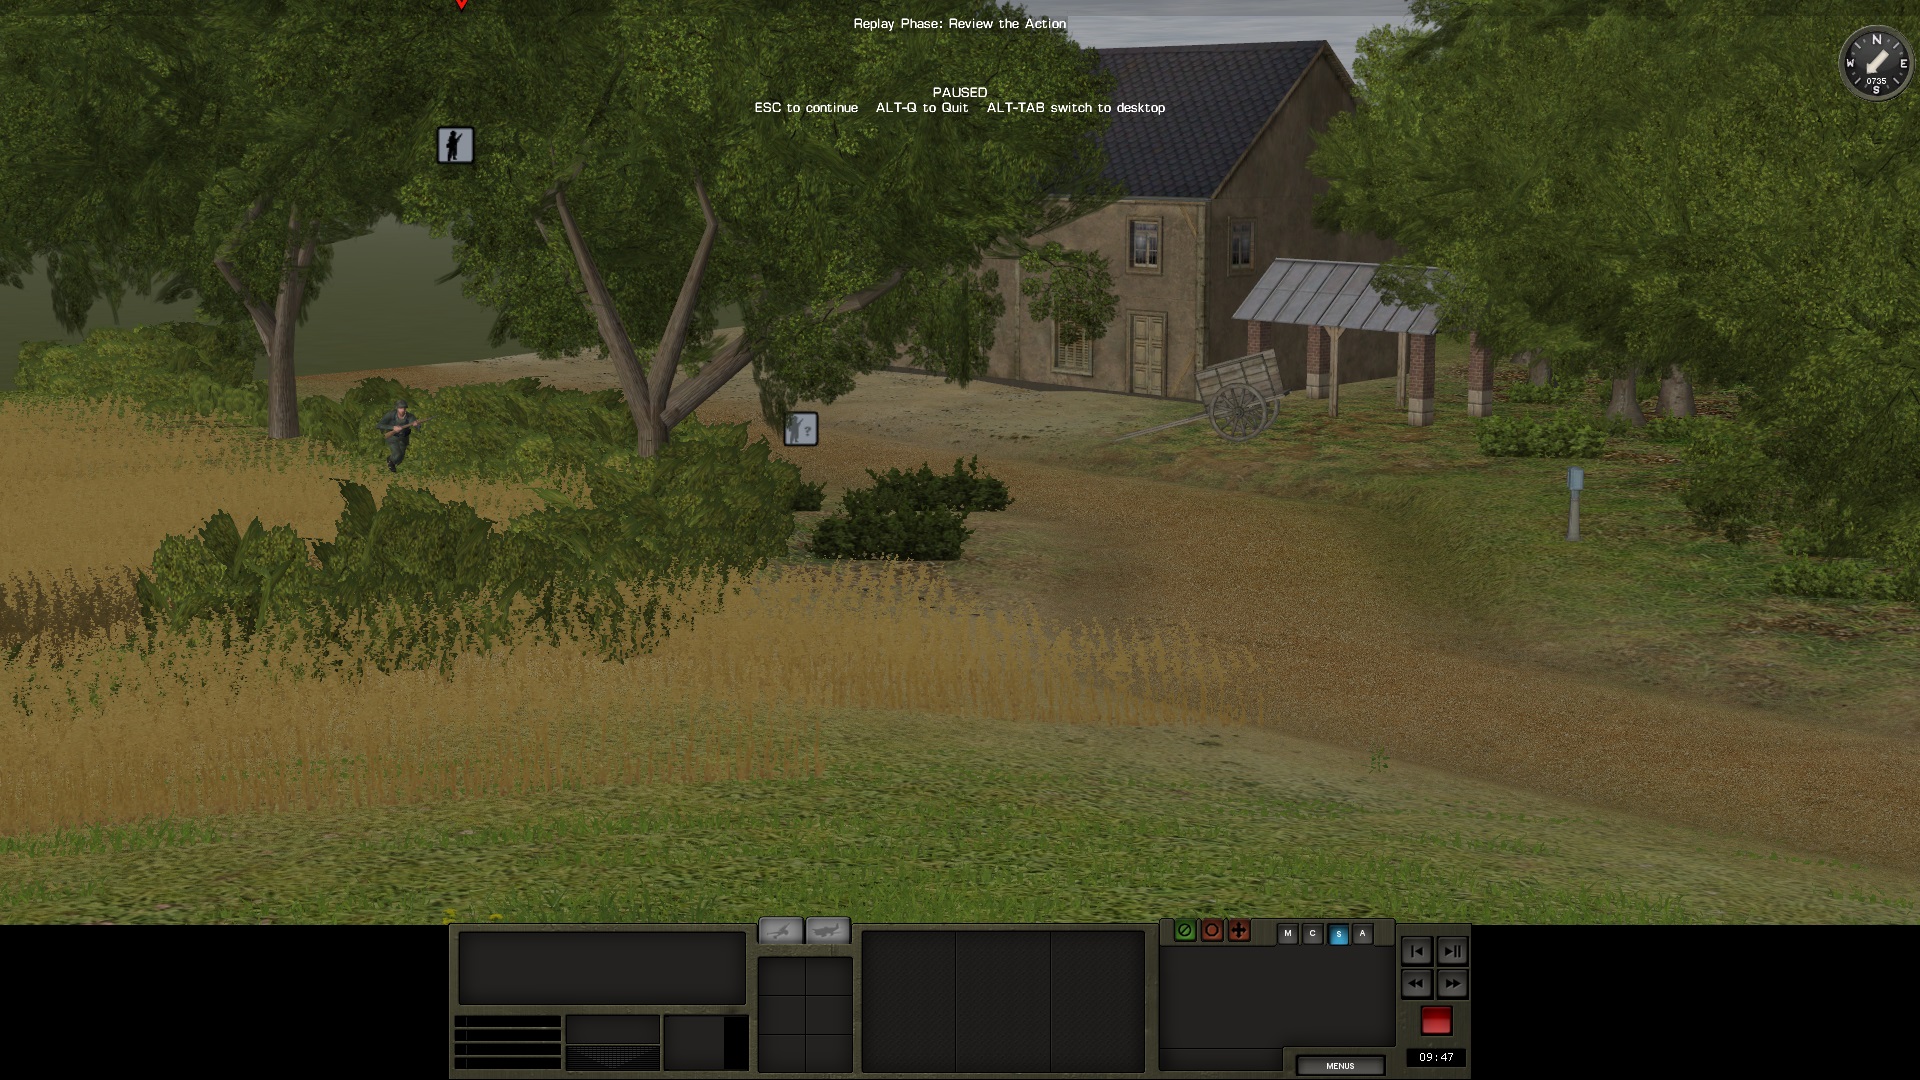
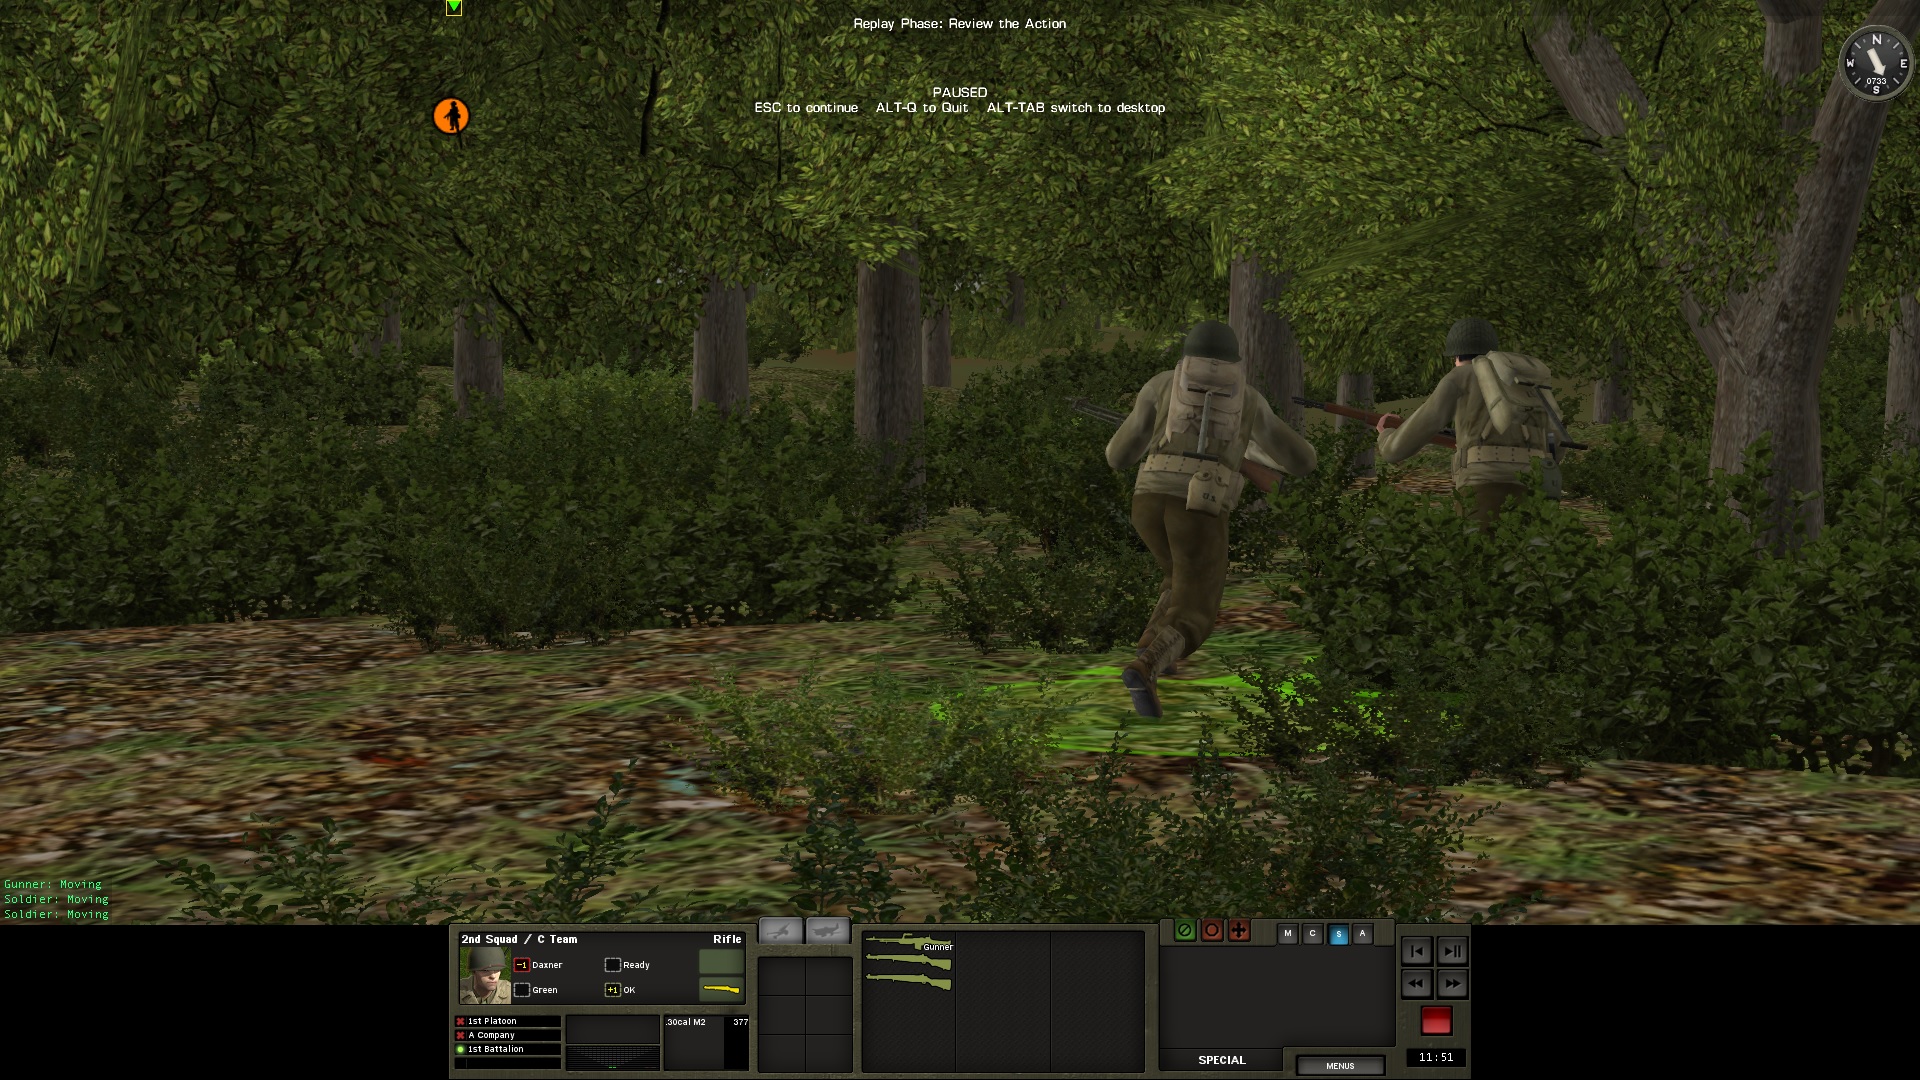
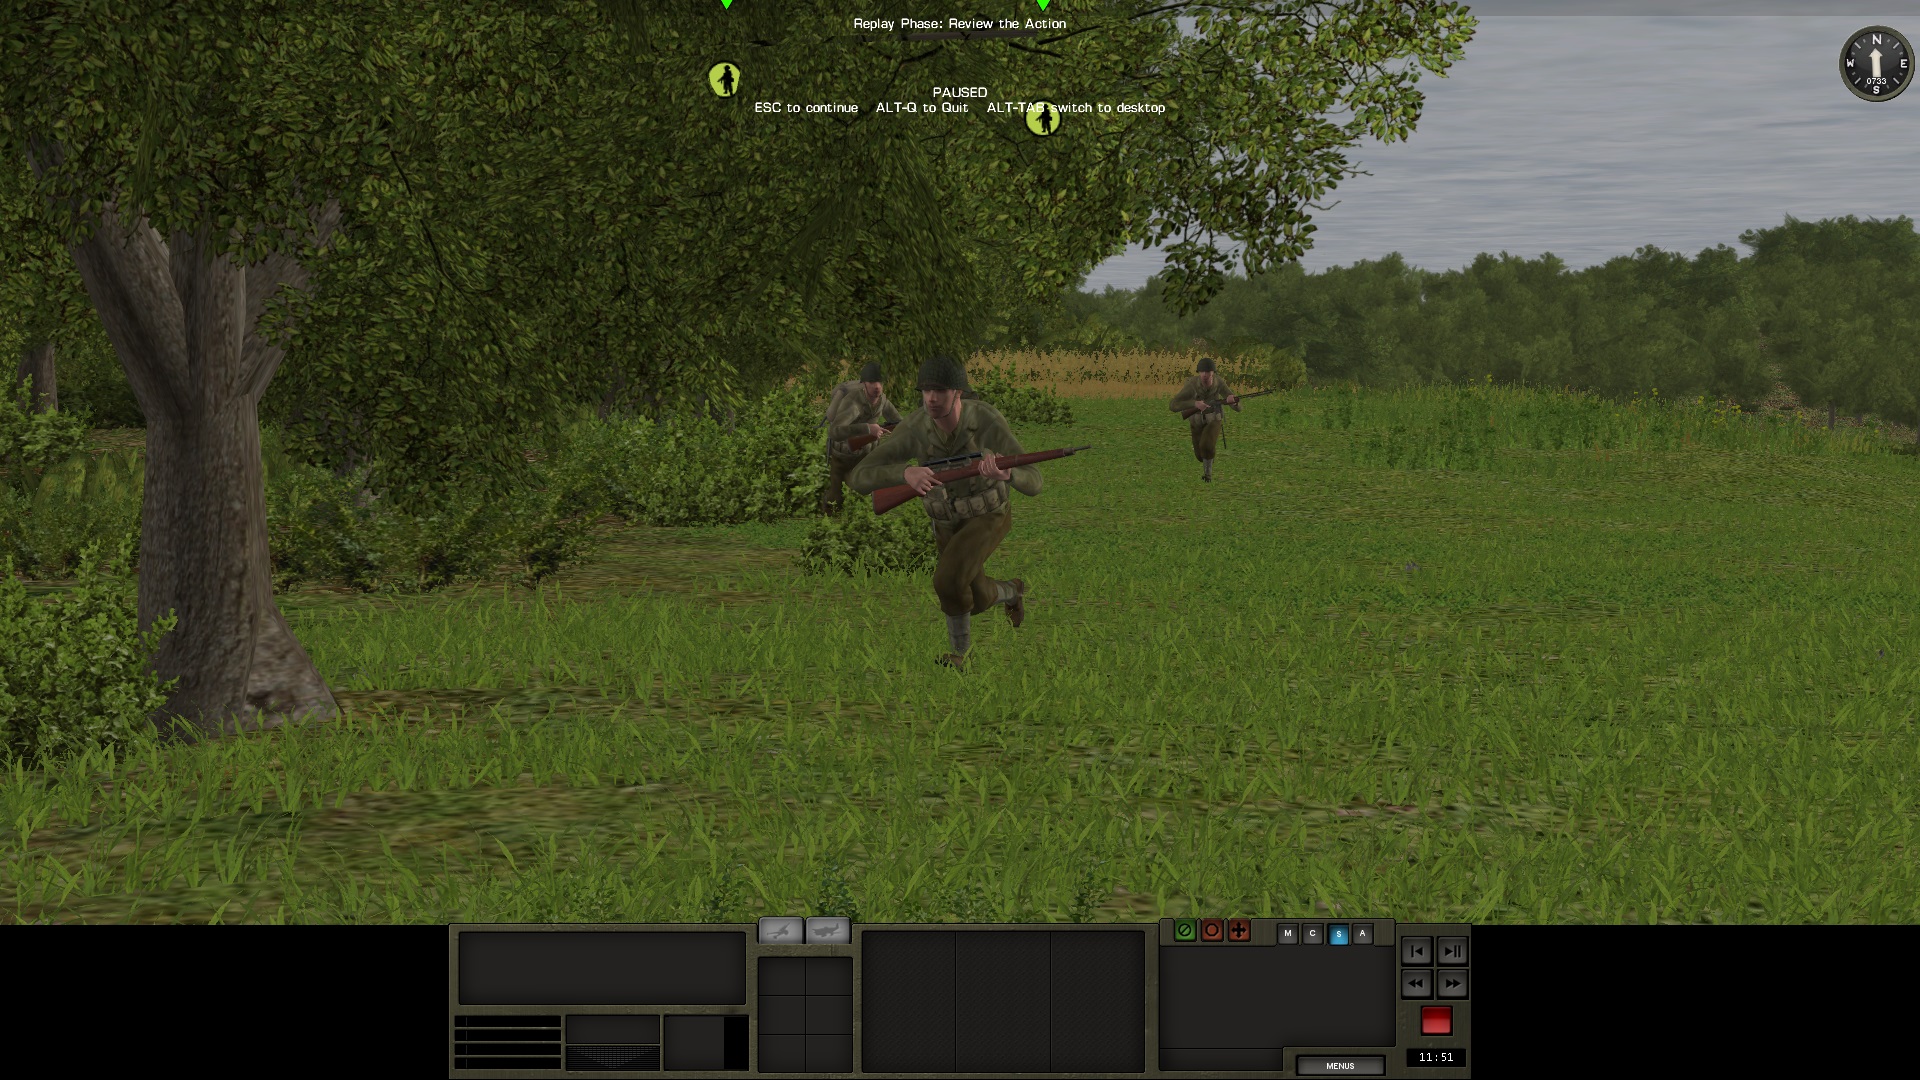
MINUTE 7
Looks like the situation is developping a little bit.
On my right wing, I can spot some Germans going in my direction. Looks like my men in the woods have been spotted.

Same thing on my left wing, more Germans are coming to support the one in the last screenshot of above minute 6's report.

In the center, my 60mm mortar team is almost deployed. I say almost because the turn did finish just 5 seconds before the deployment is complete. I am losing time here...
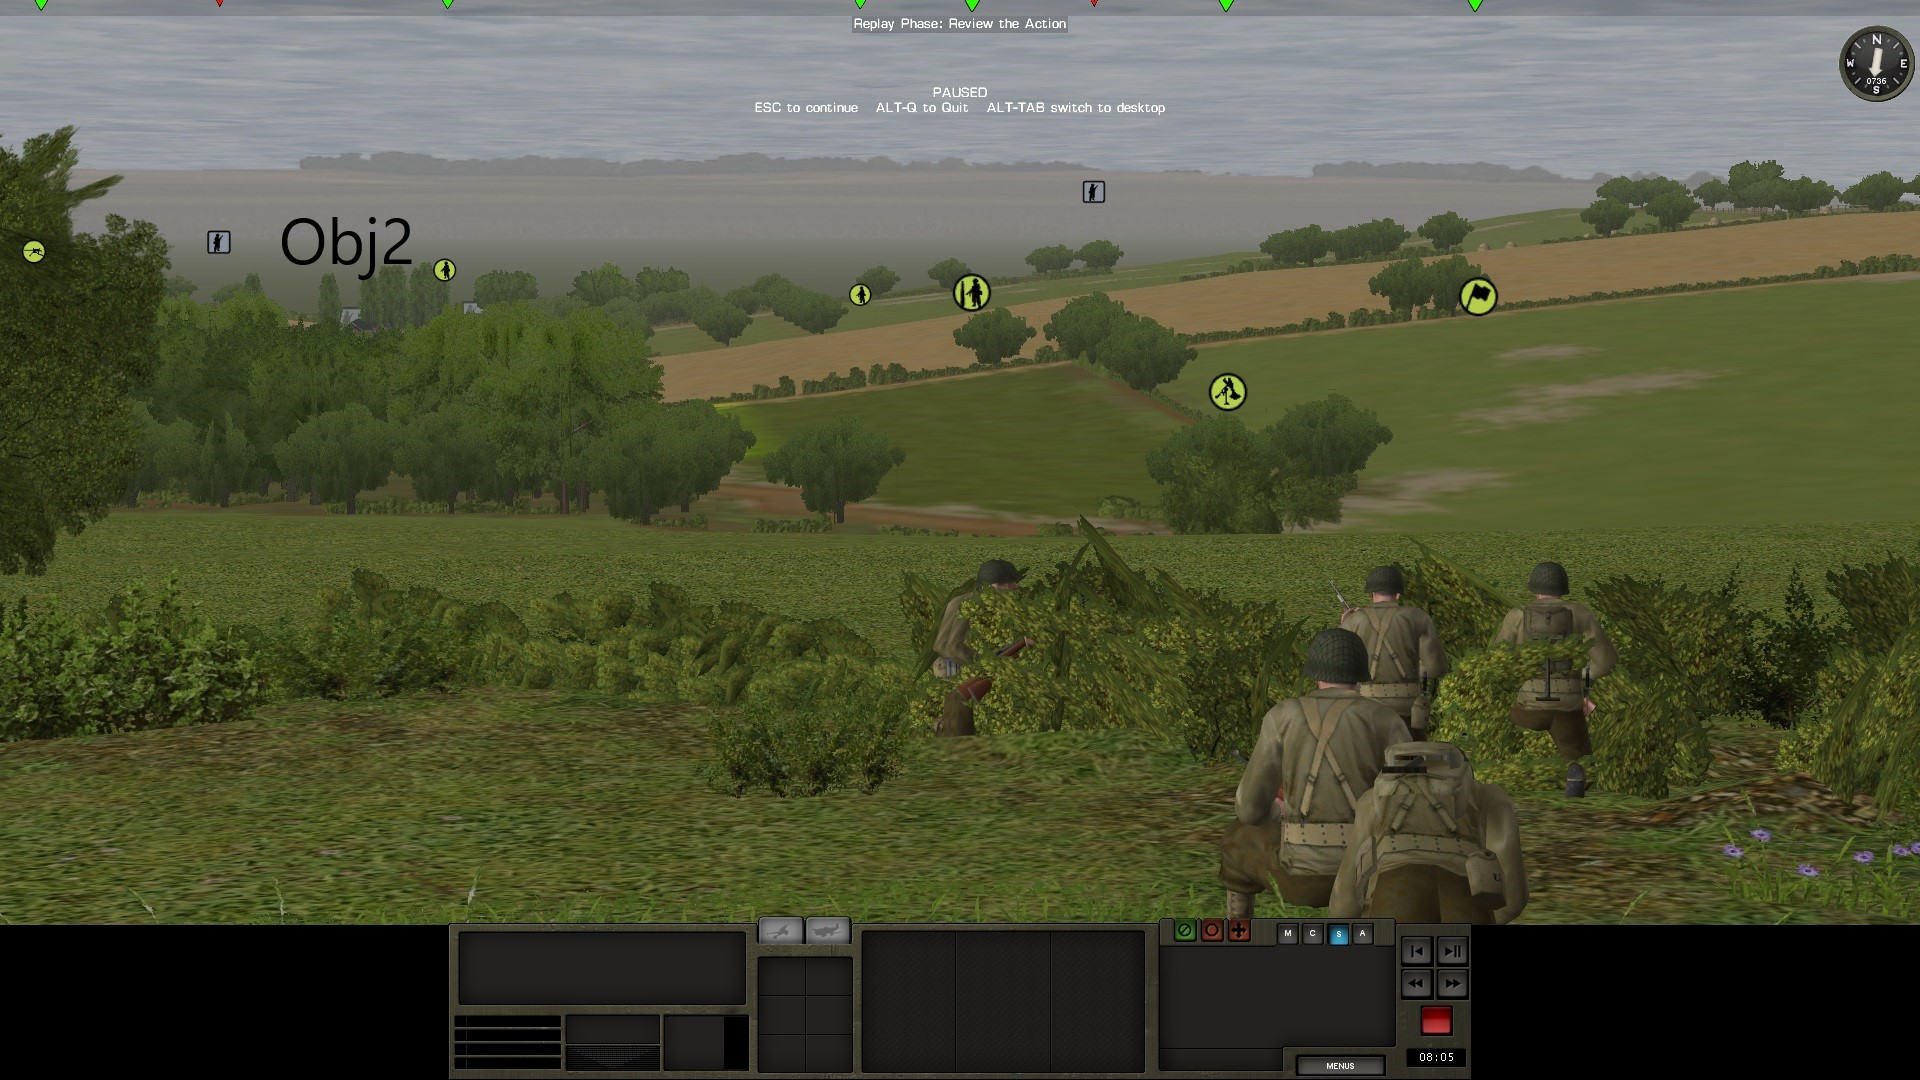
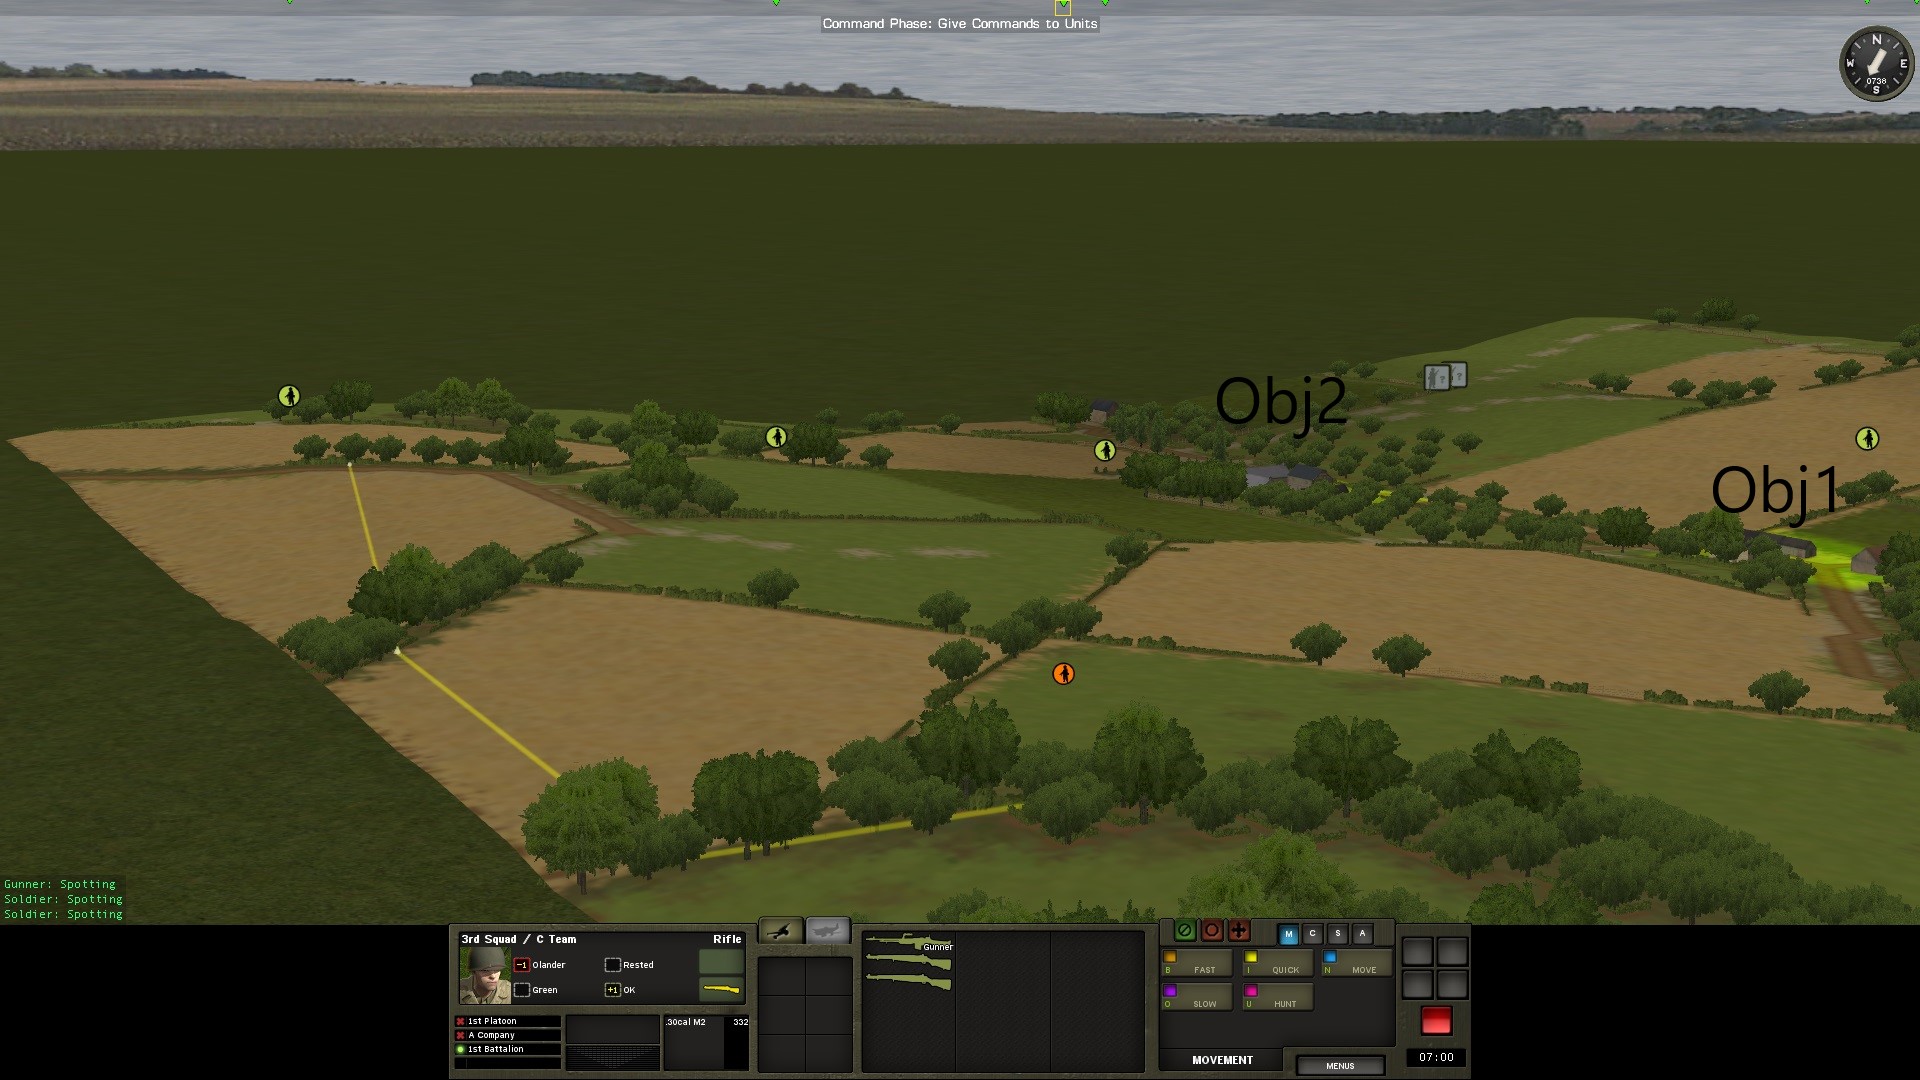
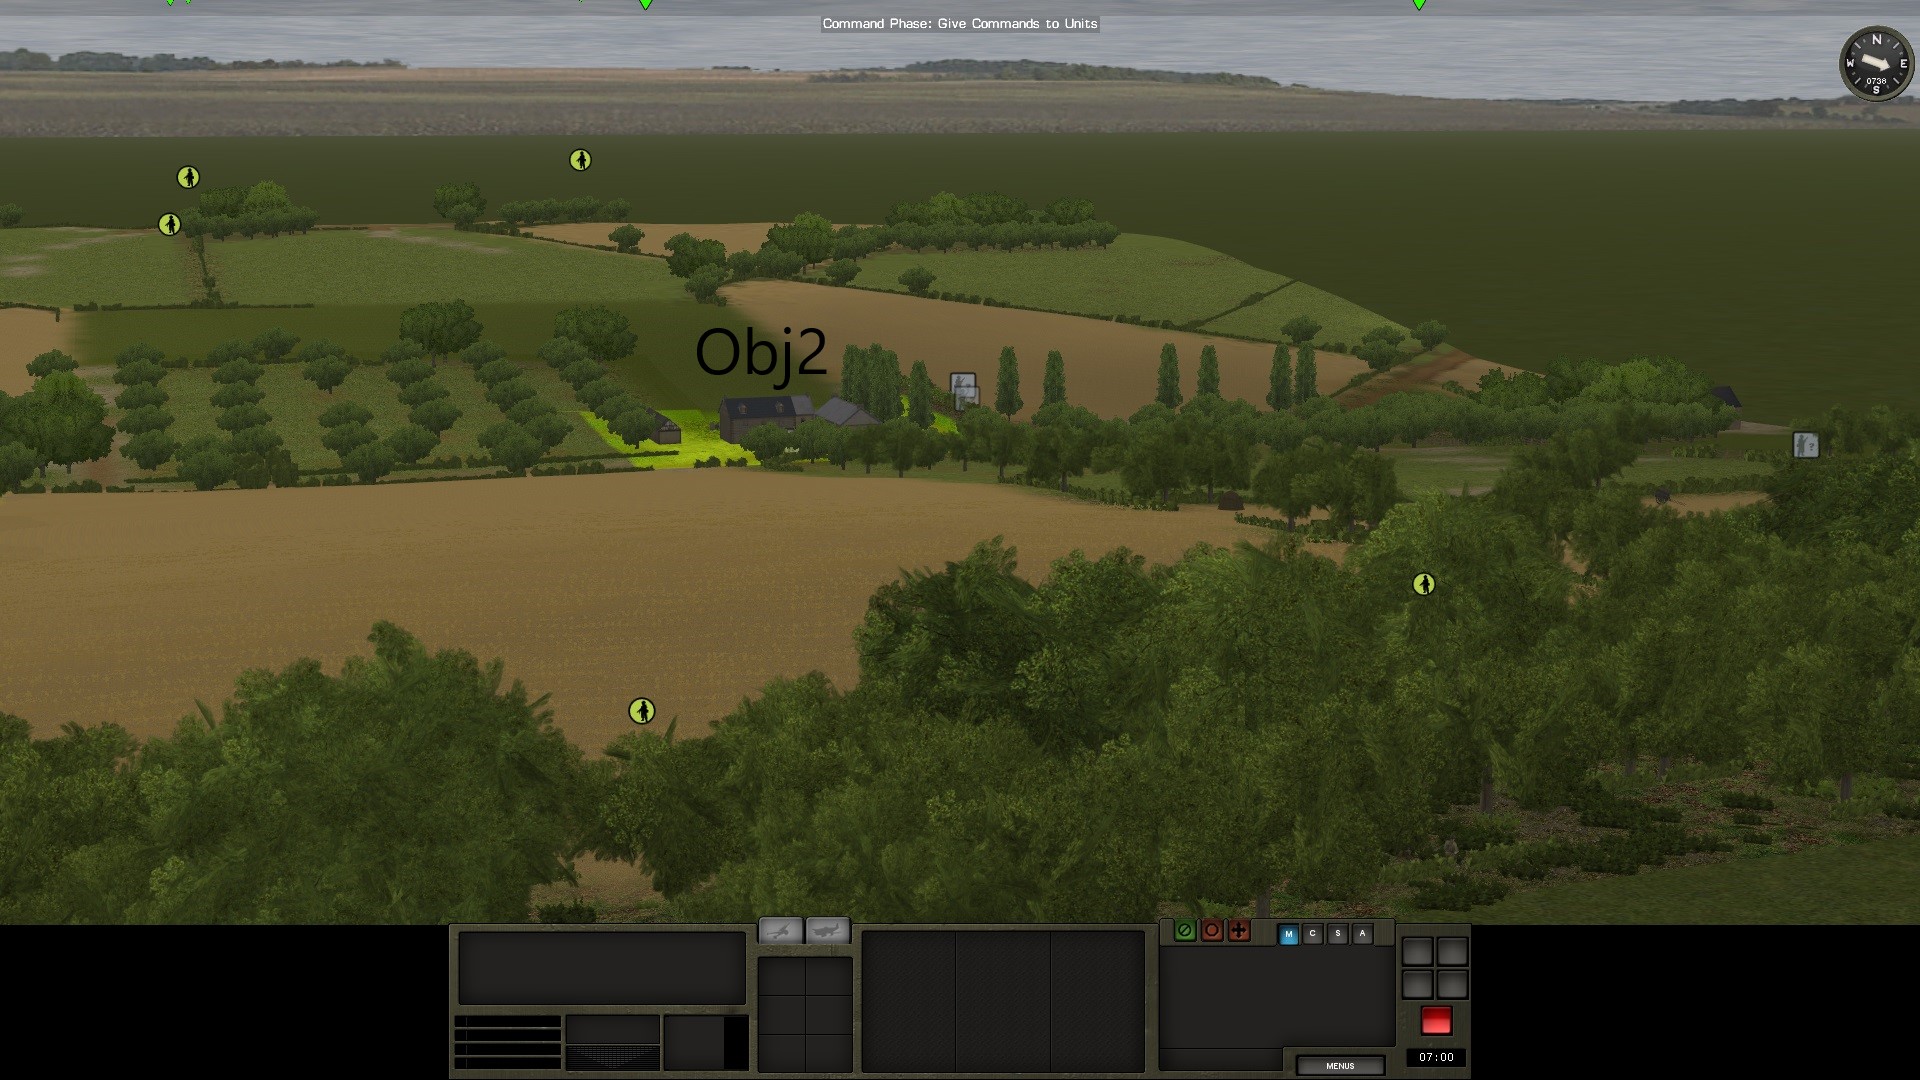
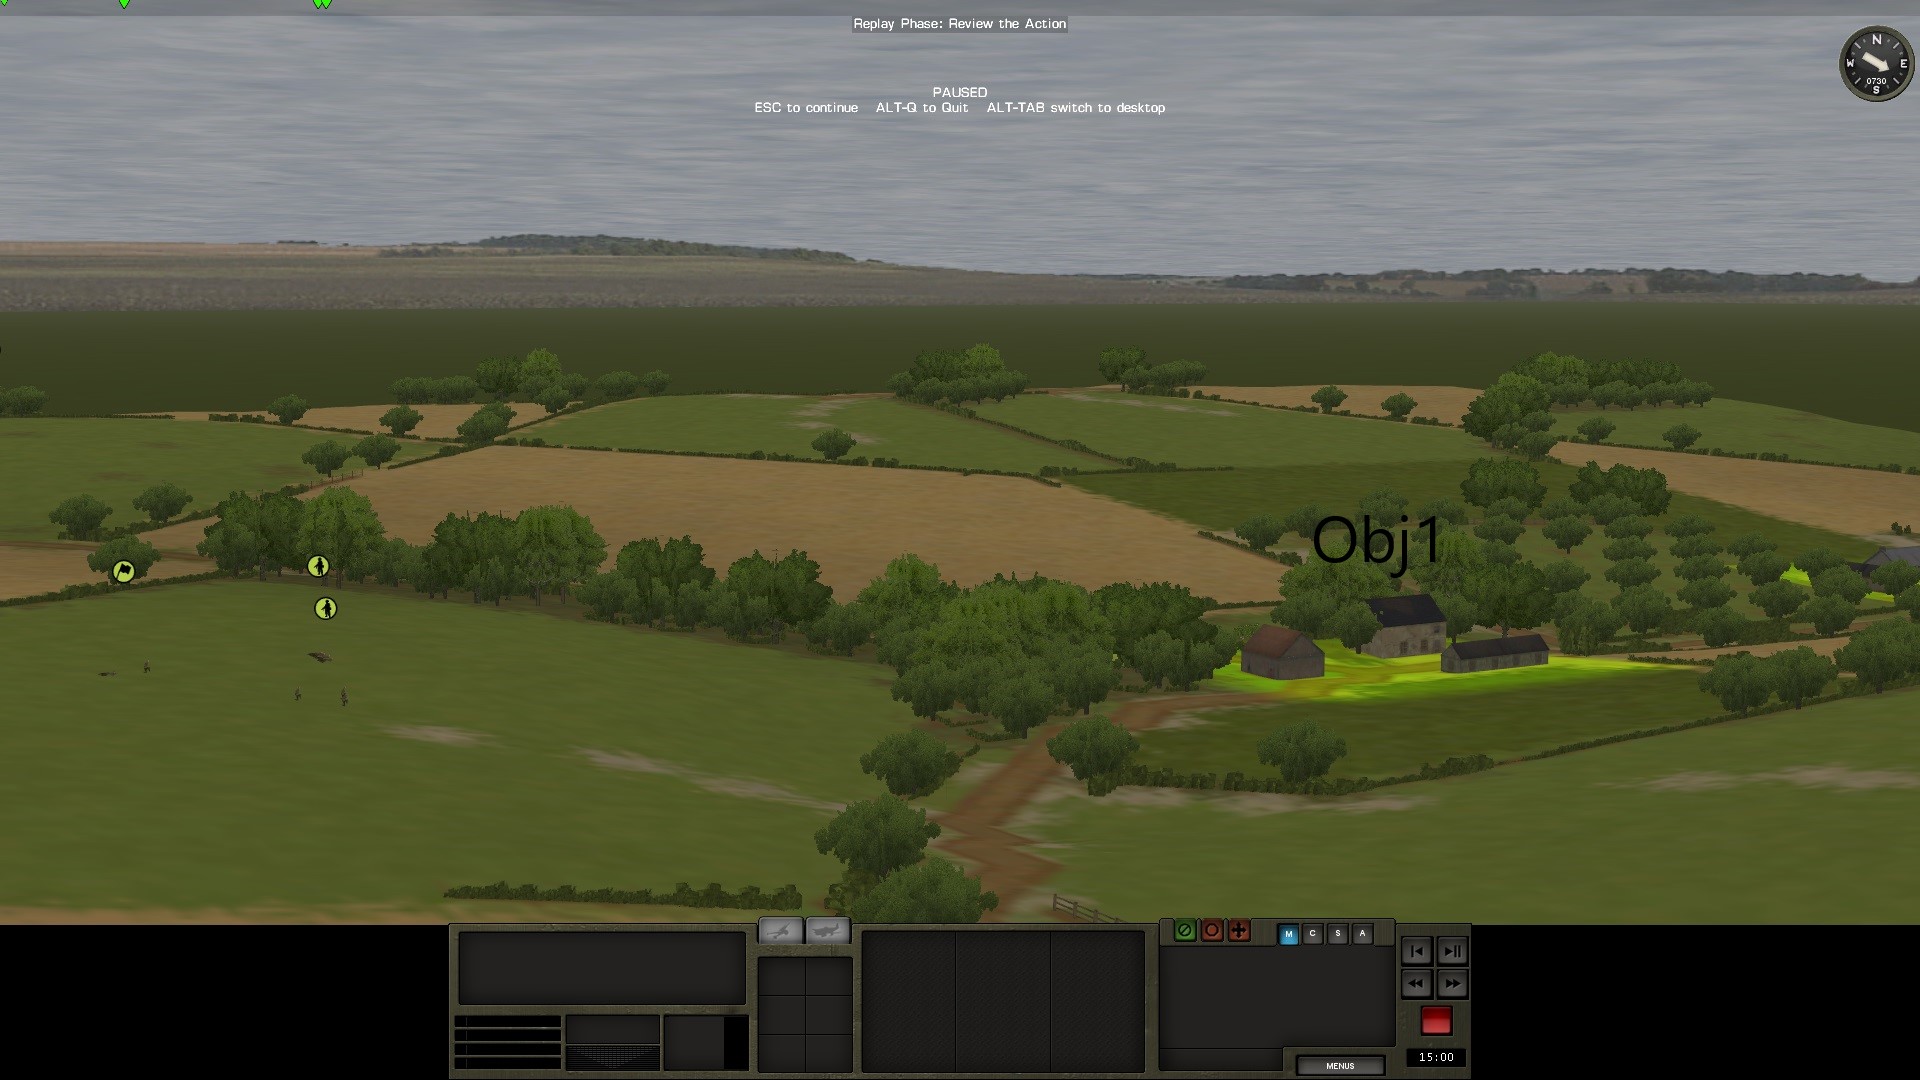
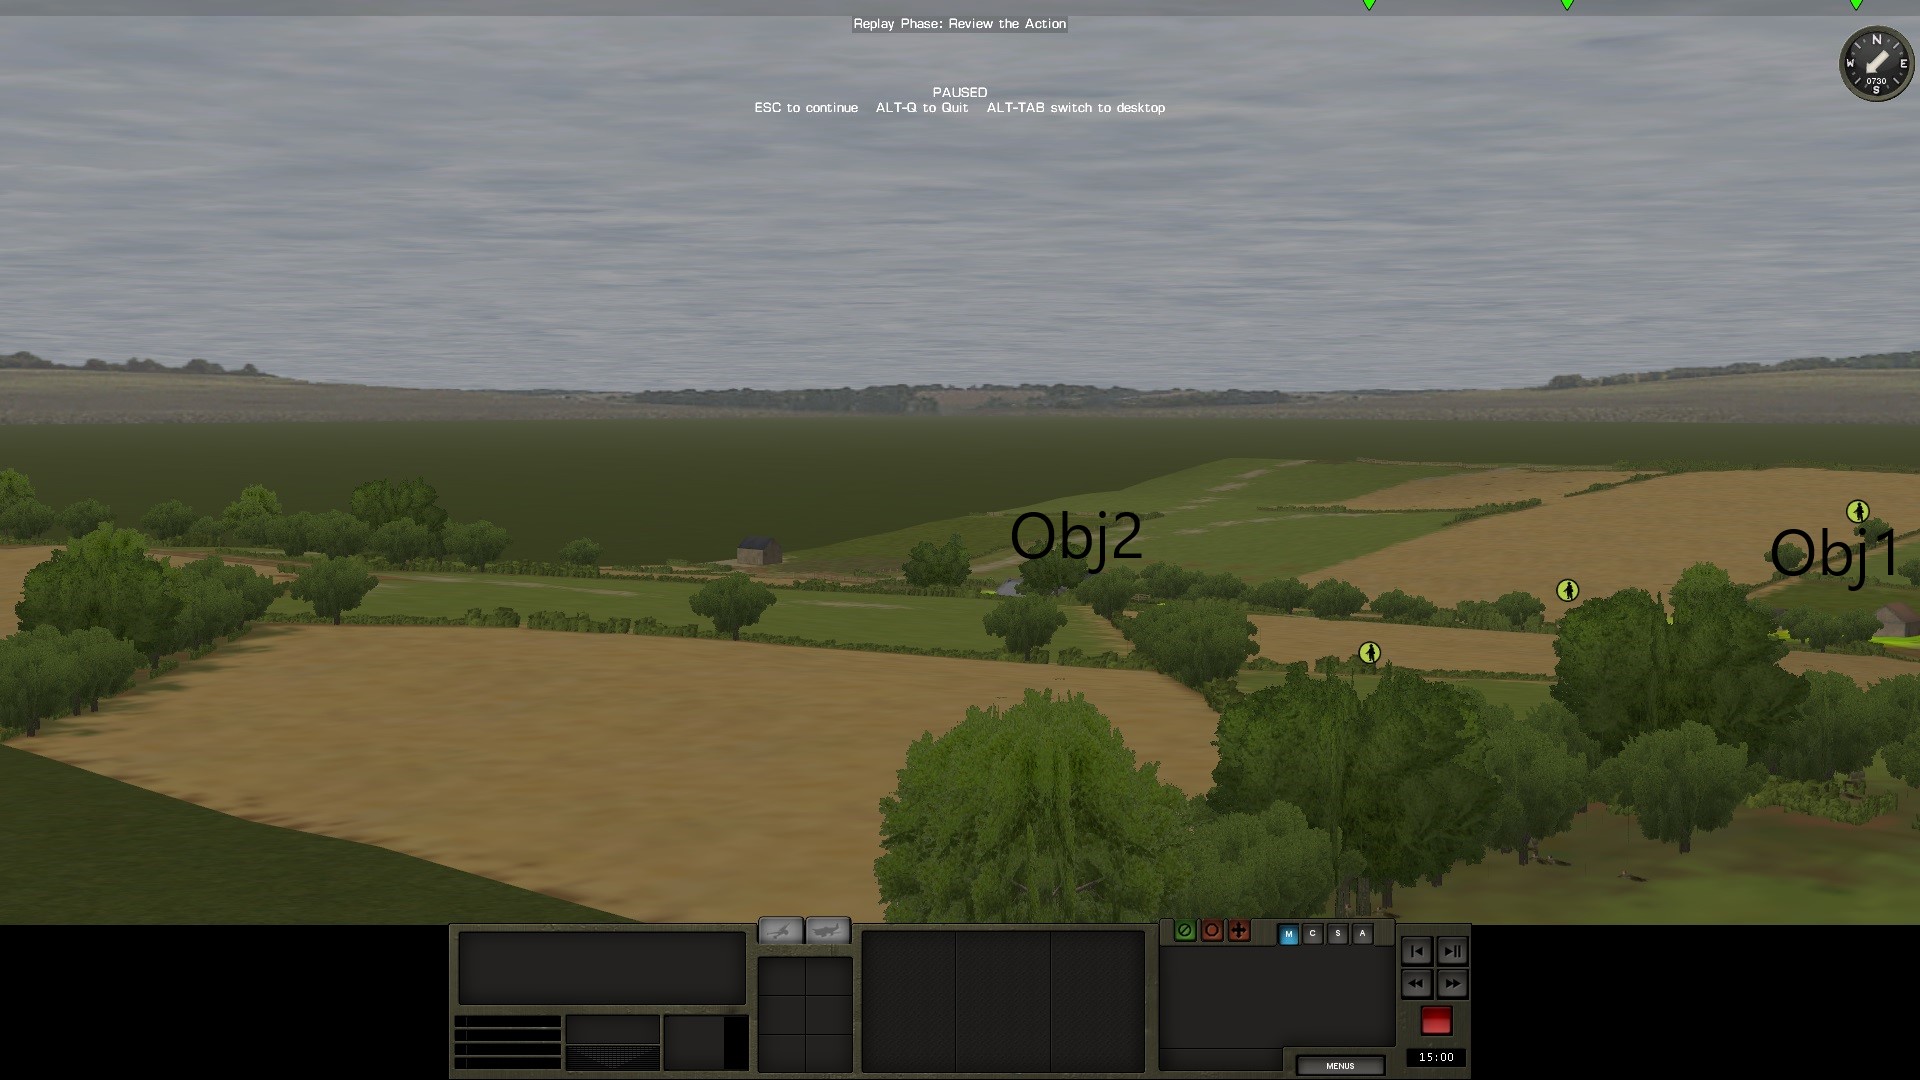
On the left wing, still no opposition. Here are three screenshots with my overall positions.
-
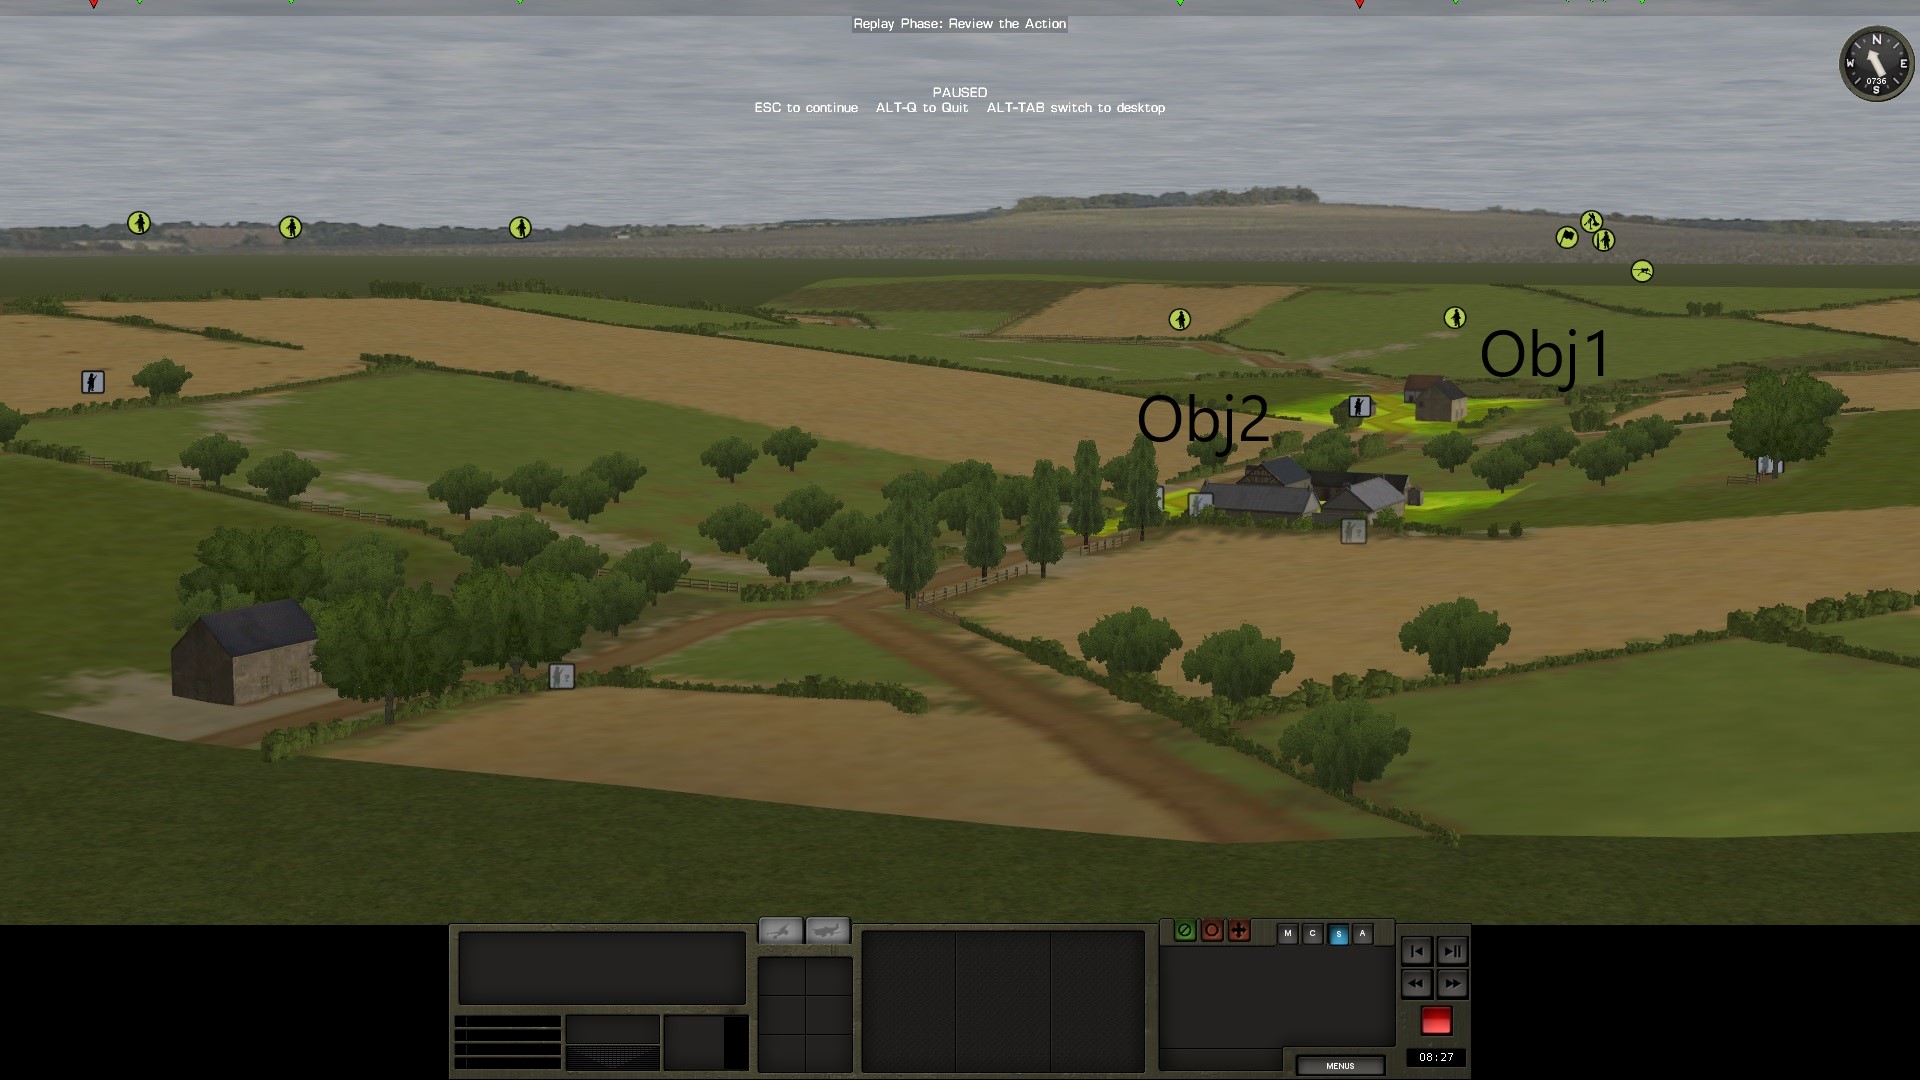
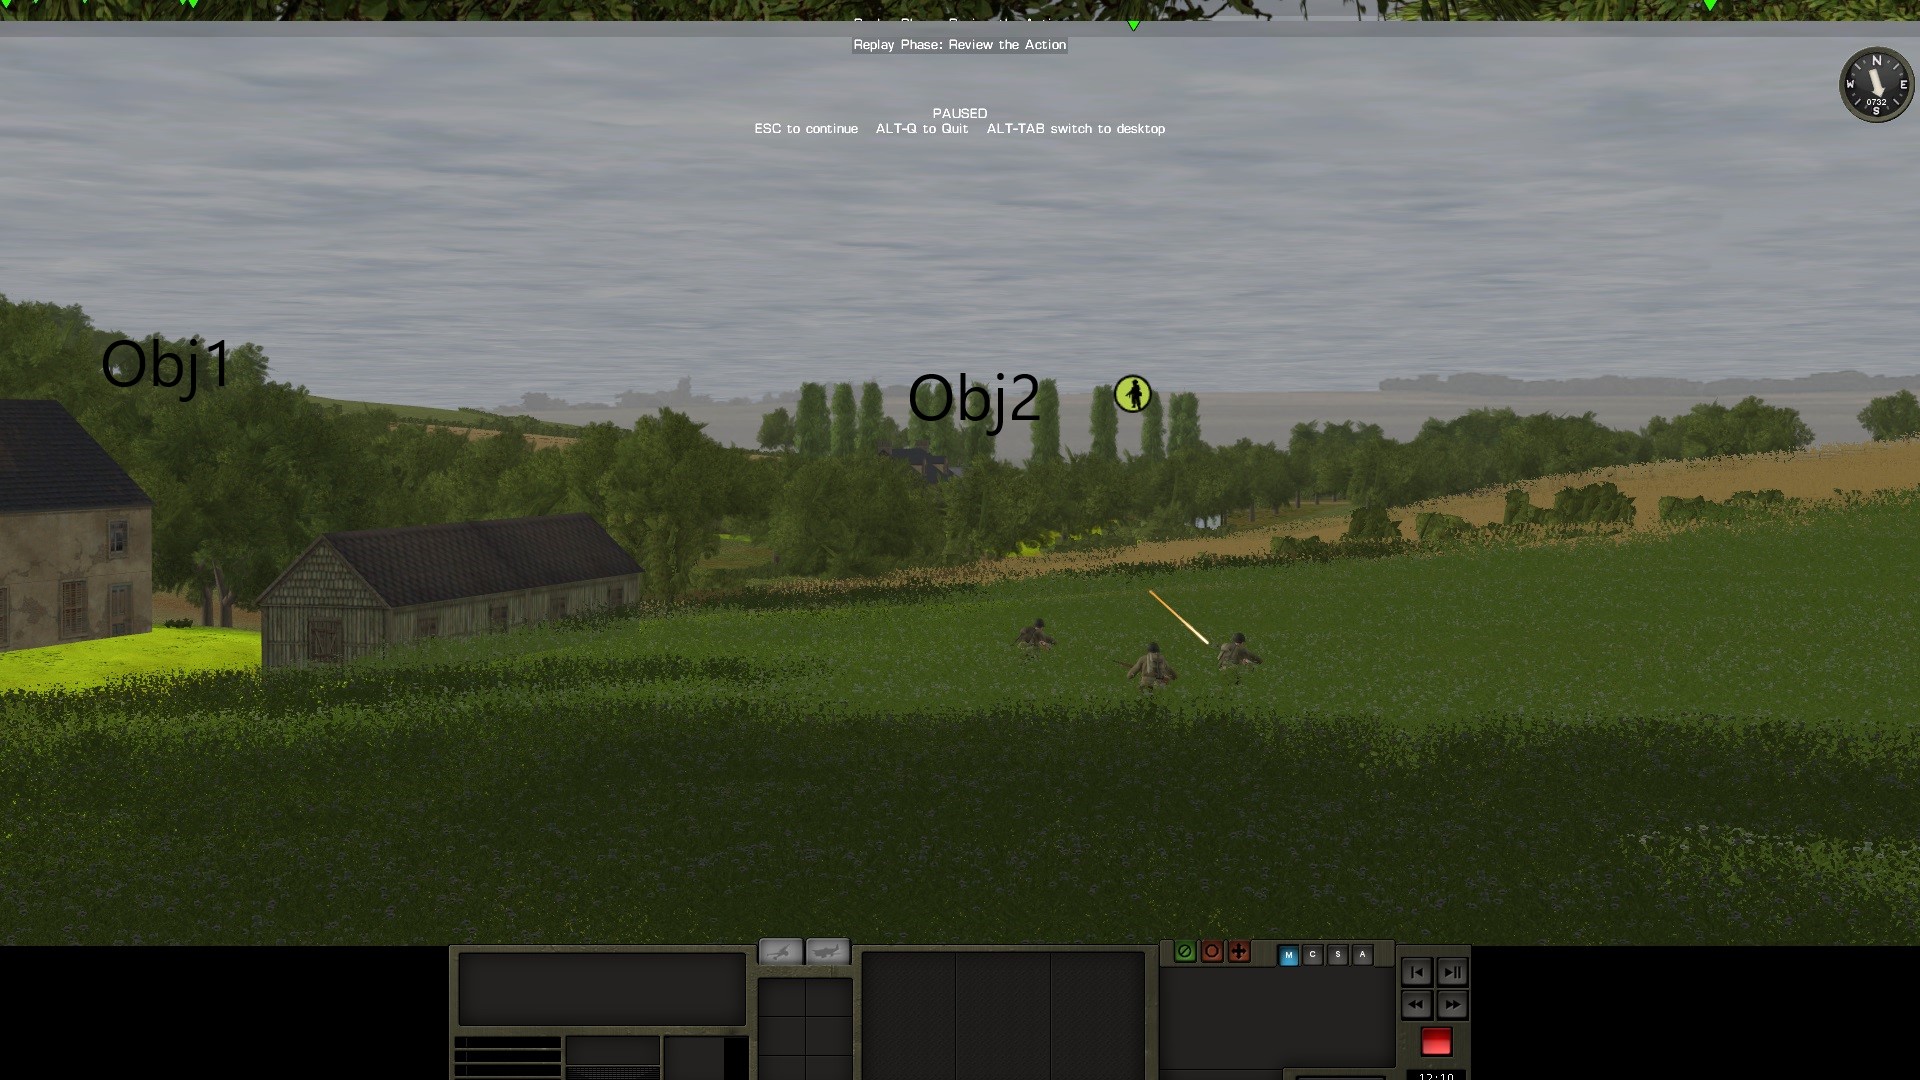
MINUTE 6
This turn was interesting because it has reveal me lots of enemy positions. The overall situation at the end of the turn is here:
Behind Obj2, I can spot some troops coming. Is it German's reinforcement?
Germans have a direct LOS on the Obj1's house my team is in. I think I must exit this house now.
Interesting also to notice that some Germans are going in the direction of my left wing. Did they spot something finally?
-
MINUTE 5
The lucky team continue to undergo some area fire. Thus, I am using a Slow move to avoid it and take some cover a little on the right of their current position. Looks like the german have not seen this since they continue the area fire on their old position.
On the left side, I am taking a risk now. I am advancing quickly to the next little wood since nobody was spotted here after two minutes waiting. Was it enough?
And my bad, I have forgotten to move the heavy weapons that has just arrived before sending my turn. One minute lost for them I guess. I hope I won't regret this.
-
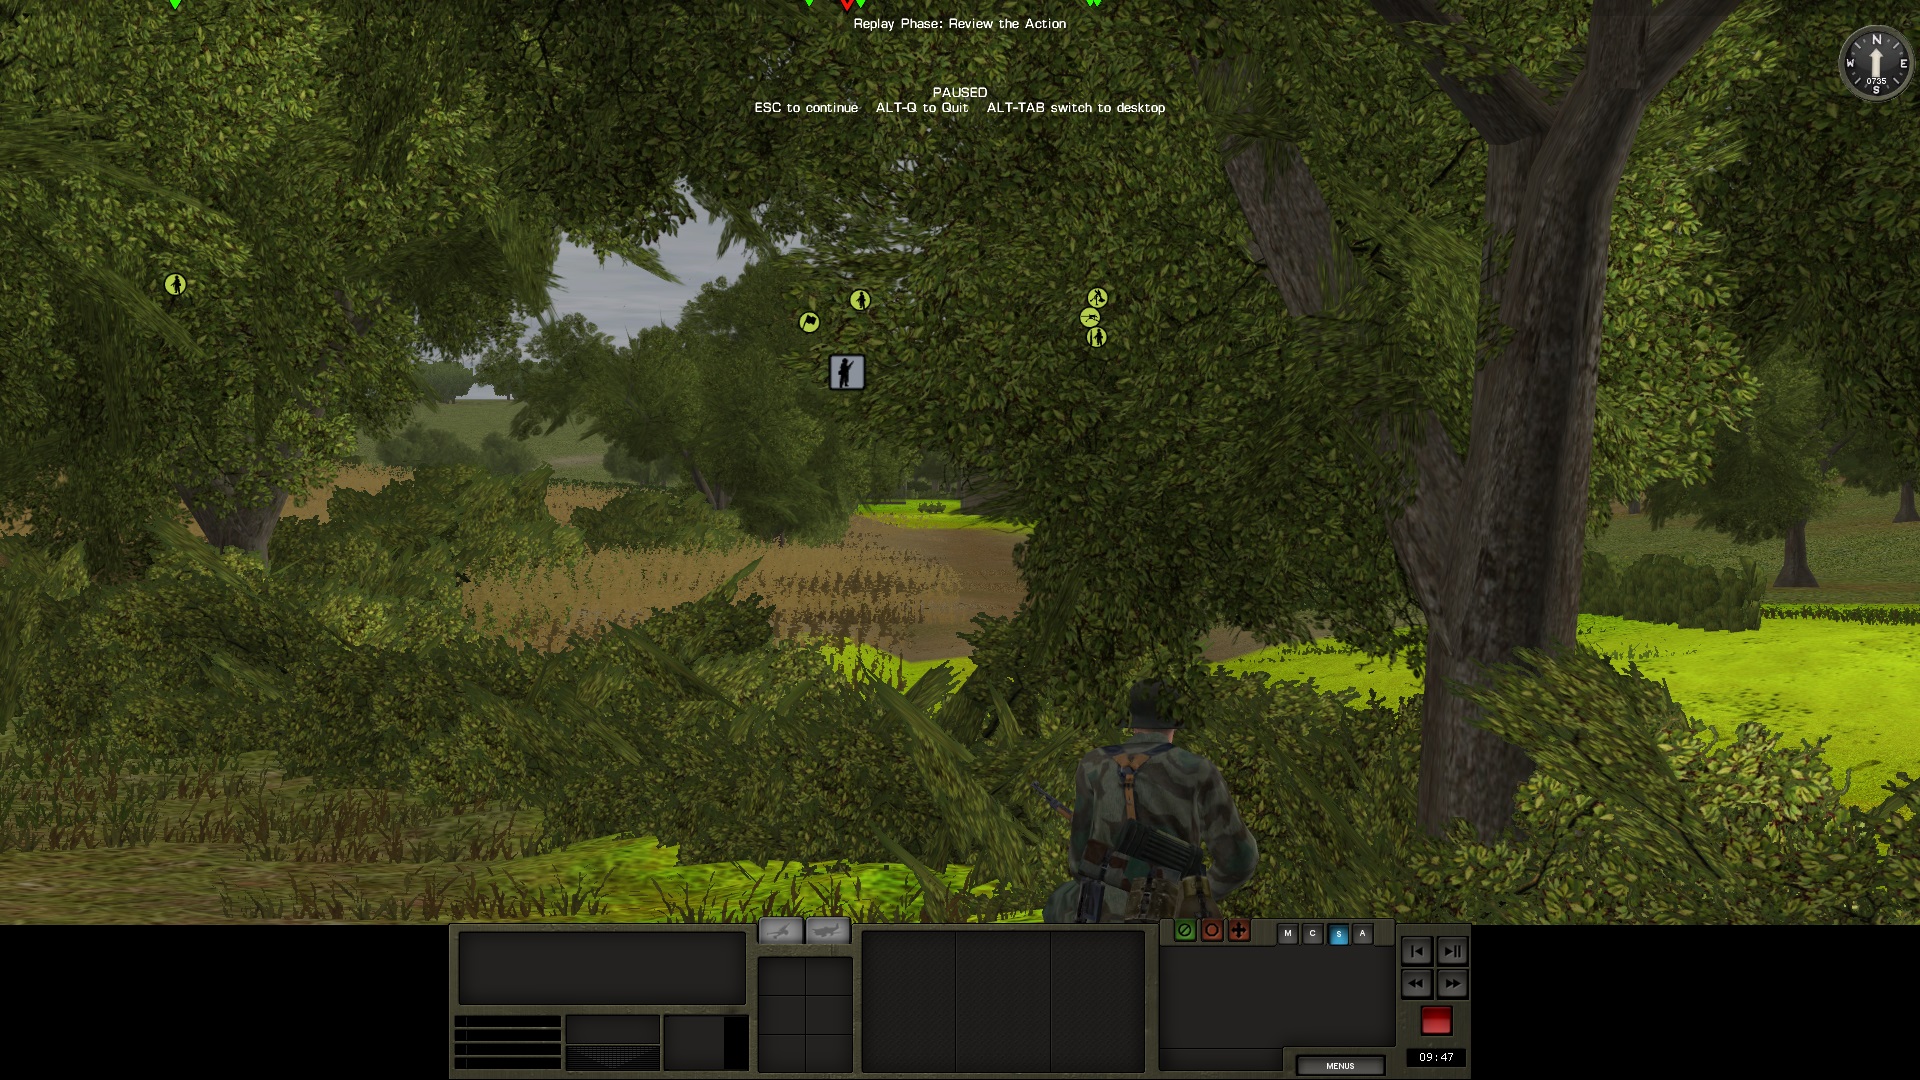
MINUTE 4
On the right, the progression into the woods is going well. No opposition has been found and this is worrying me. @JoMc67 is surely waiting for me
In the center, as @IanL pointed out, I have forgotten to give my team a 30 seconds pause. I was thinking this was done by the Target Briefly. One newbie mistake, one


 Thus, the team left the house immediately without supporting by fire the other team on the right that is under fire!

By chance, the other team has reached its destination without any casualty. I think I am lucky.
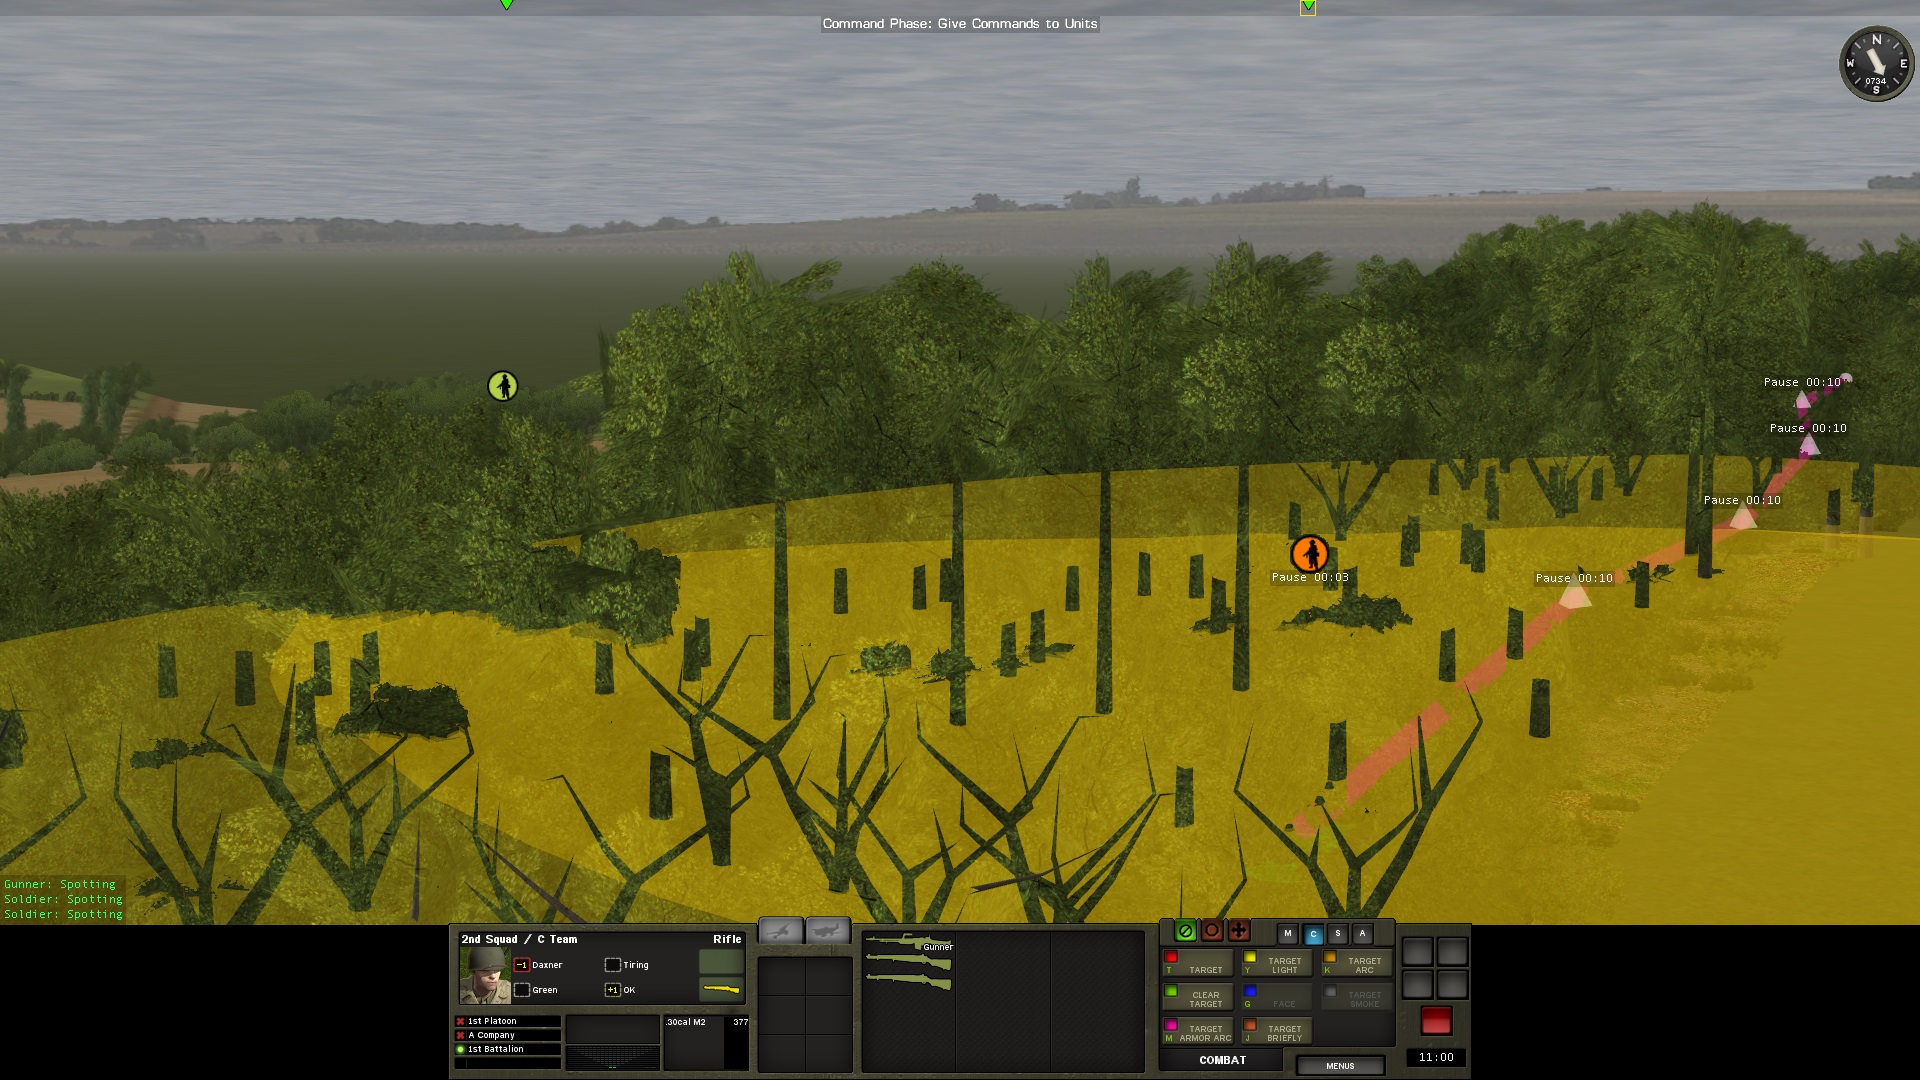
For next turn, I will start to carefully progress into the woods. I am sure the Germans are setting up an ambush there.
Here is the overall situation. Still no casualties so far...
-
10 minutes ago, IanL said:
Cool. Did you also give them a 30s pause? The target briefly will not hold them in place.
Hé hé, no
 as you will see ...
-
8 minutes ago, Ivan Zaitzev said:
I'm no expert, and I don't want to be negative or rude or discourage you in any way but I would argue that you don't need to occupy the map, just the objectives. I might be totally wrong here but your approach looks more suited for a company sized force than a green platoon. It seems you are just giving your opponent a chance of taking you piecemeal if he concentrates all his troops on the objective. But once again I'm no expert and everyone should play they way they want. It's not an advice, it's just how I would tackle the situation.
Do not worry, if I am here this is for learning from my mistakes. Occupy the map was not the good term. What I would like is to counter a possible move on my flanks. I know I am a little spread out and I have not done any reserve. Perhaps, I should have kept one squad in reserve and move only on one flank.
-
MINUTE 3
On the right wing, the squad is starting its progression into the woods, hoping to be unseen from the Germans.
On the left wing, teams are continuing their approach, one team is stopping to watch while another is doing some quick moves forward.

In the center, I am concerned that I am a little too weak. As such, I have send the rest of the squad to support the single team in the house. One team will be on the left side while the other on the right side of the objective. But, the right team gets shot at from the position I have seen them coming the previous turn...
I decide to use for the first time the new "Target Briefly" (I come from CMSF1
 ). I am asking my team in the house to area fire during 30 seconds, with Target Briefly, and to
run out of the house to avoid return fires. Will see if that works.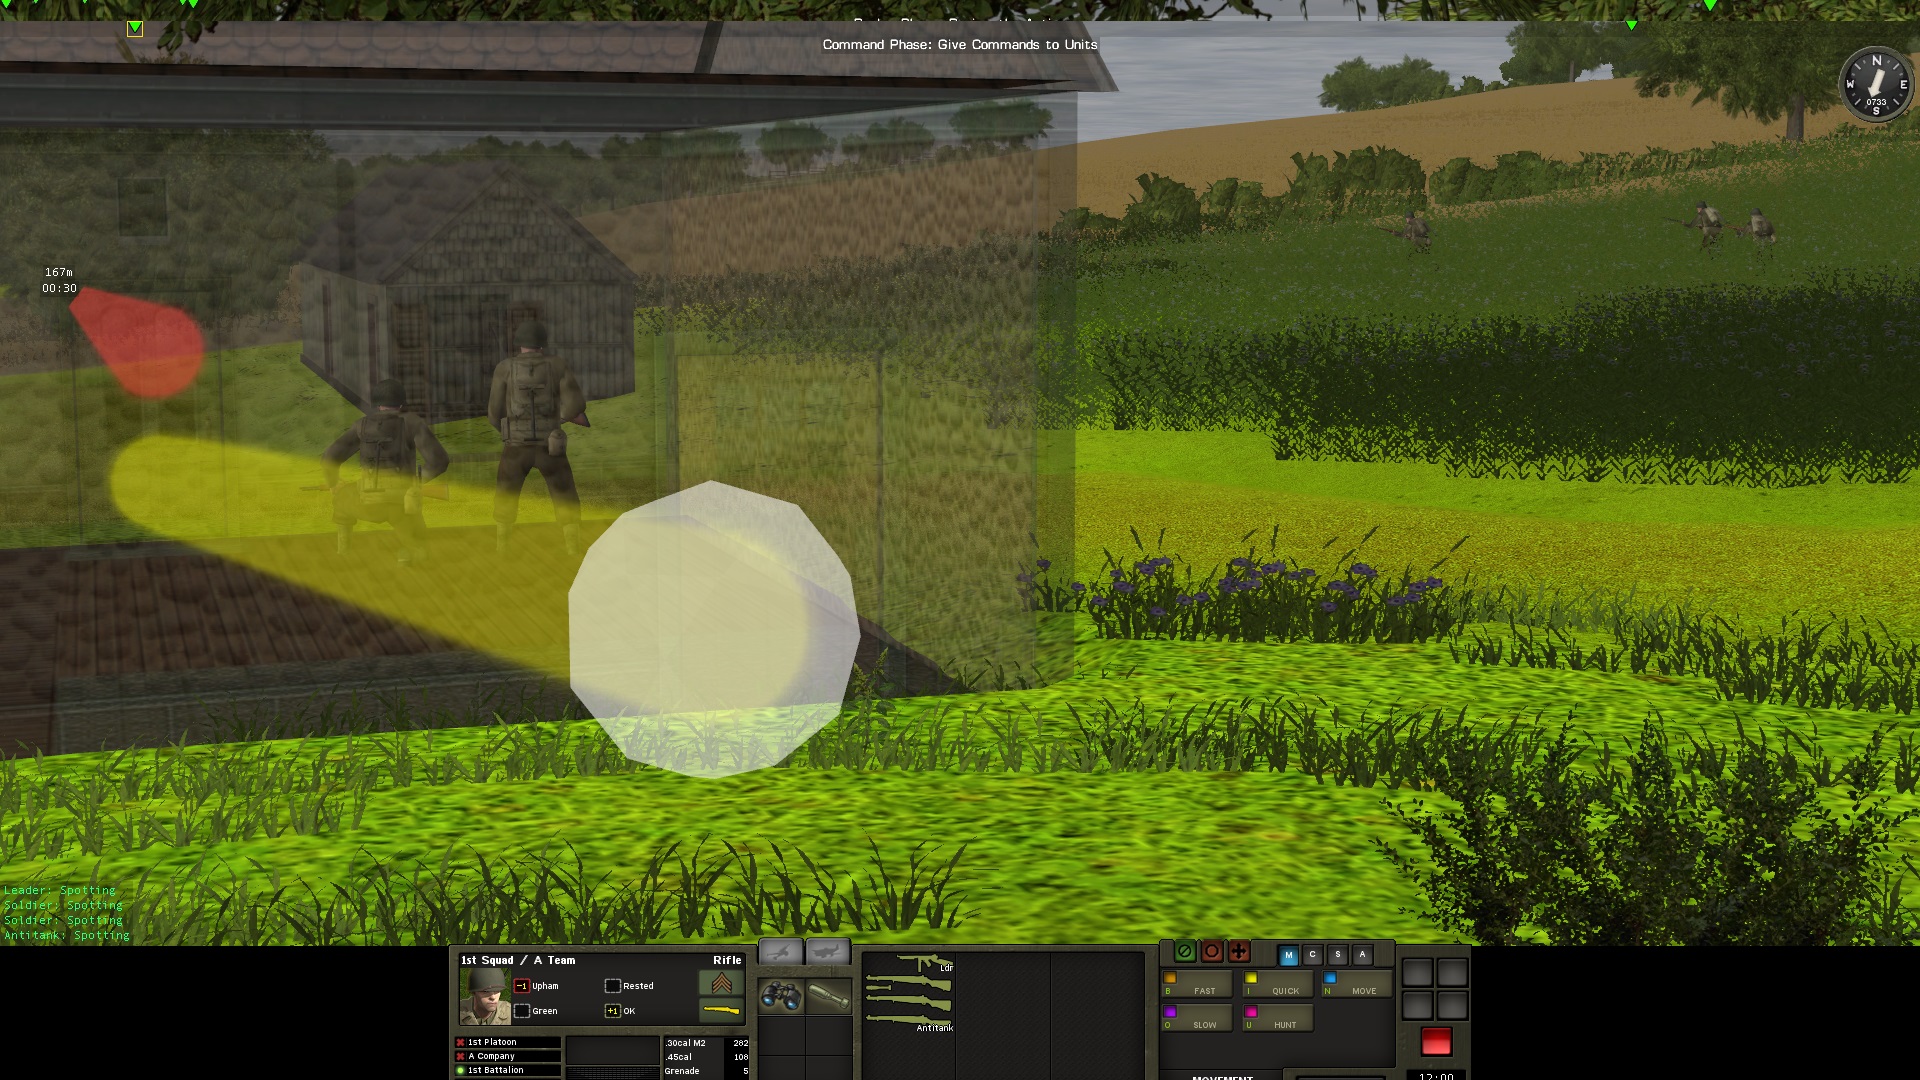
Here is the overall situation at the end of the turn. Still no casualties so far...
-
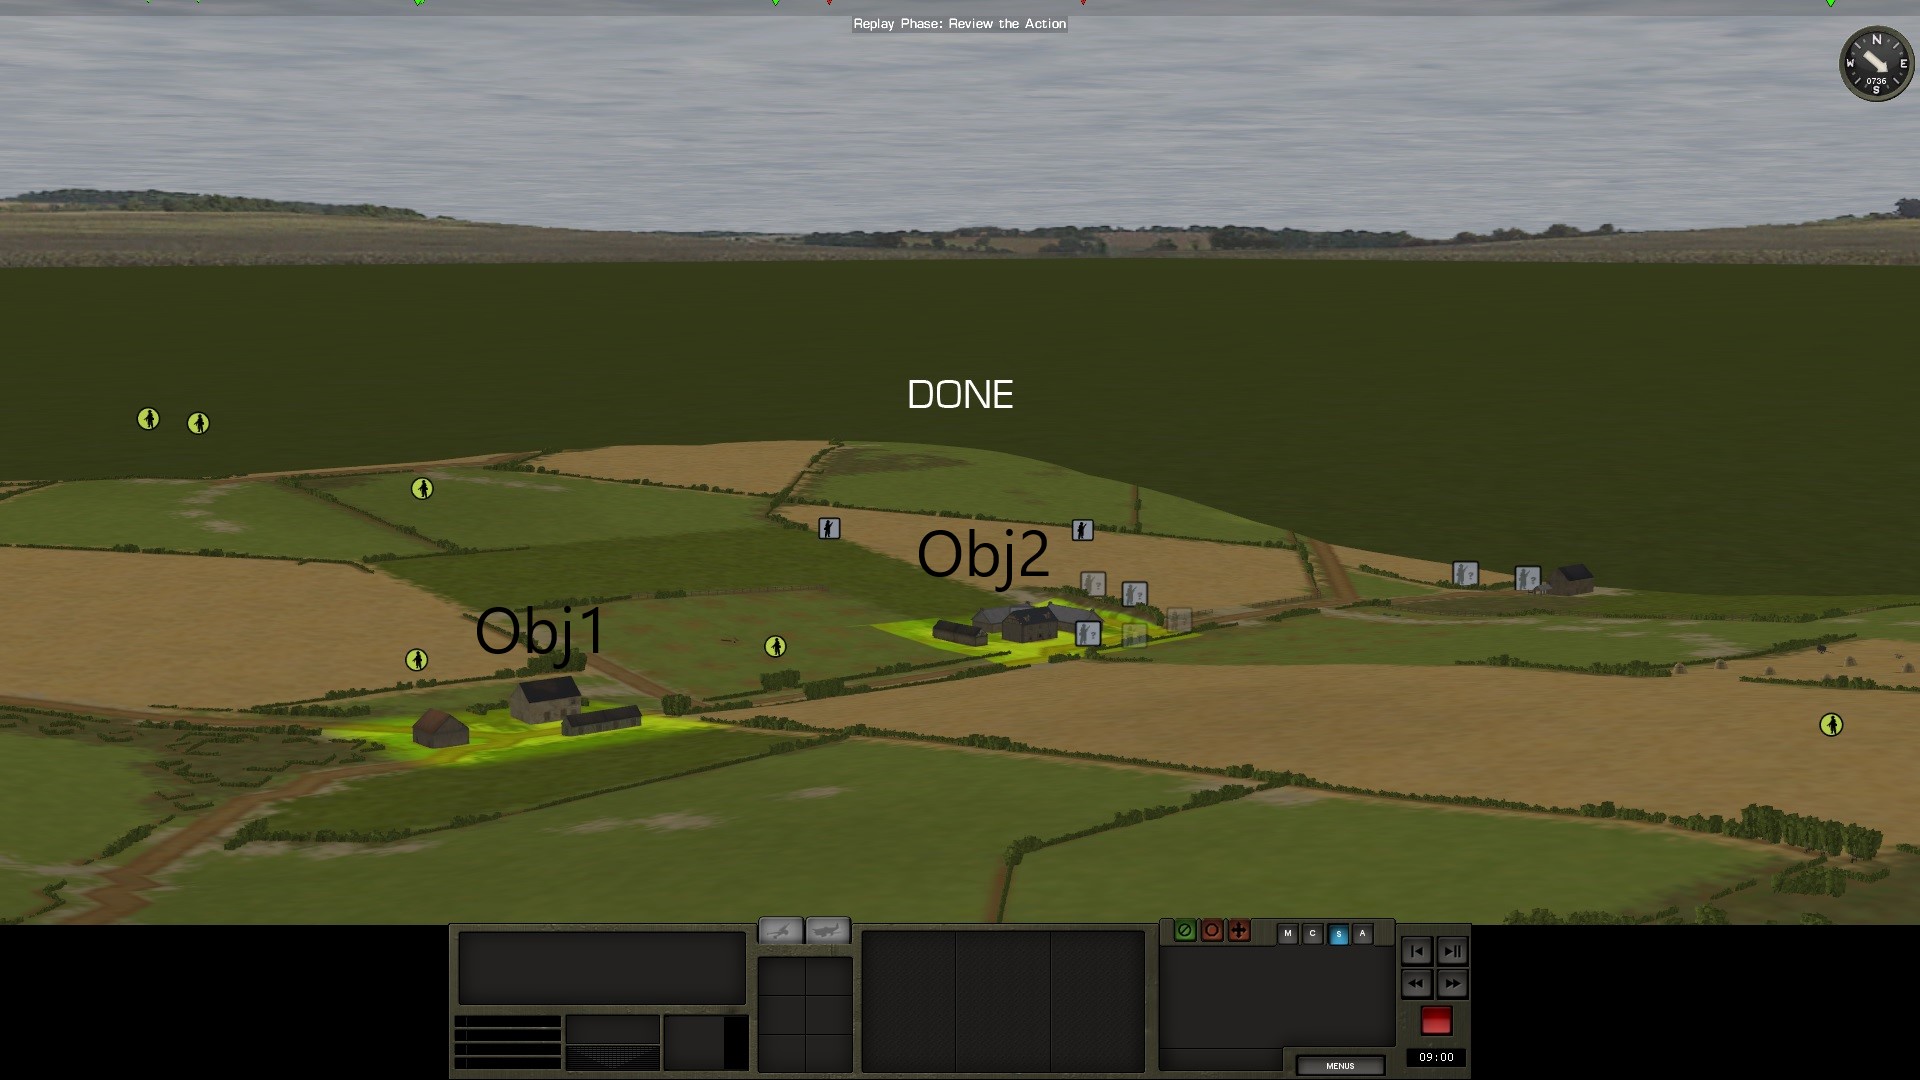
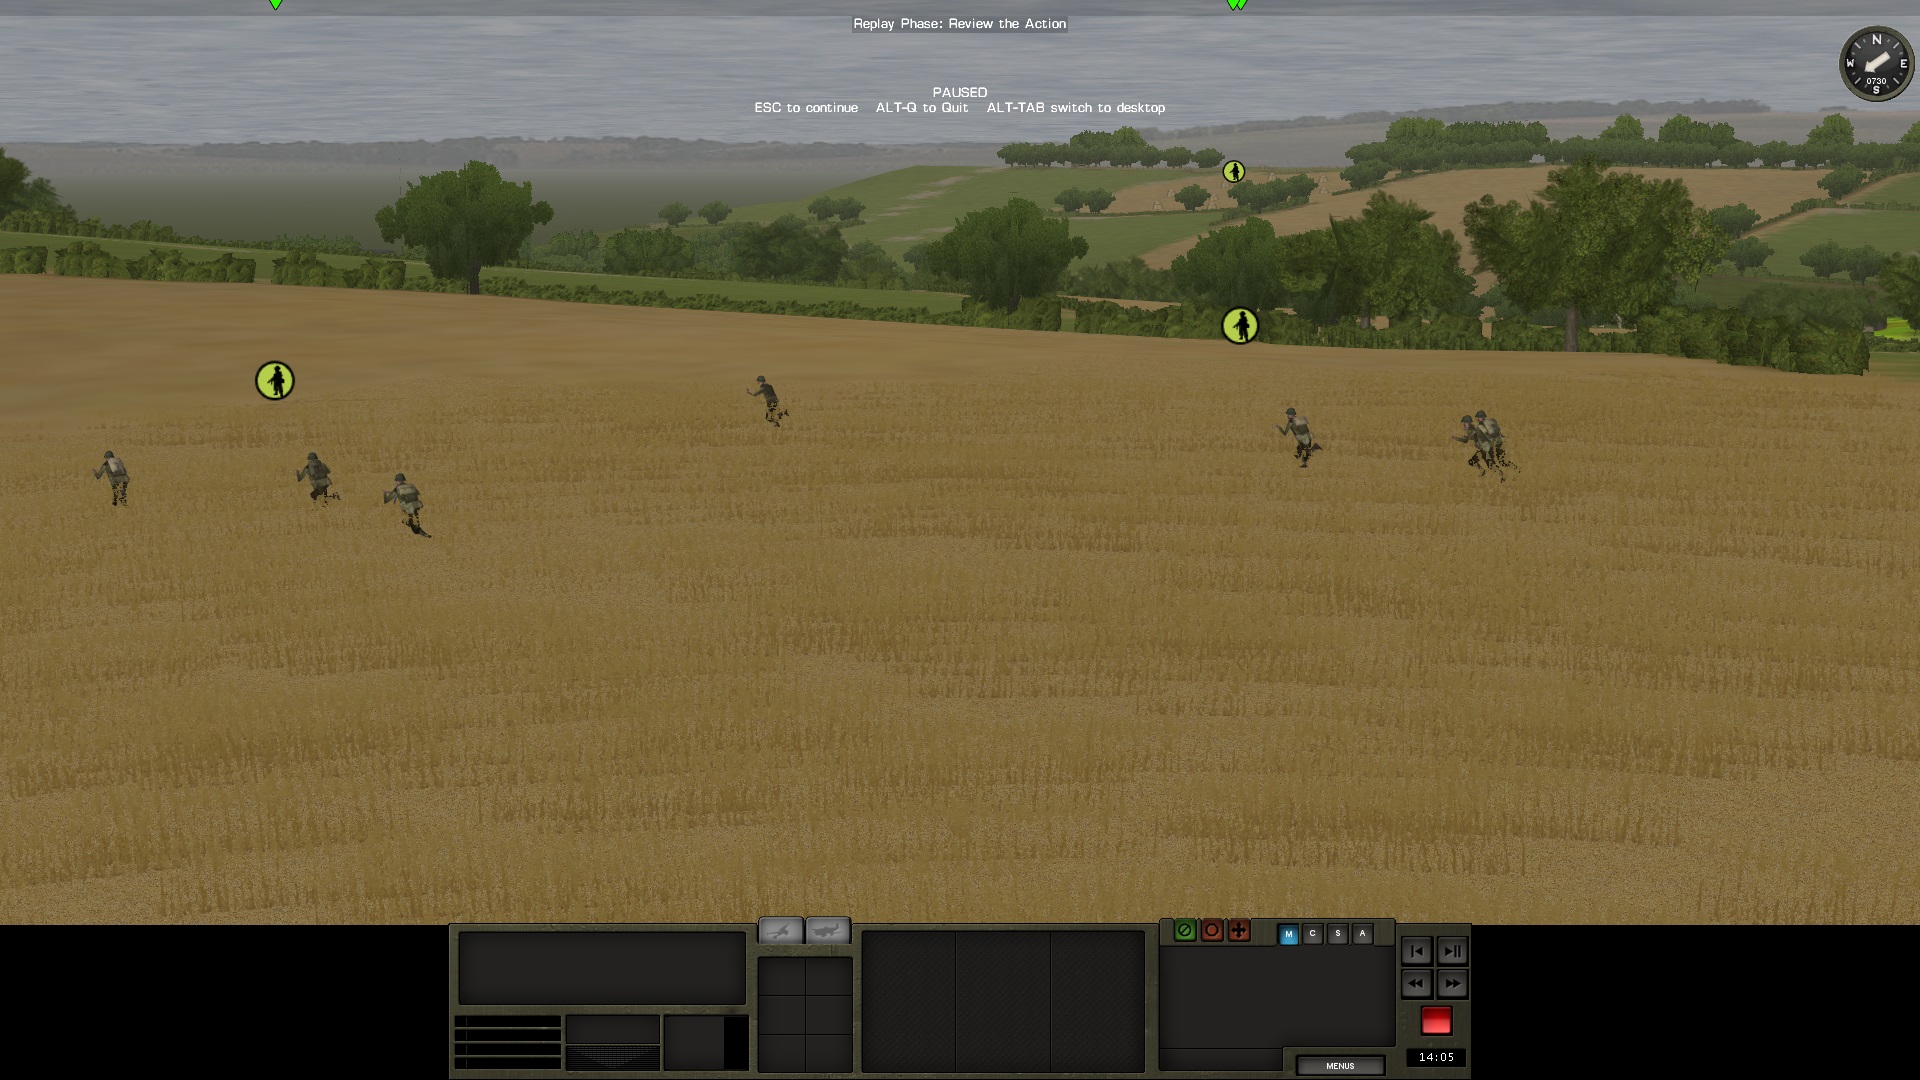
MINUTE 2
On the left and on the right wings, my troops are progressing well.

In the center, the team is occupying one of the house on top of Obj1. And, contact, at least two teams are spotted.

As planned, the Germans are running to occupy some houses of Obj2.

-
1 hour ago, Bil Hardenberger said:
You are a brave man showcasing your first PBEM game publicly. Bravo.
Thank you, I hope showcasing my way of playing will bring me plenty of tactical advices from senior experts of this game like you.
57 minutes ago, Ivan Zaitzev said:I can see from the last screenshot that your troops are green. I would not separate green troops from their platoon commander.
Yes, you are right, most of my troops, if not all, are green. But, if I am not separating them from their platoon commander, how could I occupy the map?
-
MINUTE 1
And this is it: baptism by fire
I hope my men won't suffer of my mistakes... On the right, the squad is nearly approaching the woods without opposition.

In the center, my team is quickly going to the house to have a LOS on German's AOA2.

On the left, no opposition so far.

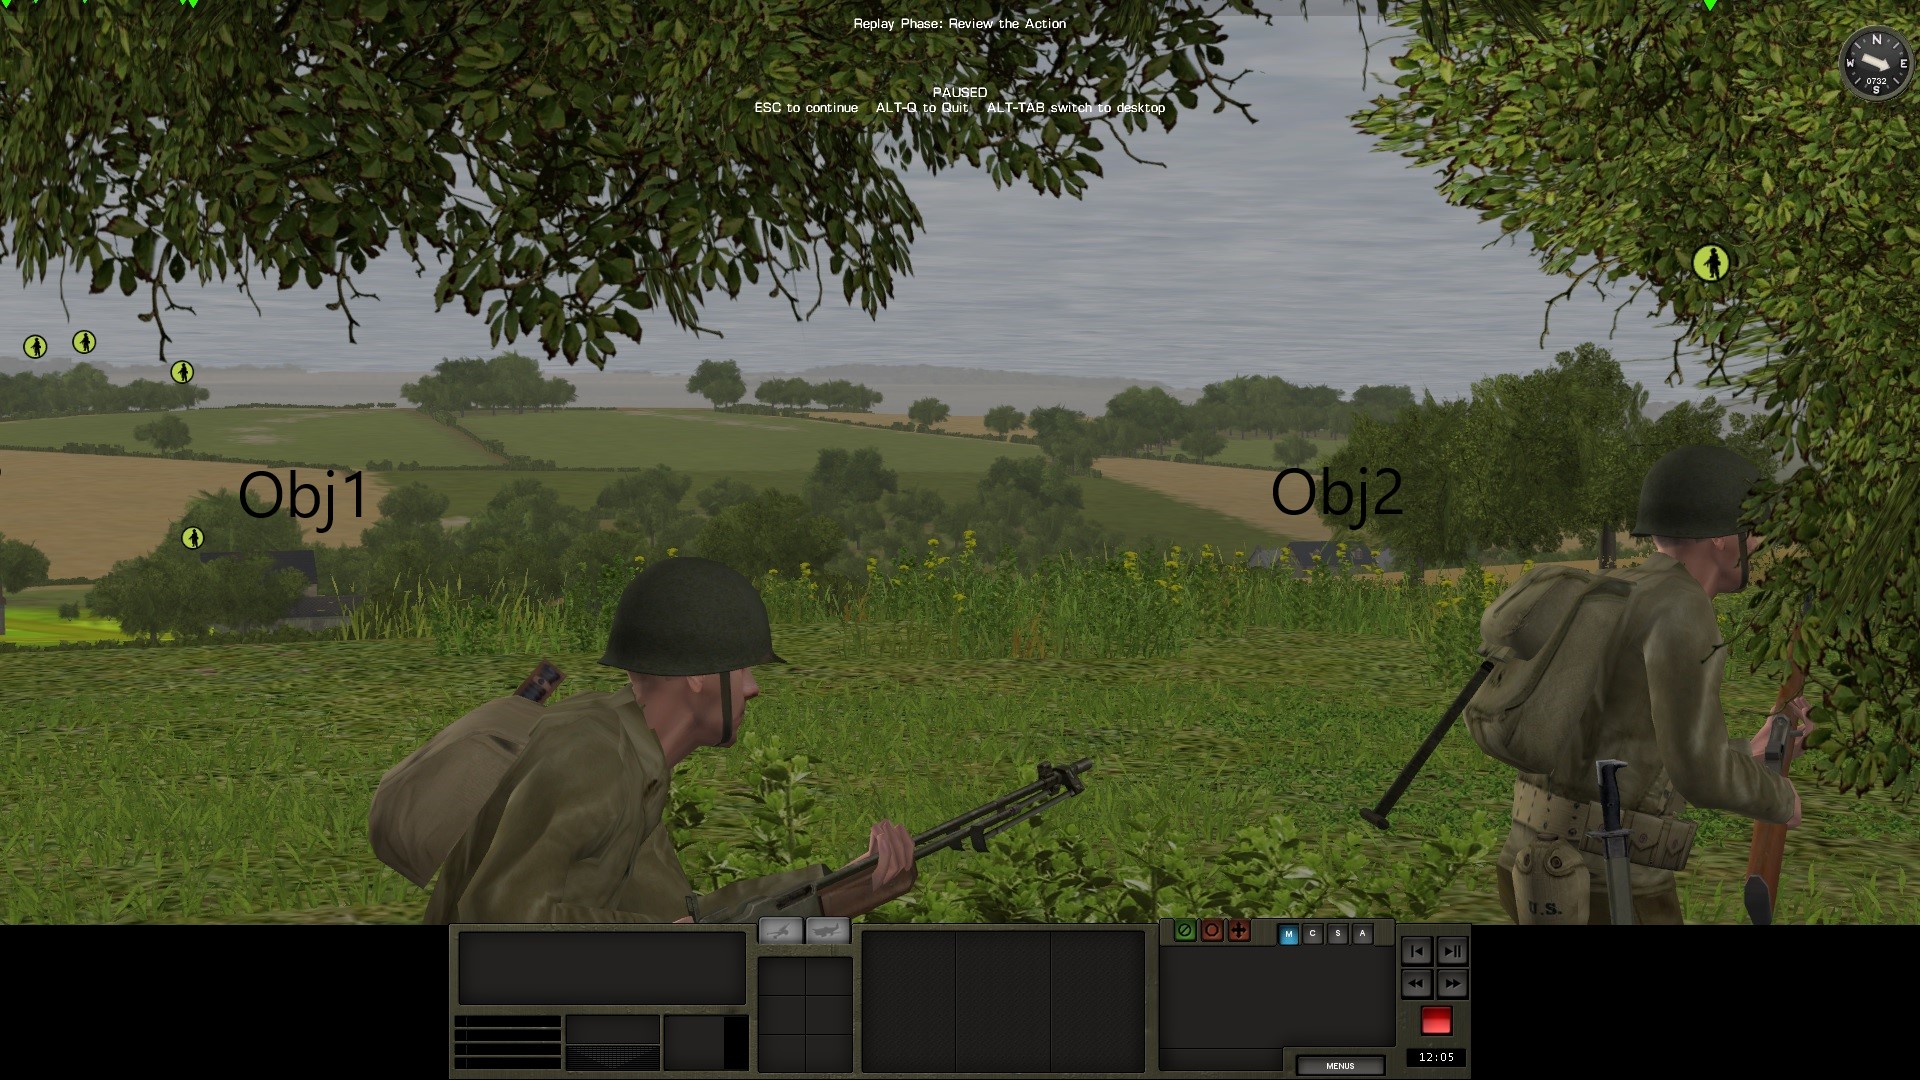
One could think that these men are exposed but in the two following screenshots you can see that the ridge is protecting them

Overall situation at the end of the first turn. No enemy detected so far, not a single shot. On the right, I will detach one team to take a good overwatch position and monitor the second objective and the plan of the enemy to take the first one.
-
MY INITIAL MOVES
On the right, my squad is ready to rush into the woods. The ridge will normally protect them from the eyes of the enemy.

In the center, only one small team will go after Obj1.
On the left, same thing, there is a ridge that will cover the movement of my second splitted squad.
-
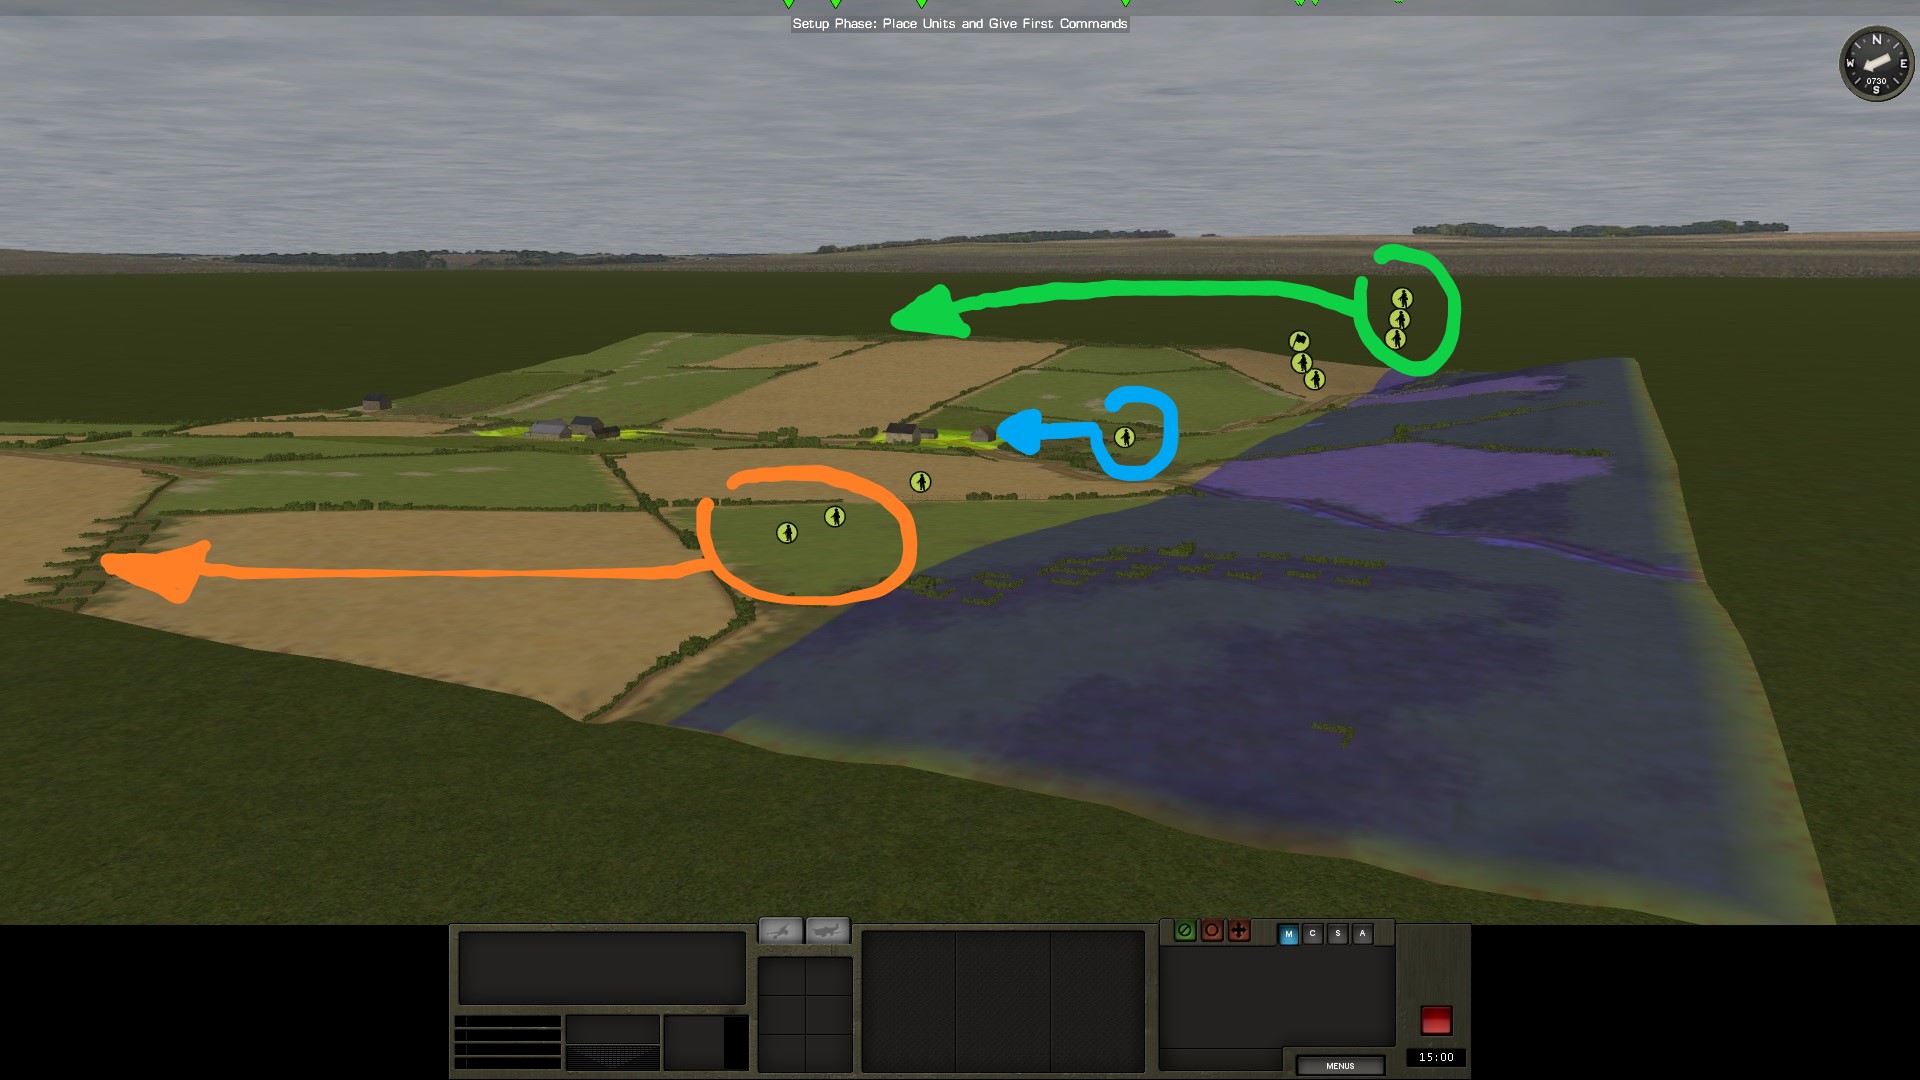
MY PLAN AND MY INITIAL MOVES
My avenues of approach are the exact opposite of the Germans. Since I think the enemy will try to flank me, I will advance on both sides of the map with splitted squads (one on each side). The center will remain quite weak but I am convinced that the enemy will not try to assault directly Obj1.
As a young green lieutenant, my goal is to preserve as much as possible my men. As such, I will try to carefully plan my moves. Since this is my first PBEM, I can say that I am strangely much more careful than against the computer. Self preservation?
-
On 10/13/2018 at 2:34 AM, Ivan Zaitzev said:
Would love to have access to the place where the reported bugs are and see the state of each one, like so many games do.
Yeah would be great if this information could be available
-
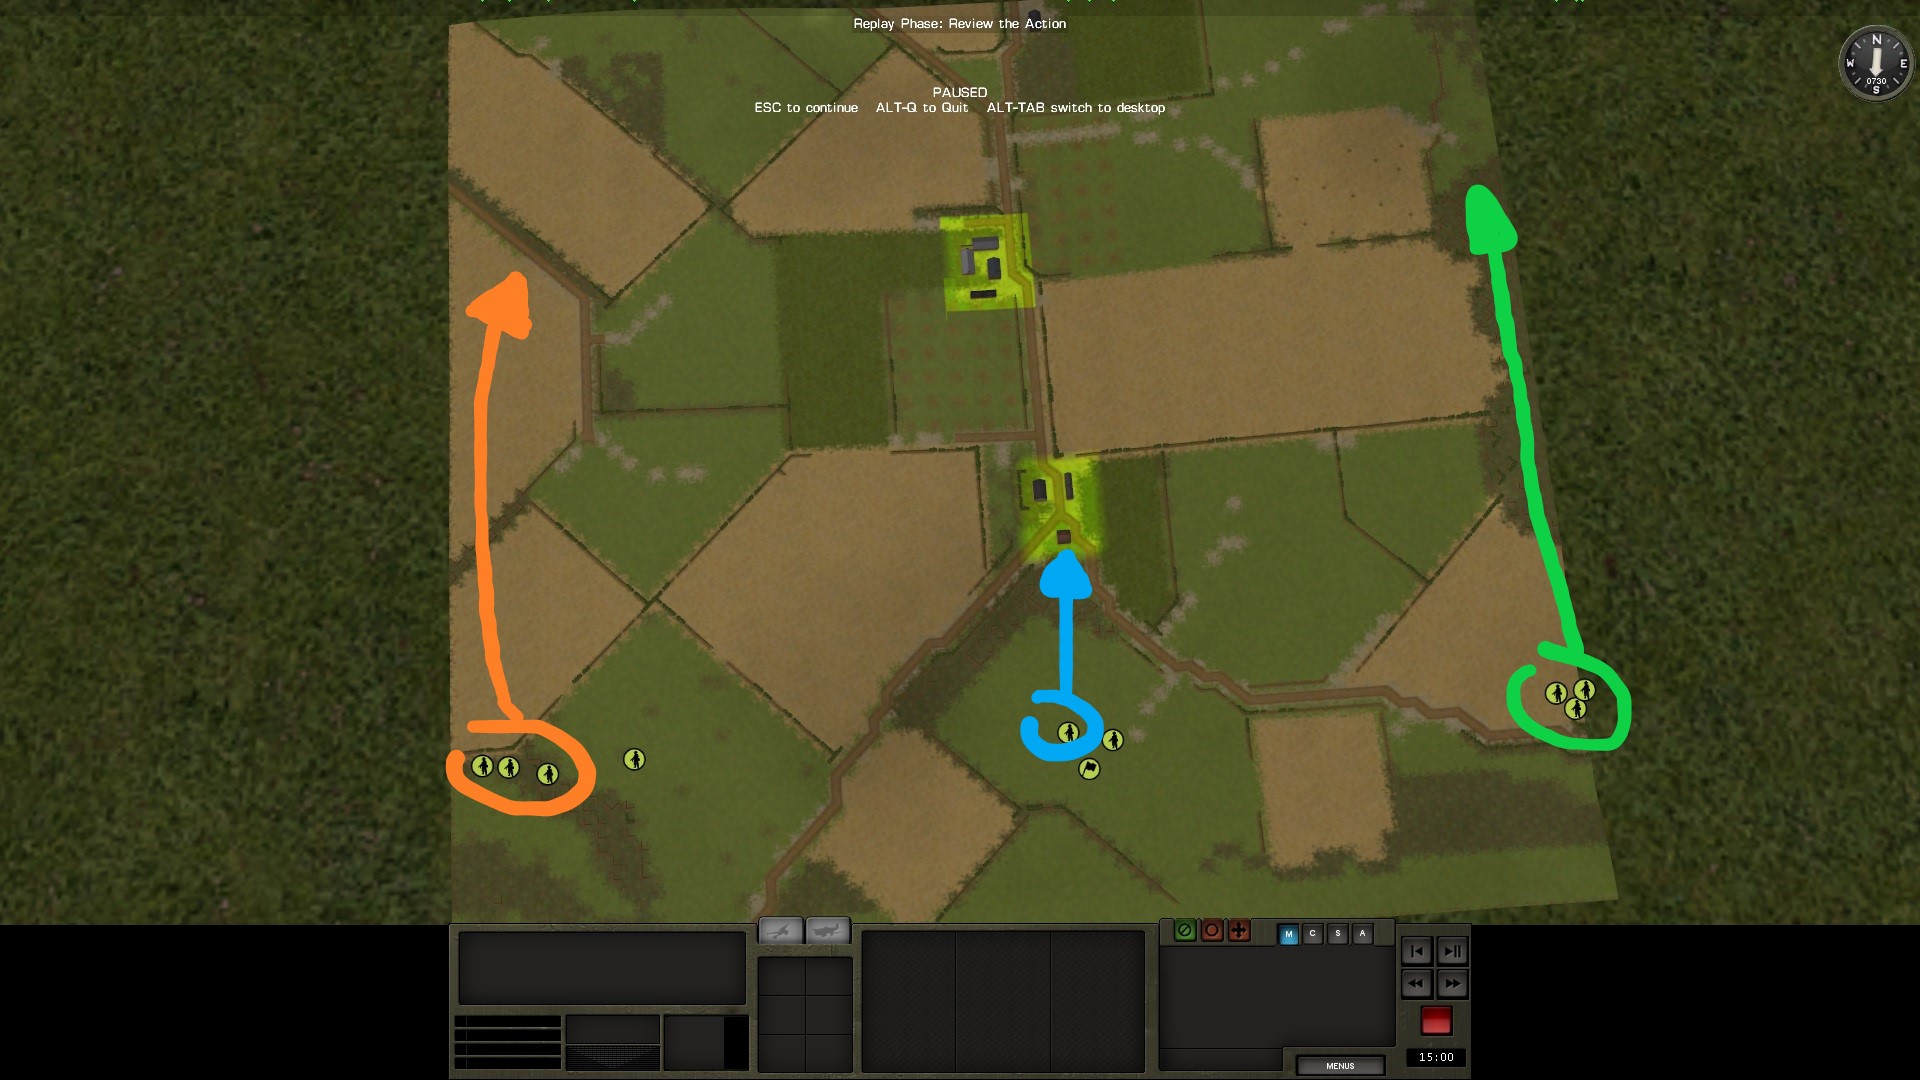
ENEMY AVENUES OF APPROACH

AOA1 (Green axis)
The green axis has the advantage to be masked by a ridge and can perfectly be used to advance on my left flank. On the other hand, terrain is pretty opened thus the advance will have to be careful and slow.
AOA2 (Blue axis)
This is the most unlikely axis in my opinion since I have direct LOS from the Obj1 houses to this avenue of approach. I am pretty sure @JoMc67 will try to flank my troops using AOA1 or AOA3 axis.
AOA3 (Orange axis)
The orange axis is the most important threat in my opinion. It is covered by both a ridge and a wood. This is surely the axis that will be taken by the enemy troops to attack on my right flank. I will have to reinforce my right flank at all costs.
-
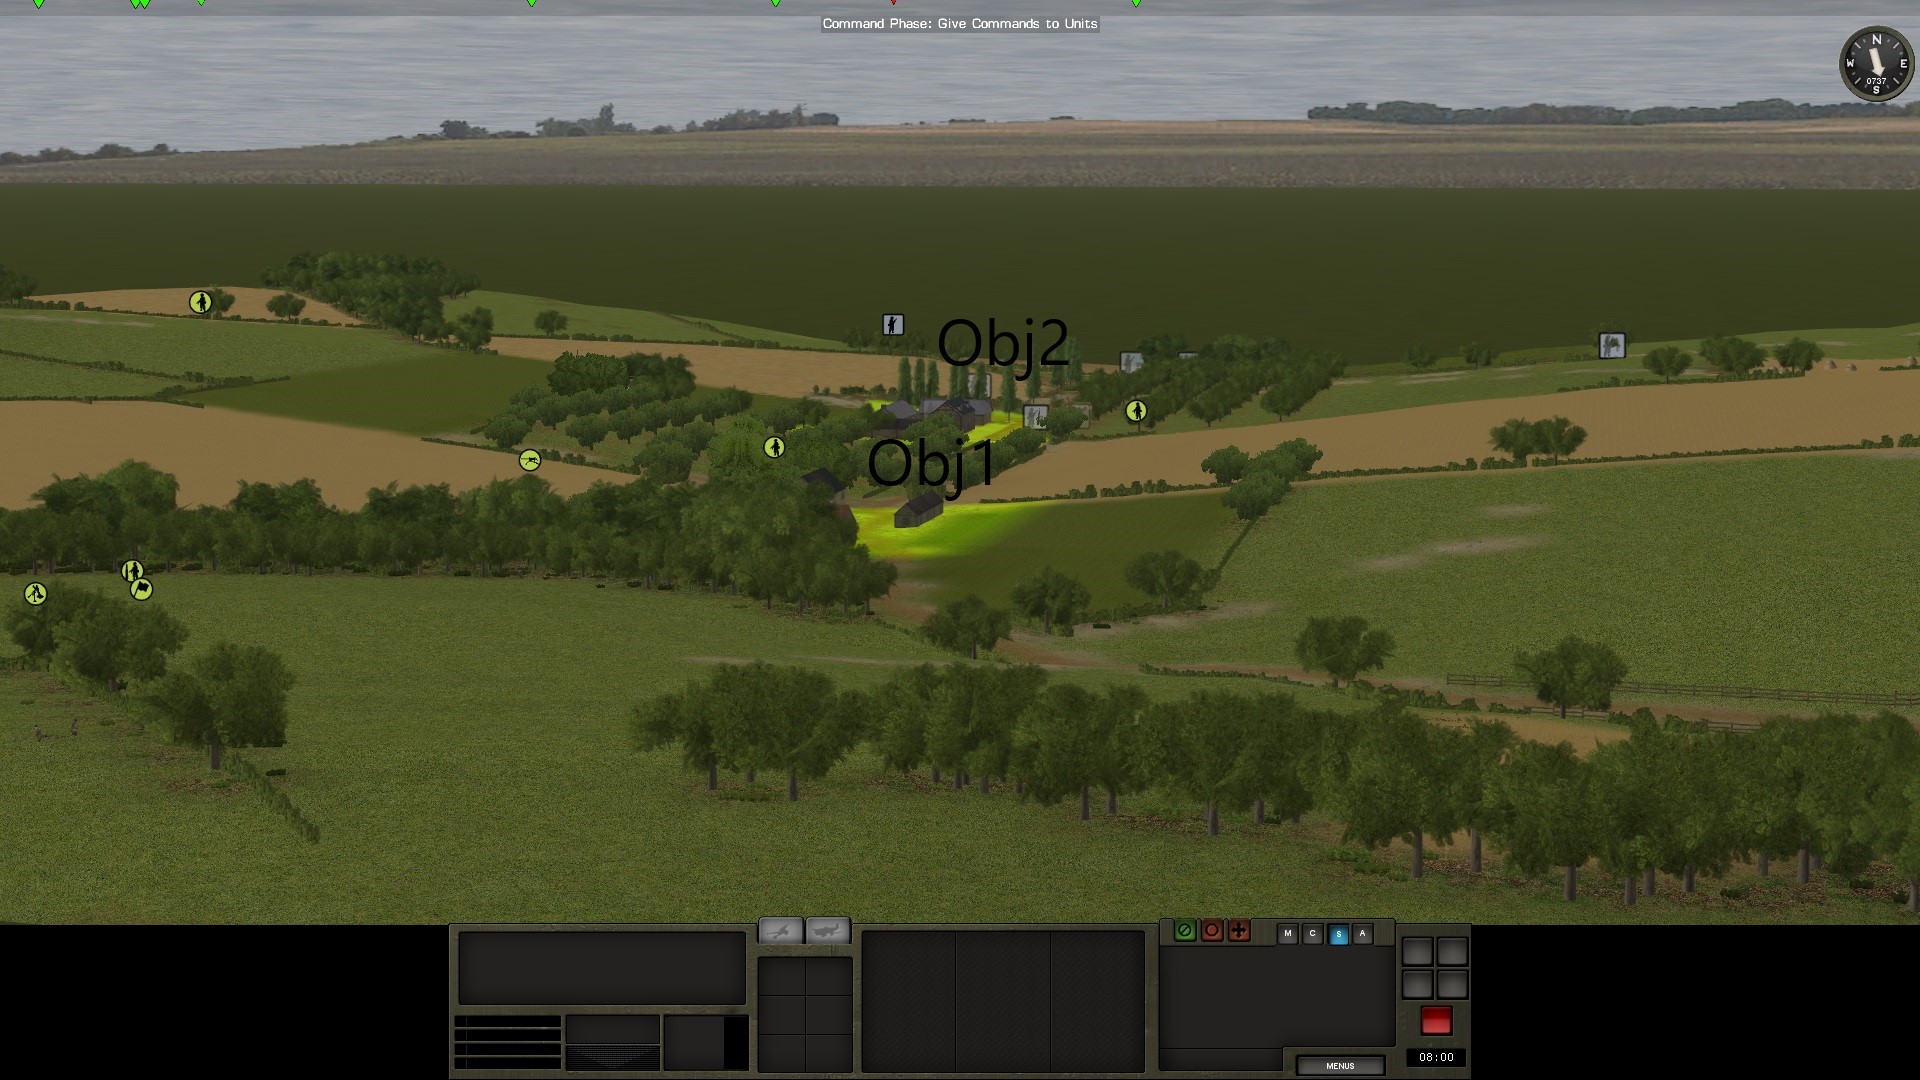
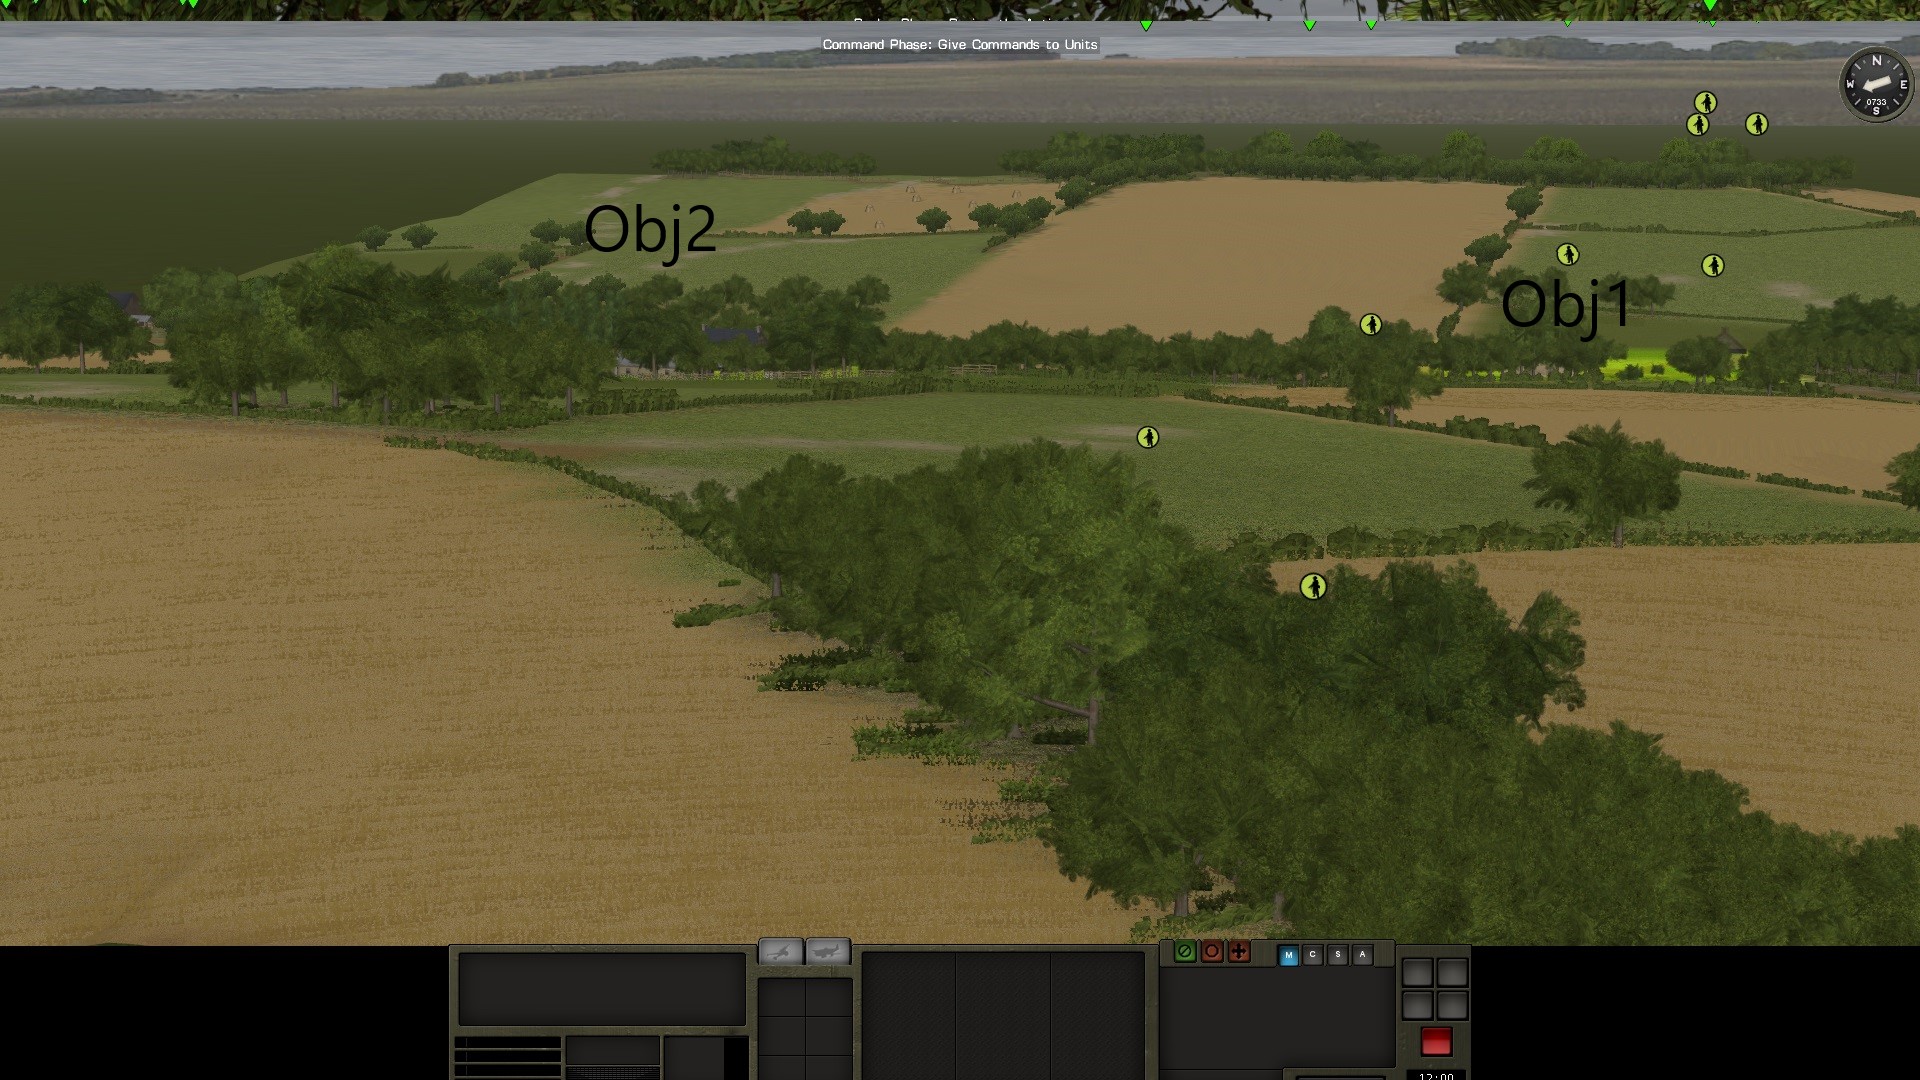
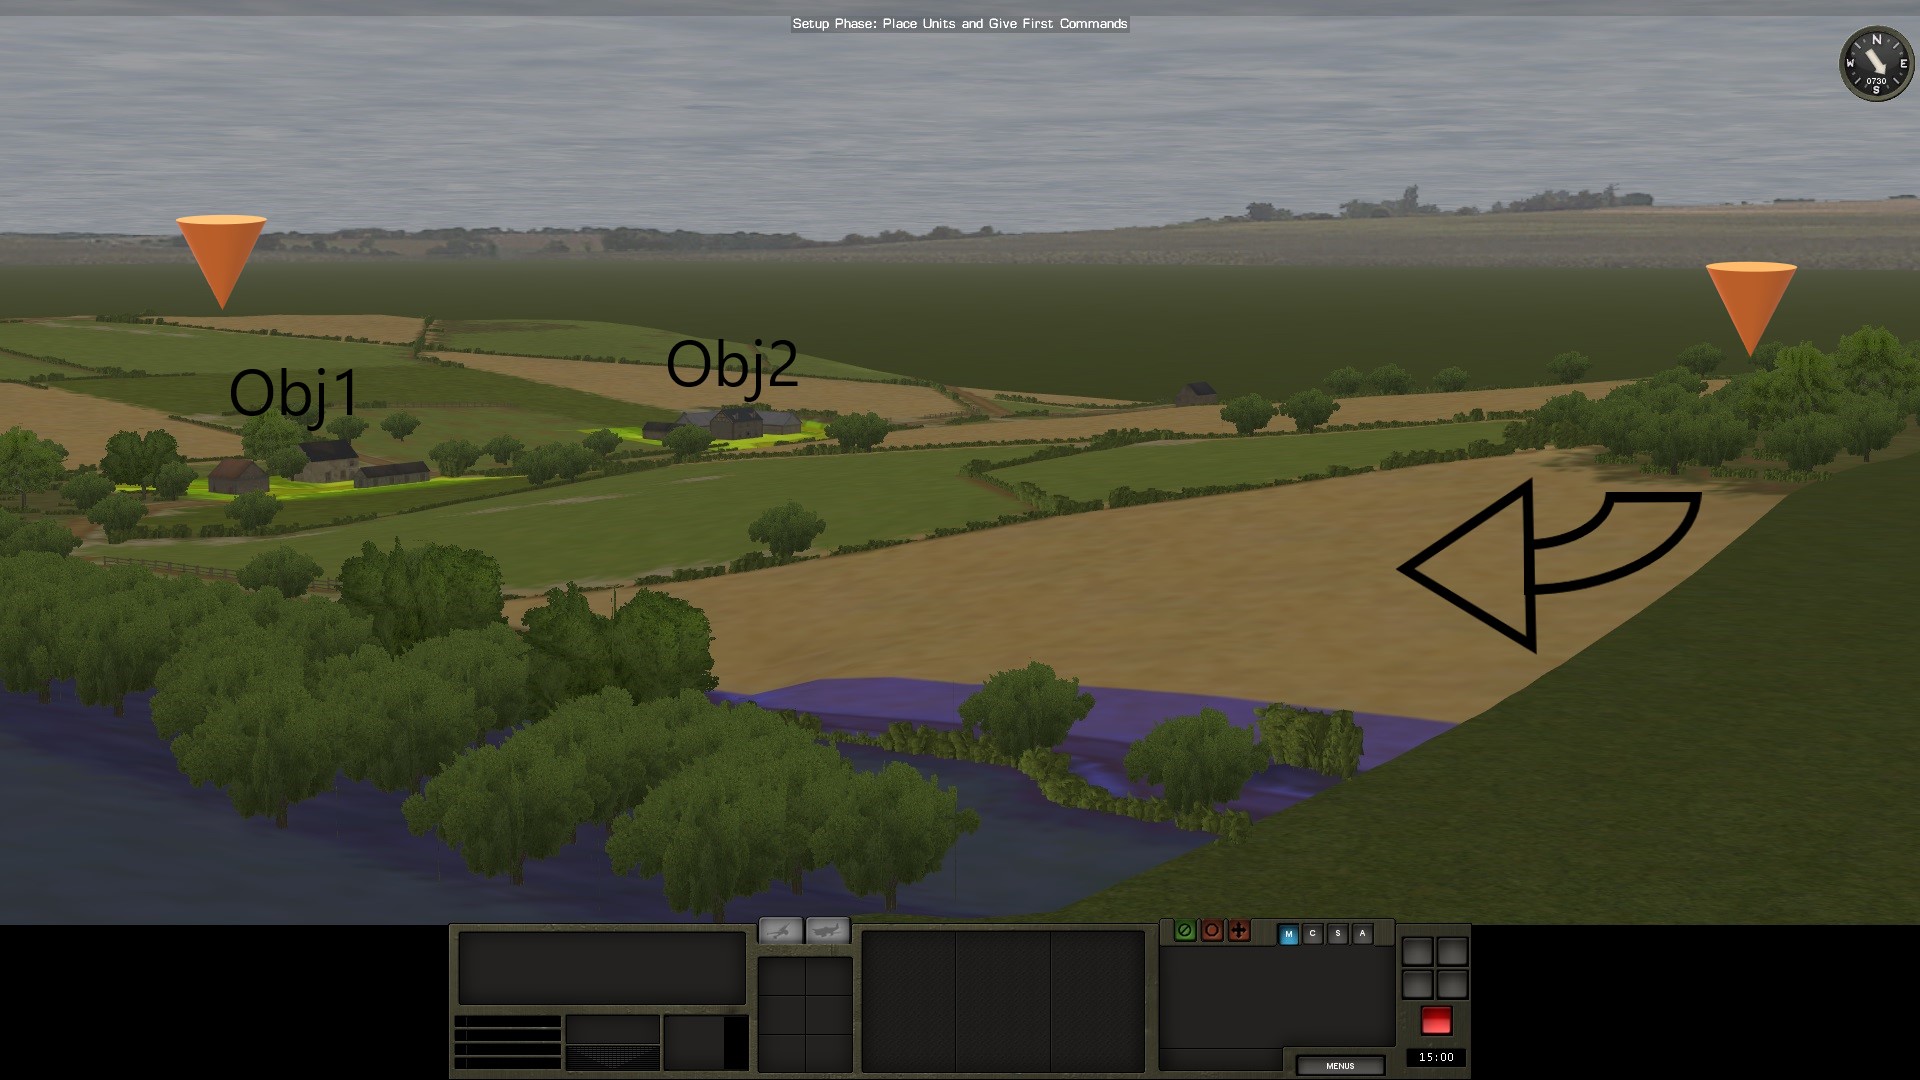
ENEMY AVENUES OF APPROACH
After looking at the map, I thought my opponent had three main options for his attack. I think that he will use the top of the hills to mask his approach and try to flank my positions. He can use either my left flank or my right flank (the orange icons). The main advantage of the right flank is that there is a wood that can provide cover and concealment for his squads.
-
Many things have already been announced. See this thread:
CMBS module will come after all the above releases
-
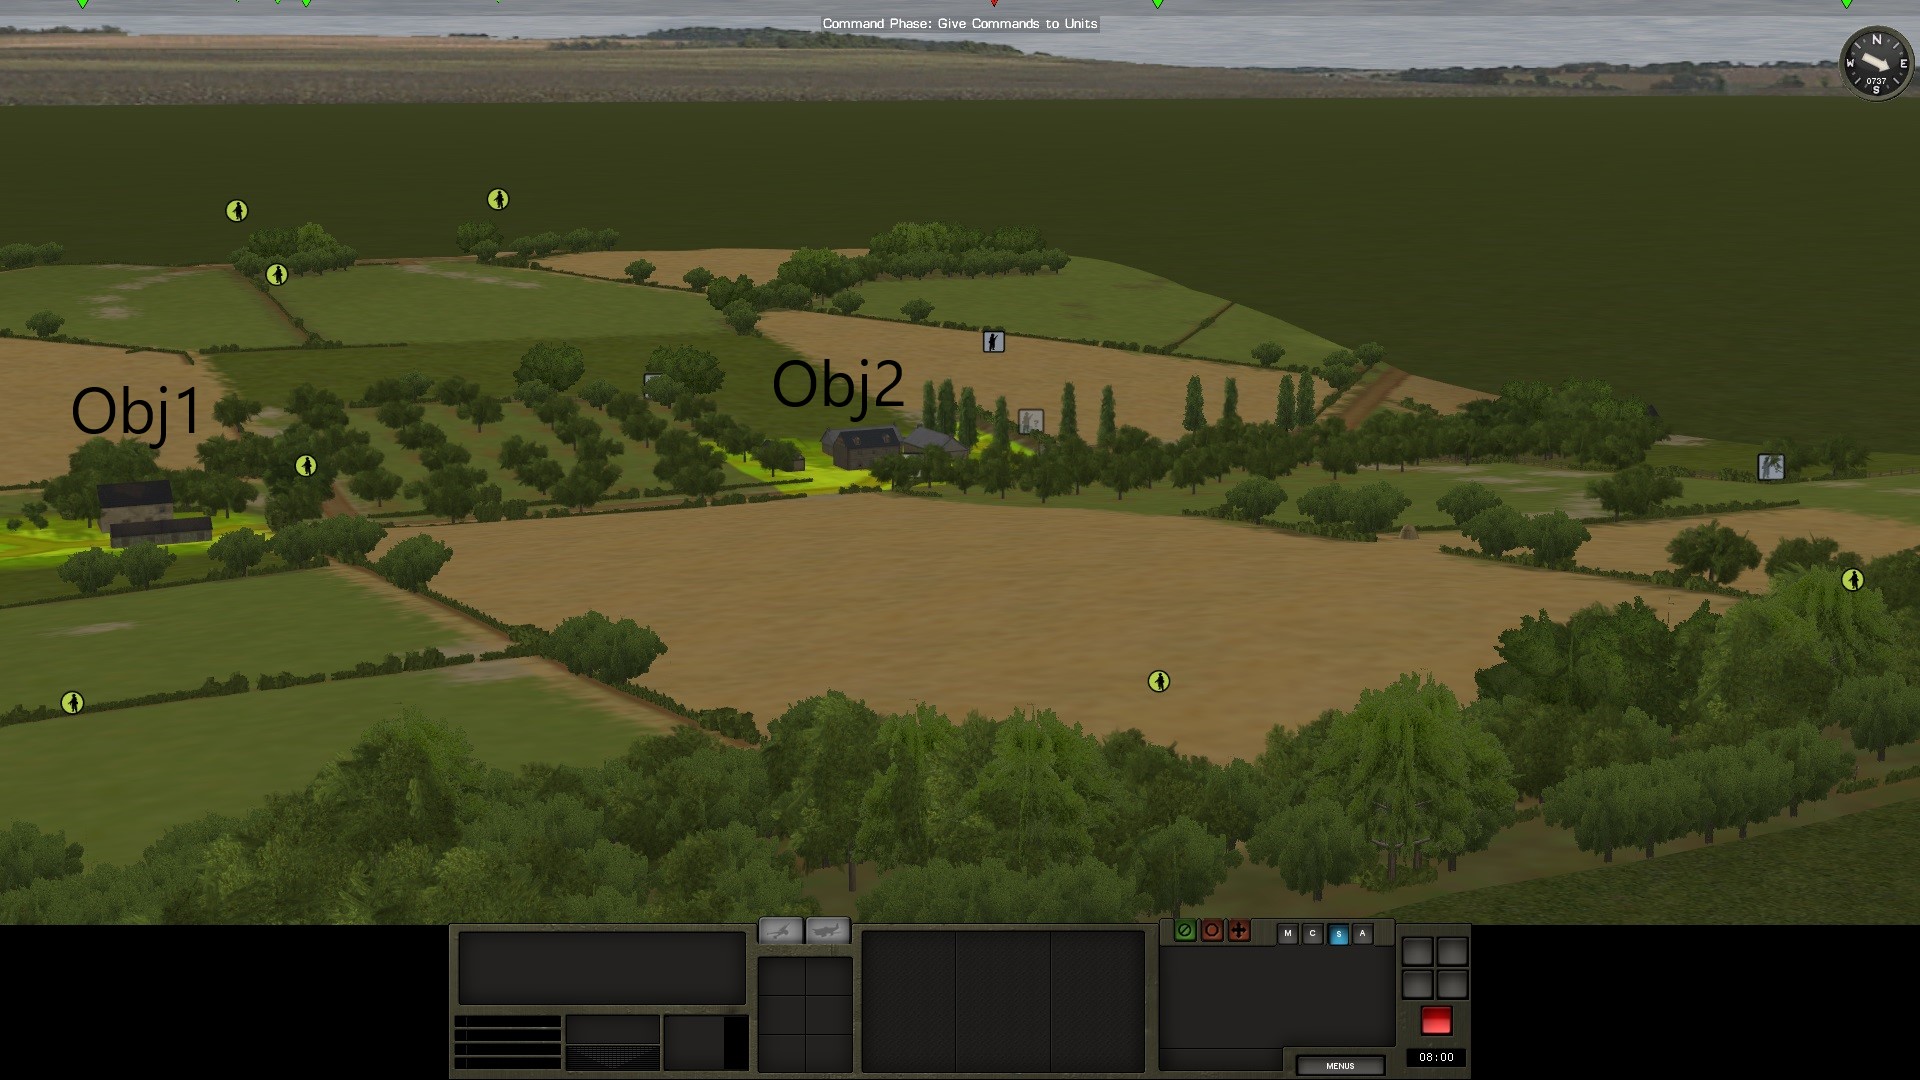
Based on this excellent blog: http://battledrill.blogspot.com/2015/11/mett-t-analysis.html from @Bil Hardenberger, I will try to conduct my first METT-T analysis.
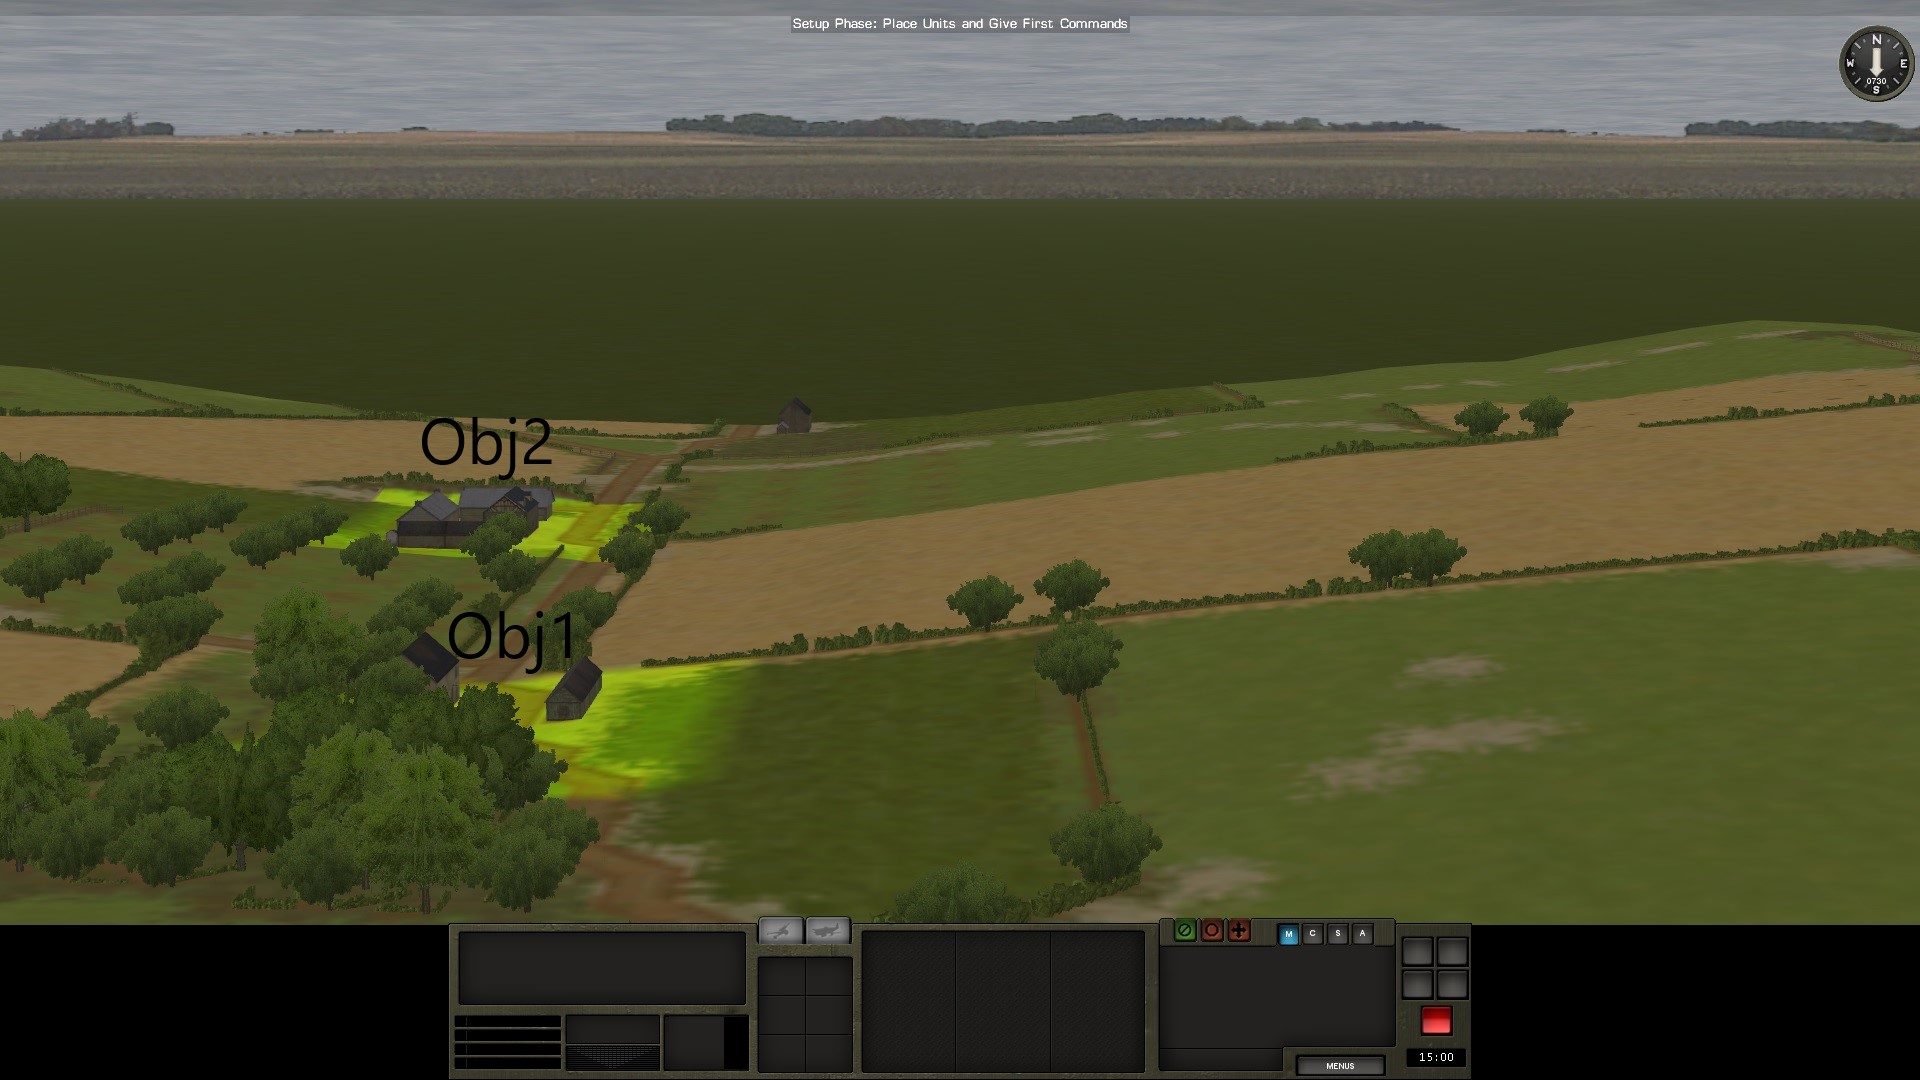
MISSION
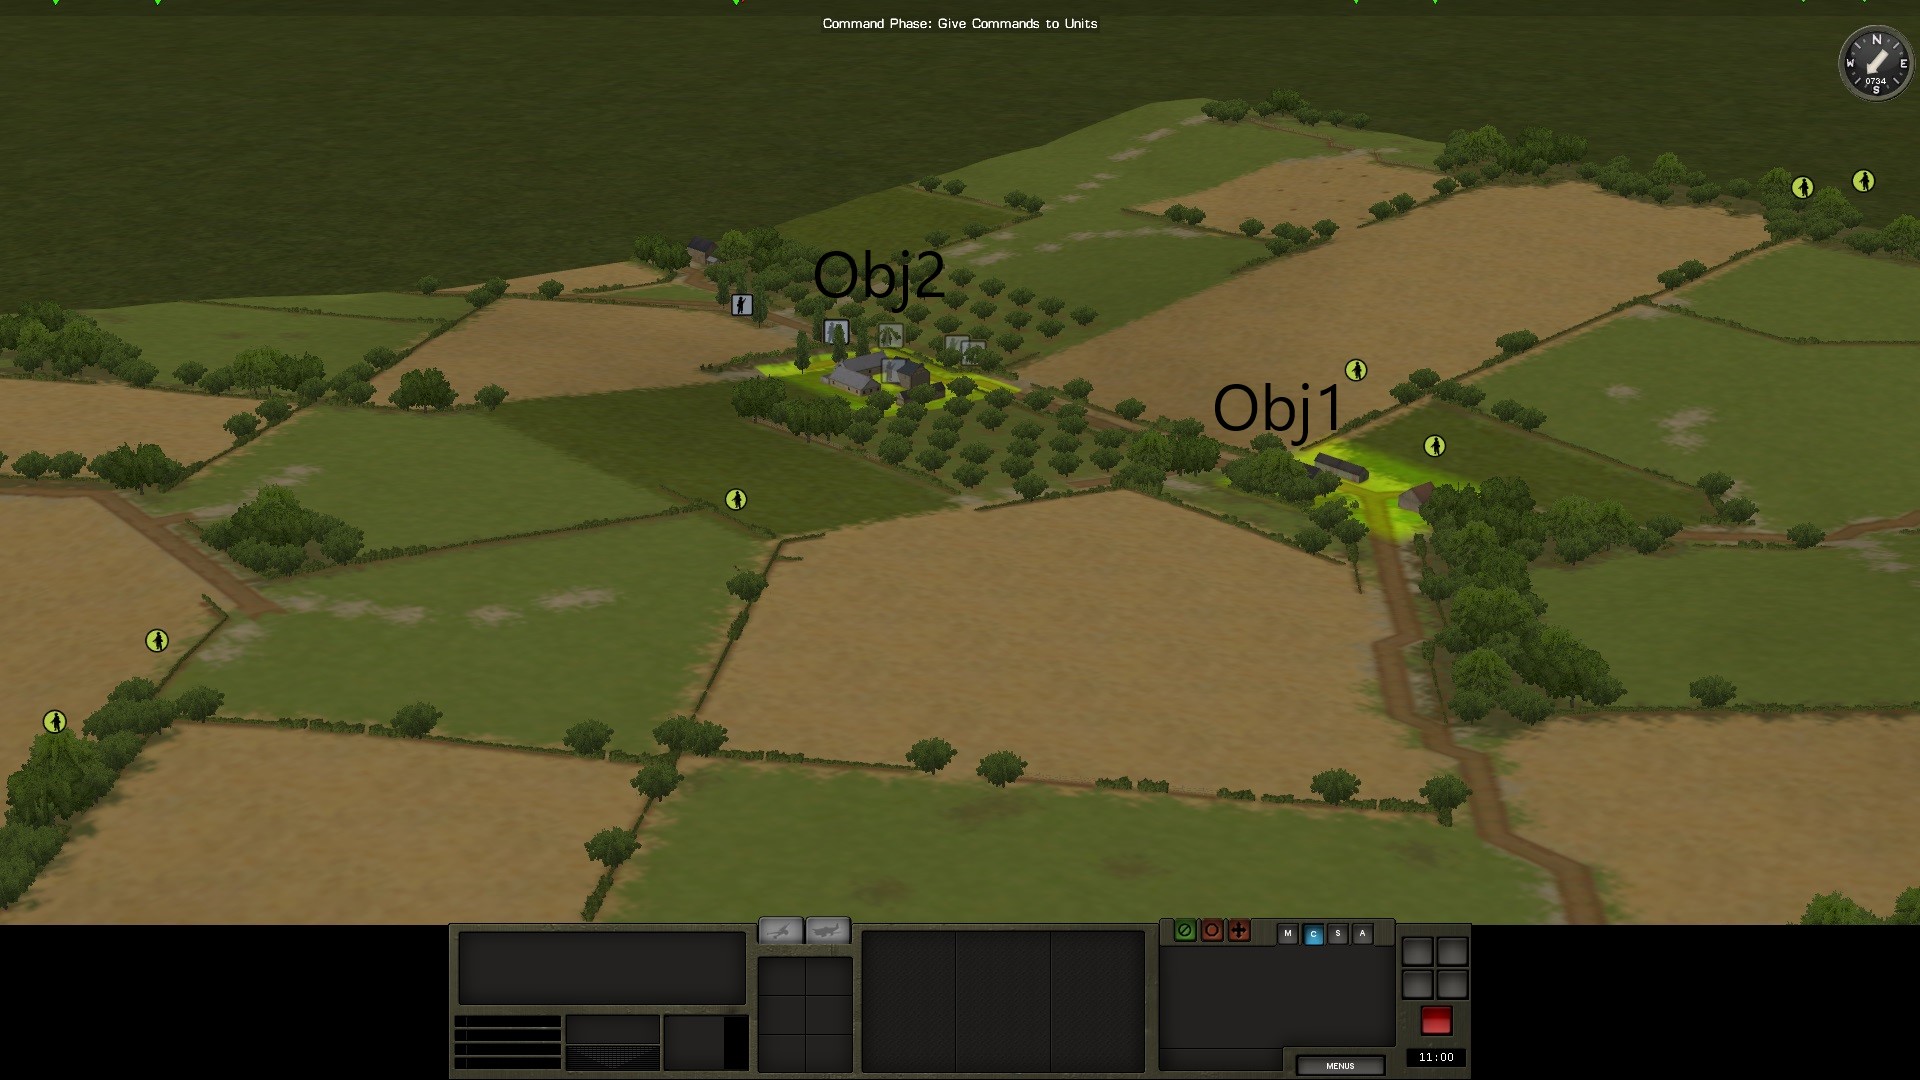
This mission is simple, my main goal is to hold the two objectives in my zone. This is a meeting engagement so I will have to reach Obj1 at the beginning of the scenario and destroy the enemy to reach Obj2 that will be surely occupied at the end of turn 1.
ENEMY
Intel is indicating that German is starting with a Reinforced Infantry Platoon followed by some Heavy Weapons coming at turn 5 and one Halftrack at turn 10.
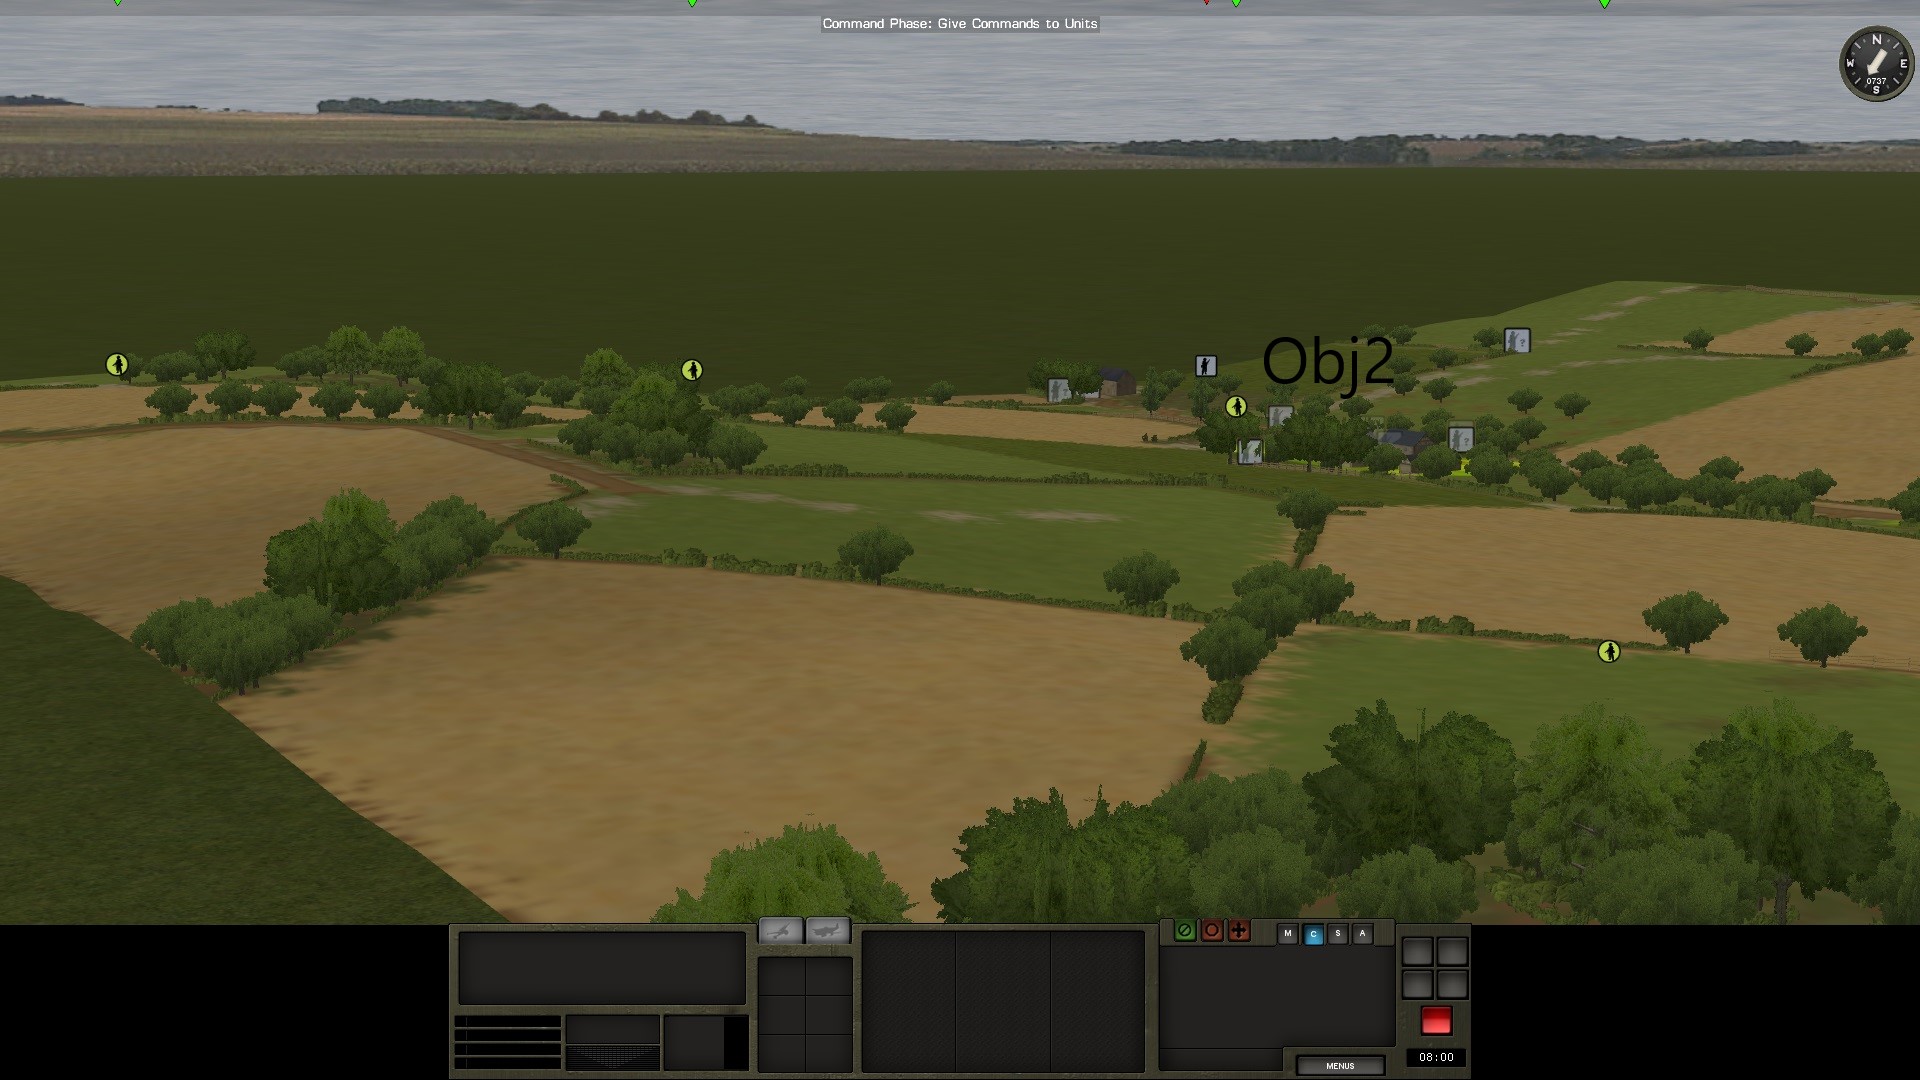
TERRAIN
The two objectives are located at a bottom of a V formed by two hills on the left and the right side. There are quite good lines of sight across the map. Controlling the flanks should give me some overwatched positions on the two objectives.
TROOPS
I have a Reinforced Infantry Platoon but many composed of "green" soldiers. I am expecting the same reinforcement that the Germans.
TIME
I have only 20 minutes to reach both objectives plus 5 minutes extra possible.
-
21 hours ago, Vet 0369 said:
A Tunguska is about the only thing that can bring it down, maybe the ZU-23 also
Cool, there are some technicals with ZSU 23-2 in CMSF already but will its aim be precise enough?
Can't wait to try.
-
Oh boy, what did I have accepted? This is my first PBEM on any game and this is of course my first PBEM on CMBN. @JoMc67 has convinced me to leave CMSF to go back in time. And, I must say this is very entertaining for me.
The year is 1944. The scenario is named Meet Med Hills QB-245. This is a meeting engagement with two objectives that are closed to each other. Both sides is having a Reinforced Infantry Platoon to start with. Reinforcements (Heavy Weapons) is coming on turn 5 and one Halftrack is planned for each side on turn 10.
We agree on these 'house rules' that will make the game a little more realistic in our opinion:
- No Pre-Planned Arty (or Area-Fire from Ground Units) on Turn 1 of a Meeting Engagement, or from Defender. Player will need to Call-In Arty normally (Attacker in Attack/Defense Games are exempt and can use Pre-Planned Arty). FO & HQ Units will need to Spot or have knowledge of Enemy Units or Icons on Battlefield to Call-In Arty (click on your Unit to see if it spots Enemy Units or Icons). Once that knowledge has been obtained then it can call in Arty Anywhere at Anytime on the Battlefield w/o restrictions.
- Players will let the Computer AI choose what Targets to shoot at (player can't choose Targets, but can still use 'Area-Fire'). Player can still use Smoke at anytime and any Location on the Map.
- All Units can only check LOS (and thus use 'Area-Fire') at its exact Location at beginning of turn.
- Players Can't click on Enemy Icons or Units during a Game (there will be some accidents from time to time).
- You can Area-Fire anywhere on the Map...However, the Area-Fire has to be at the closest point possible to the Enemy Unit/Icon (this includes Direct HE fire from Onboard Arty...Smoke can still be anywhere on map)... Basically, this means a Player can Area-Fire 100 meters away (if that happens to be the closest point), or 10 meters (if that happens to be the closest point).
- Vehicle Smoke Dischargers (not Smoke Shells) is controlled by the Computer AI, and not by the Player.
We are currently at turn number 12. More to come very soon...
-
39 minutes ago, domfluff said:
You'll note the above argument structure bears a strong resemblence to the format of the Solutions in "Moltke's tactical problems from 1858-1882"
Off topic, but will you recommend this book?
-
On 10/11/2018 at 6:07 AM, MikeyD said:
Because they have the capacity to be scenario enders. You saturate the far side of the map with artillery rockets at startup and... well, that was a fun scenario.
Yes exactly. That why I said initially "Would it be too easy for US player if he has one in its inventory ?" I do think so.
12 hours ago, IICptMillerII said:First off, the idea that using these assets against "primitive" insurgents being wasteful is wrong. Yes, these assets are expensive. You know what is infinitely more expensive? Human lives lost doing a job a Tomahawk/F-18 can do risk free
Yes, it remember me something I have seen on TV about Afghanistan. At a given point in the documentary, a sniper was eliminated by a Javelin missile.
Newbie AAR: ncc1701e vs JoMc67
in Combat Mission Battle for Normandy
Posted
But a wonderful scenario designer!