

Heirloom_Tomato
-
Posts
1,421 -
Joined
-
Last visited
-
Days Won
9
Everything posted by Heirloom_Tomato
-

Weekend Challenge Battle
Heirloom_Tomato replied to Heirloom_Tomato's topic in Combat Mission - General Discussion
This weekends challenge battle features an Italian attack on an American held position in a "What If" battle. It is for CMFI and you will play as the Italians. The Gustav Line bundle should not be needed for this battle. There is some AFV support for this battle, however use it with caution. Each AFV spotted by the Americans will award them points and could tip the battle in their favor. Use your infantry as best as you can! https://www.dropbox.com/sh/k5v42gds4y7e2so/AADyXv9MCabs64EVeJJFv0jua?dl=0 -
Realism Suggestions?
Heirloom_Tomato replied to slippy's topic in Combat Mission - General Discussion
I will assume the HT means me, anyone else with an HT name feel free to jump in with your user friendly rules If you are looking to add realism and want to introduce some command delays, play the game on Iron mode and use the following rules for C2 sharing. These screen shots were taken in the most up to date version of CMFI. I setup a quick battle with D Company of Canadian infantry. Here are all three platoons marching across the battlefield with no unit selected. Notice how you as the player have no problem seeing all the units and where everyone is. If we go in nice and close to 10th platoon and select the platoon HQ we can see the units he can see. You will also notice that since he has gone over the crest of the hill, his line of sight to D Company HQ is gone, as well since they are still moving his radio link is out. 10th Platoon has no C2 link with the rest of the Company. Any information they may have about the battlefield is then off limits to all other units in the Company. In other words, 11th and 12th Platoons will have no idea what is happening to 10th Platoon and cannot come to their rescue if they are in trouble. These Platoons will also not be able to modify their current orders based on something 10th Platoon might be able to see. Somehow 10th Platoon will have to make contact in order to share what they can see. A runner would need to be sent or the Platoon HQ will need to stop moving in order to reestablish radio contact. At the end of this turn, 10th Platoon HQ can issue orders to any of his men as they are all in contact. If any of them get out of contact, those units will be considered "lost" and somehow contact will need to be reestablished with Platoon HQ before they can given new orders. Lost units are allowed to complete the last orders given to them, ie their current movement plans and allowed to fire at will. They can also attempt to move back to the last known location of their HQ in an effort to restore C2 themselves. However any offensive moves must wait until contact is made with the Platoon HQ. Looking behind them, 10th Platoon has an idea of where everyone was before they crossed the ridge. But notice how one of the sections from 10th Platoon is still on the edge of the ridge? What can they see? Why that is the 2nd section of 12th Platoon and they have a visual/audio link with them. According to my rules, it can be assumed 2nd section has all the knowledge of 10th Platoon at the end of this turn and can begin to react to any threats potentially facing them, but only 2nd section. The rest of 12th Platoon will have to wait one more turn, the time it would take 2nd section to relay this information to their Platoon HQ. So at the end of the next turn, all of 12th Platoon could break from their current plan and begin to move in support of 10th Platoon. You will notice 12th Platoon has a visual link still with D Company. My rules require a further minute for all C2 sharing with the next level higher. So in this case, if after a second minute has passed, 12th Platoon still has contact with D Company, it can be assumed all units in contact with D Company know the situation of 10th Platoon and can begin to move in support of them. Here you can see D Company HQ and all the units it has contact with. If C Company was also involved with this battle, and both C and D Company have radio contact with Battalion HQ, it is assumed a further minute of delay to share information between Companies. A quick summary: If a unit spots the enemy, they may react to what they see immediately. Any units in direct contact with them, like the visible ones shown above, will also be able to react immediately. Any units outside of direct contact will need to reestablish contact before they can be issued new orders. If Platoons have radio contact with Company HQ, it is assumed a one minute delay to share information within the Company. If multiple Companies are on the map, it is assumed a two minute delay to share information between Companies. If multiple Battalions or Formations are in the same battle, it is assumed a three minute delay for sharing information between them. The simplest way to prevent these big delays is to have units stay in close contact with each other so information sharing can be instantaneous. For example, keep 9th Platoon of C Company in contact with 10th Platoon of D Company and both Platoons in contact with a tank from the Armour formation. This will cut the delay down to one minute for all the units in C and D Company and the Armour formation. What happens if a Platoon HQ is wiped out? In this case, the men would either stay in place until contact is made by another HQ unit or they will begin to fall back to the last known friendly locations and join up with the first unit they come into contact with. Clear as mud? -
CM:BN Screenshot Thread #2
Heirloom_Tomato replied to Battlefront.com's topic in Combat Mission Battle for Normandy
@RockinHarry the picture I posted was the exact last possible moment before he got hit. The next moment he was no longer visible to my men. The only thing that makes sense to me is that the mod only changes the visual for the player and not for the game engine. -
CM:BN Screenshot Thread #2
Heirloom_Tomato replied to Battlefront.com's topic in Combat Mission Battle for Normandy
This is what the good Canadian boys saw right before he got whacked. From my angle it appears to have been a burst of fire from a Sten gun @RockinHarry. -
The Truelife* Mode PBEM DAR
Heirloom_Tomato replied to Heirloom_Tomato's topic in Combat Mission Battle for Normandy
I should have added it is also the reason I play WeGo only. I watched that little section of the battle, over and over and over again. As the player, when you bring the camera down to its lowest level and get right in and watch the battle playout as if you were the fourth man in this team, I am always impressed by all the little details the game models. -
The Truelife* Mode PBEM DAR
Heirloom_Tomato replied to Heirloom_Tomato's topic in Combat Mission Battle for Normandy
The following sequence is one of the reasons why I absolutely love the CM series. It is also the reason RH wanted to give the name Sexton House to this little building. I still don't know why, but I am sure he will explain it in his DAR. At the end of the last turn some smoke rounds were starting to fall, giving cover to my men from 15th platoon sent to clear out Sexton house. I ordered this three man section lead by Corporal Morrissey to move in and flush out RH's men. I assumed they would be suppressed and hopefully easy targets for my men. As the section closes in on the house, they see a smoke round falling and fail to spot the men laying in front of the house. They do however, spot a two man team just behind a barb wire fence. The Germans greet them by throwing gifts.... The first grenade explodes harmlessly off to the side while both side trade inaccurate rifle fire. Corporal Morrissey falls to a shot from RH's men and a second grenade goes off taking out the nameless private behind him. The view from the German vantage point Private Purval has had enough and breaks for the safety of the church. As he flees, the Germans take a shot at him. Big mistake. Private Purval feels his blood boil and stops to get some revenge for his fallen comrades, readying a grenade of his own. His throw appears to be spot on, while the German's shot goes just wide. Seconds later the grenade goes off, lifting the German off his feet and dumping his broken, lifeless body back to earth. Haven gotten his revenge, Private Purval continues his run for safety in the church. As the turn ends, the men in the church spot the other German from this team and bring him under fire as he runs away. -
The Truelife* Mode PBEM DAR
Heirloom_Tomato replied to Heirloom_Tomato's topic in Combat Mission Battle for Normandy
The vehicles in over watch between the companies come under fire from some sort of HE round. It falls short but causes both Staghounds to turn their attention in the direction of the shot. It is a Schreck team and they come under a hail of fire from the Staghounds and flee for safety. I am replaying this turn to get the screenshots and I missed this sequence on the first play through. I am glad I did not give these guys any target armour arcs or they may have been knocked out due to my neglect. It is a good thing the TAC AI knows how to look after the men, even when their commanding officer ignores them. This next picture is for you @JoMc67. While looking at this turn a second time, I found these guys. I have no idea where they came from, who took them out, or when it happened. It did not happen this turn as they are already casualties at the start of the turn. To me it is another example of how when playing with all visual clues of the enemy off, it is best to let your men have the freedom to fire at will! -
The Truelife* Mode PBEM DAR
Heirloom_Tomato replied to Heirloom_Tomato's topic in Combat Mission Battle for Normandy
Turn 1:52-1:51 Last turn we left this Daimler and his supporting infantry from C company firing away at a MG nest in a building. At the start of the turn the MG crew is spotted again and engaged by everyone who can see them. Within a few seconds of heavy incoming fire, one man is spotted fleeing the building. Unfortunately for me, the guy running away is carrying an MG. Too bad they didn't nail him but at least they got him suppressed enough to flee. At the end of last turn a section of RH's men was spotted in the Laundry, lower window of the tile roof building. I gave a two inch mortar team orders to fire smoke in front of this position, to hopefully blind these men and allow me to move my men out of their line of fire. There he is! While my rifle crews can't seem to hit anything, my mortar crews appear have paid attention during training. INCOMING!! What a shot! Right in the window! The smoke rounds from the 2 inch mortars are all WP rounds. I know the manual says WP rounds can cause casualties and really hope it happens in this case. I would find it hard to believe a WP round going off in the confines of a small building would not cause some kind of injuries even if they are just light ones. If nothing else, those guys had better be suppressed! -
Unable to finish the "hot mustard" sp battle
Heirloom_Tomato replied to user1000's topic in Combat Mission Fortress Italy
I am not sure what you mean by this. Are you saying it takes 3 minutes for the game to process the turn in WeGo? -
Weekend Challenge Battle
Heirloom_Tomato replied to Heirloom_Tomato's topic in Combat Mission - General Discussion
Sorry if this one ends up being too easy or boring. Seems the last battle gave everyone a real hard time and I may have gone overboard with the support assets in this one. If you are worried about it being too easy, move the TRP's at the start of the battle so you can't use them. I added them at the end of my last play test. I knew the who, what, where and whens of the incoming attack and had to mount a true last minute counterattack to seize the objective back. It was a very close run battle. -
Unable to finish the "hot mustard" sp battle
Heirloom_Tomato replied to user1000's topic in Combat Mission Fortress Italy
Are you playing the game in WeGo or real time? -
Weekend Challenge Battle
Heirloom_Tomato replied to Heirloom_Tomato's topic in Combat Mission - General Discussion
Challenge battle #6 is not like the other battles in this series. It features a city battle with lots of support. Tanks, arty, and CAS all show up in this battle. It also features holding onto a key piece of terrain at all costs instead of focusing on limiting casualties. Be prepared for a serious and vicious counterattack, keeping casualties low is going to be near impossible. There is only one AI plan, but it gives a hell of a fight. In my play through it took all the tools given to score the victory. The last play test took until the last turn to secure the objective completely. I hope you all enjoy it as much as I did. Please play this battle all the way to the end of the battle clock for the full experience. Good Luck! https://www.dropbox.com/sh/k5v42gds4y7e2so/AADyXv9MCabs64EVeJJFv0jua?dl=0 -
Weekend Challenge Battle
Heirloom_Tomato replied to Heirloom_Tomato's topic in Combat Mission - General Discussion
This weekends battle features a shattered American platoon cutoff and surrounded in a church. Your men must clear a path to them, hold the church and defend against a determined counterattack. Can you hold out long enough? This battle is fought as the Americans against the German AI in CMFB. Battle to be posted this evening. -
The Truelife* Mode PBEM DAR
Heirloom_Tomato replied to Heirloom_Tomato's topic in Combat Mission Battle for Normandy
In the middle, one AFV was able to spot an MG team at the end of the last turn. I gave them a target light order and they spend the turn hosing the building down. The rest of D company was trading a few pot shots with some of RH's men. Nothing serious happened until the last few seconds of the turn. A large HE round hit the front of the houses in support of the church. One man was hit, a guy all the way behind the house, completely out of harms way, or so I thought. I assumed a shingle fell off the roof and onto his head. This is the situation at the end of the turn. The areas circled in red are where I know his men to be. I have started to call in some 81mm mortar fire onto his strong points and will be slowing the combat down if I can, while I wait for those rounds to come in, approximate call time of 6 minutes. I have also ordered a couple more of the AFV's to begin moving in support of C company. Hopefully the mortars and AFV's can suppress his men long enough for me to flank and then destroy them. -
The Truelife* Mode PBEM DAR
Heirloom_Tomato replied to Heirloom_Tomato's topic in Combat Mission Battle for Normandy
Turn 1:53-1:52 C Company's sector sees a fair bit of action this turn. These men in 10th platoon have an interesting view, let's see what they see. The man on the left is taking aim here but it is hard to tell what he is aiming at. If we zoom in over his shoulder, a PzG can be seen sprinting for the hedges. He takes aim and fires but manages to hit the chimney. First a wheel and now a chimney. If we survive this battle, these men are going to be spending some serious retraining time with their weapons. Over at the next window, this trooper has a house full of targets. He takes aim, and fires. His shot sails wide by a few feet, straight towards the window with no one visible. I mean it is the proverbial broadside of the barn door but good grief fella, your aim is off four feet on a 100 yards. He can't even put his shot through the window, nope it hits the window sill and ricochets harmlessly into the sky. At least the Daimler in support for these guys is able to see some targets of his own. His shot with the 40mm again hits low but at least it hit the building. Maybe some dust will get into his face and give him a serious case of red eye. The MG rounds that follow the HE are on target. After this burst the team in the house are not spotted again this turn. -
The Truelife* Mode PBEM DAR
Heirloom_Tomato replied to Heirloom_Tomato's topic in Combat Mission Battle for Normandy
RH asked for this to be the name of the house. I am not too sure why but I would think he will reveal all in his thread. -
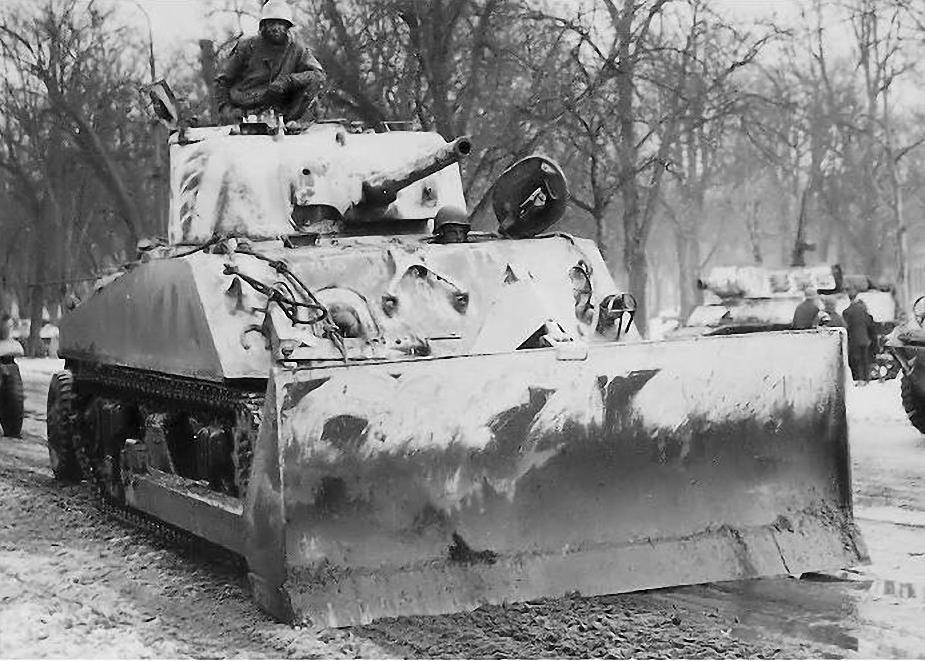
Until we see these guys in game with the ability to clear snow off the road, I agree it makes zero difference where you try to drive with that much snow on the ground.
-
Resuming Carillon Nose campaign project
Heirloom_Tomato replied to LongLeftFlank's topic in CM Normandy Maps and Mods
I would agree with this, in game we push too hard to fast. I would however say 2x the clock is not enough but rather 3x or even better 4x. I would suggest then a 3.5 to 4 hour scenario. I would suggest including @RockinHarry invisible enemy icons mod for use with this battle. Use all of them so the human player has zero clue where the enemy is beyond what can be seen on screen. As for points, set up the parameters to match the battle as close as possible. If the US lost 30 men out of a half battalion, it would be roughly 10% of their force. Have the briefing state this is the goal as clearly as possible and set the points so if the player exceeds this limit, the best they can do is a draw. Set most of the US artillery as reinforcements to prevent the player from flatting everything in a turn 1 preordered mass arty drop. Build some "safe" houses for the German side. No windows or doors on the bottom floors facing the US side, but the upper floors with great LOS to the US side. This should protect them from all but the heaviest artillery direct hits. Use snipers/scouts/breach teams on the bottom floor set to ambush at 75 meters. Give them terrain triggers to rise to the upper floors, creating ambush zones. Use plenty of wire, hedgehogs, TRP's and spread enough mines around so everytime the player encounters an obstacle, they will assume it has mines, and need to find a new path or deal with them. -
Well done. Now try to do it again!
-
The Truelife* Mode PBEM DAR
Heirloom_Tomato replied to Heirloom_Tomato's topic in Combat Mission Battle for Normandy
Over at Sexton's house I sneak an assault section in for a better look. They see some men still present and open fire. Other than a few rounds fired harmlessly over the German's heads, nothing happens. C Company was given orders to spread out and seek higher ground in an attempt to welcome RH's men to this side of town. Here are their positions at the start of the turn And again at the end. The Daimler seen in this last screen shot was within line of sight and of the men who had made contact last turn. He heard their shouts of "Enemy Spotted" and their rifle fire so raced over to offer support. C Company Commander has now been made aware of RH's men in the town and begins to direct some other AFV assets under his control to help support his men. This turn ends with little other action occurring. -
The Truelife* Mode PBEM DAR
Heirloom_Tomato replied to Heirloom_Tomato's topic in Combat Mission Battle for Normandy
Minute 1:54-1:53 This 20mm Ac halftrack.... WOW! With his drivers dying screams still echoing in his ears, he turns the gun and fires off another amazingly accurate burst of fire. Once again striking another Staghound with incredible ferocity. I lose the driver and the radio operator. Shortly after this picture is taken, the remaining crew bail and run for cover. Finally RH's gunner can stand it no more. Grabbing the picture of his girlfriend from near his gun, he takes one last look at his driver before bailing and seeking shelter. I can only hope all his halftracks are not as difficult to knock out as this one was. -
The Truelife* Mode PBEM DAR
Heirloom_Tomato replied to Heirloom_Tomato's topic in Combat Mission Battle for Normandy
I am starting think this halftrack gunner is the basis for @Mord amazing book series on halftrack gunners. Ask him for a signed copy today! -
The Truelife* Mode PBEM DAR
Heirloom_Tomato replied to Heirloom_Tomato's topic in Combat Mission Battle for Normandy
It is now time to take this DAR into dangerous waters, unbuttoned halftrack gunners and their totally useless shields. I should be able to be dropping these guys like flies, am I right? D Company's 14th Platoon has been spotting behind a house near the church. It appears they have spotted something. One man is peeking around the corner of the house and is taking aim. A closer look down his rifle sights reveals his target, an unbuttoned halftrack gunner blazing away. Ah fresh meat. He steadies his rifle against the side of the house, takes careful aim, exhales slightly and gently squeezes the trigger. His shot is away and somehow he manages to miss. A Bren gunner from 15th Platoon, high in the houses to the left of the church also has a spot on the gunner. He blazes away and only manages to hit the gun shield. The ricochets fly off harmlessly into the sky. So what gives?? What did I do wrong?? I thought these guys were bullet magnets. I thought they died within seconds of being exposed. I thought they didn't stand a chance. I thought those gun shields were useless. Maybe it is only when they are under my command that they die like flies but when the enemy uses them they are safe? -
The Truelife* Mode PBEM DAR
Heirloom_Tomato replied to Heirloom_Tomato's topic in Combat Mission Battle for Normandy
Over by Sexton's house, my 2 inch mortars have started to have some effect. The tree has lost all its leaves, the wall turned to rubble and RH's men start to flee. I will adjust the aim of the mortar and hope to catch a few of his men in the open next turn. I have two Staghounds in this area and with 10 seconds left in the turn, they get a spot. Can it be? Please oh please be who I think it is... HAHA! It is the 20mm AC halftrack. He is reversing again and with no time left on the clock, the Staghound fires! A solid hit again, but this time it appears to have done some more serious damage. Say, where did the driver go....hehehehe.... -
The Truelife* Mode PBEM DAR
Heirloom_Tomato replied to Heirloom_Tomato's topic in Combat Mission Battle for Normandy
His lose was not in vain! The Staghound was watching them flee for safety and somehow managed to spot where the enemy rounds came from. Can you spot RH's men? Here, I will give you the full zoom view. Does this help? Lets try that again, but this time with the trees turned off. There he is! A marksman with a scope. Is he a dedicated sniper, or just the marksman in a PzG squad? Who know and who cares, my Staghound send him some 37mm HE love. After this round hits, the marksman disappears from view. I can only hope it took him out, but the shot appears to have hit a little low. Does the little 37mm HE round pack enough punch to penetrate the wall and cause casualties? Sure would have been better to see the round sail through the window and straight into the sniper.


