
Boche
-
Posts
1,263 -
Joined
-
Last visited
Reputation Activity
-

 Boche reacted to 37mm in Heaven & Earth: Project discussion thread
I've made a number of requests for map makers/scenario makers throughout this thread and I will do so again.
If anybody is interested in helping us create content for the public release then don't hesitate to send me a PM.
That would include you too @Boche 😉
-
Boche reacted to IICptMillerII in Combat Mission AAR: Consulate Crisis
LANDFALL
The Marines make landfall and as promised, its with a bang. Timed to coincide with the first wave hitting the beach, a host of Maverick AGM armed Hornets and Harriers are unleashed against Regime forces. In just one minute, the city is continuously rocked by consecutive explosions as Maverick missiles and JDAMs connect with targets throughout the city.
The Marines of the first wave pour out of their AAVs and onto the beach. Luckily they take no direct fire, and the engineers are quick to begin their work of screening the beach for obstacles and making sure there is sufficient access to the MSRs leading off the beach. Things proceed smoothly for the most part. One of the AAVs throws a track as it tries to return to the ocean. This is a headache and a nuisance, but not a game changer. Worst case scenario, the vehicle will have to be abandoned and destroyed in place.
A quick firefight ends as quickly as it began when two Regime MP’s poke their heads around the corner at the intersection of MSR Wiley and Market. The MP’s quickly lose their heads for their curiosity. Besides that, the beach is quiet. No obstacles are found by the engineers, and both breach points are found to be clear as well. The way is open for the Marines to advance into the city itself.
Loading A Company into the AAV’s took a little longer than expected, but the company is finally ready to go and steps off into the water. Unfortunately, another AAV becomes immobilized as it steps off. I’m hoping that this does not become a consistent problem.
As the AAV’s swim to shore, the Hornet that missed with its JDAM on the first pass of the enemy assembly area comes back around and drops another JDAM. This time, its on target and the Marines at breach point Elmer get a tooth rattling firework show.
After the dust settles from the blast, a few shellshocked MP’s are seen running away through the rubble and are engaged by the Marines. Hopefully this indicates this possible enemy assembly area as being thoroughly neutralized.
With the MP’s killed or fleeing, the Marines of A Company begin moving down MSR Wiley. As this is occurring, movement is spotted near the US consulate by Marine security. A few moments later, a group of Regime MPs are seen advancing down a side street towards the consulate. The Marines open fire.
This is a dangerous situation. The consulate can hold its own against the current threat, but won’t last long against a large determined attack. A Company must make all possible speed to reach the consulate and reinforce it before it is overrun.
Captain Amato, A Company’s commander is informed of the attack on the consulate and the new urgency to get to the consulate. A few moments later as his Marines are moving down MSR Wiley, they take fire from an RPG followed by small arms fire, and a firefight breaks out halting forward movement.
The situation gets more tense when Marines from 2nd platoon take a barrage of fire from a side street and suffer a casualty.
Regime MP’s fire at the Marines from intact buildings part of the Police Headquarters. The Marines take two more casualties, both wounded, before returning fire with small arms. Two LAW disposable anti-tank rockets are fired into the buildings, suppressing and hopefully destroying the MP position there.
The short but sharp firefight ends moments later. The Regime MP’s hold up in the Police Headquarters break under the immense small arms return fire from the Marines and flee their fighting position.
With the enemy fleeing, the Marines move up. They establish initial positions along blocking position Bugs and screen the Police Headquarters before attempting to clear it. Sporadic sniper fire is still coming from inside the Police complex which manages to wound another Marine. The snipers location is found and suppressive fire is poured into the position. More potshots are taken at the Marines, including another RPG round which slams into the wall just over the heads of an M240 team. Miraculously none of the Marines are wounded, or even hit. It all goes to show that even though the Regime MPs appear to be retreating, it is more orderly than not and they certainly have some fight in them.
With the firefight decidedly one sided in favor of the Marines, and the enemy fleeing or dying, elements of 1st platoon begin the treacherous task of clearing out the Police Headquarters complex. Though initially tense, it is soon apparent that the only occupants of the headquarters are corpses. 1st platoon clears the rest of the complex without incident and blocking position Bugs is officially secured and established. Back at the beach, the AAVs carrying B Company are nearing the beach.
-
Boche reacted to Combatintman in Heaven & Earth: Project discussion thread
I've looked at it too … I reckon there's a Red Force Khe Sanh campaign in it along these lines:
Battle 1 = Hill 881
Battle 2 = Lang Vei
Battle 3 = Hill 661
Battle 4 = Khe Sanh Village & District HQ Compound
Battle 5 = Khe Sanh Airfield
The aim would be to make it representative rather than an actual recreation of Khe Sanh because to do it for real would involve huge numbers of troops. So the core units would be two NVA Regiments. One Regiment would attack from the West and would fight Battles 1, 3 and 5 and the other Regiment would attack from the South and fight battles 2, 4 and 5. It would work something like this:
Battle 1, 1 Bn/1 Regt.
Battle 2, 1 Bn/2 Regt.
Battle 3, 2 Bn/1 Regt
Battle 4, 2 Bn/2 Regt
Battle 5 would involve 3 Bn, 1 Regt and 3 Bn, 2 Regt as the core units. The player is also given the choice of which of the battalions from the earlier missions to add to this battle via a decision mission. The premise being that they will pick the bn from each regiment that incurred the fewest losses in Battles 1-4. The battalion in each regiment that incurred the highest losses would notionally be a reserve or sent to a blocking position. So for example:
Battle 1, 1 Bn/1 Regt suffers 50% casualties.
Battle 2, 1 Bn/2 Regt suffers 50% casualties.
Battle 3, 2 Bn/1 Regt suffers 40% casualties.
Battle 4, 2 Bn/2 Regt suffers 60% casualties.
The player in the decision mission selects 2 Bn/1 Regt and 1 Bn/2 Regt for Battle 5. Forces for Battle 5 would therefore be:
2 Bn/1 Regt at 60% CE
3 Bn/1 Regt at 100% CE
1 Bn/2 Regt at 50% CE
3 Bn/2 Regt at 100% CE
This of course is only a rough conceptual sketch so there would be nuances reflecting actual events such as NVA armour at Lang Vei, with possible options to commit it to the Khe Sanh Village battle and the Khe Sanh Airfield battle.
I think this would be a relative cinch to make because, with the exception of Khe Sanh airfield, the maps wouldn't be massive and the two hilltop battles would be a doddle (ie a hill covered with trees with a cleared area on top with trenches, barbed wire and minefields. I'd be surprised if each of those took more than a couple of days to put together. Lang Vei again should be not much more than a 1500m x 1500m map with a bunch of trees and a fortified compound. Khe Sanh Village would be about that size or smaller and would be a bit more complex but not excessively so. The big map would be Khe Sanh airfield which I reckon would be a 2.5 x 2km map and some jiggery pokery would be involved with the road and runway orientation but I've had a pretty good look at it and I think its doable.
The 1:50,000 map sheet is Series L7014 Sheet 6342 III Huong Hoa and you can get it here:
http://legacy.lib.utexas.edu/maps/topo/vietnam/huong_hoa-6342-3.pdf
Places I've referred to on the map can be found at the following grids:
48Q XD 8036 = Lang Vei
48Q XD 8538 = Khe Sanh Village
48Q XD 8441 = Khe Sanh Airfield
48Q XD 776437 = Hill 881
48Q XD 803443 = Hill 661
Just rough thoughts of course but I think it is achievable and @37mmhappy to discuss ...
-
Boche reacted to ncc1701e in BMP rear infantry hatches
All right, this is the kind of WOW moment I like. It starts with a kind of mistake of my own.
I was progressing in a little village as Syrians against uncons. With my first attacking wave progressing well, I have moved forward two more BMP1 but, been perhaps too optimistic, with their squads mounted.
Suddenly, an enemy team coming from nowhere was spotted on the right of one of the immobilized BMP1. And, the squad inside the BMP1 opens fire using the roof infantry hatches that are located at the rear of the vehicle killing few guys. WTF.
I did not recall having seen this in CMSF1 ever. Is it new to CMSF2?
Anyhow, well done BF !!!
-
Boche reacted to 37mm in Heaven & Earth: Project discussion thread
I've made some changes to the modpack based on this map-making attempt, so it's certainly been a productive exercise.
Either way, there's no mistaking this map for Syria!
PS
It is kinda funny checking out our maps without the modpack...
-
Boche reacted to Liveload in Tal Malah
Hi All!
Hope you had a great weekend. Time for a quick update. Our first 4k x 4k master map of Al Arbaeen and Al Zaka is coming along nicely so I thought I'd post a couple of in-progress shots:
Al Arbaeen area:
Al Zaka area:
Kafr Nabudah is also a 4k master map and is currently in progress along with Hobait, Jibeen, and Al Mughayr...many more to come as we progress.
To save you time in hunting around the thread, here's list of published scenarios thus far in the form of Dropbox links:
Tal Malah - Blue Defend
Qasabiyeh - Blue Defend
Qasabiyeh - Blue Attack
Kabani - Meeting Engagement
Attera - Blue Attack
Al Hamamiyat - Blue Attack
Respectfully,
LL
-
Boche reacted to Rinaldi in [AAR] UK - Recipe for Disaster AAR
As promised, let's move right along!
-------------------------------------------------------------
1826-1831:
The TACP team begins to move into a better position to vector the air support into both EA2 and EA3, which by this point the enemy attack had broadened into. As that occurs, the small group of enemy vehicles that strayed into EA2 are engaged with good effect: a javelin at BP1 destroys a T-72, subsequently leaving the BMPs as easy prey to a pair of Warriors at BP1. The Warriors engage briefly, then duck back into their defiladed positions.
Even as this engagement is occurring the enemy vehicles and dismounts spotted at 1825 appearing in front of EA1 turns out to be much larger than a platoon in size. The BMPs duck behind a low rise and are not seen again for a bit, but over this little rise comes an entire company of Syrian infantry, who fan out into a line. Behind them on another small rise caused by the rolling terrain, a machinegun section takes position to support their advance. Shortly afterwards, the BMPs re-emerge taking a forward slope position on the same rise they initially ducked behind, also clearly in a position to support the advance of their infantry. Despite this development, the dismounts in BP1 hold fire, waiting until the enemy close to within effective small arms range.
The Syrian infantry advance along the COA1 axis into EA1. Their BMPs take rather exposed firing positions behind them.
Realizing that this advance has humbugged the relatively thinly held BP1, who is now bereft of the support of their sister platoon who has earlier displaced, an Observer is dispatched from the palace when the word of the enemy advance reaches the Company HQ. He speeds to a small rise near the vacated BP2 to take a good position to call in a 155 mission on the enemy infantry. The mission is called in a linear pattern with medium, long, anti-personnel parameters.
I break my rule of ‘tanks only’ and order the Javelins at BP1 to start engaging the BMPs, displacing between shots – usually with 30mm chasing them out of their initial firing positions – so as to make it as safe as possible when my own infantry unmask themselves and begin firing. Then, inexplicably, the 2nd platoon leader opens fire prematurely on the advancing Syrian infantry, baiting a storm of return fire from the MMGs and remaining BMPs. Miraculously none of 2nd platoon get hit by the cannons or enemy fire and begin to calmly and accurately give the Syrian infantry their return fire. The javelins are not so lucky, a team fires its final missile – with good effect – but before they can displace into safety a 30mm round burst kills the gunner.
With a general firefight having begun the 2nd platoon’s warriors begin to take firing positions at BP1 and the vacated BP2, taking hulldowns for a few seconds at a time and displacing to a new position. Their cannons systematically rip into the supporting BMPs, reducing the pressure on their dismounts. However, despite all my precautions one of the Warrior’s is eventually hit and destroyed by a BMP’s anti-tank missile.
As the IFVs go tete-a-tete they also go tit-for-tat. Although the Warriors find far more success in a sustained fight, knocking out half a dozen BMPs in a matter of minutes.
The Syrian infantry continue their advance in spite of their supporting assets systematically being destroyed. As 2nd platoon’s fire forces them to ground, they doggedly return fire with small arms and RPGs, causing a few of the defenders to become wounded in action. A pleasant surprise is had when Warriors, all the way over on the reverse slope of BP3 identify and begin to engage the Syrian infantry from the flank. A section of warriors at BP3 is given better firing positions and ordered to spray the area with coax. The goal is to keep the Syrian infantry pinned and in one position until the previously mentioned artillery mission finds the range. As the enemy BMPs begin to thin out the 2nd platoon’s warriors switch their own fire to the infantry and their supporting MMGs, the enemy thrust into EA1 is rapidly disintegrating into a mob.
By 1831 the entire battlescape is brimming with fire. EAs 1 through 3 now have targets in them and almost every element of the company is engaged. 3rd Platoon dismounts in the hasty BP begin to acquire enemy targets in the vicinity of both EA1 and EA2; what appears to be a second machinegun section setting up to further support the hapless Syrian infantry are engaged from the scrubs and bushes and are forced to defend themselves with return fire – making their role as fire support defunct. The exchange of fire largely goes the way of 3rd platoon but they do suffer a few casualties. The Harriers also contribute to the engagement, apparently with excellent effect, hitting BMPs as they begin to move through EA2. Streaks of smoke from the high ground near where the Syrians were initially spotted hint at the presence of anti-air, though they are not successful in engaging the jets.
Situation as of 1831 hours, marked by activity along the entire company front. The enemy thrusts thus far have been either destroyed or completely stunned as more and more of my assets come into play. It is clear at this point that the enemy have been arriving in waves; there’s too many vehicles stacked up in front of BPs 1 and 3 to be from the same units engaged in the first phase of the battle.
The plan at this point is such: BPs 1 and 3 continue to engage as they are currently doing, with the Warriors switching their targeting priorities back to enemy armored vehicles. The Company 2IC, with 3rd platoon’s remaining warriors at the ‘hasty’ BP4 will take firing positions to add their weight to BP1s engagement.
-
Boche reacted to sburke in Shock Force 2 Unofficial Screenshot And Video Thread
The young insurgent leader may have been inexperienced and afraid, but he was brave... or just blindly stupid. He didn't hesitate to throw his men at the Americans who had appeared behind him. Against a superior trained force in a good defensive position endowed with night optics his men never stood a chance.
Some survived long enough to return fire, but that lasted only moments. Some of the insurgents did survive...and would likely end up in Fallujah or Ramadi
Hitman's battle was just beginning
-
Boche reacted to sburke in Shock Force 2 Unofficial Screenshot And Video Thread
Assassin 1 is given the order to reveal their presence. Lt Navarro gives the order to Sgt Nieto to light up some contacts around their position - "time to start this party Sgt." The bravado hides his concern that his platoon is isolated from the rest of the battalion and the enemy force in the town is estimated at several hundred.
On the opposite end of town Hitman starts eliminating enemy units surging toward the canal road.
-
Boche reacted to Rinaldi in [AAR] UK - Recipe for Disaster AAR
Thanks for that, another update planned for tomorrow - I'm keeping the AAR short and sweet. Already working on the next.
-
Boche reacted to Sgt.Squarehead in Heaven & Earth: Project discussion thread
Nice!
Is that a stock CM:SF map, I kinda recognize it, but it's hard to tell?
-
Boche reacted to Rinaldi in [AAR] UK - Recipe for Disaster AAR
Alright, let's get into the fighting proper with this update:
---------
1820-1825:
The action begins with enemy artillery landing near the palace; a mixed mission of air bursting high explosive and slow-building smoke. The palace, as I suspected, would be a magnet for fire and there are no losses among the few men emplaced there. BP2 reports BMPs in the area beyond Engagement Area 2 simultaneously with the enemy barrage. Reports begin to come in quickly from BP2 and 3 over the next few minutes. One of particular note is the spot report of a UAZ on high ground to the west of EA3. I suspect it belongs to an enemy forward observer team and luckily enough BP3 is best furnished of all the positions with forward observers. Harassing 81mm fire is ordered on the high ground to discourage or kill the suspected enemy forward observer. Post battle analysis later confirms that several scout teams and a forward observer had did moved onto that plateau and suffered casualties as a result.
Enemy smoke begins to build by Battle Position 2, masking my dismounts' field of fire for a time.
At 1823 tank and auto cannon fire began to impact an area of scrub and bush, at that time unoccupied, to the right of BP2. Obviously this is speculative suppressive fires. The origin of this inbound fire was rapidly established to be coming from several platoon sized elements of T-72s, followed closely behind by BMPs. They advanced over the same high ground being impacted by my mortars, roaring into what I had identified as COA3 and towards EA3. By the end of the minute the entire company is aware of the enemy thrust and a rapid, coordinated reaction was as a result possible.
Firing as they move, the threat forces debouch off the high ground and move into Engagement Area 3.
BP2 had no javelins and was at any rate at this time completely masked by the enemy smoke, making their position useless. They were ordered to remount and, joining with the 2IC and his reserve Javelin team, assume a new, hasty BP. They would help with inflicting losses on this enemy thrust as they entered EA3. The overarching idea: Maximize the scant dead ground I had behind the palace and the mobility of my units. The goal was to have anti-tank infantry and then anti-infantry armour. As this shift occurs, the enemy thrust enters the designated free-fire zone of the Javelins at BP3. Two Javelins are fired by the detachment emplaced there, scoring a single kill. The Javelins displace rapidly to new locations within the BP.
The Javelins engage. Sticking with the idea of letting my Warriors engage the BMPs, the Javelins - operating on limited ammo - engage enemy T-72s instead.
Situation at 1825. Showing the ground for the Hasty Battle Position and the thrust of the enemy,
As BP2 dismounts rush to their Warriors to remount, an advancing T-72 acquires a Warrior that becomes exposed and sends a round crashing through the smoke and into it just as the infantry
remount. Miraculously, only a crewman is made a loss and the dismounts tumble out, panicked, but safe. They fall back to the palace, heedless to the world for the time being. The end of minute 1825 sees a rapid series of developments: the 2IC’s attached Javelin team has already taken position in the Hasty BP and scored a satisfying kill. A Javelin at BP3 likewise bag another T72 from their new firing positions. BP1 starts to report the enemy thrust broadening out into EA2 and, more alarmingly, reports enemy dismounts and BMPs swinging out to the left, near a rise behind EA1. Finally, the radio squelches with the welcome announcement that the promised Harriers are at their checkpoint and ready to provide us with anti-tank air support.
-
 Boche got a reaction from Liveload in Terrs kick JJ Butt - Battlefront to be commended
That guy is a russian reporter, hes been following the tigers for a while now. Oleg something is his name
edit: Oleg Blokhin is the name, some parts say he is a reporter, others a mercenary.
-
Boche got a reaction from Liveload in Terrs kick JJ Butt - Battlefront to be commended
In the end you go to battle with what you have...we in the west "mostly" have the luxury of having a lot of equipment to go about. Its something thats suprised me for a couple of years now, all the video of the tiger forces and the 4th armoured with preety much no standard equipment. Then again thats not everything, You dont have to just look the part, you have to play the part and im sure after all these years these guys know what they are doing. You can tell when you watch them. A plate carrier is nice but combat experience is better.
-
Boche reacted to IICptMillerII in Combat Mission AAR: Consulate Crisis
MARINES
At 1011 hours local time (0911 zulu) Task Force Wasp arrives off the coast of Al Mout and begins preparing for disembarkation. To support the Marines, a large number of aircraft from both the Wasp and Enterprise are launched and settle into their on call air stations. By 1022 local, all aircraft are at their stations and the Marines are ready to disembark.
Regime forces have not been able to detect my ships, until now. Task Force Wasp is within visual range of the city, and both the U-2 and Global Hawk UAV are showing a lot of increased military activity in the city. The good news is it appears the Regime has been taken by surprise. Most of their armed forces in the city appear to be trying to secure and triage targets stuck by the Tomahawk strikes or are centered around the Canadian consulate. There do not appear to be many Regime forces near the US consulate, though that is likely to change quickly. Having the city under complete surveillance like this gives me a definite advantage. As Marine AAVs begin to hit the water, air controllers aboard the Wasp coordinate with the U-2 and Global Hawk feeds to begin directing airstrikes in the city. The Marines are entering Al Mout with a bang.
At 1025 local time, the first wave of Marines hit the water. Four AAVs carry the reconnaissance platoon, scout sniper platoon, and the engineer platoon. In the distance smoke columns can be seen rising into the sky, marking the locations of the Tomahawk strike targets. Flying overhead are a pair of Super Cobra’s. They are initially tasked with scanning the beach for any hostile presence and engaging it if it exists. For now however it appears that the beach is completely undefended.
That could quickly change. It is only a matter of time until someone in the city realizes there are amphibious vehicles on their way to shore. It will take roughly 5 minutes for the AAVs to make a one-way trip. That means that the first wave of Marines, a relatively small group, will be alone for at least 10 minutes. This initial landing will be one of the most vulnerable instances the Marines will have to face. They are not completely helpless though. In addition to the two Super Cobra’s, much of the city is under active surveillance. If Regime forces make a move for the beachhead they will be quickly spotted, and orbiting CAS aircraft can be vectored in to interdict them.
The Cobra’s spot and engage a few enemy vehicles on MSR Market just inland from the beachhead as the Marines approach. If the Regime didn’t know we were coming, they do now. As if to confirm it, a flurry of activity is seen. Armed personnel are seen pouring out of a large building complex in multiple directions.
This situation quickly becomes a serious problem. Based on what is being observed, it appears that the building complex is some kind of assembly area for a large contingent of dismounted Regime infantry. This building complex sits at the intersection of MSR Wiley and Market and is directly next to blocking position Bugs. A Company’s blocking position and route of advance into the city to the US consulate appears to have an enemy assembly area smack in the middle of it. Before Marines have even put boots down on hostile soil, the fog of war rears its ugly head. Intelligence failed to identify this concentration of enemy forces at a critical spot.
The solution is simple, an old but true tactical maxim. Most any problem can be solved with the proper application of firepower. And firepower is something the Marines have in spades. Two Hornets loaded with 2000lb JDAMs are ordered to strike the building complex. The first JDAM misses its target by about 8 meters, slamming into the dirt road next to the complex. The second JDAM is dead on target.
While this goes a long way to mitigating this potentially serious issue, it does not solve it outright. The remains of the complex will have to be swept by elements of A Company in addition to establishing blocking position Bugs. This will add a time delay to the plan, prolonging the time both the Marines and consulate personnel are exposed to danger, increasing the chance of taking casualties.
-
Boche reacted to Sgt.Squarehead in Combat Mission AAR: Consulate Crisis
That's the proper way to treat Ramadi!
Good show.
-
Boche reacted to sburke in Shock Force 2 Unofficial Screenshot And Video Thread
The Fedayeen occupying the town however have bigger concerns than the mosque. Recent students from Syria, Jordan and Saudi Arabia, they have not experienced any of the sheer terror of modern combat.
1st Recon units start moving towards jumping off positions. Unfortunately trying to drive a bunch of Humvees through even a lightly occupied town with one sniper in CM isn't gonna end up looking at all like what 1st Recon did in Al Gharraf. Assassin 1 units move into their forward position...…… on foot
By the way if anyone is interested there is a nice site with google map links for the major locations in 1st Recon's drive on Baghdad. Also a really nice pic of their pimped out Humvees LOL
http://www.americanspecialops.com/usmc-special-operations/marine-division-recon/1st-recon-generation-kill.php
I've substituted Al Rafai for Ar Rifa- According to Google maps that is it's proper name. It's eventually gonna be Mahmudiyah in the Triangle of Death for units of the 4th ID when I get around to editing the map for that. Your map is getting near as much use for me as LLF's Ramadi map @George MC
-
-
Boche reacted to Erwin in Russian army under equipped?
Well, you go find a man to do the heavy lifting work - like always... Silly...
-
Boche reacted to Rinaldi in [AAR] UK - Recipe for Disaster AAR
Hey everyone, figured I'd share an AAR of a recently completed single player mission. I know its not as dramatic as a MP battle but I simply don't have time to commit to PBEMs as of late and as I'm sure everyone is aware single player has been much revitalised since the 4.0 patches - it's also a great way to remind people that even if the engine is showing its age, it's a good looking one. Taking the time to make an AAR lets me slow my roll, enjoy the action a bit and learn in the process. I'll be updating this roughly every couple of days, everything's already complete. More to come I believe if there's enough interest. Without further ado:
____
Recipe for Disaster
Situation:
It is the 27th of June 2008. The coalition invasion of Syria is in full swing. I am the commander of A Company (Coy) of the 1st Battalion (Scots Guards) of the 1st Armoured Infantry Brigade. My unit is currently stationed at an abandoned palace at the edge of the Syrian desert, resting and refitting after a series of actions. The bulk of the brigade is conducting operations to isolate city of B’ir Basiri in advance of lighter units assaulting to reduce it.
This area was supposed to be quiet and clear, yet alarmed messages from HQ and dust clouds on the horizon herald trouble is afoot and it’s coming for us! Evidently, a Syrian force has managed to remain unmolested in the desert as intelligence and air assets focused their attentions on B’ir Basiri.
Battalion and Brigade are organizing a quick reaction force and are promising us priorities from several indirect and air power assets. For now, I must look to the defense of my command with what is to hand.
Enemy Forces:
Unknown. Electronic intelligence has identified radio-communications between what appears to be at least three separate callsigns. This suggests that the enemy approaching me may be a battalion in strength.
Key Terrain and Enemy Courses of Action:
Much about the enemy is unknown, asides that they are advancing on us from the west. I have identified three general courses of action the enemy could make:
The battlescape, with an overlay showing Key Terrain (KT) and what I believe the enemy can and will do.
Course of Action (COA) 1 is a thrust through the open desert to the NW into a shallow dip in the ground. While not visible in the above overlay, there is a sandy piece of ground with a grove of palm trees as you approach KT01 that could provide cover. This first course of action I largely discounted: it had the least cover and an advance over it would be exposed to no less than four of the positions I had planned on occupying.
Looking west towards KT 01 (left) and 02 (right). Asides from scrub and chaparral, these rises offer little cover and concealment but are undeniably good positions in a pinch.
COA 2 was deemed a more likely route. It runs through a small valley formed by four jagged outcroppings, though the distance between these features is more than wide enough to allow the deployment of a combat formation. There is a palm grove in the valley that offers good cover and concealment, while the approach out of the valley has many small folds in the ground that could provide decent fire positions.
Once again looking west, from KT 02 into KT 03. The ground that the enemy would have to cross if they were to take COA2.
COA3 was the one I judged to have been the most likely route of advance. It would have been the one I would have selected had I been the opposing commander. While the terrain in that half of the battlescape is generally open, it is only adequately covered by two pieces of key terrain – KT 04 and 05 – one of which was the palace itself, a position that could be easily suppressed. If the enemy were supported by indirect fires and advanced swiftly and in strength they could easily break in and roll up my flank. Exacerbating the issue is that KT 05 was, similar to KTs 01 and 02, a small rise that provided good fields of fire but unlike these former positions was isolated, offered no good options to retreat and was far more sparsely vegetated. To KT 05’s front was a sparse palm grove in low ground that could provide a good position to establish a support by fire from the enemy.
KT 04, the Palace, as seen from the enemy's point of view. Due to the slope to its front the positions that could observe and fire on the enemy were few and obvious.
The view from KT05 , looking west. The palm grove. High ground to the left also provided the enemy with a good position to support any thrust.
Scheme of Maneuver:
As a result of the near total lack of information about the enemy force’s size, composition and greater objective, I settled for a defense-in-sector. However, that does not mean I fail to select alternate battle positions. My men all had access to armoured fighting vehicles, allowing for flexibility in the sector. As I had identified several courses of action the enemy could take, I selected obvious, though strong, positions that could fire on at least two of the three expected paths of enemy attack.
Further, a series of engagement areas (EAs) were identified as the sweet spot I would want to open up on the enemy with if I had the luxury of being able to hold my fire.
Three battle positions (BPs) were selected. Units were distributed in the following manner:
BP1: occupied by 2nd platoon (+), with a planned fall back to the cluster of buildings to the left-rear of the palace; BP2: Occupied by 3rd platoon (+), with a planned fall back into the palace itself; and BP3: Occupied by 1st platoon (+), which I had great difficulty in selecting an alternate position for – of all the positions there’s was the most precarious. Additionally, a small ‘light armoured reserve’ which consisted of the Coy second in command (2IC), the Company Headquarters’ fighting vehicles, a javelin team and miscellaneous vehicles was kept in immediate reserve in the reverse slope of the palace. I put little faith in their ability to really influence the battle.
The scheme of maneuver, or rather, the battle positions. EA = Engagement areas where I hope to hit the enemy hardest.
Command and Control:
The left flank of the company’s line was held by the 2nd platoon, reinforced with a javelin detachment of two teams.
The center was held by the 3rd platoon, reinforced only by the company headquarters, a forward observer and some marksman teams emplaced in the palace.
The right was held by the 1st platoon, directly in front of what I felt was the most likely route of attack. As a result, it had the best and most immediate access to fire support. They are reinforced with a javelin team, a fires party from the supporting AS90 battery and the company’s Tactical Air Controller Party (TACP).
On the subject of fires, the following assets were ultimately available to me:
Light mortars, which are organic to every armoured rifle platoon; Battalion level 81mms, already on call; An AS90 battery of 4 x 155mm tubes, already on call and primed for missions; and A flight of 2 x Harriers with a light anti-tank loadout, at the time of the engagement they are ETA 5 minutes. -
Boche reacted to 37mm in Shock Force 2 Unofficial Screenshot And Video Thread
Trying out a Heaven & Earth scenario by @puje...
-
Boche reacted to Liveload in Tal Malah
Hi All,
Sorry about the radio silence. We have been busy working on our next phase of the project, which is a campaign covering the Spring/Summer offensive of 2019 from early May thru current. Right now we are testing new scenario concepts and creating maps. All of your favorite characters will be making a return. Abu Bob, Abu Steve, Abu Allmani, the GoPro Units...and a few new ones that you'll hopefully enjoy even more. I know you're asking, "but how are they making a return if I killed them in the last scenario?!?!". Ask yourself how many times a terrorist has been declared dead only to turn up at a later date alive and well...🤣
We'll post some screens as we get closer to completion.
-
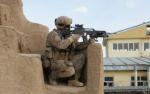
Boche reacted to sburke in Shock Force 2 Unofficial Screenshot And Video Thread
Meanwhile Hitman 2 and 3 overrun the crossroad position on their way to seizing the last canal crossing before Al Rafai. Oh wait, there goes Sgt Colbert!
-
Boche reacted to sburke in Shock Force 2 Unofficial Screenshot And Video Thread
rotflmao, I was looking through clips to get the right mix and I saw the one with Sgt Colbert after the air base seizure. "Gentlemen we just seized an airfield. Pretty f**kin Ninja".
-
Boche reacted to sburke in Shock Force 2 Unofficial Screenshot And Video Thread
Exceelent - Godfather thanks you.

