

Bil Hardenberger
-
Posts
4,975 -
Joined
-
Days Won
63
Posts posted by Bil Hardenberger
-
-
1 hour ago, IanL said:
- Use the terrain. Read this: https://battledrill.blogspot.com/2015/11/mett-t-analysis.html or any of @Bil Hardenberger's AARs. Even if you don't write things down or go as deep as Bil doing any part of METT will make you a better player and you will quickly realize you should be doing it all every damn time.
Highly recommend that every player practice at least a rudimentary METT-T analysis at the start of any game. Even a one liner on each component of METT-T will at least make you stop and think about your situation in the way a real commander does.
By the way, the post that Ian linked continues to be the most popular post on my blog of all time.
-
@Combatintman Karl, outstanding posts. I really appreciate you expanding on your initial comment re: Binh Ba and backing it up with fact and references, very well written... if @chuckdyke can't read that, take it in, and then back down and apologize for his knee-jerk reactions, well that speaks volumes about his character, to me anyway.
I suggest you ignore him and get back to work... I know you have better things to do and the clock is ticking soldier.
")
-
-
The problem I see with three-tank platoons, is that you do not have the ability to separate into two-tank sections. This is important and has important ramifications for bounding Overwatch, Fire and maneuver, etc. I think the four-tank platoon hits the sweet spot... five is right out!
So to recap... "Four shalt thou not count, neither count thou two, excepting that thou then proceed to three. Five is right out! Once the number three, being the third number, be reached, then lobbest thou thy Holy Hand Grenade of Antioch towards thy foe, who, being naughty in my sight, shall snuff it."
-
@Monty's Mighty Moustache, this is a very well done DAR! I am very happy to see you take the care and time to craft us something so exquisite. From your initial analysis to your detailed play by play with your atmospheric screen shots... very well done. Feels familiar somehow too.
Happy that you are using my floating icons.
I'll be watching you.
Thanks for the entertainment, Bil
-
Wanted to jump in real quick...
There is a lot going on in a combat formation, spotting is only one aspect and one of the many things they juggle at the same time. The way a real world formation works is they spot for activity in a sector or general area, each part of a formation having a different assigned sector, then as potential areas of interest start to pop up (in CM terms FOW icons) these formations can conduct a detailed focused search of those areas to determine what, if anything is actually there. This takes time. Just like it often does in CM.
It is rarely fast, unless the enemy units are moving or firing... then units get identified very fast indeed. Works the same in CM by the way.
I truly believe that CM has spotting about right.. not perfect and there are always odd situations... but its close enough to be a very good representation of small scale combat, in my opinion.
As for Steel Beasts.. I have played it many times though I sold my license several few years ago. I also preferred to play it as a wargame, but I had a lot of frustrations doing so that I would prefer not to get into on this forum. Suffice it to say that SB is a wonderful game that has a lot of wow moments, but it has a much different focus than CM. They are not really comparable, other than the fact that they represent combat in 3D... the approaches are miles apart. I would be curious to know how detailed the SB spotting system actually is.. but to be honest, the fact that many say they prefer it, and that spotting is easier in SB than CM tells me that it is probably more abstract than you might think it is. In my experience if some aspect in a simulation is easy and works as expected, that simulation is probably flawed in some way.
Bil - Co-designer/creator of CMCW
-
On 9/12/2021 at 9:04 PM, JorgenCAB said:
I just started playing with this rules and must say I really like them... have not played Combat Mission for quite some time...
...
At least It makes for more fun games for me and the game become more challenging overall, especially some of the single player campaigns becomes quite difficult to play.
I am happy to hear that you have been trying these out, they can give a very rewarding and eye opening experience.
On 9/12/2021 at 9:04 PM, JorgenCAB said:There also are those situation when a platoon is defending a stretched out area and being out of C2 is a product of design. In those circumstances the squad or team in question are likely to stubbornly follow the last order until the HQ reestablishes contact. The same could happen on a battle drill on the attack. A team might get an order that will take them outside of C2 for an extended period. The team or squad then have to perform that "order" the best of their ability. In my opinion this is also try about recon... they will get an order of what to do and come back or hold position. When **** hit the fan then they will fall into self preservation mode and a different ruleset should apply.
There also is the option of detaching a scout team from an isolated section to run back and find their HQ and report any development and request any new orders. Even a panicked squad might do this after they run off and hide in a forest nearby. Or a platoon leader who lost their radio need to communicate with their company HQ but can't really leave it's post, sending one or two runners probably is the second best option available.
Regarding the above... you can always write down an SOP for these detached units. An SOP such as, "Squad 1: Return to Platoon HQ if situation 1 or 2, advance to ___ if situation 3", etc.
They might have options to retire or take up another action under differing circumstances. At least for Western style armies... the Soviets, and probably the Italians with a stricter centralized control would not have this flexibility, at least not at the platoon level.
Bil
-
-
@John Kettler as always appreciate your replies! The analysis posts are of course most welcome.
Best, Bil -
5 hours ago, Combatintman said:
As a first module for this title ... again I'll bet my two pensions on it not happening.
You can be t more than that Karl.
-
T-72 should indeed be rare in GSFG. I put them in the NTC Campaign because that is what the Opfor used.
Bil
-
1 hour ago, mazex said:
Lol. Just finished the first scenario - and I am HAPPY with this result
")

Congrats! Don't get cocky kid.
Seriously.. good job on that scenario, it was designed to be a challenge and looks like you handled it well.
Bil
-
1 minute ago, Megalon Jones said:
Question for the developers: what scenario should I do first for a YouTube AAR?
I think Between Two Fahrbahns would be a perfect subject.. both for scenario size, and for knuckle biting excitement.
Post a link please.
Bil
-
Have fun with the game guys.. please post your reactions! Curious if you think its as cool as we do.
-
10 minutes ago, riptides said:
Was it my imagination or did The_Capt's comrades seem to die rather quickly after firing their RPG's? Whilst Bil's Dragon troopers suffered no such fate?
I lost three out of six of my Dragon Teams. I just didn’t dwell on it.
-
-
Yep, I have a couple more turns to post and then Warren and I will start the debrief. I'll get to those tomorrow...in the meantime I'm going to go read Warren's thread and the peanut gallery.
Bil
-
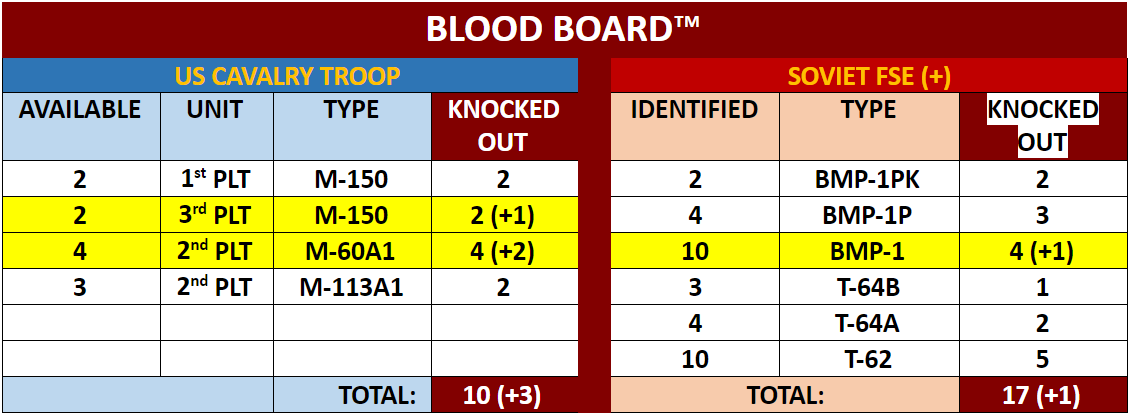
The Twenty-Fifth - Thirtieth Minutes - The Wheels Come Off
“Be the hunter not the hunted: never allow your unit to be caught with its guard down.”
James Mattis
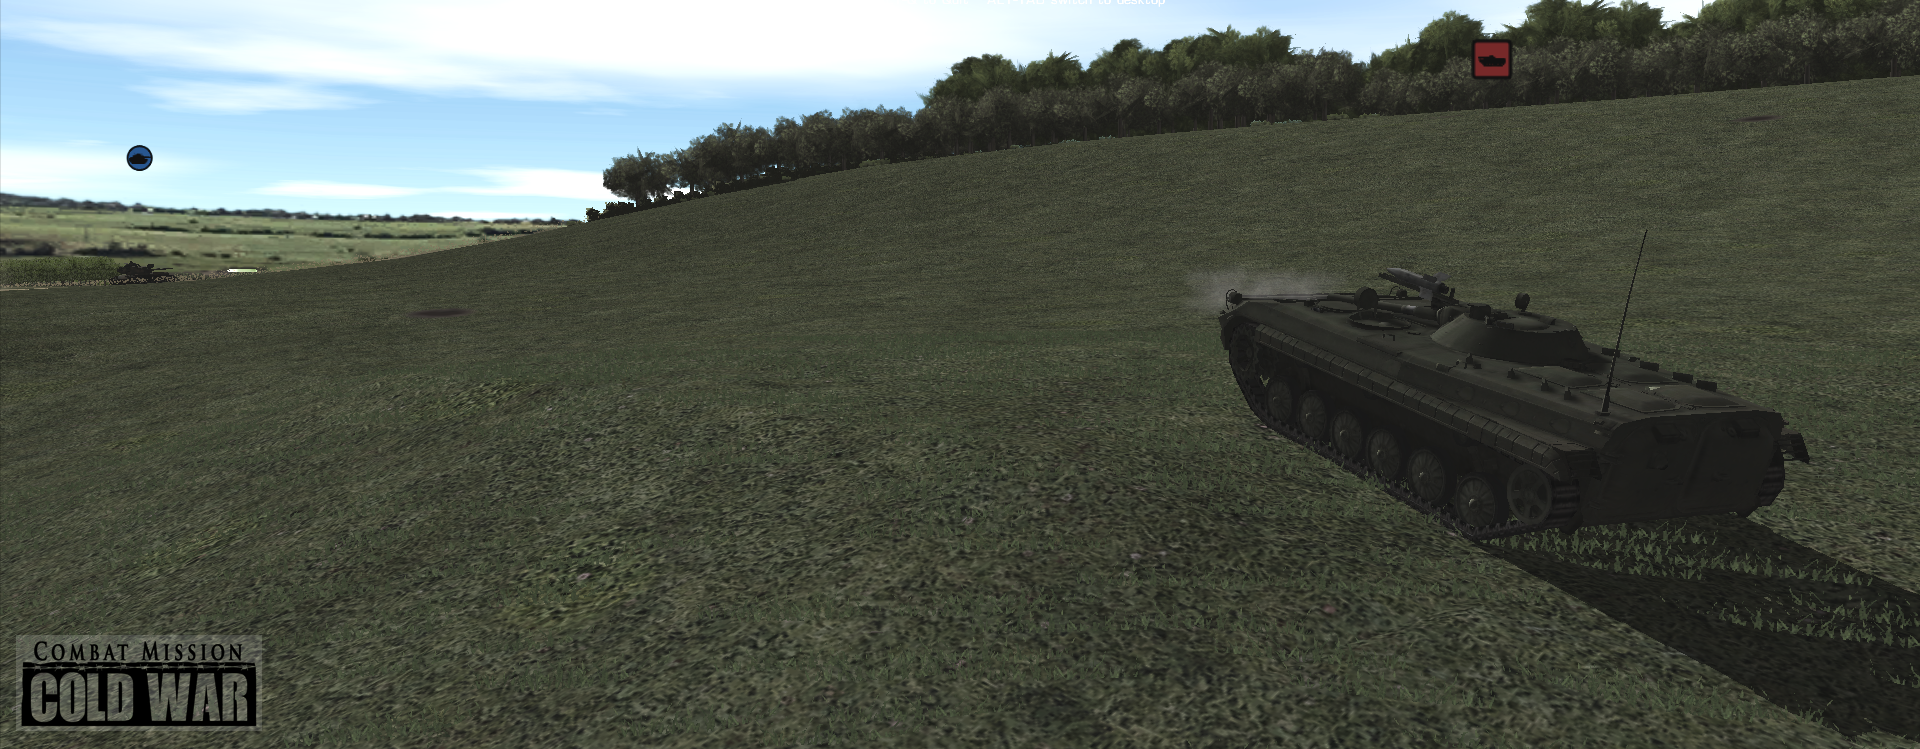
My AH-1 has been flying overhead for several turns now, and as far as I know this BMP is its only kill. But in its defense it was being chased by AA missiles for most of the time it hung around and did lose it's mate so I'm lucky it made even this kill.
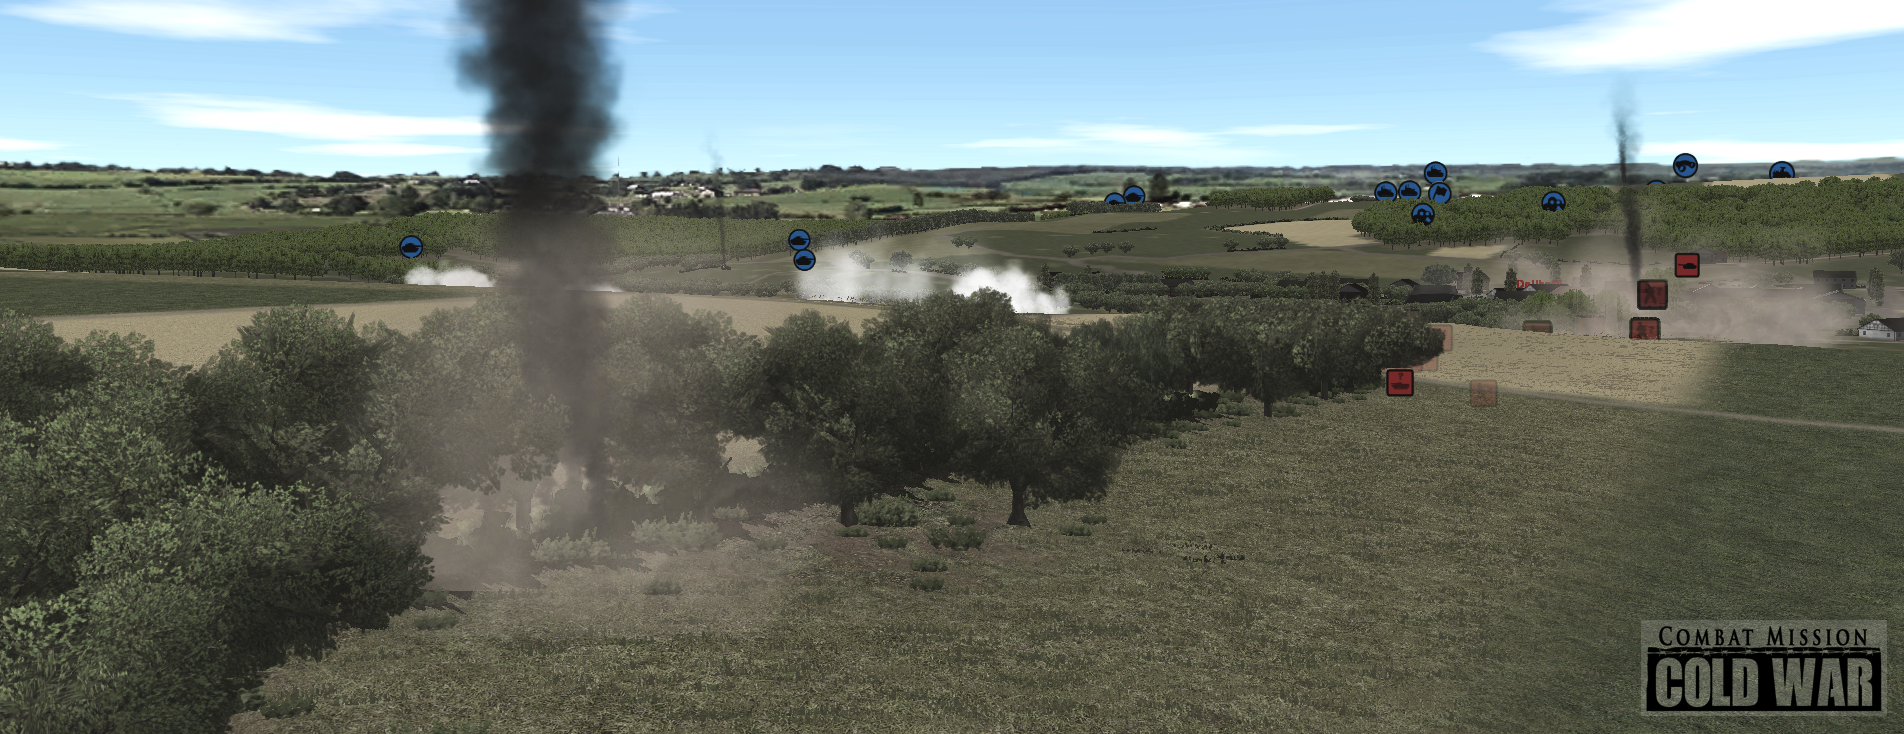
After that the wheels started to come off....
...one of my M-150s exchanged ATGMs with one of Warren's BMPs...


...both missiles passed each other on flight... the M-150's hitting a tree... sigh...

...of course Warren's didn't miss. Damn!

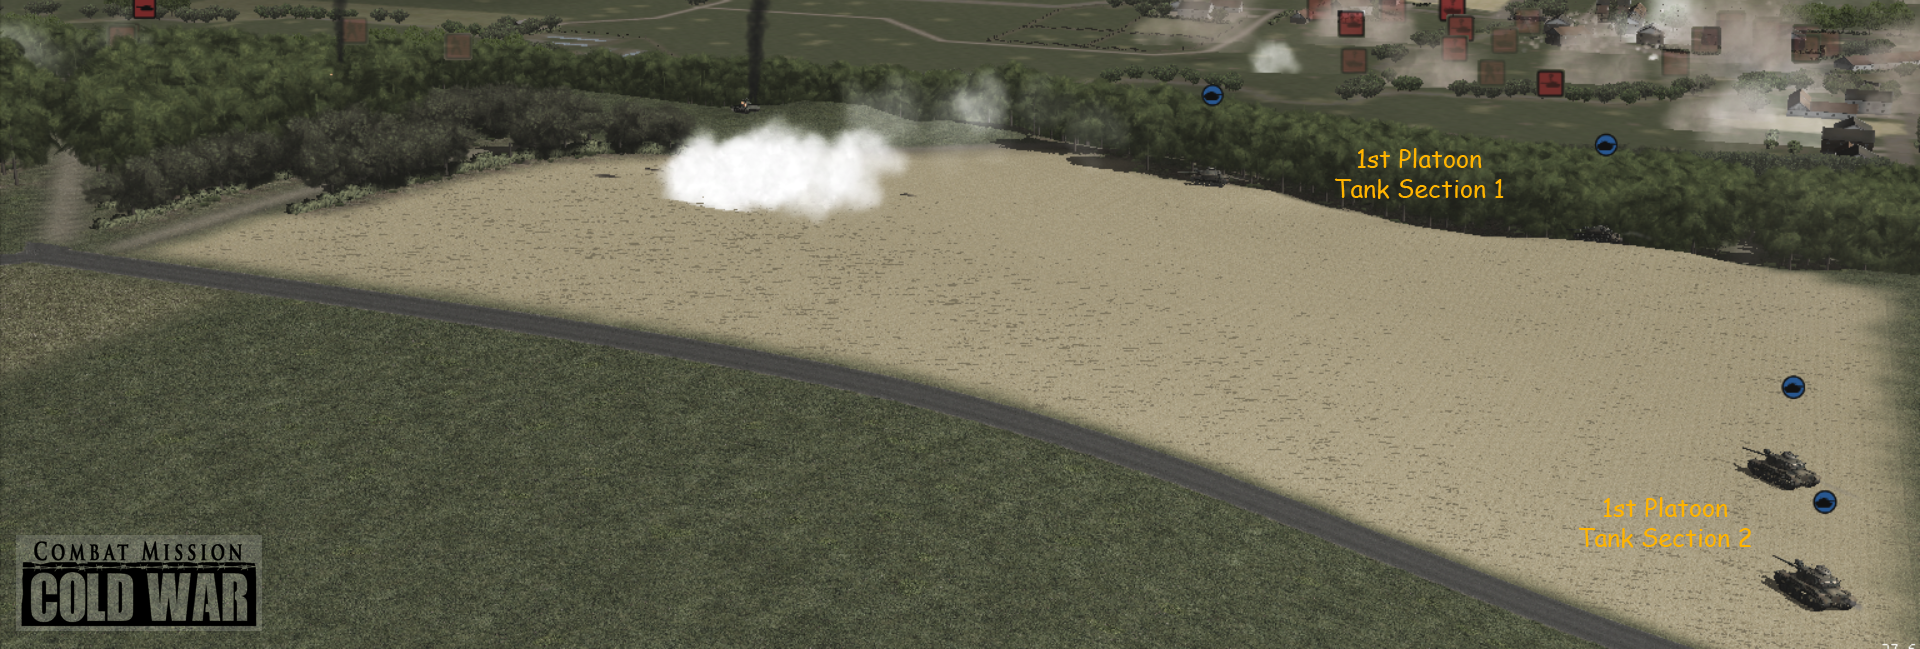
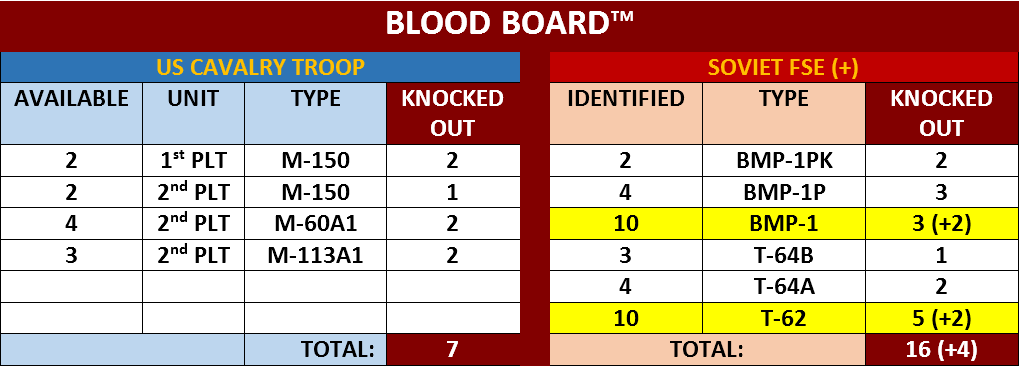
One of Warren's T-64Bs... (in fact one that had been beaten up, in what seems like another life now, by my 1st Platoon tanks) fired and destroyed one of my M-60s still sitting on the Short Route... damn. That means 2nd Platoon has now lost three of four tanks. Triple damn.
Now with Tank Section 2 joining in on the fun I order all four 1st Platoon tanks back into the breach!
Tank 1/9 had it's career cut short when it exchanged rounds with a T-62... 1/9 fired first, however... it missed.. the T-62 did not.
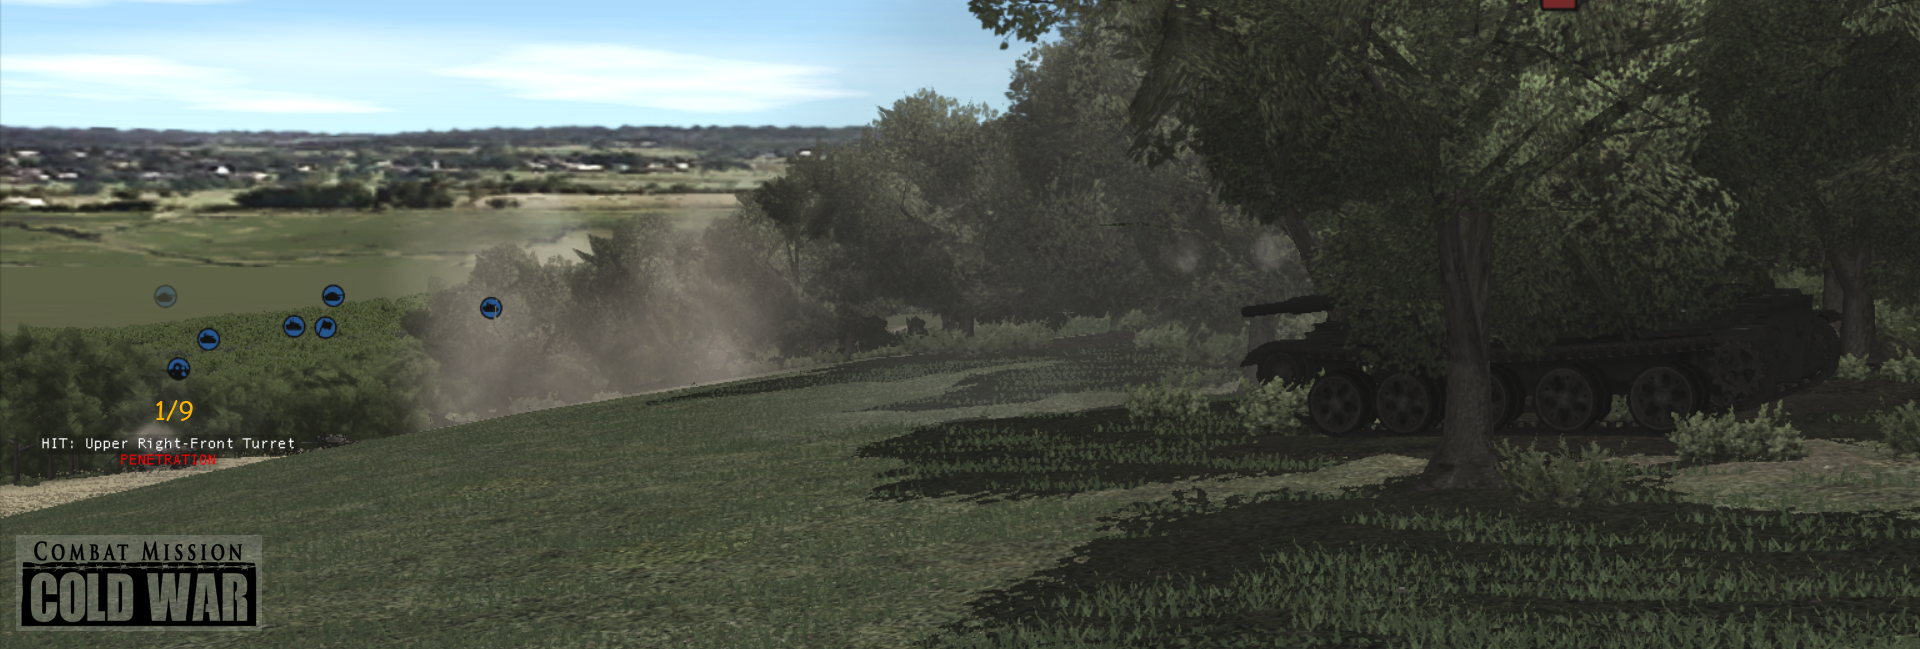
Uh-oh... have I pushed too far?
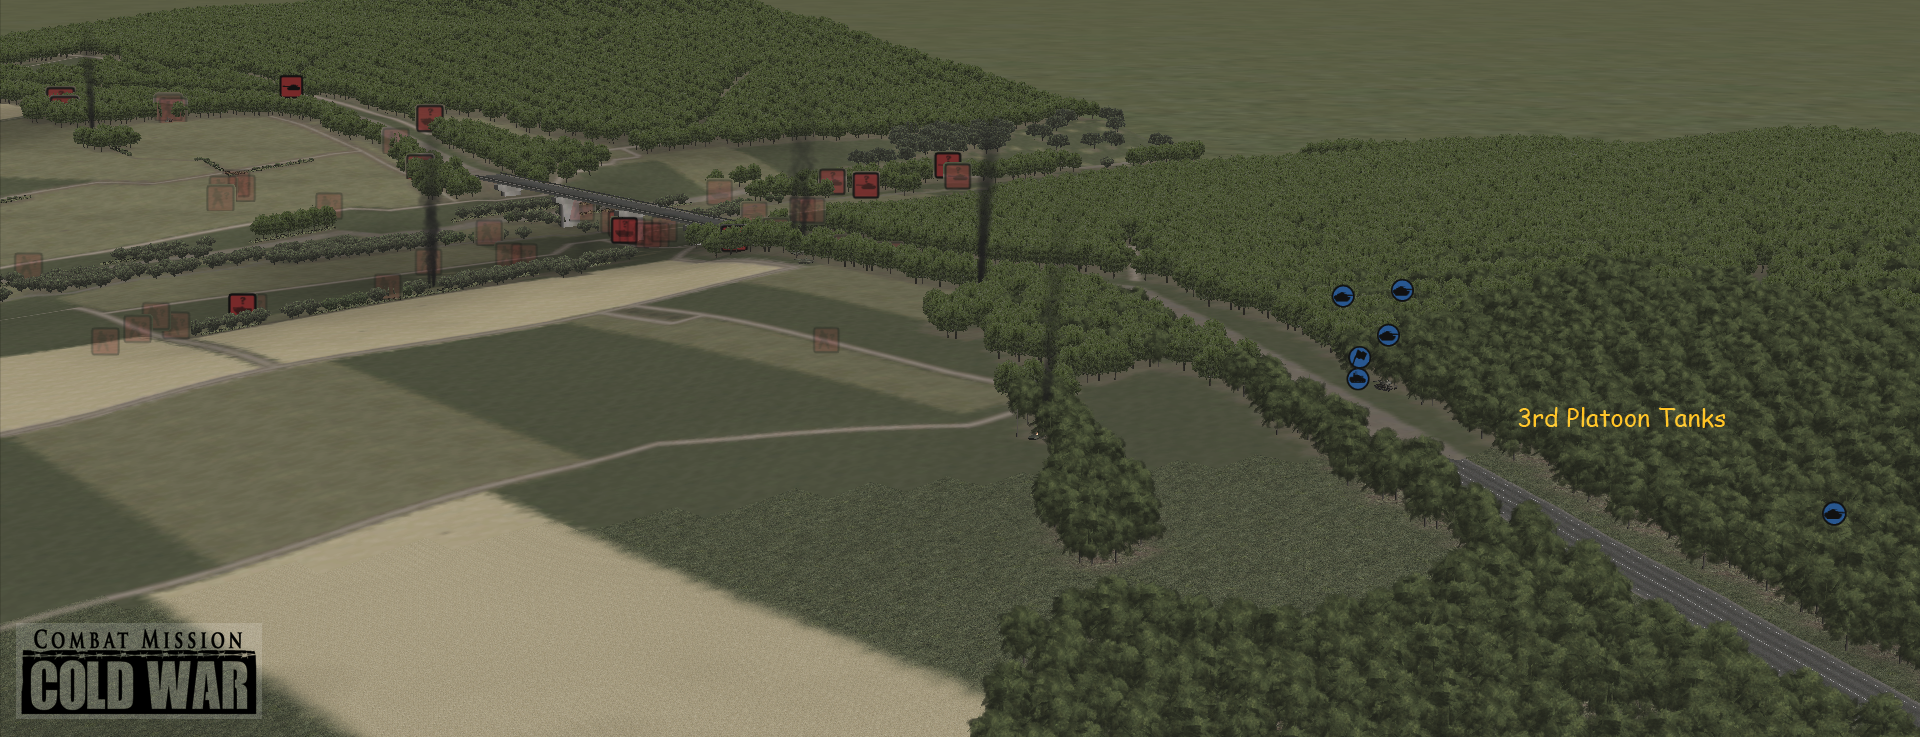
Third Platoon's tanks have also started moving down the highway...
-
-
46 minutes ago, Rinaldi said:
Not going to lie, I had convinced myself you were cooked a few turns ago. Definitely premature.
You cut me to the quick...
-
1 hour ago, Rice said:
@Bil HardenbergerAs updates drop for the Beta build, will you be updating your game? Or just playing on the version you started the scenario with. Mostly asking because you held off on showing unfinished things as points (Dragon firing animation)
Ummm... nope. Once these are posted that's it for me.. look forward not back. I even ripped the rearview mirrors off my car.
3 hours ago, BletchleyGeek said:Those were two fun turns, Bil. Any chance of a video covering the last 5 minutes of the battle? It would be a great advertisement for the game.
Interesting idea.. sounds like a lot of work.
 I will consider it.
-
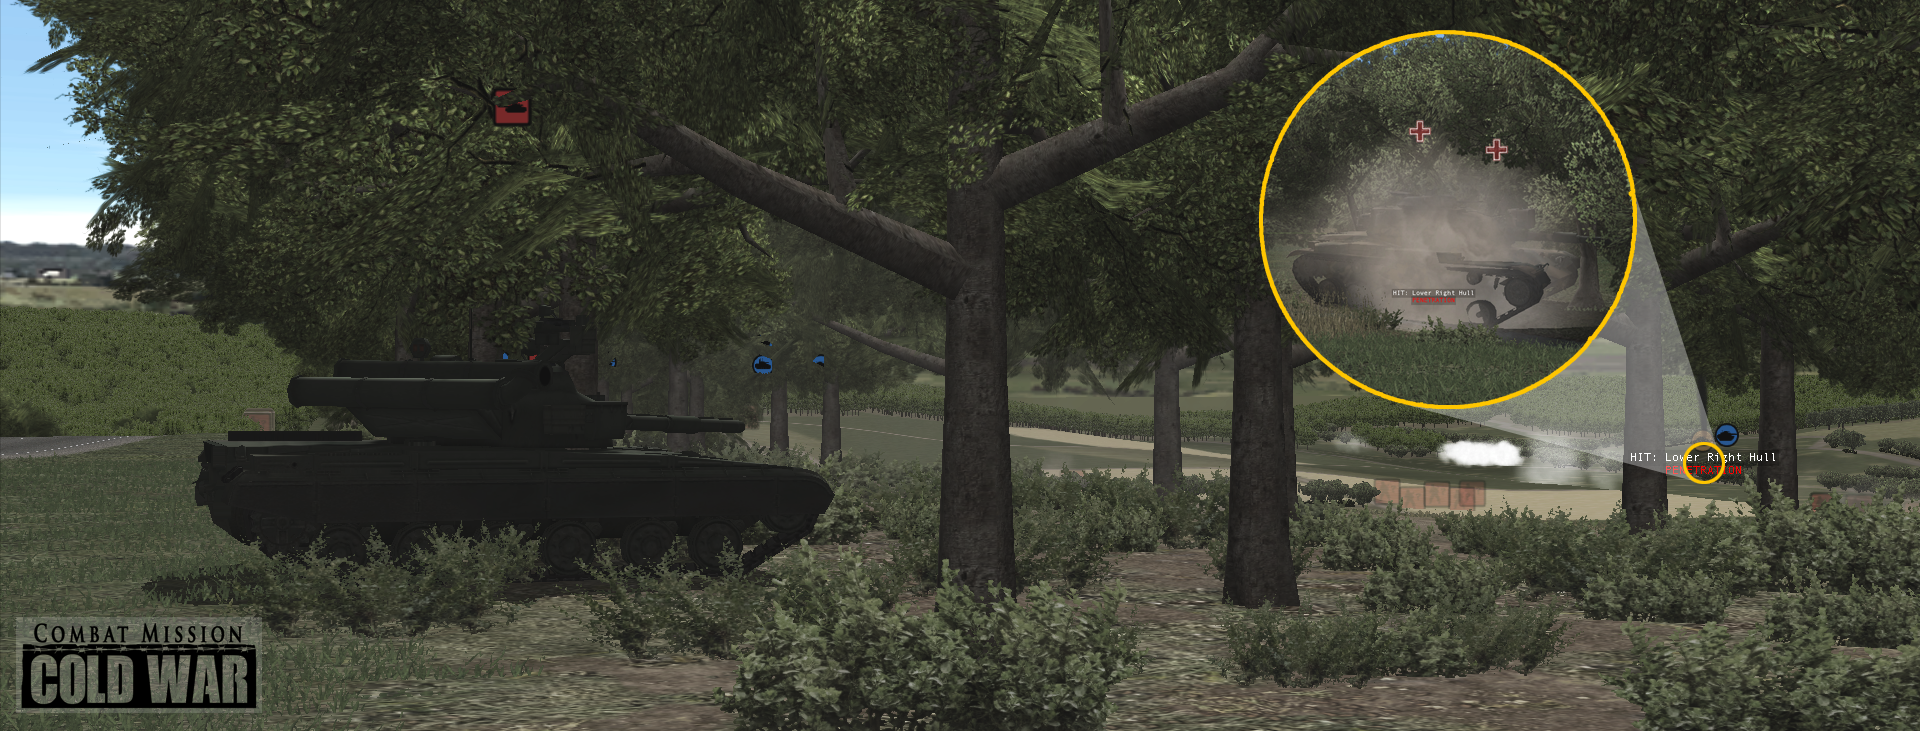
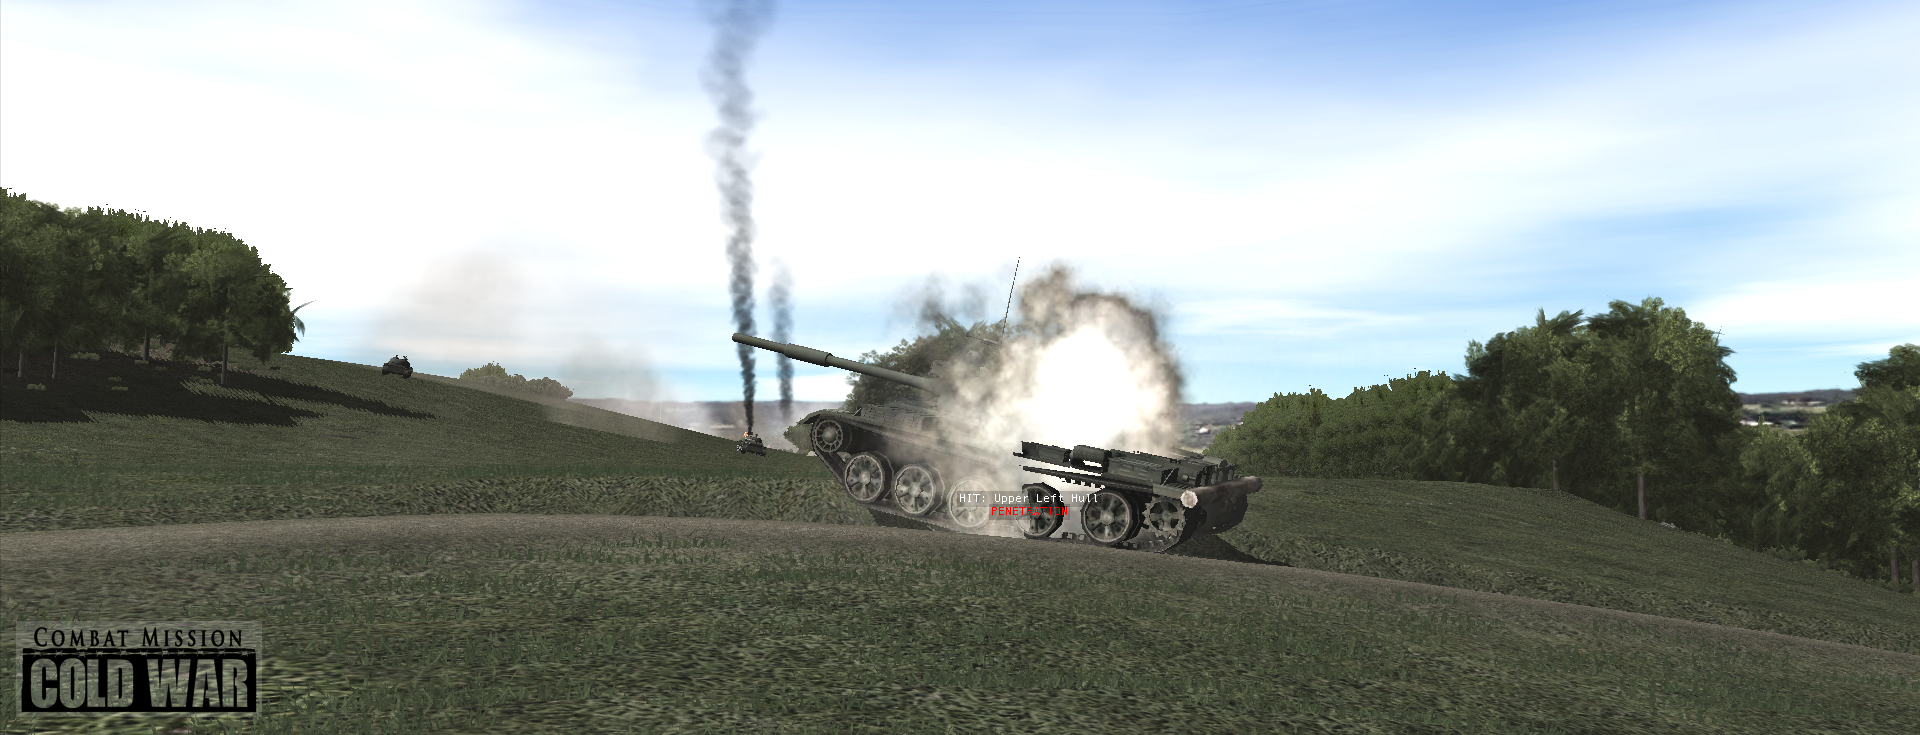
The Twenty-Third & Twenty-Fourth Minutes – Saga of Tank Section 1
“If the tanks succeed, then victory follows.”
Heinz Guderian
Tank Section 1... quite an exciting turn to watch actually... well, it was for me.
As tank 1/8 came around the corner it immediately spotted a T-62 presenting its flank. It appears that Warren did not see their approach!!


- Kill 1 - T-62
While the crew of 1/8 was exchanging high-fives a BMP-1 popped into shooting range and fired it's gun... which surprisingly hit 1/8 and penetrated!

Though shocked and surprised 1/8's crew got its siht together, neatly pivoted its turret and destroyed the BMP. Damage from the BMP's gun round was minor, though the crew would remain shocked for the remainder of the turn and would start to withdraw in the next.

- Kill 2 - BMP-1
Tank 1/9 drove up alongside 1/8 and while it was dealing with the BMP, 1/9 spotted and destroyed another T-62... these were almost simultaneous actions.

- Kill - 3 T-62
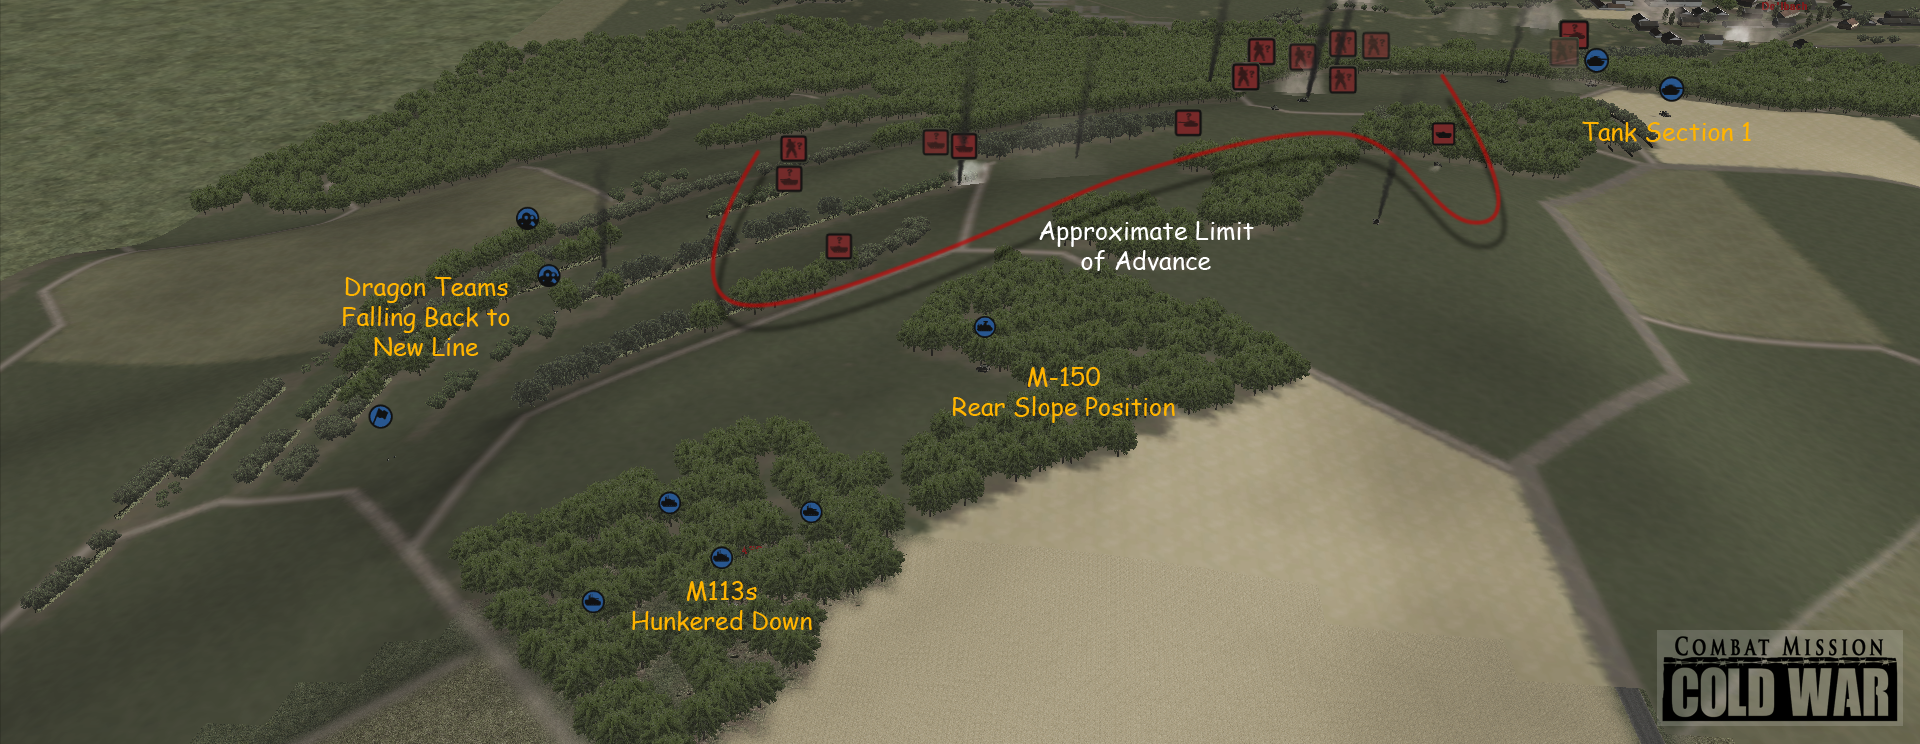
So overall a successful foray. Warren did have some infantry teams in this area by the way... luckily none were in position to attack my tanks and they were following his armor up the hill. After these two turns some of these teams started skedaddling back to the woods.
Tank Section 1 will now withdraw a bit and wait to see what Warren's response is.
One of the Dragon teams joined in the fun launching a Dragon at another BMP.
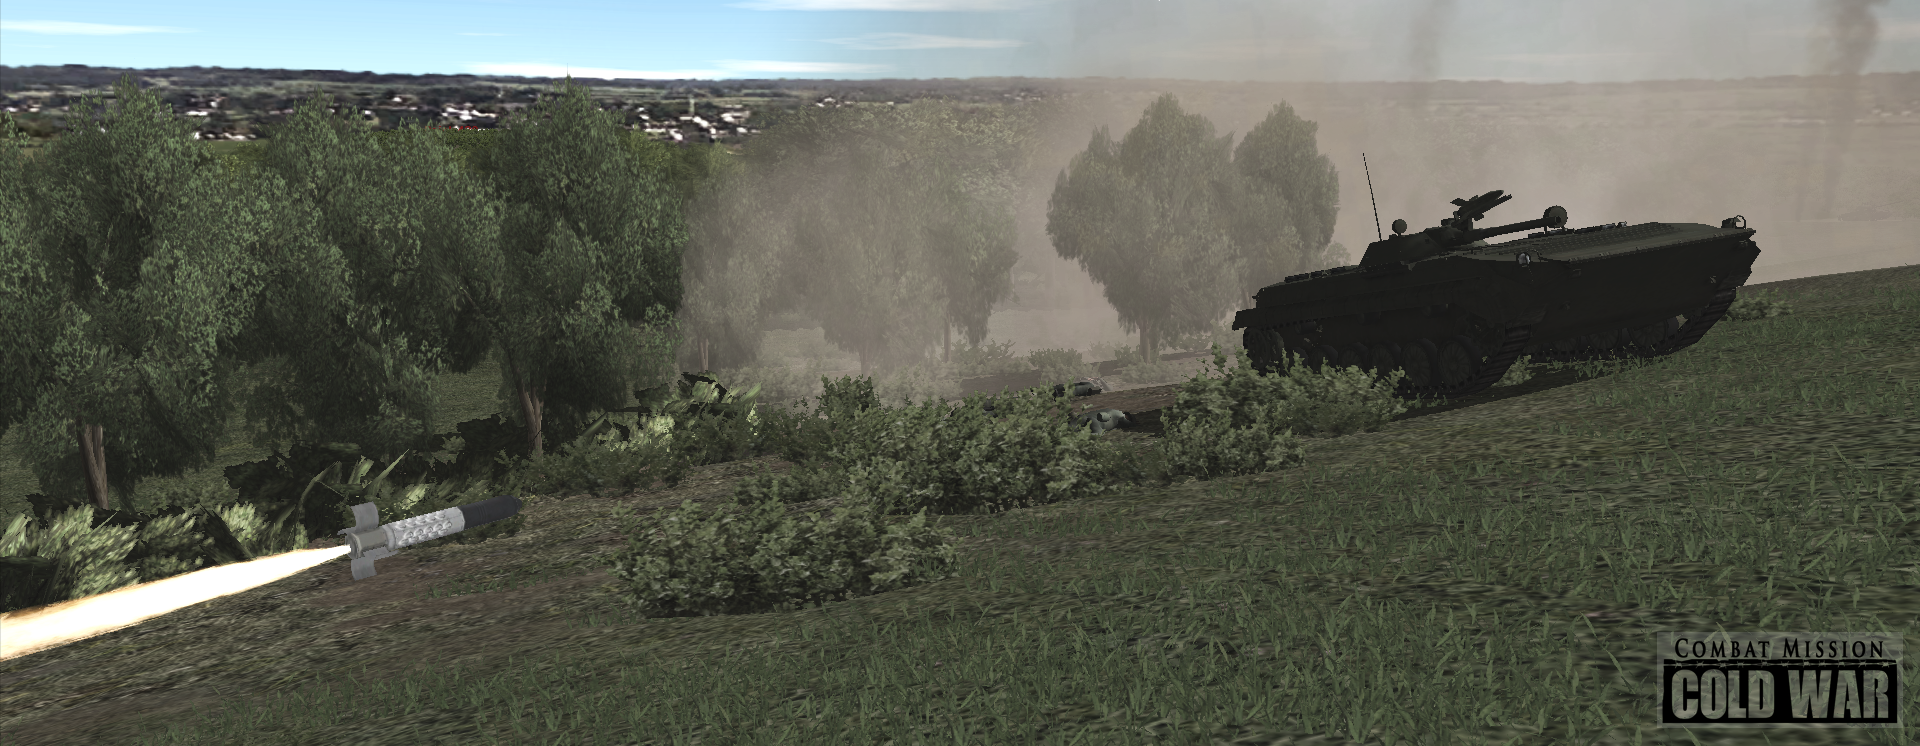
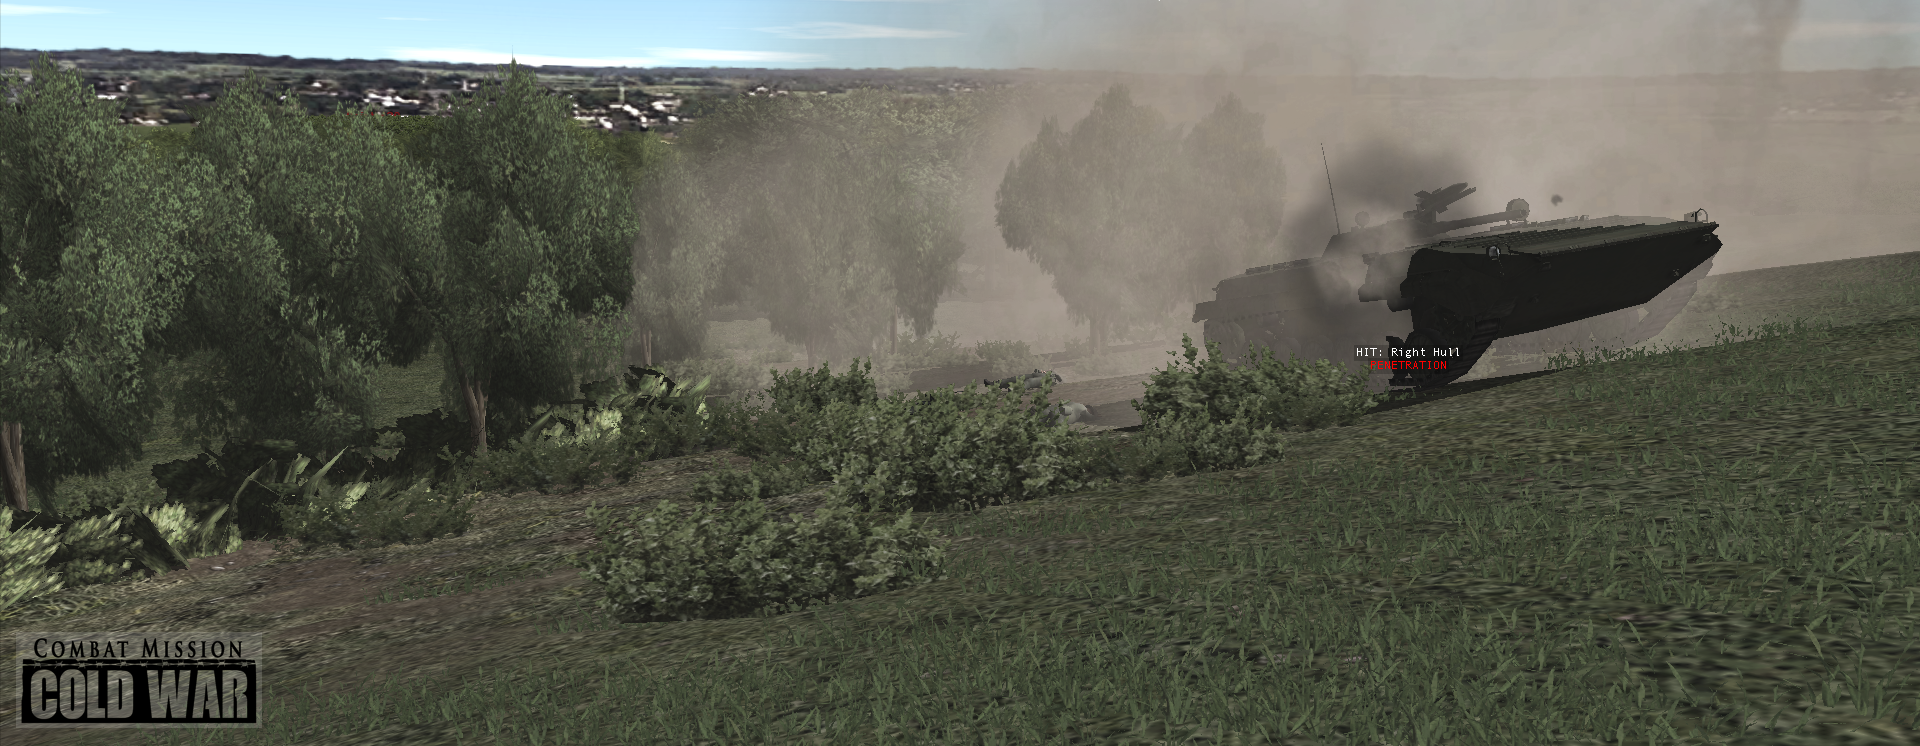
After these turns Warren started to pull back on this approach. The following image shows his high-water mark... if he had kept pushing he would have run into my three M-150's kill zones... Warren's foremost BMP was meters from entering the killing zone of the M-150 shown in this image when it started to retreat.
The three surviving Dragon teams are withdrawing to their next line, in case the Soviets decide to push their luck.
-
21 minutes ago, riptides said:
Bil, are you really just going for steel points now, or are you still looking at getting a bite at the donut?
No donut for me, I'm on a diet...

I am looking to kill or maim all of his armor. Then I will call in the infantry to clear the town and make it safe. That is NOT a Cavalry Troop's job.
Bil
-
14 minutes ago, Bradley said:
Bil, any chance your right flanking force will show sound contacts before they’re in prime position. Maybe too late for that though if not already recognized.
I’m sure he’ll hear or see them coming at some point. But that’s expected. It’s what he does with that information that matters.


Excellent Review from School of War
in Combat Mission Cold War
Posted
Highly recommended reading. So hop to it
http://schoolofwar.org/tactical-excellence-with-combat-mission-cold-war/