

BigDork
-
Posts
589 -
Joined
-
Last visited
Posts posted by BigDork
-
-
Feeling their vehicle hit, the crew of my StuG panics and flees. For the next five minutes I'll watch helplessly as they run further and further away from their abandoned vehicle. The loss of my only armor is quite the demoralizing blow.
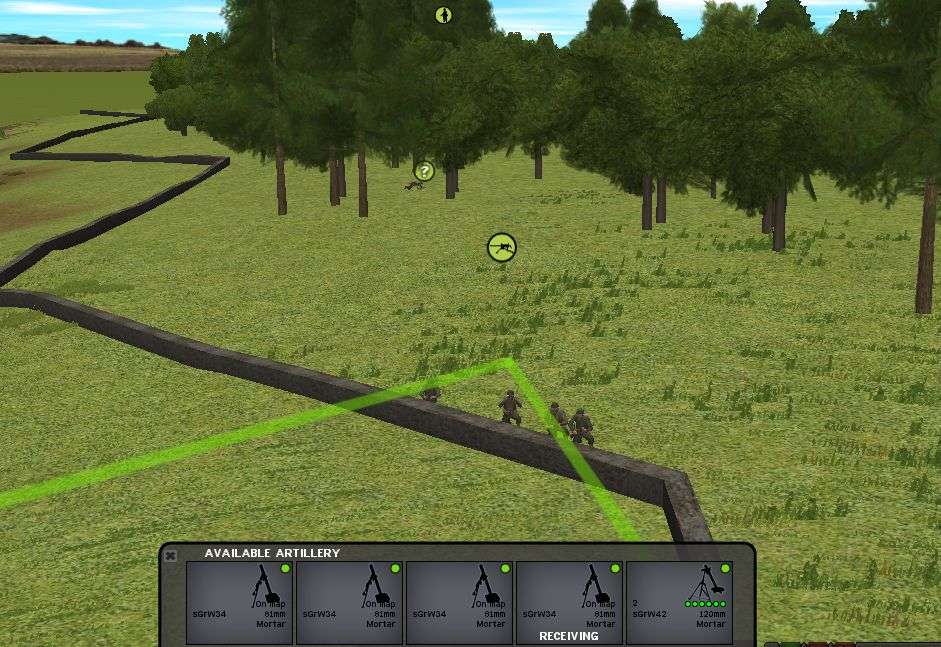
The HQ unit on my right flank proves to be very useful. They are able to accurately call in multiple mortar strikes on American positions. I'm sure I'm causing some casualties but I highly doubt it's enough to retake the advantage in this fight.
All good things come to an end and my artillery spotting HQ unit meets theirs. Somehow Penry spots my guys and starts lobbing in some mortars of his own on their position. The loss of the unit comes at a bad time. They had just called in some new mortar strikes on the Americans. Without them as spotters it's anyone's guess where those rounds will land.
The 120mm mortars start to fall a little further back from where I called them in but in the vicinity of some of Penry's men. I'm skeptical that I caused any casualties though. It's unfortunate I lost my spotters because I know for sure that there are GIs in those trees. If those shells had fallen a few meters shorter... Penry would have felt it for sure.
Another one of my mortar strikes was off target, this one falling short. The only good thing about this was that all these men had already fallen to American fire earlier during my failed rush of the bocage.
-
Ok... I fell off the AAR train for a bit. Time to catch everyone up to the disaster that is this battle.
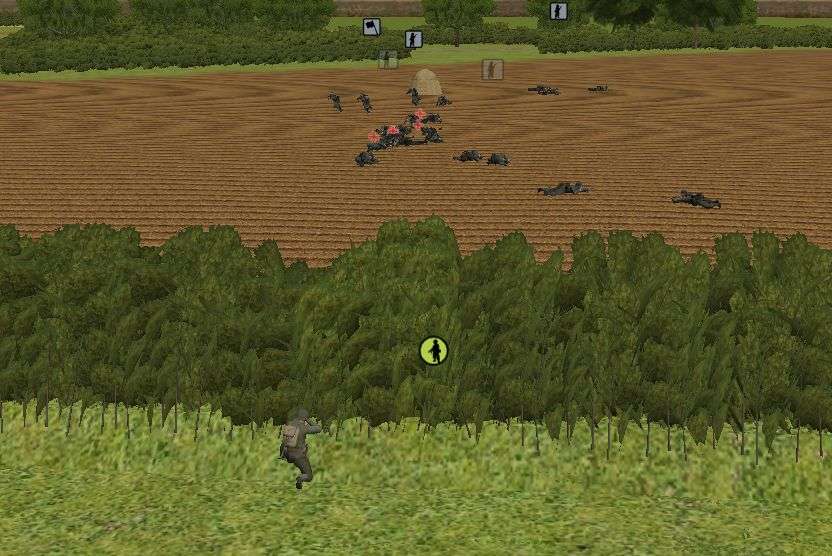
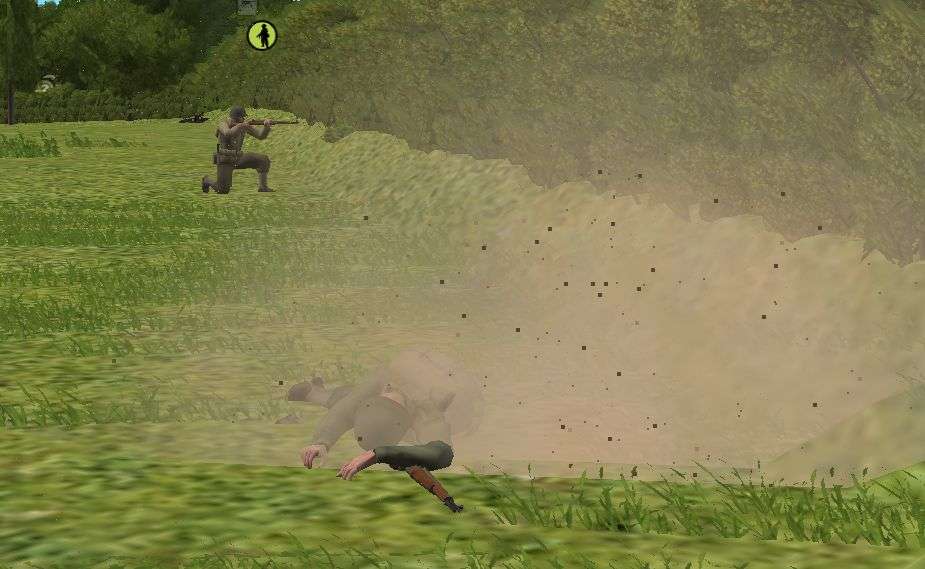
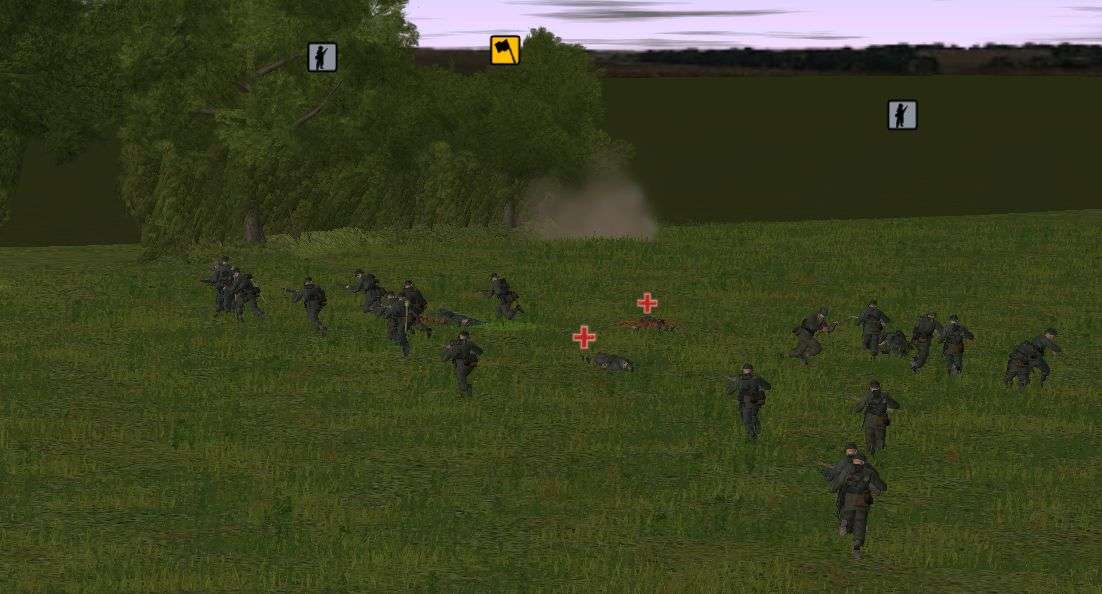
My hopes of beating the Americans to the hedgerow are dashed. Unknown to my men, they are running to their death.
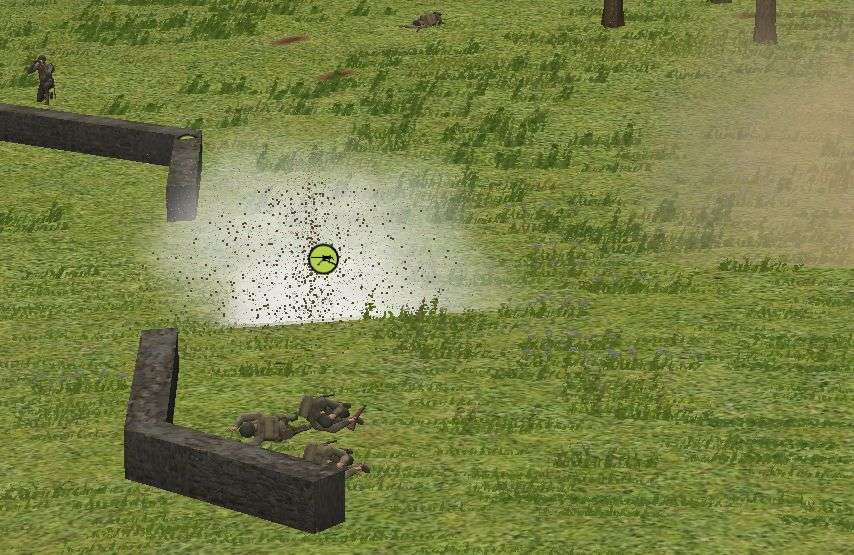
As the seconds go by more and more brave German boys fall to the ground. Their blood spilling seeping into the French fields. In less than two minutes my attack is broken.
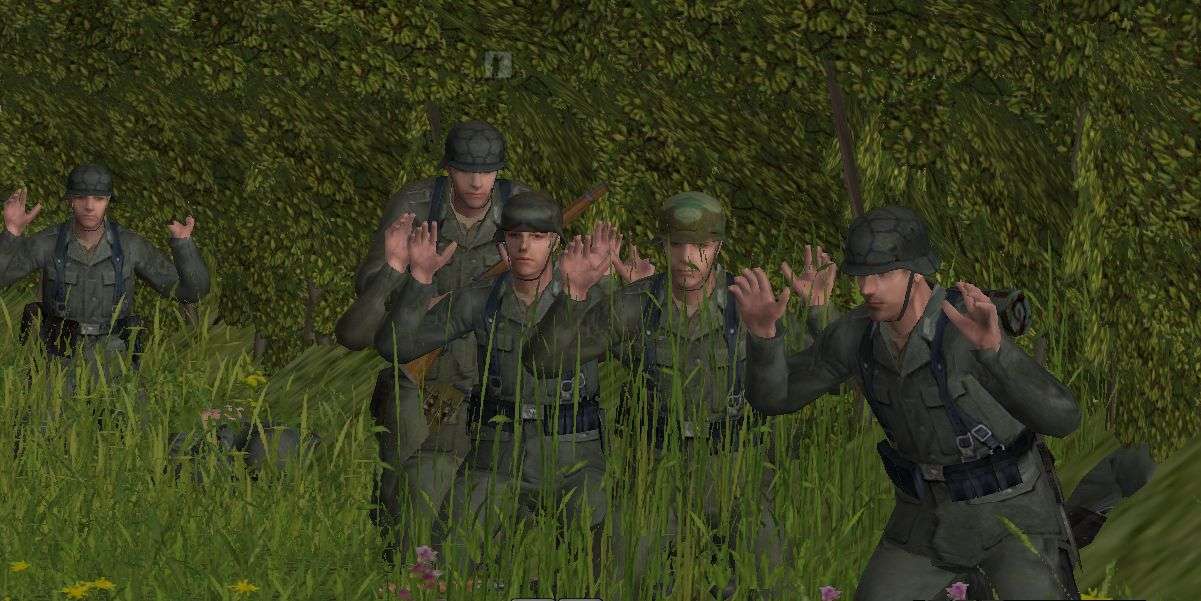
Some of those lucky enough to not be cut down by American lead decide that maybe it's not worth dying for the Fuhrer.
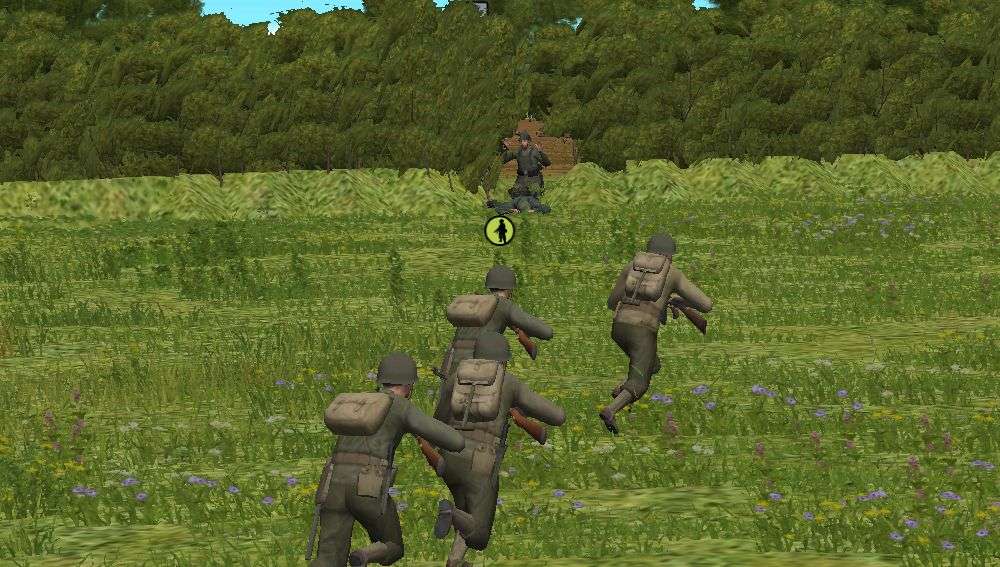
Others decide to fight on. After thwarting my attack Penry tried to push forward. A few of his men were surprised to find that there were a few stubborn Germans holding on. Not enough to change the tide of things but I was able to stop them from totally pushing me off the map.
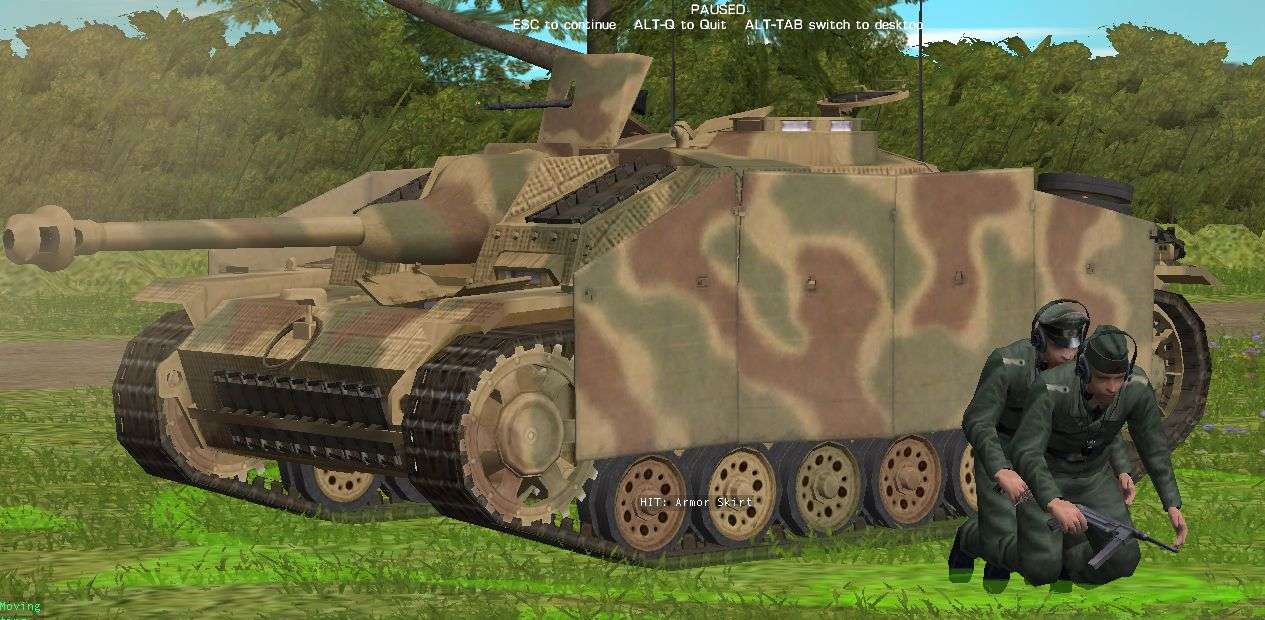
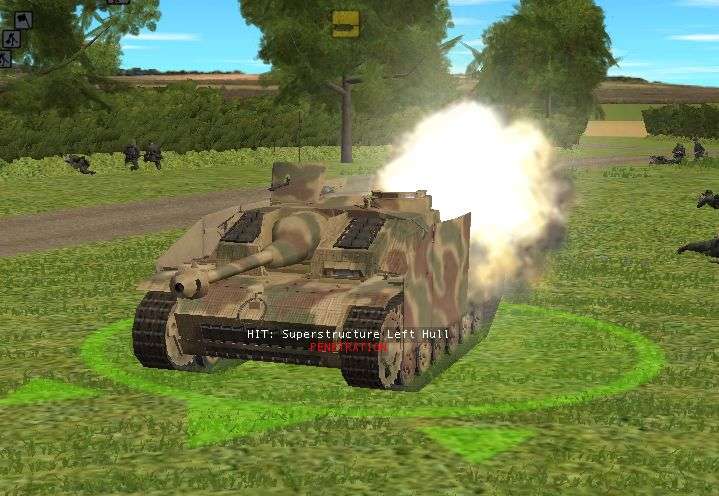
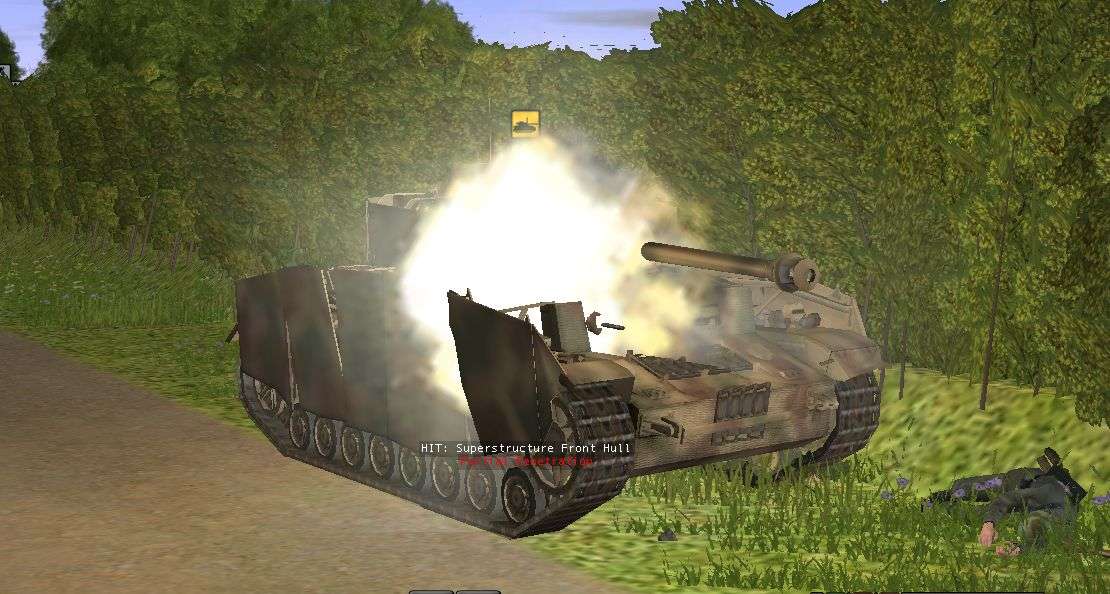
My attack was stopped even with the close support of my StuG. After losing the initiative I pulled my AFV out of the field to keep it safe. Unfortunately my StuG still wasn't safe. Despite the long range Penry had his bazookas open up. After many misses one finally hit the mark.
-
Thanks for sharing! I'll take a look at it early next week when I'm at work. Weekends are for playing CM. Weekdays are for surfing the net.

-
Very cool, keep em coming! I'll play Marley's redemption song in the background while I read.
I'll gladly keep them coming. For me, making an AAR/DAR while I'm PBEMing makes the game that much more enjoyable. Having a soundtrack to go along can't help either.
BD,Thanks for this AAR. I recently played a QB vs the AI on this map, commanding a company of Amis and a scout team supported by one Sherman. I had to post because your attack plan is literally EXACTLY what I did. I had one scouting unit on the right flank, with the rest following your exact attack groups and routes, planning to cross river bed, through the woods, take the large building bordering the two-star zone and use it as a launch point to take the town.
So, I'm very interested to see how this goes with two humans duking it out!
Good luck!
I played about half a battle on this map once and already it's going differently. Penry crossing the stream to put a couple squads on the other side of the hedges is already making this a far more difficult fight. I think it's going to take a full scale mortar barrage to clear the way for me to cross the stream and I don't even want to think about taking that village yet. Glad you're following along!
-
TURN 4
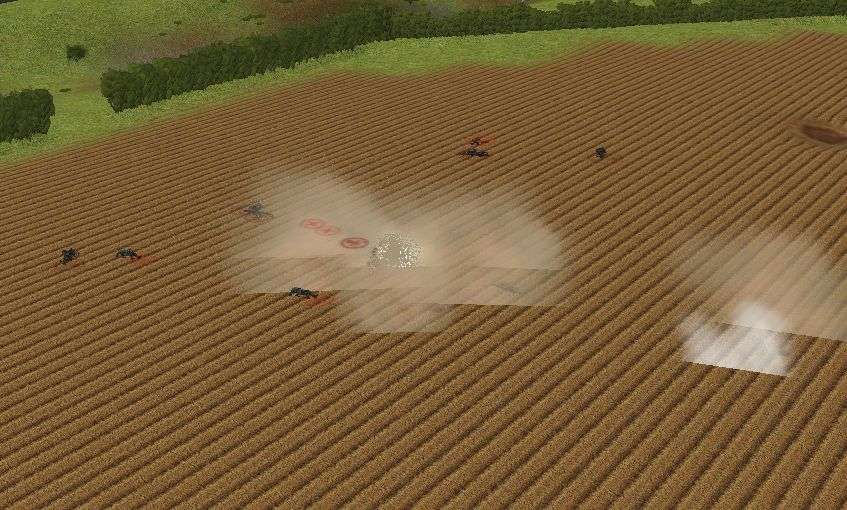
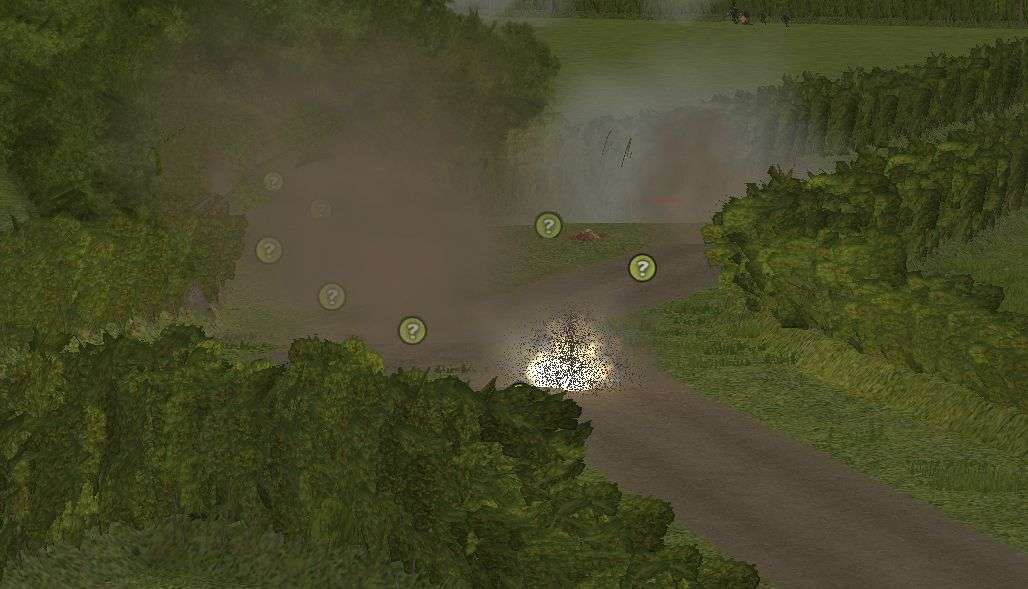
I ordered my StuG to pull forward in the plowed field to a point where it had LOS on the American MG I had spotted. As my guys rush forward to take up positions on the hedgerow that MG could be a problem and I don't have the 4 minutes it will take for the mortars to arrive. I figure a little direct HE will do the trick just fine. Unfortunately the first shot goes a bit long. Hopefully the next one won't miss.
Rushing across these open fields towards defenders is starting to take its toll though casualties could have been much heavier. I think I caught Penry my surprise a little bit. While he did have a few watchers on these fields I don't think he expected me to push hard here and doesn't have enough to stop me from setting up on the far sides of these fields.
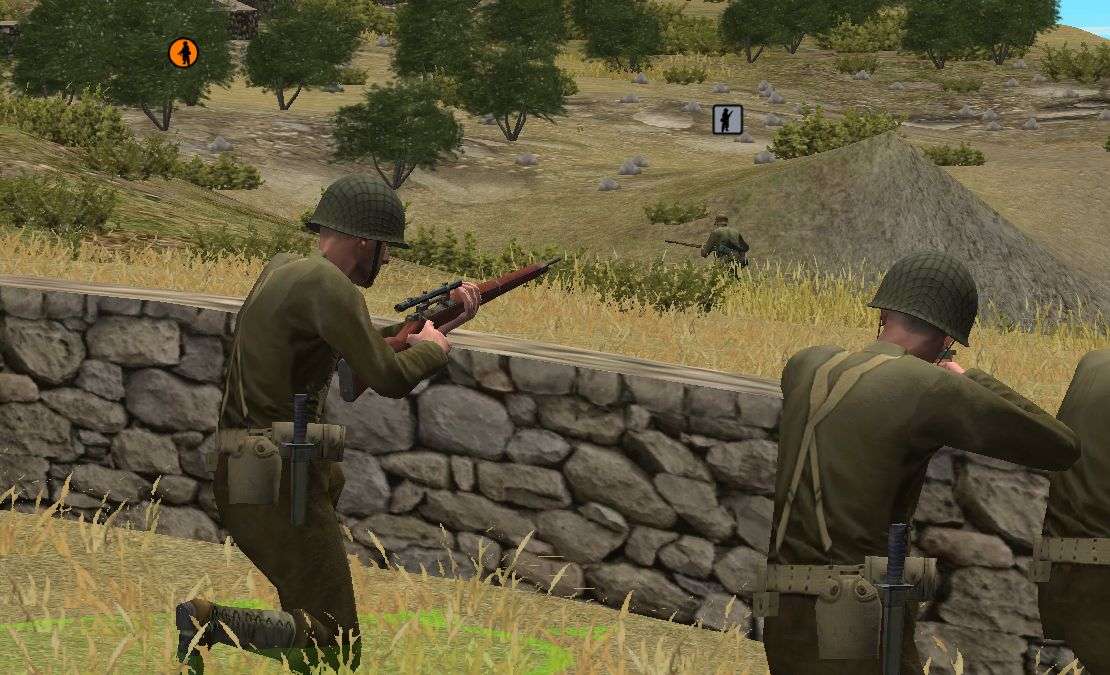
On my far left flank, 1st platoon is able to slide onto the other side of some bocage to better engage the Americans. Opposing my platoon is a single squad broken up into 3 teams. My plan is to get my platoon set up with 2 MG42s for support, suppress the American squad and then push forward and destroy them. With the amount of firepower I'm going to be throwing at the GIs I don't see them lasting long.
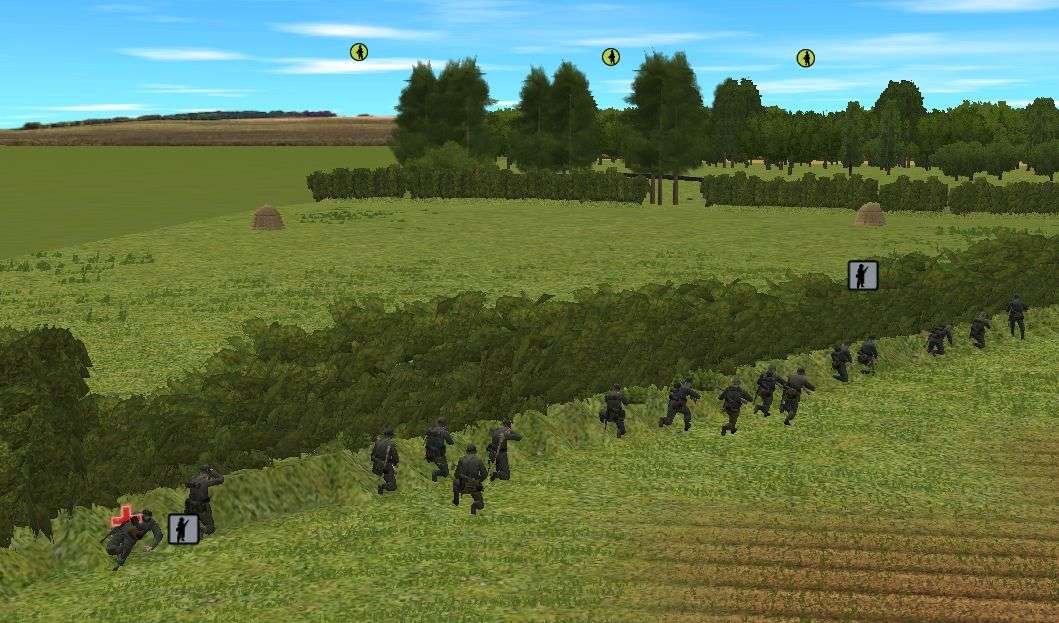
So far my scout HQ team hasn't noticed any new units repositioning across the stream to meet my push. I'm going to keep an eye on that because if Penry can get a full platoon or so on the other side of that open field my guys are going to pay a bloody price just to meet our first objective.
-
TURN 1
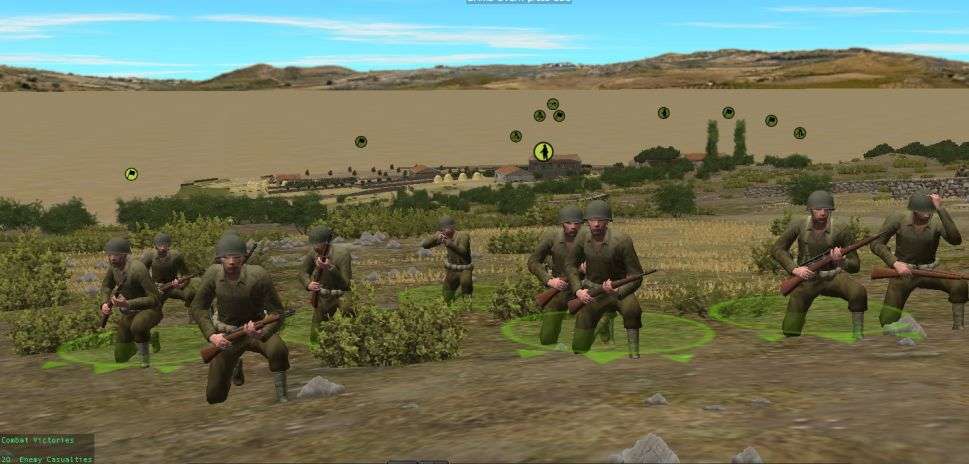
It's go time and like a swarm of ants my men rush forward.
TURN 2
My pioneer team opens up the way for my men to advance through the bocages.
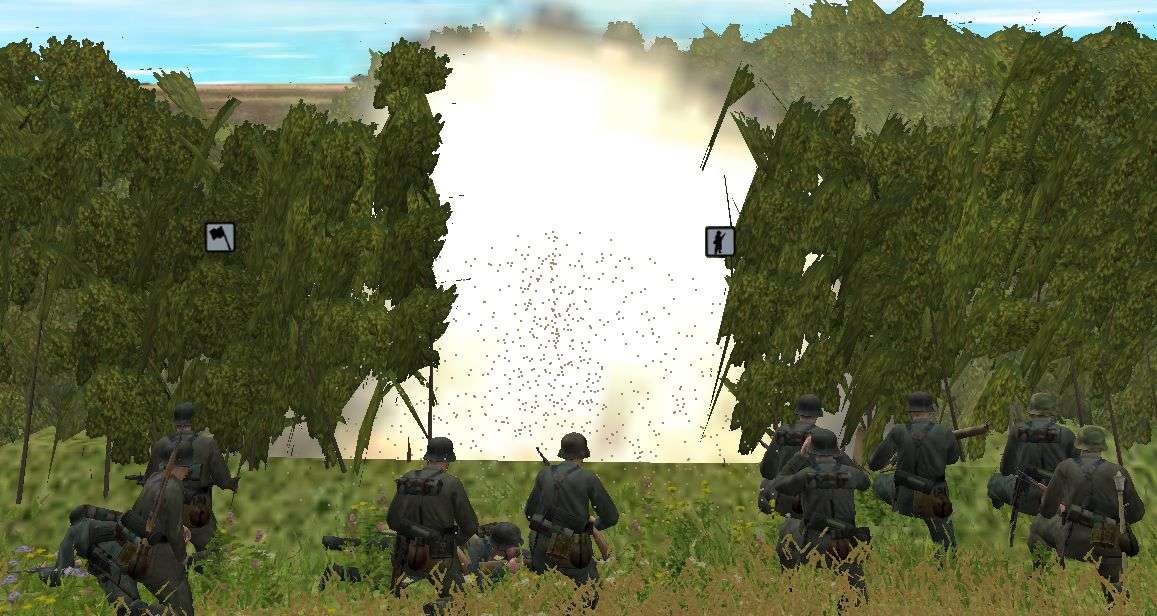
A part of my problem last game was I could only move through the hedgerow where the gaps were. It restricted me and made things slightly more difficult. This battle I've come prepared.
TURN 3
When drawing up my battle plan one worry I had was that Penry would move a force forward across the stream to the bocages and force me to push forward through open ground. In fact I somewhat expected it. I figured there were two ways I could approach that, either I could move forward cautiously and give him time to set up a forward defense or I could try to rush forward and catch him before he could really set up to repel my offensive. I opted to go for the second option.
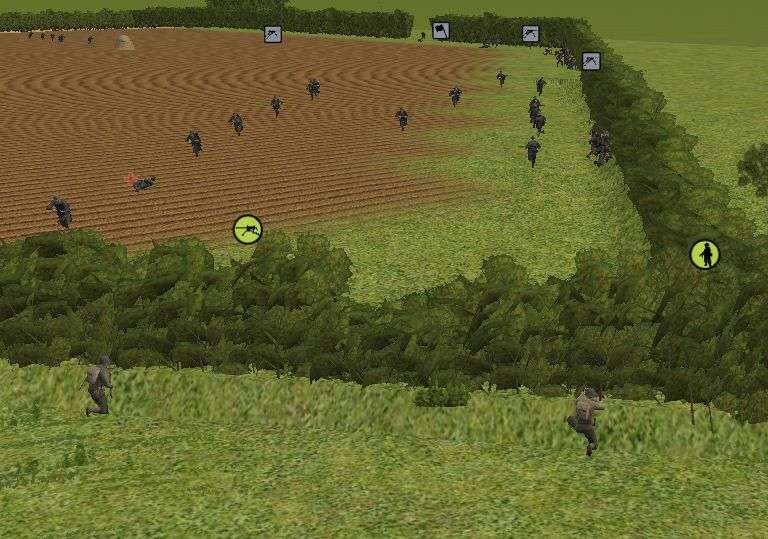
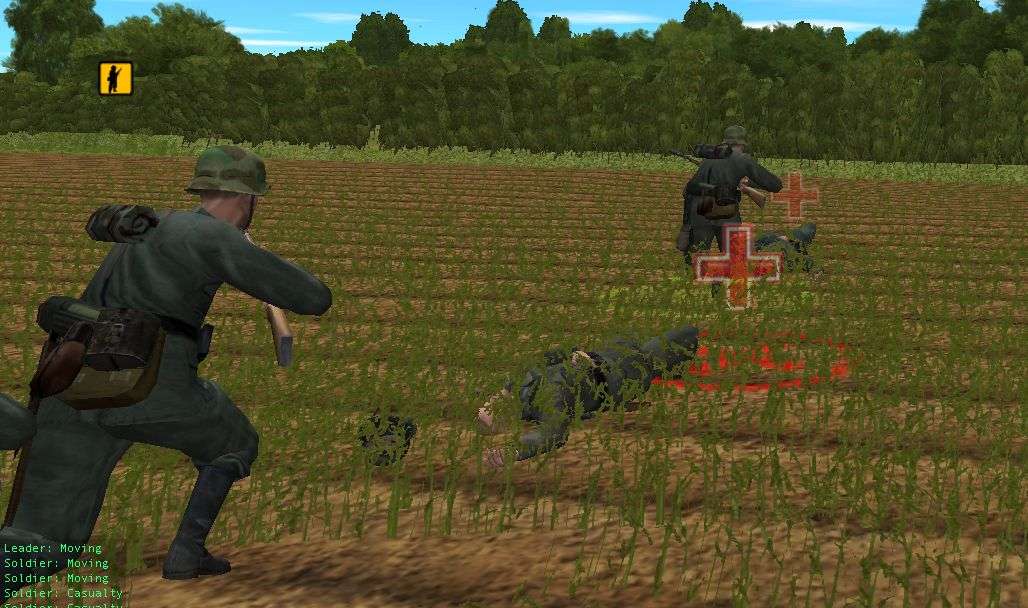
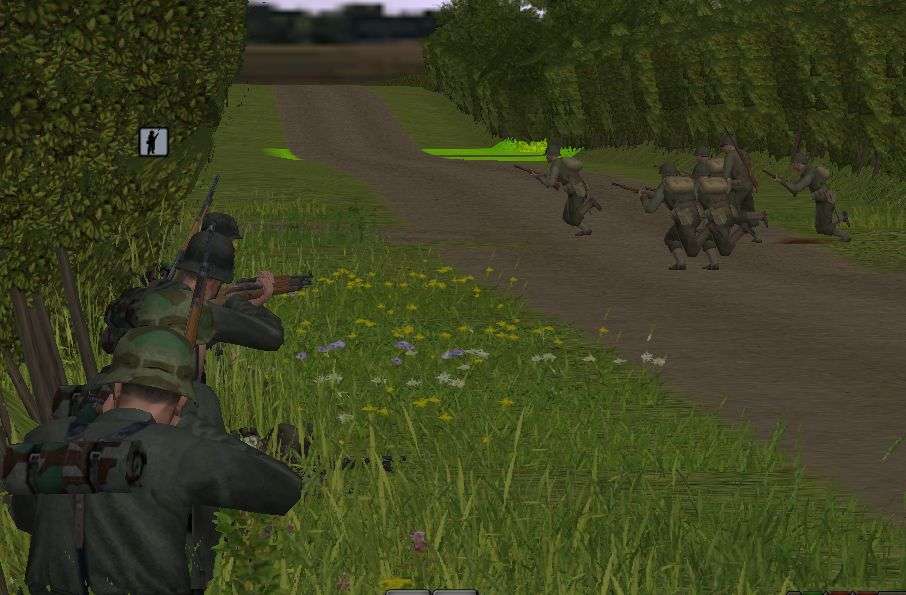
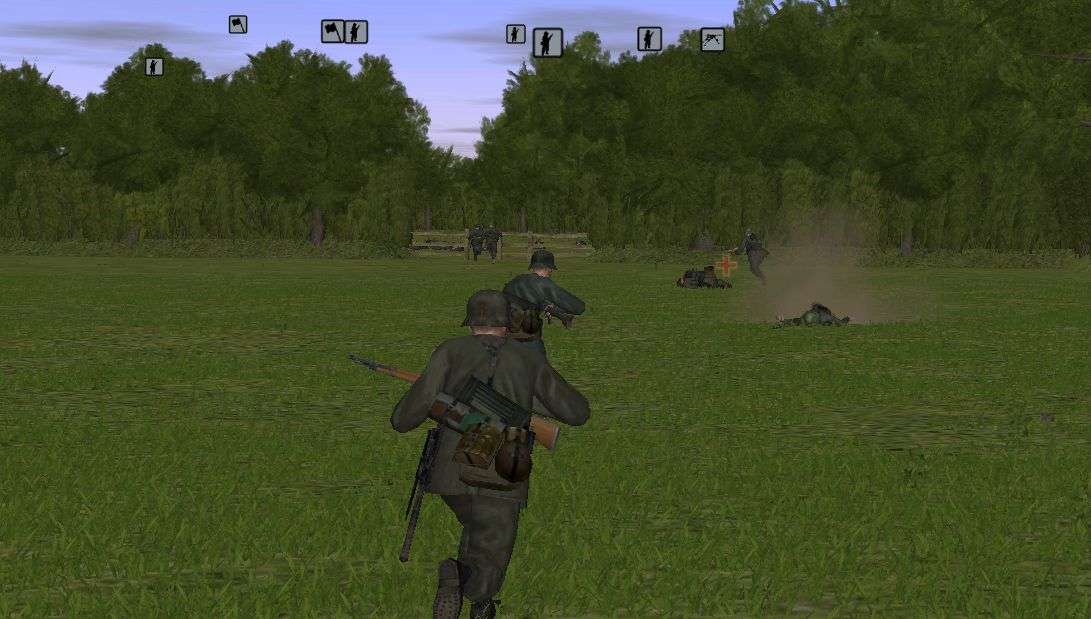
With the hole blown in the hedgerow by my pioneers 1st platoon rushed forward into the field. I had hoped that the StuG would be able to follow through the gap as well to provide support but unfortunately the hole wasn't big enough and it began to go around on a longer route. Unsupported but undeterred my men pushed forward even as light gunfire started coming their way.
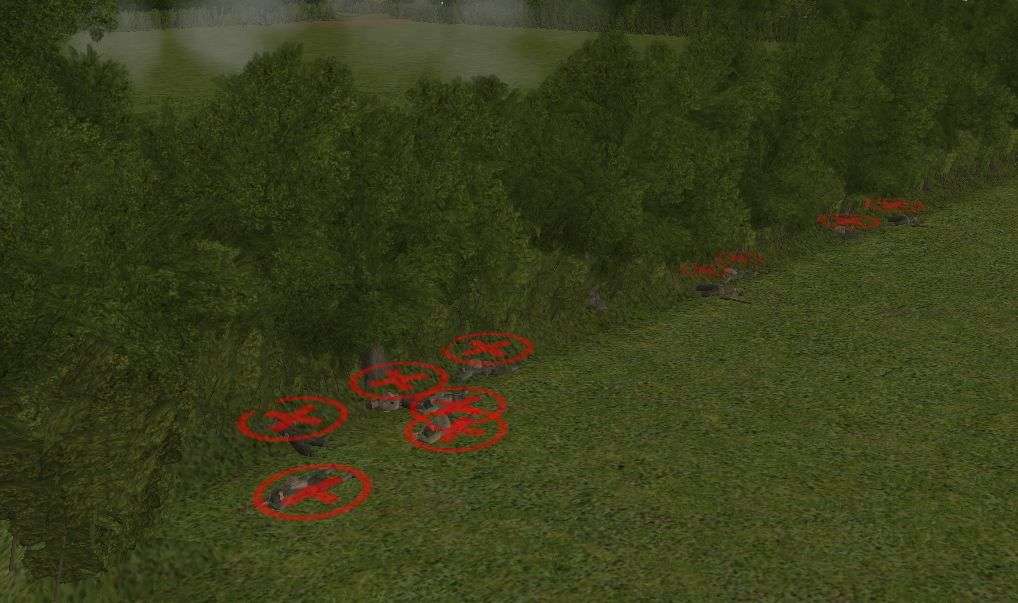
As one of my men drops dead we ID an infantry team on the other side of the bocage covering our approach. This 4 or 5 man team was able to cause a couple casualties by the end of the turn but hasn't disrupted my push too much. Unless Penry rushes some extra support to cover my advance through this field his men will quickly be overwhelmed.

The scout HQ team on my right flank is proving useful. As they moved forward to a position along the stream they ID an American MG team set up behind the wall on my left flank and an infantry squad moving around in the trees along where I plan on advancing. 4 minutes from now the 81mm mortars will start falling.
-
After the crushing defeat the Germans suffered last game I needed a chance to redeem myself and also push the Americans out of France. This time my counterattack will push my men through a few fields and ultimately drive the Yanks from a small village.
In this battle I have at my disposal
1 company of grenadiers with each platoon supported by 1 panzerschreck
4 MG42s
4 81mm mortars, 2 120mm mortars, and a FO to call in the boom
3 squads of pioneers. Their charges will help me to blow holes through the bocage and allow me greater freedom of movement
1 StuG to change it up from always playing with a PanzerIV
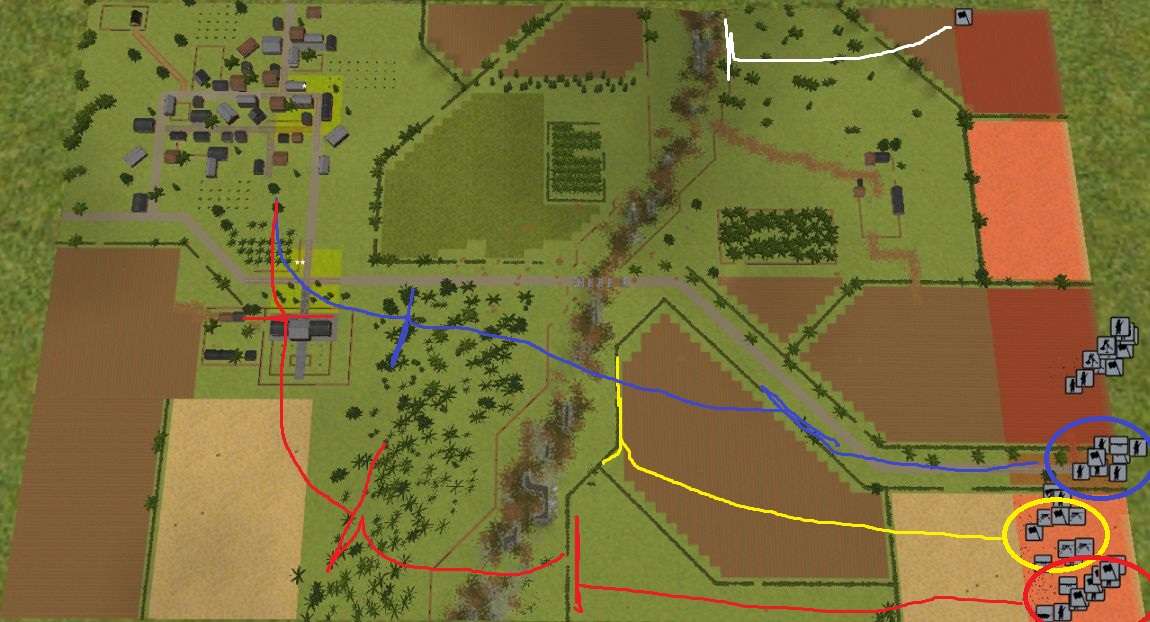
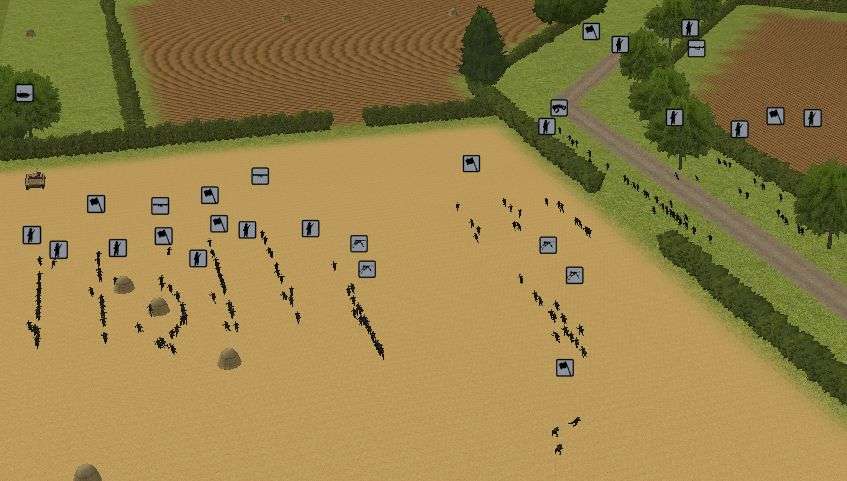
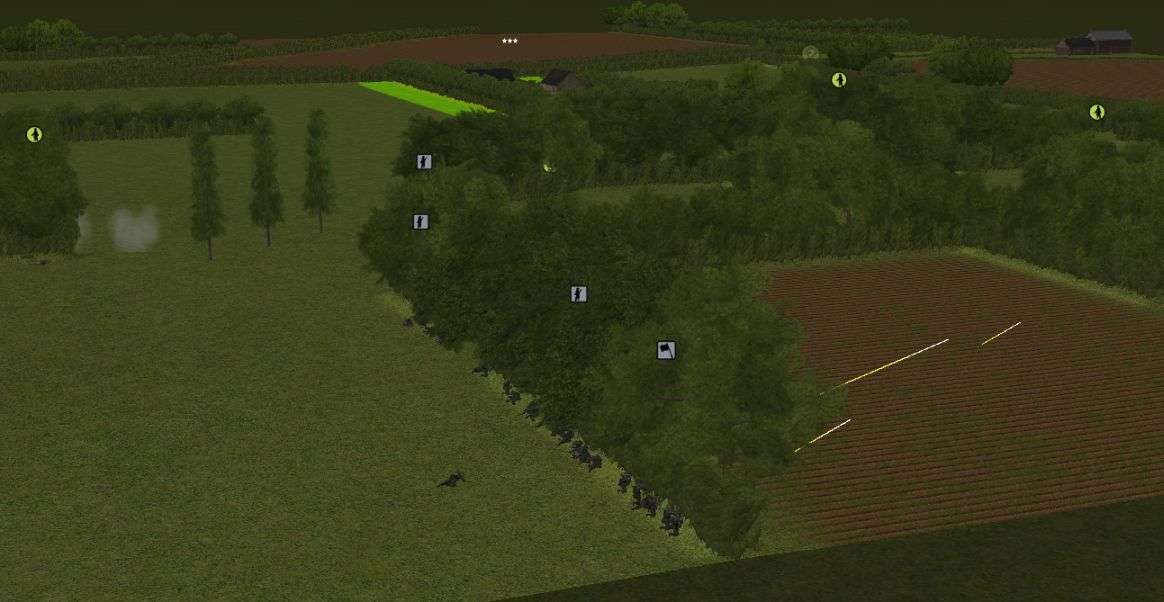
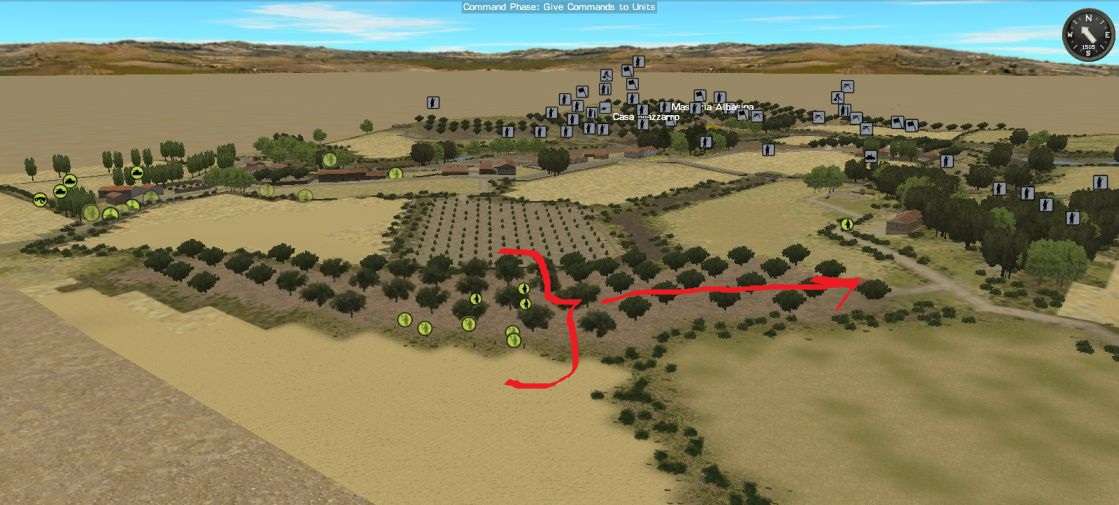
Above is the map with my initial plan. The men in red include 2 platoons of grenadiers, the StuG, and a squad of pioneers to open up the bocage. The yellow group are my MG42s which will push forward and set up a base of fire so my infantry can cross the stream. The blue group is 1 squad of grenadiers and the remainder of my pioneers. They will hold back for a bit until red group makes contact and gives me a feel for how things are. I also have an extra HQ unit up on my right flank which will act as scout and potential spotter for mortars if I find a concentration of Americans. Hopefully it'll help to keep Penry on his toes.
Here's a closer look at the battlefield and what my men are initial crossing. I hope to make it to the far bocage and the stream before contact. If Penry is aggressive and pushes forward he could catch my men in the open and make things a real slog from the start. I put the chances of that at 50/50. He's shown in our last game a willingness to be aggressive and go on the offensive even on defense. It could definitely pose a problem. I hope that sending my StuG forward with the initial push will help to drive off any initial defenses.
-
BigDork,
I did not see that coming! I figured that Tiresias's ferocious defense, which pretty much ruined your men as a fighting force, would've yielded a much smaller victory margin. Would definitely call your last turn spectacular! Your casualties were horrible, his annihilating. Am amazed his force didn't simply break long before. Well done and quite the thrilling read!
Regards,
John Kettler
I feel the same way! I was really doubting I would be able to push over that hill and destroy the rest of the defenders. Almost all of my remaining infantry were broken and fragile and as soon as they were shot at they would panic. If I didn't have the Priest in close support I think it would have been impossible to do more than stalemate Tiresias.
Tiresias made an interesting move by going with veteran infantry with high motivation. He got fewer men but boy did they fight with determination. I'm not sure if having more men but not as skilled and resilient would have gotten better results or not. Either way it was a hard fought battle and a lot of fun. We're gonna start up a new battle after the New Year so keep an eye out.

-
I demand screenshots!!! Text only AARs just don't put you in the battle as well.
-
The noose continues to close in on the remaining Germans. Though my infantry are tired and easily broken from the days fighting they still push the Germans away from the windmill. I'm not sure infantry alone would be enough to clear the battlefield. Thankfully I have more than infantry... I still have my Priest.
Seeing the writing on the walls and wanting to spare his last few men Tiresias has called for a cease fire. I graciously accepted to prevent any my pixel men from needless death. What a hard fought battle!!! There were a few times when I really wasn't sure I was going to make it. Tiresias put up on heck of a defense.
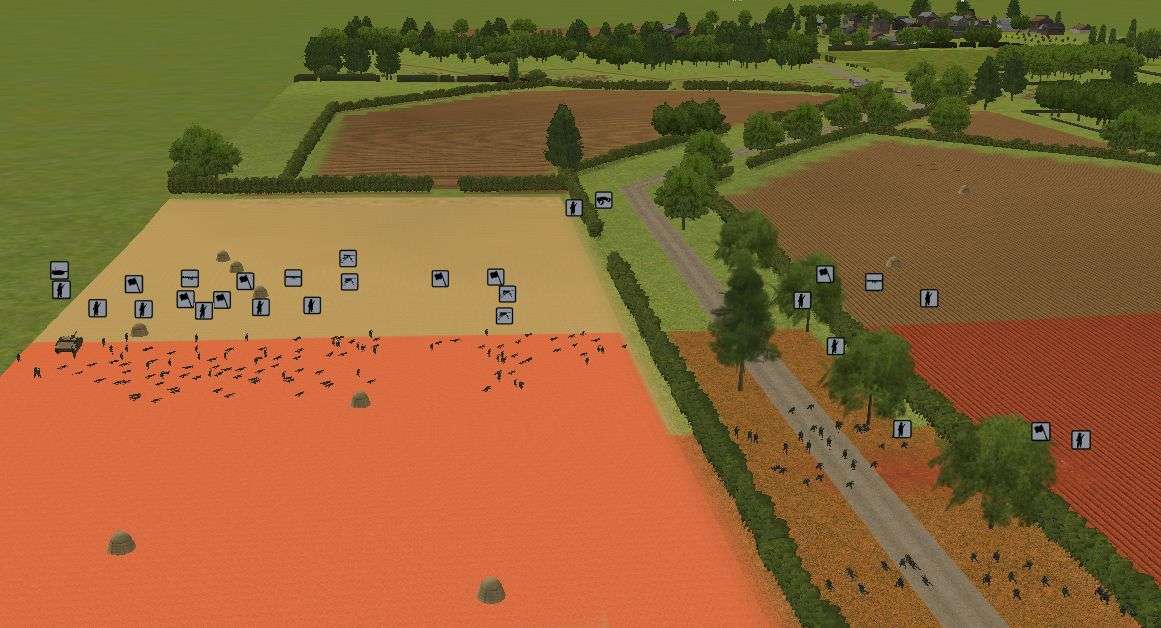
The number of men I have left is a bit deceiving. Many of them are support troops and have little to no combat power. The silver star goes to 3rd squad of 3rd platoon. They were in the push to clear the village and then moved up the hill and helped to clear out the remaining Germans. At the end of the battle they were one of my only squads who was still an effective fighting force having only lost a couple men and never breaking. Through the battle the wracked up an impressive 20 kills.
I'll post a lot of thoughts and opinions after I've digested this a bit. I'm gonna read back through my AAR and check out Tiresias' and wrap this all up.
-
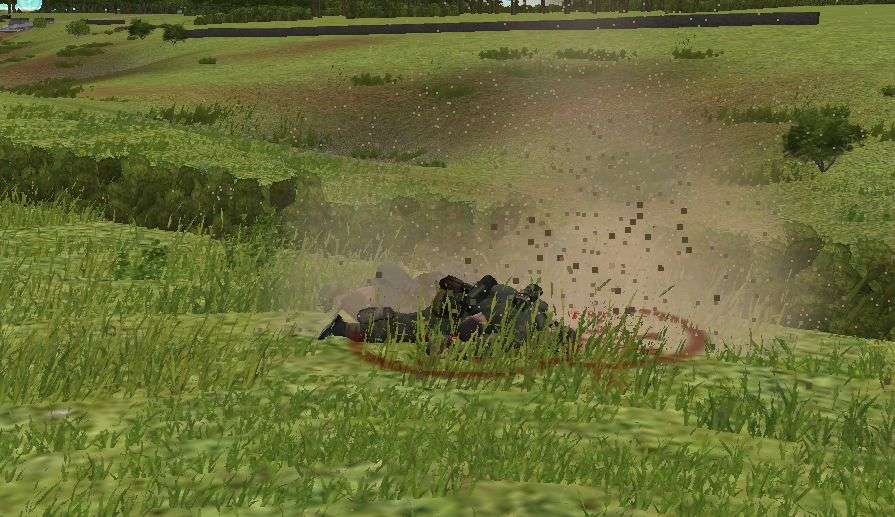
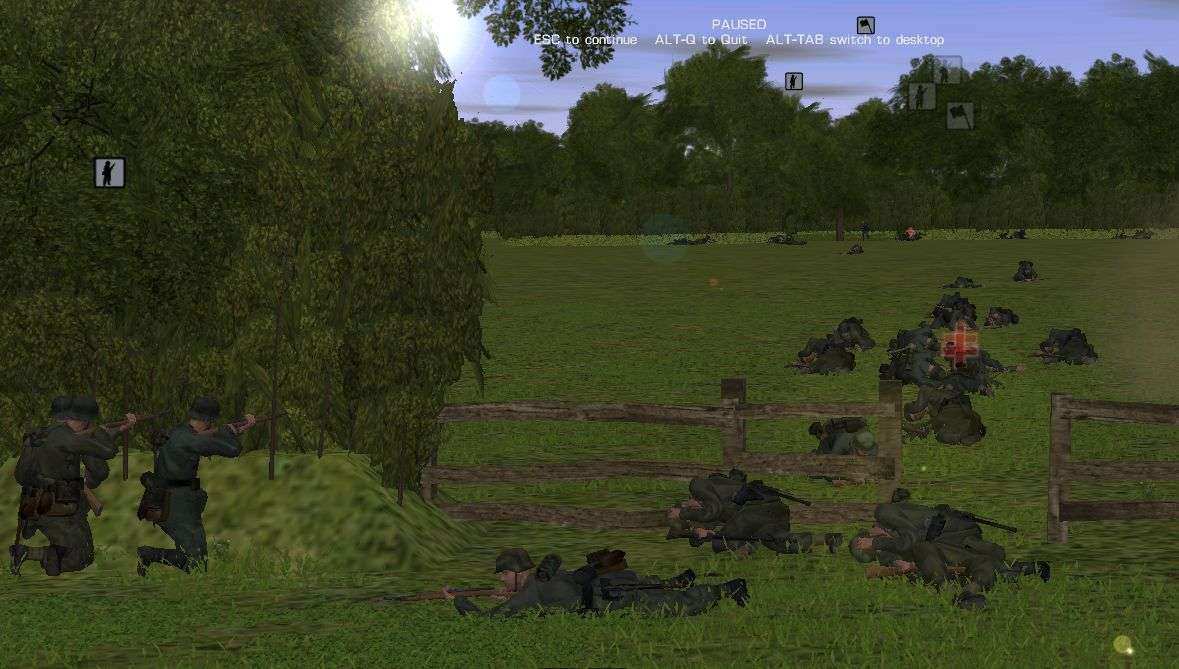
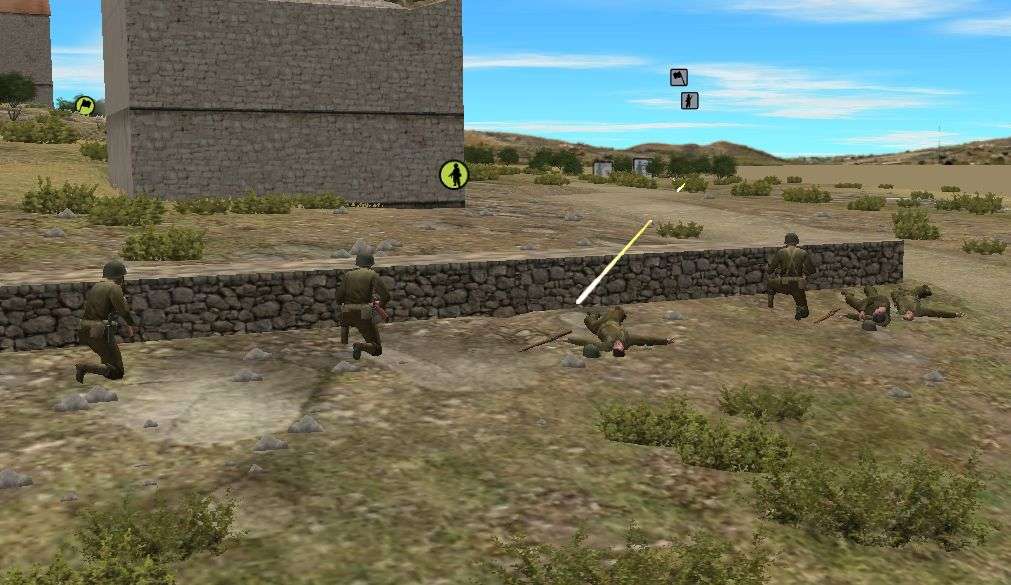
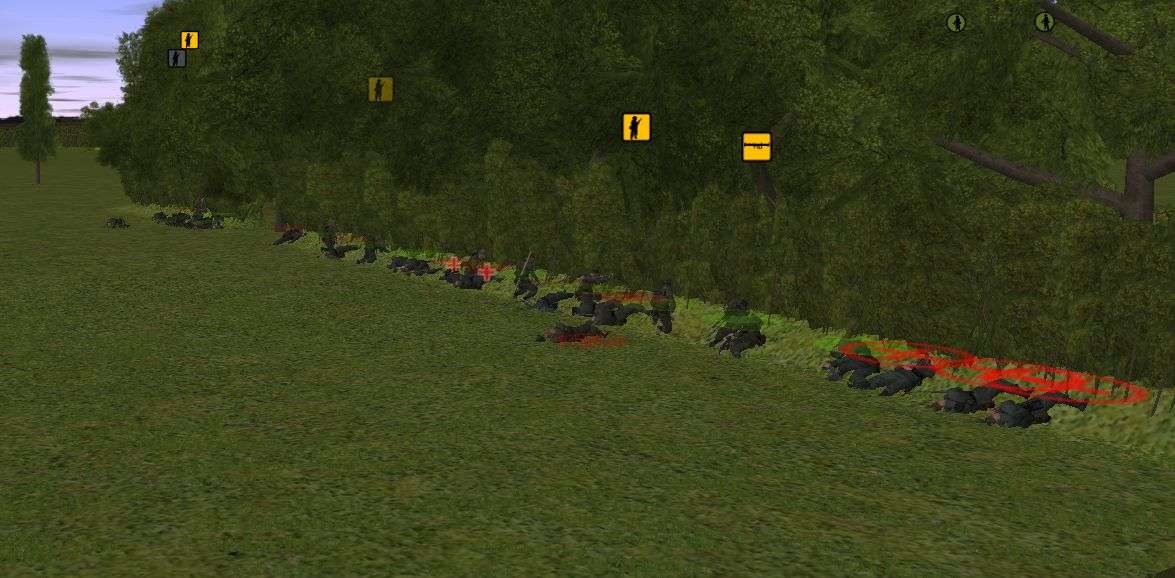
On my right flank, I try to push forward at the same time I rushed my couple squads forward in the center. Unfortunately I don't have much to provide suppression to the American MGs and quickly my offensive is stopped as my men are cut down and broken.
Here you can see many Germans hugging the ground... only some of those are doing it voluntarily.
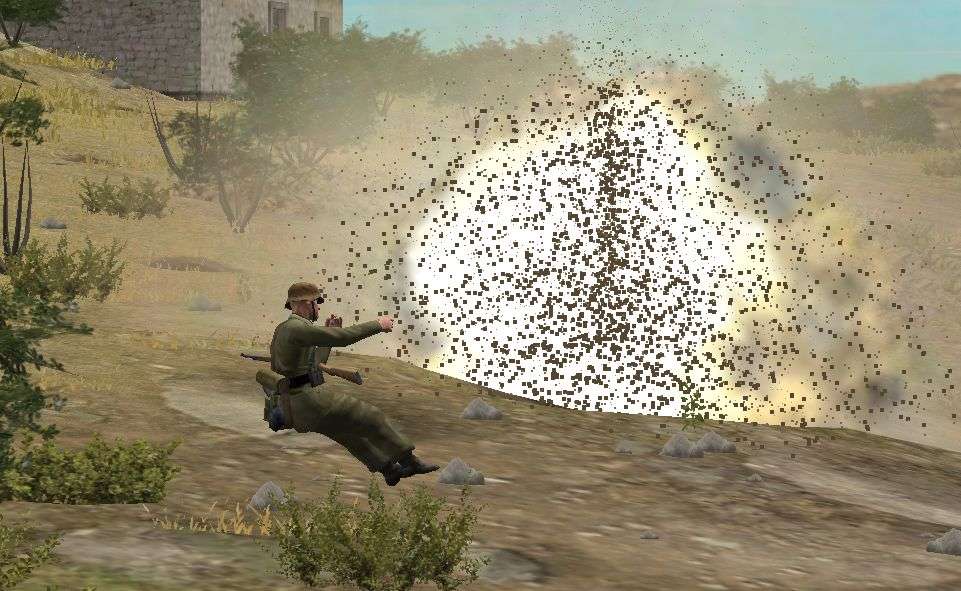
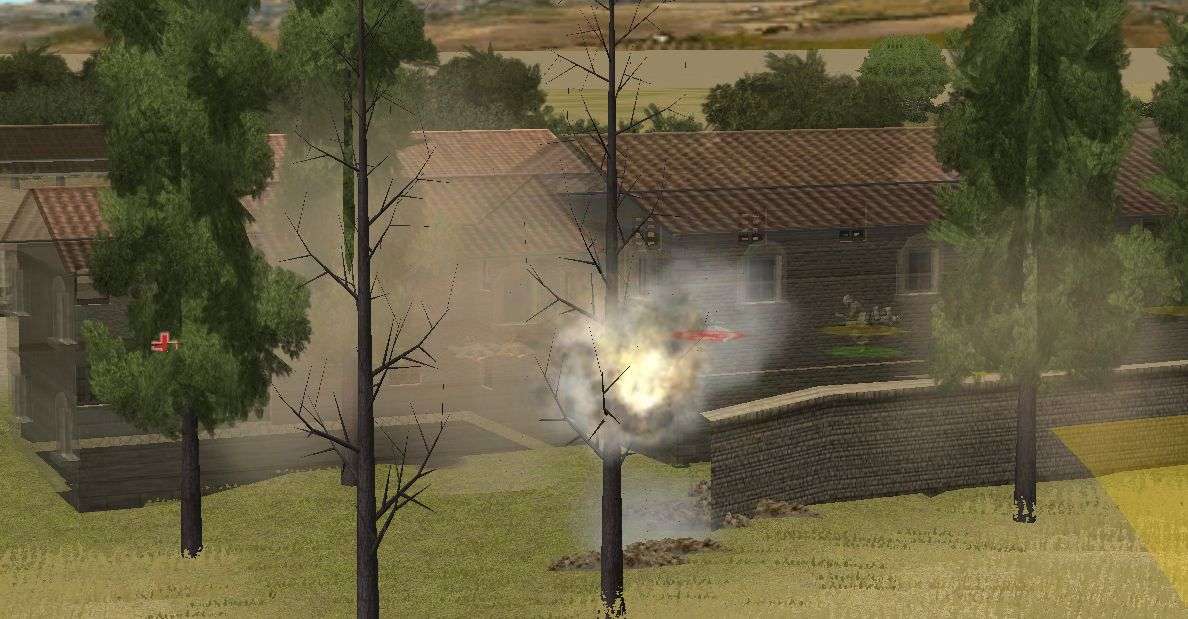
Not only am I failing to push forward with my infantry but my only armor is hit with another bazooka rocket and immobilized. While it is still in position to cover the crossroads it becomes a useless asset to assist me in pushing forward in an attempt to cease the farmhouse.
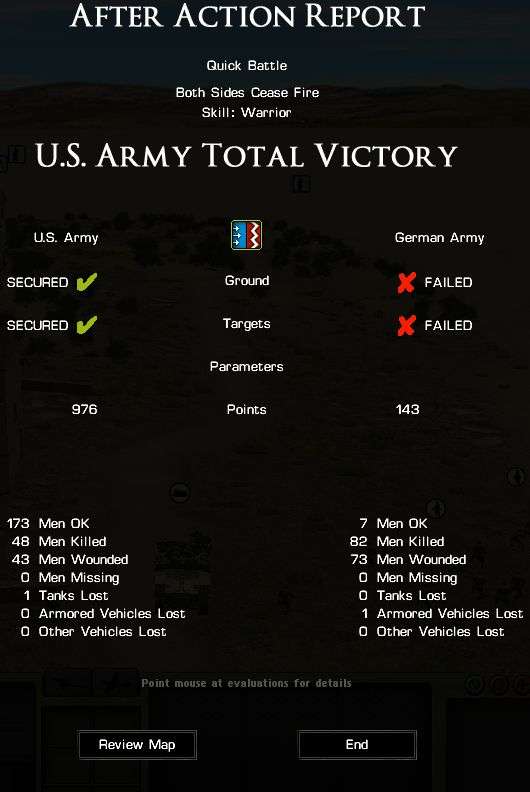
With my infantry squads shot up and broken... many of their officers killed and my Panzer immobilized I realize that there is no possibility of me to win the day. My impatience early on coupled with my ineffective pushes that were not supported well by MGs and mortars/artillery have lead to a huge waste of life and my loss. Penry played an excellent defense and I a very poor offense.
The numbers in the AAR screen are deceiving. Many of my surviving troops are support soldiers or men in broken squads.
Penry fought an excellent game. It was a challenge the entire time and boy was it a lot of fun.
-
Hoping to provide some support and help turn the tides of the battle I move my Panzer forward. It's a risk but I'm getting desperate and need to change the pace of things. Unsurprisingly the Americans answer with a bazooka shot but thankfully it does no damage.
Soon after Penry starts shifting his men from one side of the crossroads to the other. What should be an easy shooting gallery for my men and a blood bath for the Americans ends disappointingly for me with only one Joe taken out.
Soon after my single squad comes under fire and quickly breaks... giving up on the battle. The fragile morale of my German troops is starting to pose a problem for my offensive.
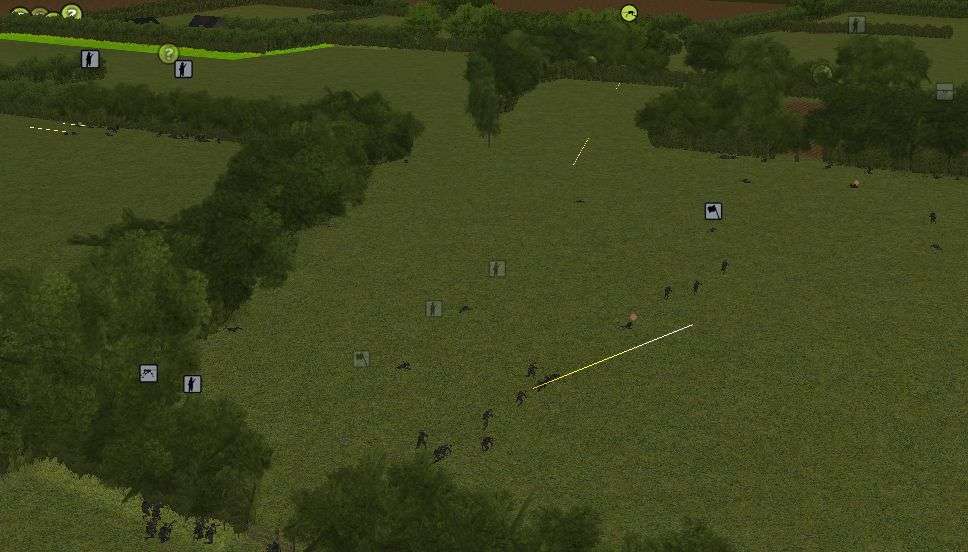
From what I witness it looks like Penry is shifting his men to my left flank. Not only did I spot several squads rushing across the crossroads but I saw others moving across fields to the left. Sensing an opportunity to push forward and a weakness in the defense I order a couple of my squads to rush forward. Unfortunately soon after I realize that I was wrong and my men are highly vulnerable. Safe from head one they are easily flanked by the Americans and quickly broken. All Penry had to do was shift his men back to the right and circle my men. Once again I fail to break through and find a gap in the defenses.

-
Back to the action...
I find myself having issues sealing the deal. Tiresias has taken a last stand on the reverse slope of the top of the hill and my men are too fragile and shaken to push forward. I tried to move my Priest forward and blast away the final resistance but all I ended up with was a dead .50 cal gunner for my troubles.
My best luck has been with this lone squad behind the stone wall. The protection of the wall has allowed them to not get shot up instantly and while they still panic every time some bullets fly their way they quickly recover and start firing on the stubborn Nazis.
Here's an overview of how things are right now. I've got Tiresias pushed back but not broken. My Priest crew has recovered and I'm slowly moving it forward in another attempt to blast away the last of the Germans. If that fails I think I still may have the upper hand because I've driven the enemy from the village and the windmills. If I do end up calling a quit to the fighting I should have enough of a hold on the terrain to still at least get a tactical win. Not quite as satisfying but a win is a win and Tiresias has proven an excellent opponent.

-
God... I cannot believe I used to think CMx1 games looked good.
-
TURN 22
Knowing that I have over-extended myself and do not have the resources in place to support my offensive I order what men I can to fall back to the relative safety of the bogaces I have already occupied. The withdrawal is unfortunately through open fields and not all my men make it back.
The plan going forward is clear out the crossroads so I can bring my tank into the fight. I'm going to call in mortars on Penry's positions and I'm going to consolidate my forces and push through the hole I hope to blast into the American lines.
-
TURN 44 & 45
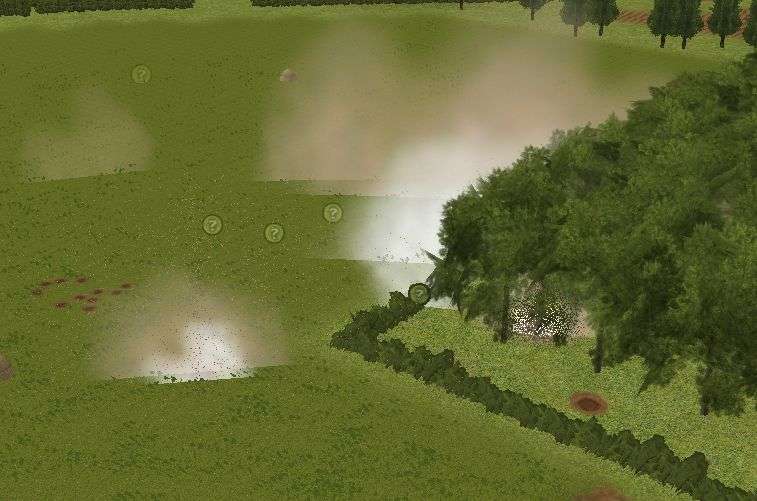
While I have ordered the Priest to cease fire, any Germans positioned near the windmills were not given a reprieve. My mortar strike starts falling all around the windmills and looks to accurately be hitting in the positions that Tiresias may have positioned his men.
Even as the mortars were falling I was pushing my men forward. 10 seconds before the end of the turn the barrage ended. Perfect timing for me to order my men forward. The Germans should still be shocked and taking cover and ripe for the picking.
-
BigDork,
In light (bit of a grisly pun) of what happened with that smoke round, I believe you'll find WO 291/150, WP as an anti-personnel weapon, of interest. Page 8 at the link.
http://mr-home.staff.shef.ac.uk/hobbies/ww2eff2.pdf
Regards,
John Kettler
You're right John, I did find that interesting. I never considered that smoke rounds could be so harmful before but it does make sense. I'll definitely keep this info in mind if I decide to drop smoke in or near my men from now on.
 BD,
BD,The Priest rules!
Heinrich505
It truly does. With around 50 HE rounds the thing is a killer. Of course it's also fragile and has to be babied. Even though I've cleared the village I still have this random fear that Tiresias has a German or two hidden away somewhere and suddenly grenades are going to start falling all around my M7.
-
TURN 19
As the 19th minute of battle begins my mortars start to arrive. My FO has done an excellent job of calling in very accurate strikes and I hope that Penry is taking some serious casualties as a result. The more dead Americans I can get the better.
As I look over the battlefield I am glad to discover that Penry paid a price to try and engage my men from behind the one hedgerow. The mounting casualties may actually be the reason he opted to pull back.
TURN 20
More bad luck for me. As I am moving one of my platoons forward on my right flank a sudden barrage of small caliber mortars starts to fall in the path of my men and the platoon commander is taken out in the first blast. Again, bad luck. This barrage is clearly off whatever target Penry was trying to call it in on and if I hadn't ordered my men forward when I did they would never have ran straight into the zone of the mortars right as they began to fall.
Much like Penry I have my own mounting casualties behind a hedgerow. I made a huge blunder pushing my men forward virtually unsupported and into a crossfire. I had made an assumption that the Americans had pulled out fully from their initial position and that the area I was running to would be free of opposition. I was wrong and my men are paying the price. What's worse is that the relief platoon I had hoped to send to maybe tip the balance and add some extra firepower to the push was the one stopped by the bad luck barrage.
At this point I'm thinking it's time to just pull back, start calling in all the mortars I have, clear the way for the Panzer IV and just methodically blast my way through this. I've been reckless and I'm unsure if I can recover and have enough of a force to take the farmhouse at the rate I'm going.
-
TURN 39-43
My caution in clearing the village proves to be unnecessary. Tiresias pulled all his men out at some point and left it empty. Not only do I feel like I wasted time but also I keep thinking about the friendly fire casualty that I suffered when I called in smoke. Such a waste of life.
As my men start to move out from the crossroads and look towards the windmills we've spotted a few German stragglers attempting to go unnoticed amongst the brush and weeds. The AFV crew proves to be resilient and guns down a couple of my men before they are stopped. This sole survivor of his infantry squad had fought enough today and instead of shooting it out with my men attempts to run for the safety of the windmills. He gets a bullet in the back for his troubles.
With the village cleared of Germans I feel safe bringing my Priest around and have it begin to soften things up a bit for my approaching infantry. I feel a little guilt with destroying some poor Italian farmer's windmills but if it means more of my men can live I think it's a good trade off for the Americans. I've also had a spotting round land in between the windmills and that barrage is imminent. Tiresias is quickly running out of time.
-
... I'm just making sure if anyone is still reading this
Thanks for reading!
I might not be commenting much but trust me, I'm reading every update.
-
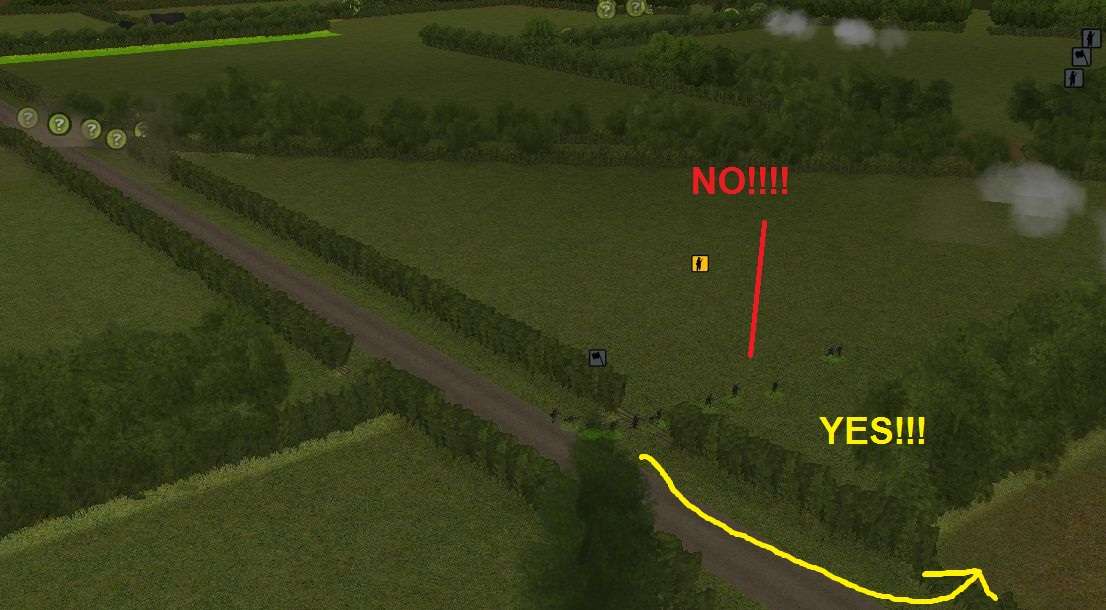
TURN 18
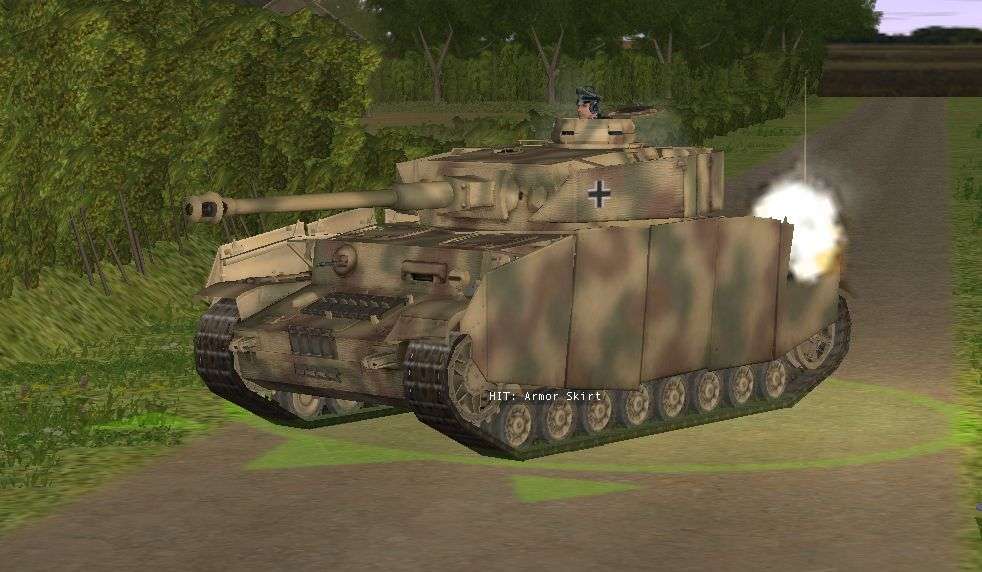
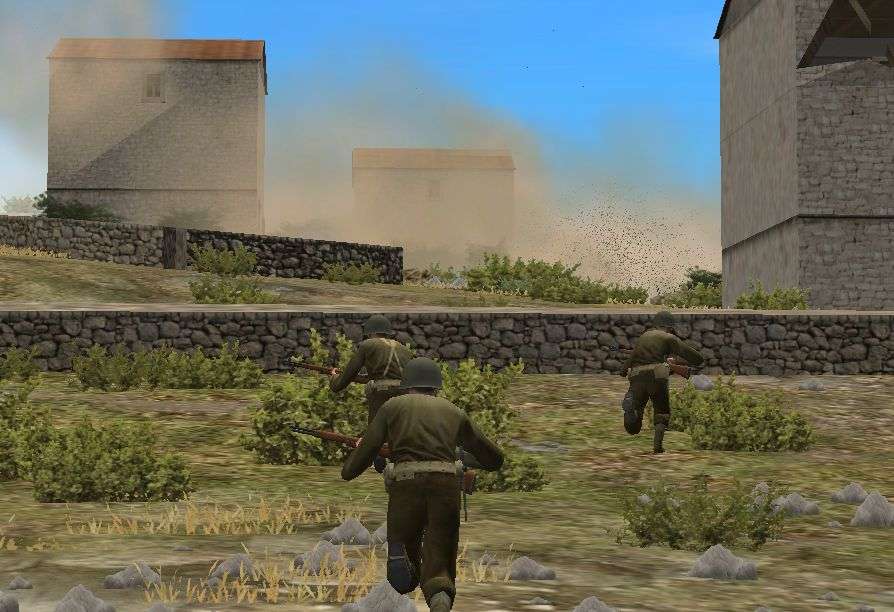
To clear the way for my platoon to cross the main road from my right flank to the middle I order my Panzer IVH to fire on an American unit I had spotted laying low at the crossroads. I figured a few high explosive shells would keep them distracted while my men crossed the road.
NO! This is proof why you need to be careful with how you set your waypoints or even better, set more than just one waypoint halfway across the map. Instead of what I expected, my men running safely on the other side of the bocage out of the sight of Penry's forces my men dash out in the wide open. Miraculously they clear the first field just fine and as the turn ends are halfway across the second field with no shots fired on them. Perhaps the Americans are just too shocked to react.
On my right flank one of my platoons takes cover along a hedgerow after dashing forward. It's a dangerous position and they are taking fire from two directions but so far they are holding tight and doing their best to keep the Americans suppressed. I'm already planning on funneling more men forward and hoping to use this as my push to get in further to hopefully begin encircling the farm house.
-
Direct fire from 81mm mortars - nice. He may not see where those shells are coming from. At 500m away if they have any concealment they may well stay hidden. I often come under mortar fire and never know where the origin is.
I'm hoping that his FO will be too busy hugging the ground for safety that they won't be able to see where the mortars are coming from. That spotting round is very troubling. I'm hoping he is just guessing I have men there or maybe saw my foxholes and is just sending in a barrage.
Either way, I'm gonna have to pull my mortar team out of there at the end of next turn.
-
TURN 5
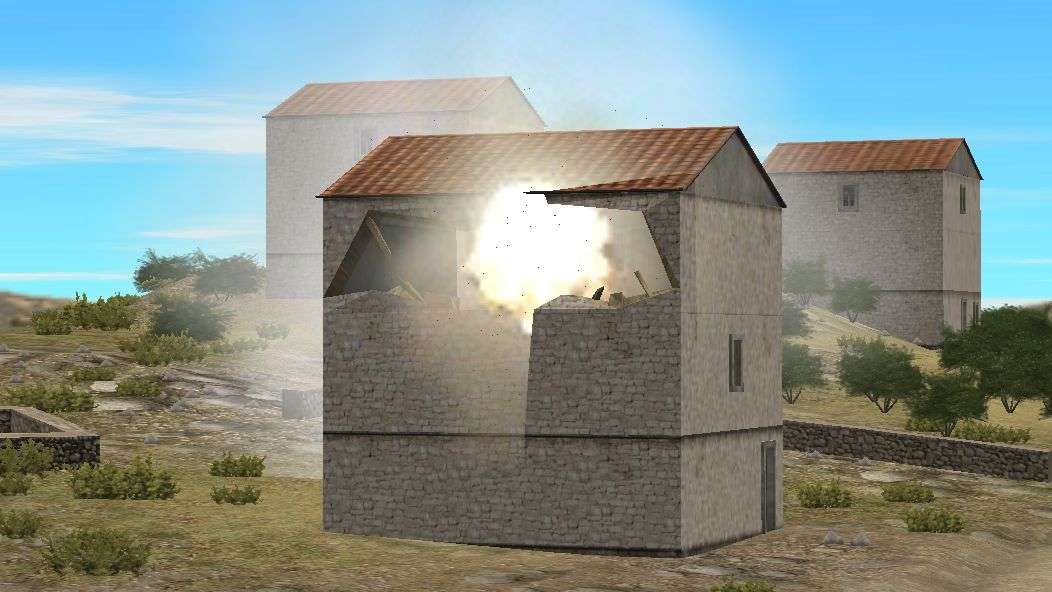
With the destruction of the other buildings Echo turns the focus of several of his Shermans to the 4th farm. The last man in my MG42 team is killed seconds into the turn and 2nd platoon's HQ takes two casualties but thankfully not the commander. However the survivors are taking their sweet time crawling out of the building and I'm afraid the roof will come crashing in before they can get away.
Even though I'm trying to do a direct LOS barrage with my one mortar unit they are taking their time with their fire mission. In the whole minute I only saw them fire off one mortar which went long off the back of the map. As the minute comes to a close a spotting round lands just in front of my mortar team. That's worrisome. I had hoped to spend at least a minute trying to take out Echo's FO before I bugged out my team. I decide to risk it and will leave my mortar in place for one minute more but have ordered the ammo bearers to retreat out of the area. No sense in them getting blown up too.
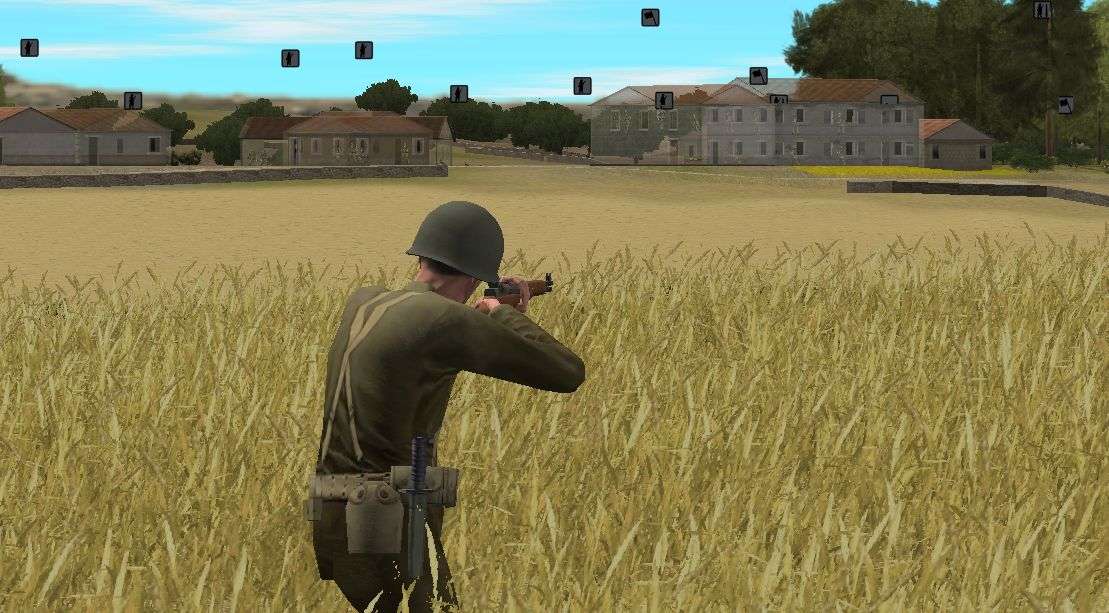
My men spot American infantry moving right where I expected them to be, moving forward towards the woods. As a scouting team pokes their head out from cover they are fired upon at long range from some of my men at Casa Mazzarro in the center. While the gunfire didn't take out any Americans it did cause them to slow down and even return fire a bit.
Here's a look at the advance of Echo's infantry on my left flank. I'm assuming he's sending a company of infantry my way. I have two platoons in ambush position in the woods to greet them and also a TRP I plan on using to call in mortars. He's going to bleed some long before he's able to attack Casa Guardice.
-
I picked it up yesterday but unfortunately won't have a chance to play until Thursday night. I put in hundreds of hours in the original and am really excited to play this one. From everything I've seen and read about this (and that's quite a bit) I'm going to love this. The changes that were made seem to have modernized it some and added a bit more action to it.
If anyone is interested I recommend checking out Giant Bomb's quick look of XCOM: Enemy Unknown.


BigDork vs Penry 2 - BigDork Tries to Redeem Himself
in Combat Mission Battle for Normandy
Posted
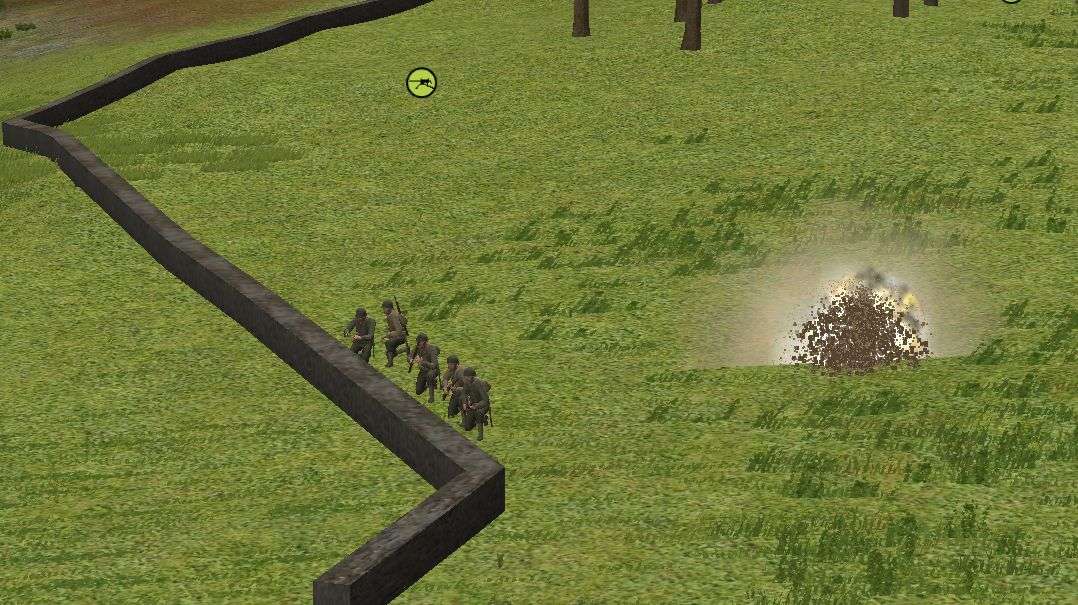
My men just can't seem to catch any breaks. I tried bringing a couple squads together to start rallying my men into a force for one last push. Of course Penry noticed this and sent some mortars at my gathering forces.
Things aren't quite all lost yet. Miraculously my StuG suffered no real damage from the bazooka hit. Once my AFV crew composed themselves I sent them back to re-man their vehicle. I can only imagine Penry's reaction to seeing my AFV come back to life and start to fight on.
Here's how the battlefield stands 16 minutes after my men started getting cut down in the field. I'm shifting what I have left (which isn't much more than a reinforced platoon) to the right flank. Penry has committed most of his men to my left and from what I can tell they're mostly still there. I'm going to use the StuG to keep them there, use the smoke from my on-board mortars, and rush the village. It's my desperate, final gamble. I'm almost out of 81mm mortars, out of 120mm, almost all my men are broken, and I've suffered around 60-70% casualties. I'm highly doubtful that I can achieve any of my goals but I'm not quite ready to give up yet.