

BigDork
-
Posts
589 -
Joined
-
Last visited
Posts posted by BigDork
-
-
Turn 16
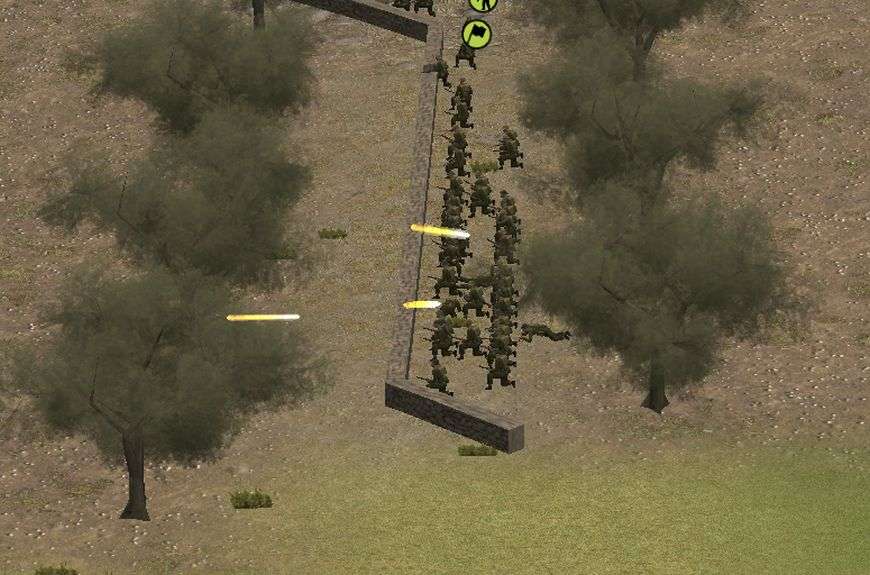
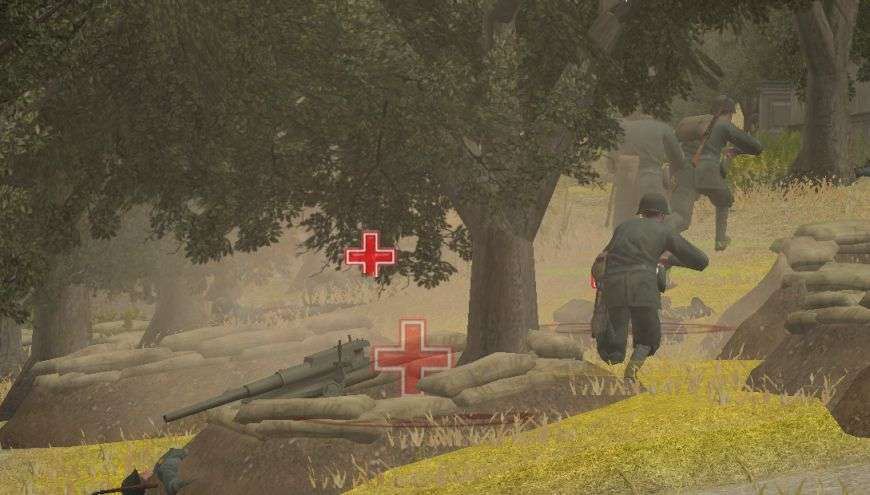
A few minor corrections and the mortars are on target. If my mortars hitting an abandoned position last turn didn't get Tiresias' attention, my men blasting apart his MG team this turn sure did.
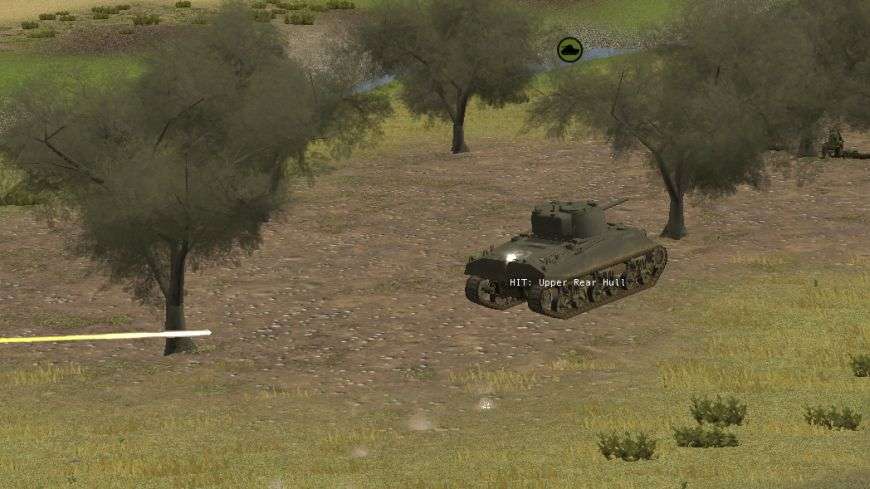
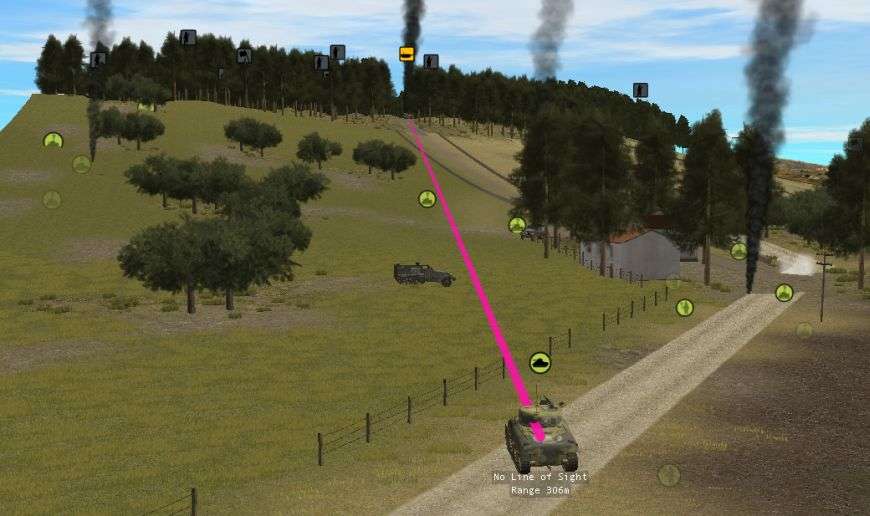
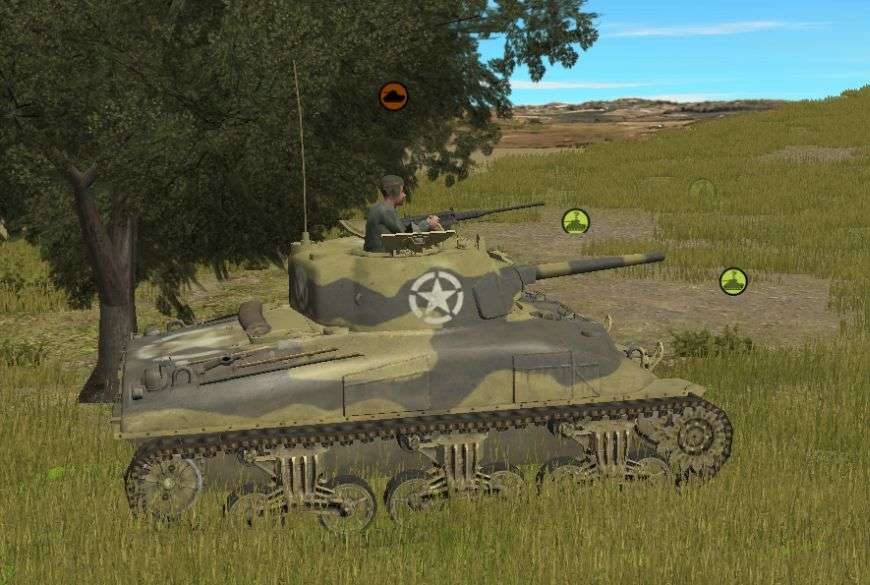
That wasn't the only MG42 team to be under fire this turn either. On the left flank, one of the Shermans supporting B Company's push spots some foxholes with Germans dug in and starts firing on them. I'm sure glad my tank spotted the machine gun before the machine gun spotted my infantry.
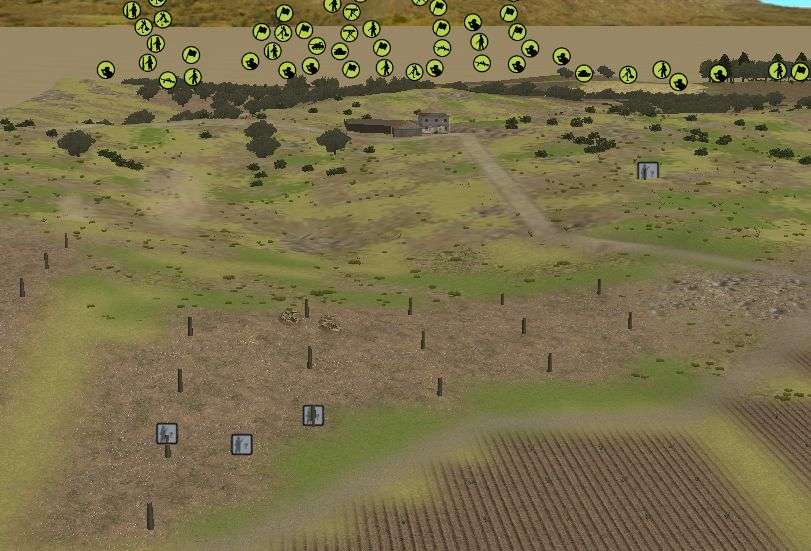
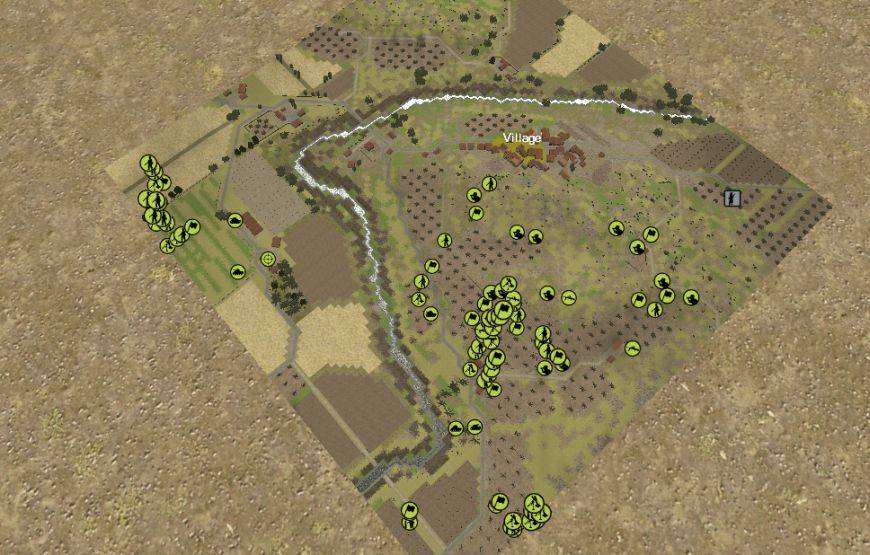
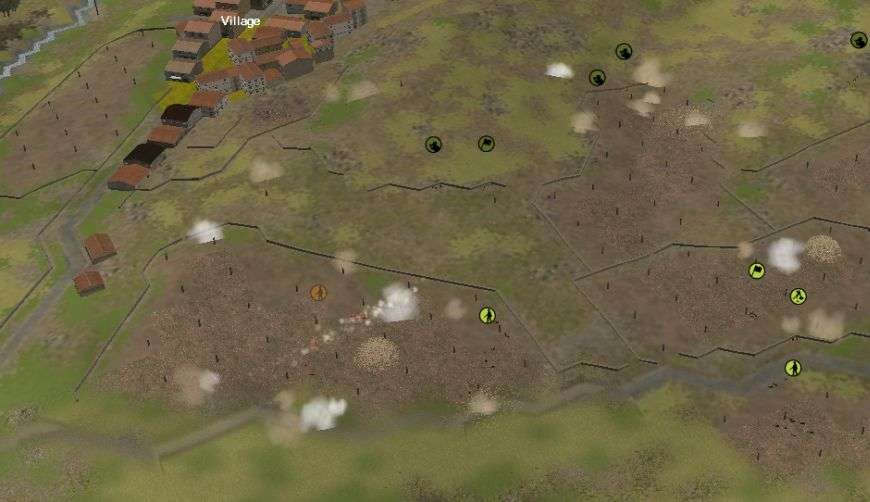
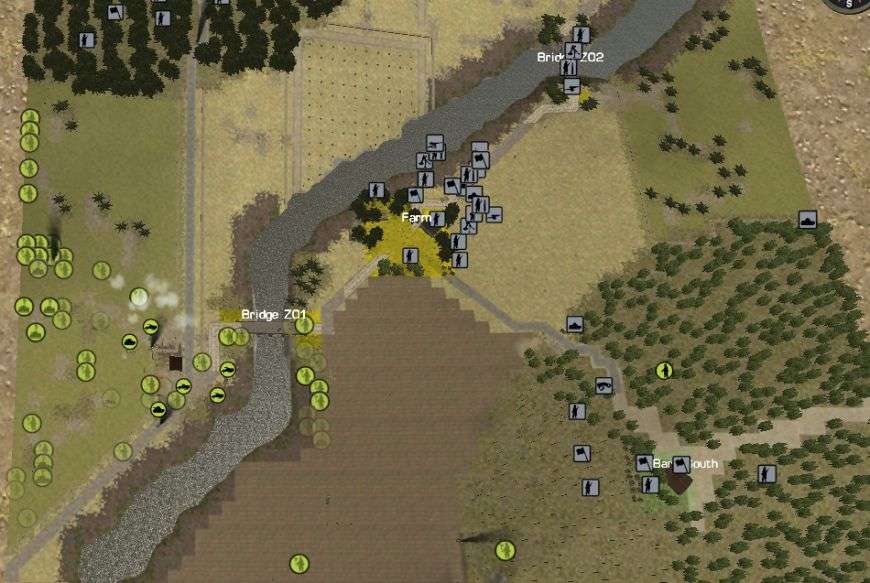
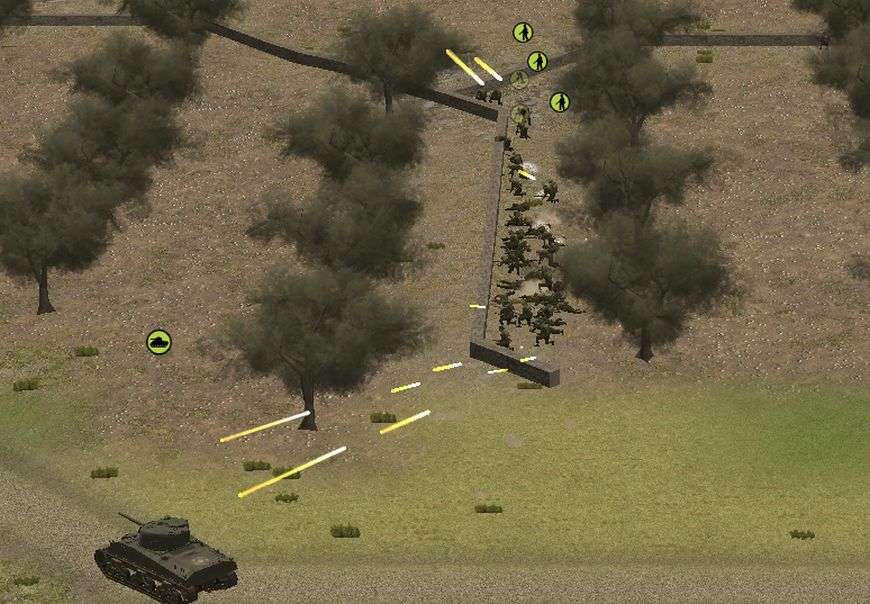
Here's an overview of the map 16 minutes in. I'm still holding steady for the most part on the right but I am starting to creep forward on the left.

Turn 17
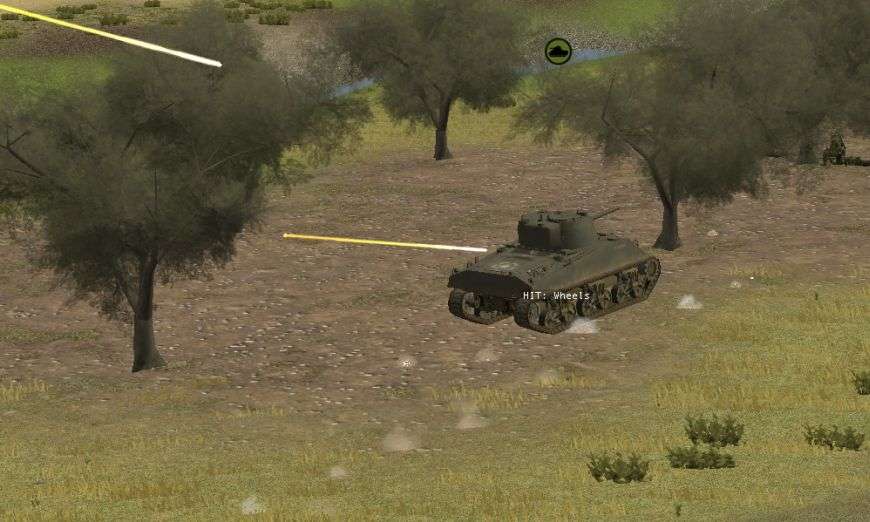
On the left my Sherman manages to land a couple 75mm HE shells on target and I'm pretty convinced that will be that for the MG team there. So far I've seen very little in the way of regular infantry from Tiresias. It's been mostly artillery, air support, and machine guns. A bit different approach to defending but so far it's been effective. I'm certainly feeling like I need to be cautious.

Unfortunately my direct hits on the MG42 aren't the only good shots of the turn. A mortar lands amongst one of my infantry sections on the left causing some casualties. It's the first of many and by the time the strike ends the section is reduced to only a handful of broken men who will be basically useless the rest of the battle. Thankfully though my Sherman survives unharmed.

-
Ok, let's get back into this AAR. A lot has happened and I'm loving this battle. It's certainly become a chess match between Tiresias and I and we have a long game to go.
Turn 13
Much to my dismay the MG team I was calling in mortars on decided to uproot and relocate. Talk about good timing for the team. This also leaves me wondering what Tiresias is up to.

Along with the MG team pulling out I get a couple more sound contacts on the other side of the hill as well. Curious. In our previous games Tiresias has proven that he's willing to go on the offensive whilst playing defense and it's certainly possible he's attempting to push forward on my extreme flank.
I do also notice a new contact closer to the house that I hadn't noticed before. The new contact turns out to be yet another MG42 team. It's a good thing I didn't decide to just rush my men over the ridge line. The mortar strike I had coming in on the departed team is instead shifted to the new contact.

Turn 15
Despite the orders to shift the target of my mortar strike were relayed over a minute ago the mortar team still sends some rounds at the original target. I'm annoyed with the waste of HE but I do hope there may have been a straggler or two around. If nothing else it will get Tiresias' attention.
What certainly got my attention was an explosion in front of B Company. Apparently Tiresias spotted my flanking maneuver and a mortar team is zeroing in on my men. I knew I could only go so long before being spotted but I had hoped to get a bit closer.

-
Turn 10
Another turn, another strafing run. The flyboy must have realized that his guns weren't going to do much against my Shermans because he returned to firing on my infantry. I've lost yet another squad of recon. My men in the center certainly are taking a beating.
Orders
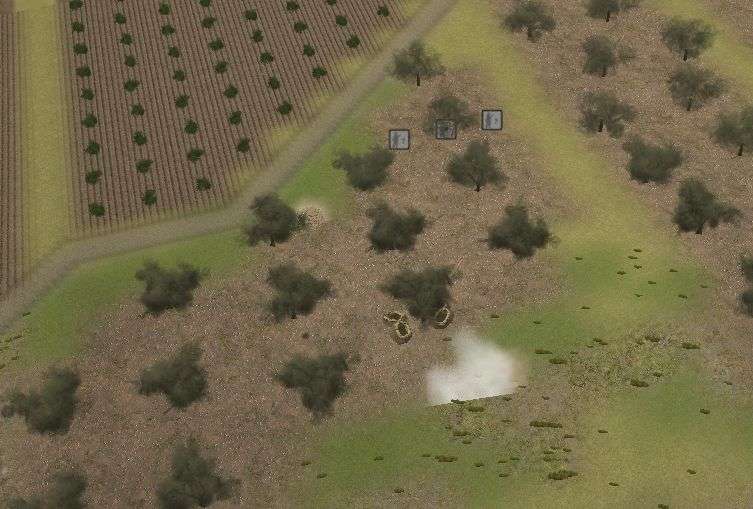
Here's an overview of things.
Not a whole lot is different other than Bravo company making their way around. I think in another 10 minutes or so we'll be ready to start moving on the village. Before that I think I want to make some noise on the other flank to have Tiresias think I'm up to something there. By then that MG42 should have been taken out by my mortars. There's only a few minutes left until that barrage starts.
-
Turn 42 and 43
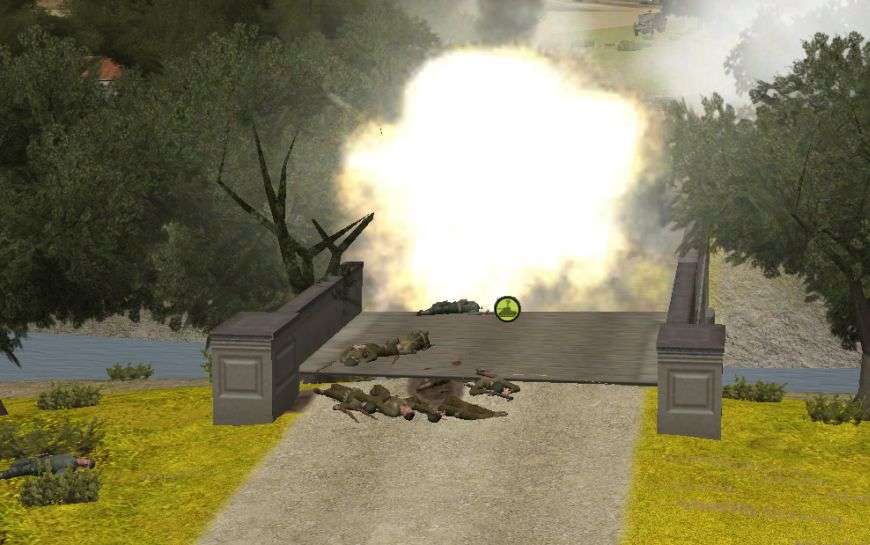
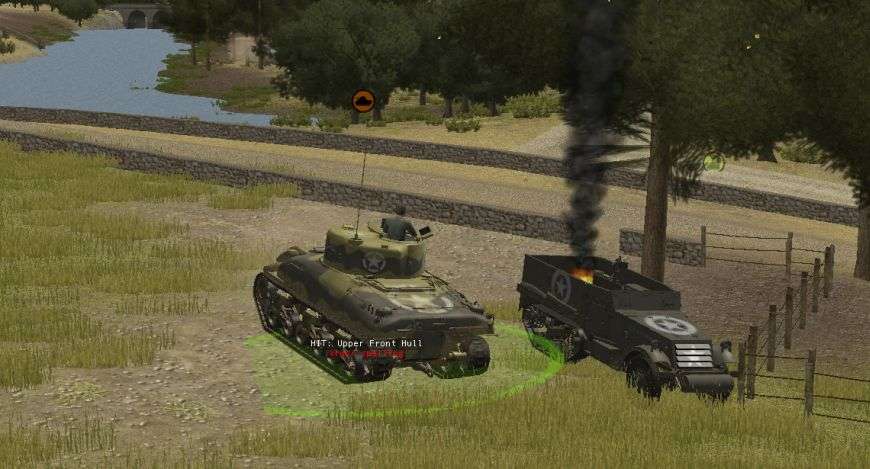
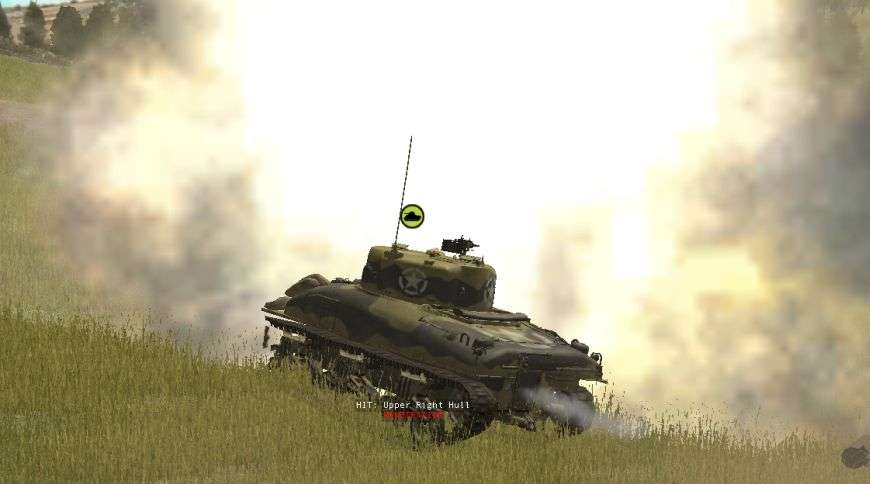
The 42nd minute was the quietest in quite some time. That quiet was punctuated by the Sherman on the bridge brewing up in one big, fierce explosion. I hope there were some Americans still in the vicinity. That could have been a nasty surprise for them.
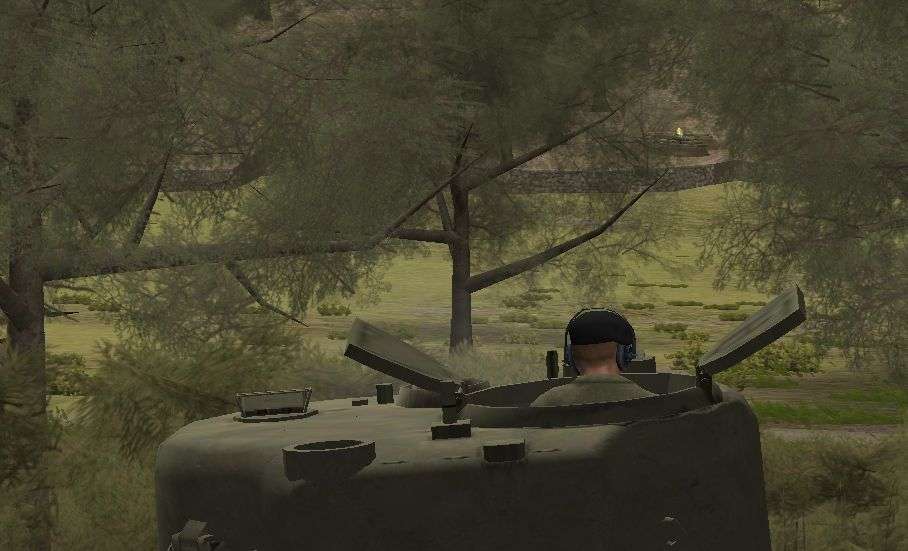
My StuG at BN has been attempting to engage with the Sherman in the back of Penry's area for a couple minutes. My single-minded focus on getting the American tank almost cost me my vehicle.
.50 cal MG fire started to plink off my armor and then suddenly a tree right in front of my StuG caught a shell. Wisely my TC ordered a reverse to the back side of the hill since he did not know where this new fire was coming from.
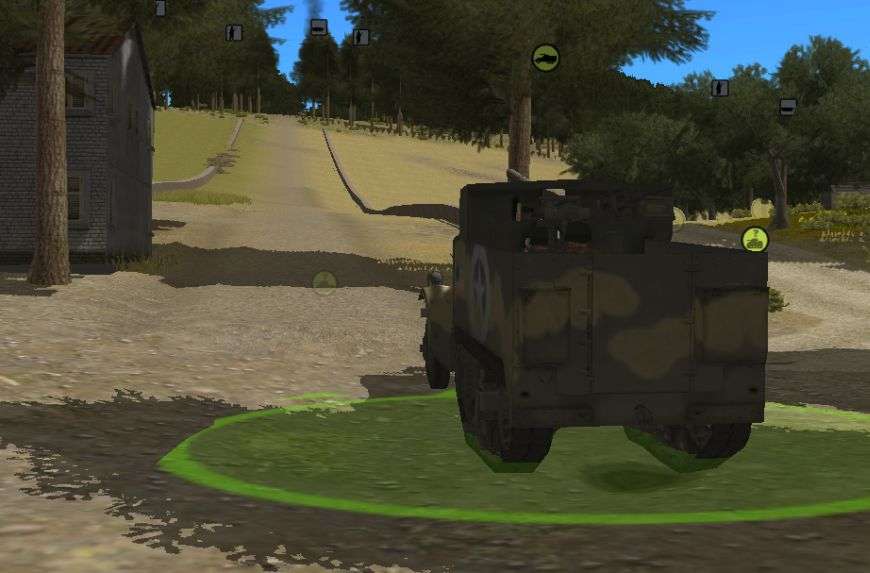
Penry did a great job of moving one of his GMCs into position to fire on my assault gun. While the thing has crap armor that 75mm gun would have caused me some problems. He's in a great position and has basically denied my StuG that ridge for the time being. I'll have to figure out a way to get rid of the halftrack.
I knew moving my other StuG at BN over near where the two tanks I'd lost earlier was probably a bad move. And it proved to be. Something got a shot on my vehicle but thankfully it didn't do any real damage. My StuG threw it into reverse and will be safe.
Planning
I'm really going to have to think about what to do with my assault guns at BN. Considering how this battle is going I may just leave them out of sight for a while. As it is I'm pretty sure I've got this thing won. I don't see a point in needlessly using my StuGs.
-
Turn 41
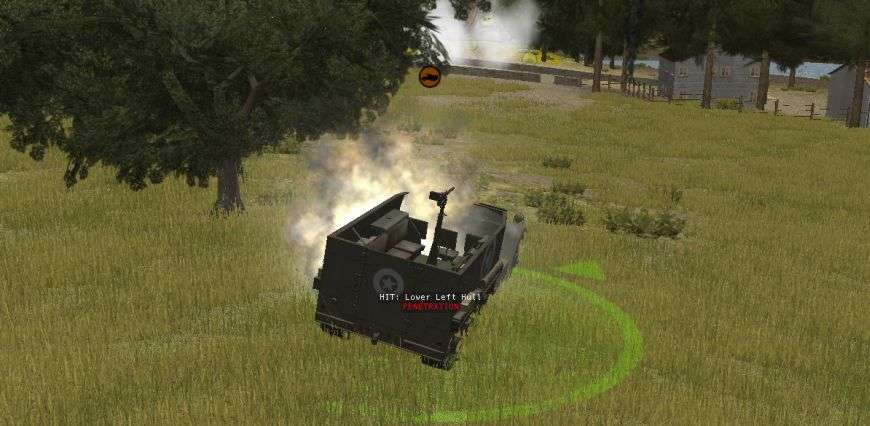
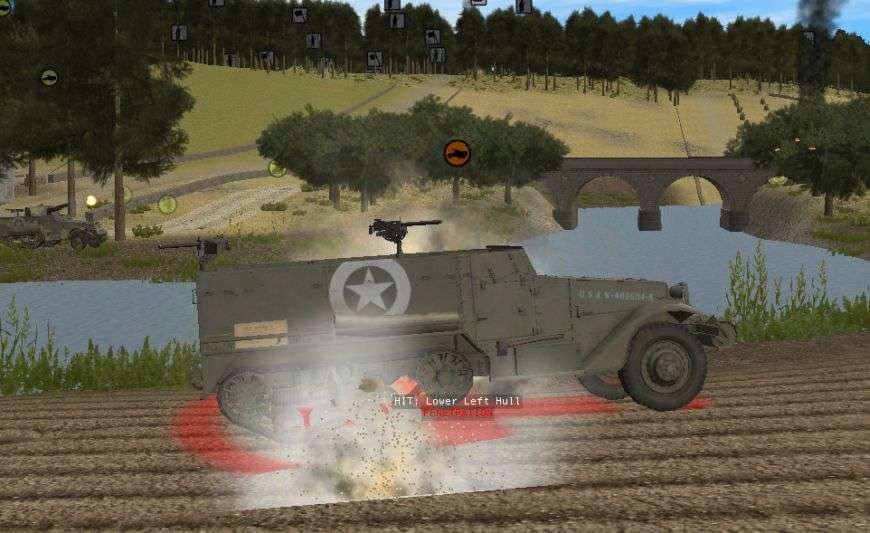
I never get tired of watching American halftracks explode. I'm just amazed how many of them there are. Penry has to be running out.
But while I'm having success against his halftracks my men in the Farm continue to be fired upon and abused. Thankfully the defenders I have left are in decent cover and somehow a full German squad and their commander has survived the earlier barrages. Those men coupled with the StuG makes me feel good about my ability to hold the location.
I'm still having a hard time finding the Americans that are roaming around at BS. Thankfully all they've been doing is moving back and forth and around and haven't caused too many problems for my men. I'm hopeful that one of these units will wander too close to one of my awaiting units.
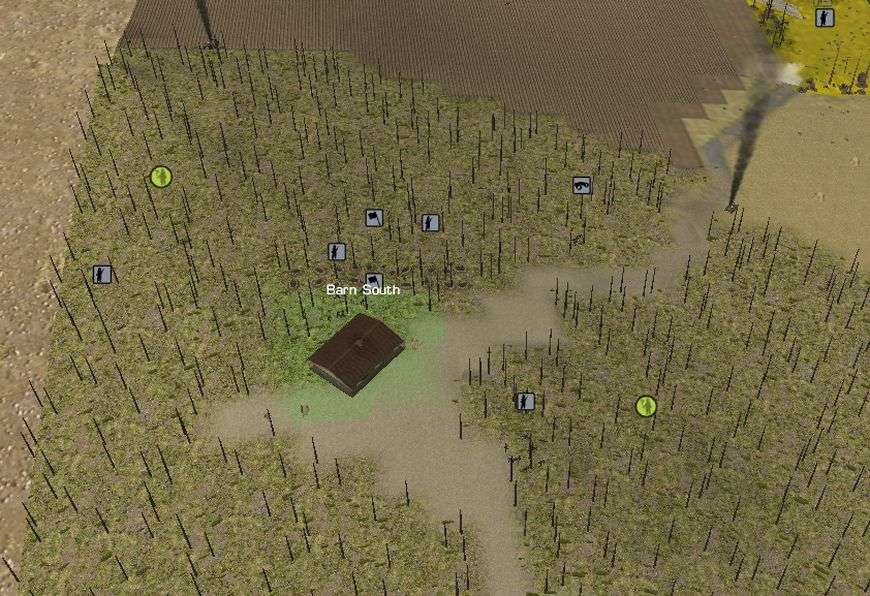
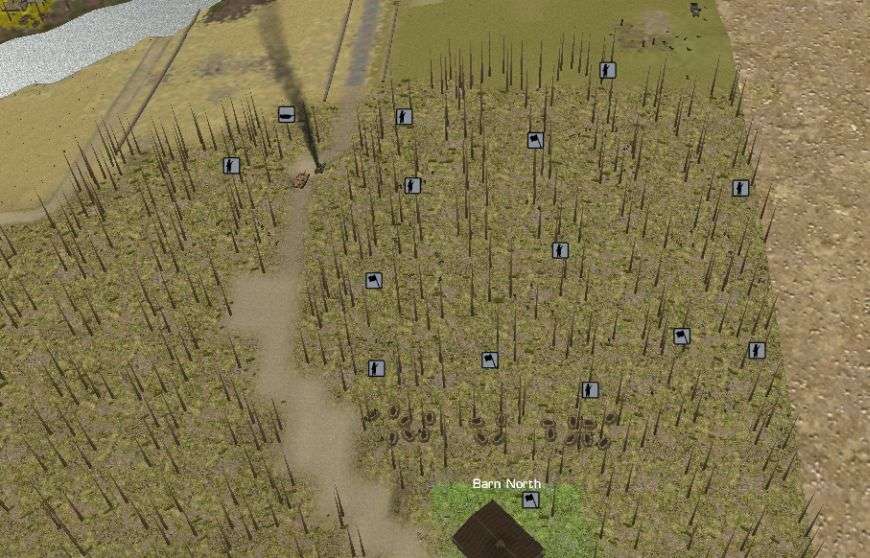
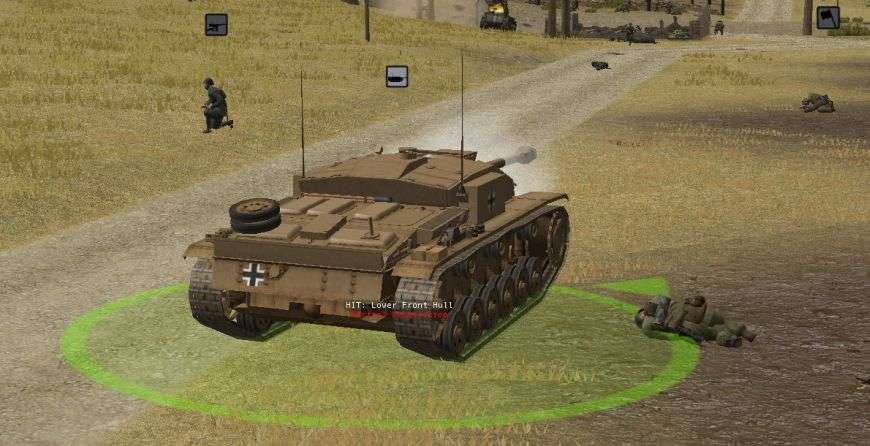
While BS is having some issues with defense and lack of men, BN is fully stacked. I don't think there's any way it would be possibly for Penry to take this location. I'm feeling so confident in fact I plan on moving up my German infantry towards the treeline to see if I can't really spoil Penry's ambitions more than I already have.
-
I've learned the hard way that reversing out of a face off like this is usually a losing proposition... better to stay and duke it out. Moving you will most likely miss if the STuG fires, and there is a chance that he will be the one to blink and attempt to reverse out of the fight, leaving himself vulnerable. It's a nail biter regardless when making these types of decisions and waiting for that next turn can be torture!
I knew I was taking a risk but I didn't think I had much of a choice. Prior to my relocation my StuG's TC could see the Sherman but my gunner couldn't. So I would have had to drive forward before I could fire on the Sherman either way. I was thinking that by reversing out of sight the Sherman may focus on something else and then I could get the drop on it. I also really wanted to put a bit of space between my armor and that burning R35. The smoke was screwing with my field of fire.
The more I think about it the more I wonder if Penry's Sherman even saw my vehicle at all. It never fired on me and it definitely had some opportunities. Guess I'll find out in a bit when this battle's over.
Thanks for making the AAR - good read!One suggestion: button your Stugs. The awareness to the front is not much worse buttoned but loosing the TC is.
I learned that lesson the hard way with one of my StuG's. It's a darn good suggestion though at this point in the fight. Glad you're enjoying it!
You fled??? How can your men respect you if you flee? How can you expect them to charge into the teeth of a machinegun if you run? Oh. Then you advanced. Well done.
I did not flee, it was a tactical relocation of my armor. As for respect, that's easy to gain. I just threaten to send them to the Eastern Front if they disobey.

-
Turn 40
The last minute ended with one of my StuGs facing off against one of Penry's Shermans near the Farm. Each thank had taken a hit and the next shot would probably decide it. I watched anxiously as my assault gun sat there stunned over the loss of the loader. I expected an American 75mm AP round to rip through my armor at any moment. Instead both vehicles lose LOS and it all ends rather anti-climatically.
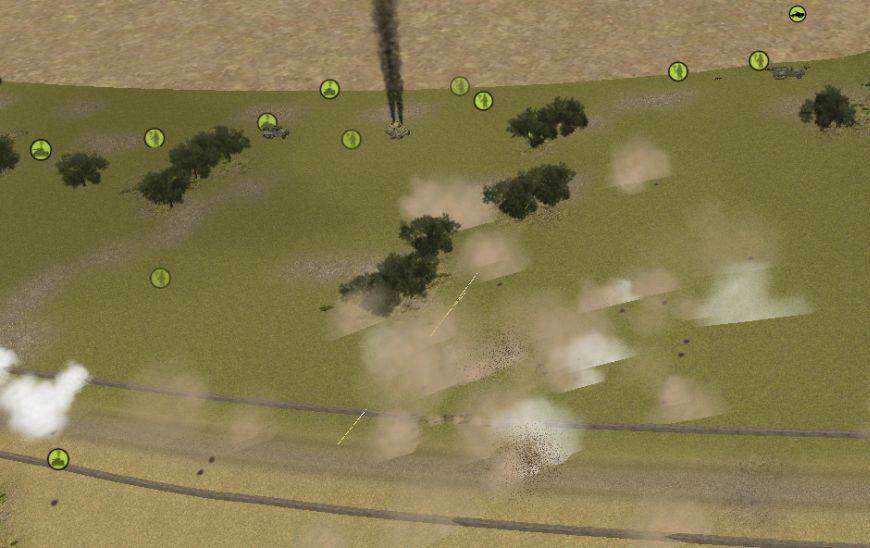
However... another one bites the dust! My StuG near BN reverses behind the hill only to relocate moments later and with a single shot take out another of Penry's Shermans. I would imagine the American commander is feeling pretty defeated right about now.

Also near BN my mortar strike (I'd forgotten I had called in) starts to fall. Unfortunately it falls just short of where I need it too. If it had landed just meters from where it was I would have totally stopped the American advance.
Orders
For the next turn I'll have my FO call in a hopefully better spot for my mortar strike. I may get lucky and still be able to blast some of Penry's men.
My second StuG is still relocating near BN. I'm realizing that where I'm ordering him has turned into something of a scrap yard for my tanks but I need my armor here to help cover the Farm and BS. Both locations have taken a serious beating and need the support.
-
-
Turn 39
While my StuG doesn't move forward enough to bring his gun to bear on the Sherman he does manage to take out another of Penry's halftracks. I've lost count of how many of these things I've turned into useless heaps of scrap.
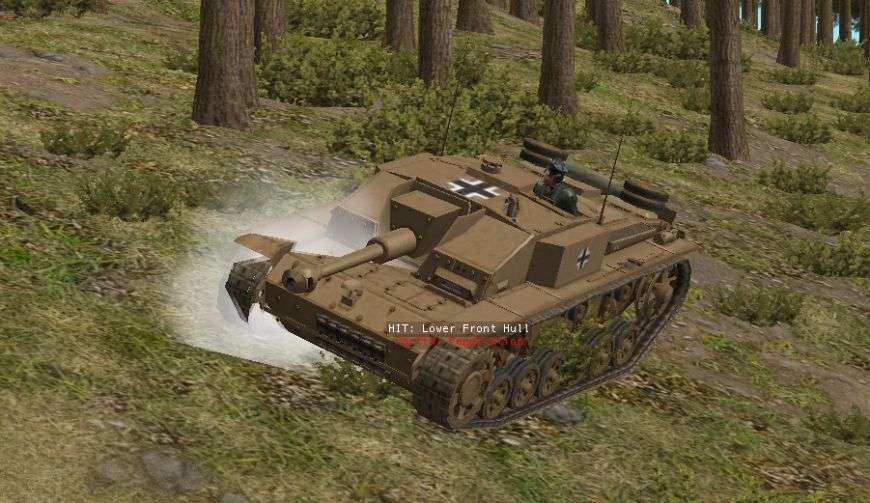
Things do get tense when my assault gun near the Farm gets line of sight on a Sherman crossing the bridge. My first shot hits but only causes some spalling and I don't believe any casualties. I'm not as lucky. The Sherman's response causes a partial penetration and takes out one of my crew. As the turn ends each tank is poised to fire again. I have a bad feeling about this.
Orders
Considering the exchange between the StuG and the Sherman in the middle of the map I've decided to not just push my StuG at BN forward when the Sherman I want to fire on is pointing directly at it. It's too risky. Instead I've ordered this StuG to reverse out of LOS and then pop back up. I also hope to have a better shot on the tank around the burning R35.
I'm also ordering the other StuG near BN who lost the TC back into the action. I feel like I'm holding on by a thread and I really need all my armor to survive.
-
Turn 9
When will this plane leave me alone? For the 7th minute my men are harassed from the air and there's nothing I can do about it but pray he runs out of fuel soon.
As I heard the plane open up I noticed the impacts right behind my HQ Sherman. My heart stopped momentarily. But as I watched the bullets just plink off my tank I relaxed. Despite multiple hits my armor survived unscathed. Apparently the cannons on the plane aren't big enough to do much damage. Good for my Sherman but potentially bad for my tank destroyer.
Orders
Last turn's arty strike is over and my men are starting to recover. B company is continuing to move forward and I'm waiting for my mortars to blast the MG42 I spotted earlier. Basically not a whole lot has changed from last turn.
-
Awesome, thanks for the heads up. I'm not going to say no to free.
-
Turn 8
Tiresias continues to bring the pain to my men as they come under a new round of mortar fire. I believe he's using a large area target so it's not the most focused of barrages but it's still causing some casualties. Some of the casualties are the recon squads I'm using as a line of defense against any push he may make. There's one unit though who's just having a bad day. My lead infantry squad finds themselves not only under a mortar barrage but that damned Luftwaffe plane comes around for another pass and fires on my infantry. I'm glad it's not my armor but still, I'm another squad down.
Orders
Bravo company is starting to move out again. While the artillery and strafing missions hurt it's a long battle and we're only minutes into it. My men have time to recover, regroup, and push the attack. Considering the points Tiresias put into the arty and plane I'm still feeling decent about my chances.
I am still smarting about losing that platoon. Stupid, stupid, stupid, stupid, stupid.
-
Turn 38
Despite machine gun fire from the Farm and mortars being shot from multiple locations the Americans just keep pushing forward. It's become apparent to me that if I am going to stop Penry from taking BN it will be by my infantry in the woods.
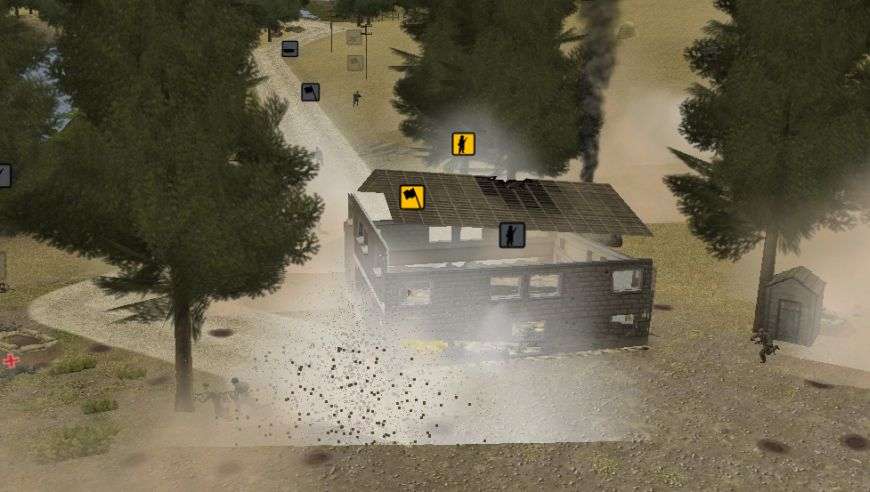
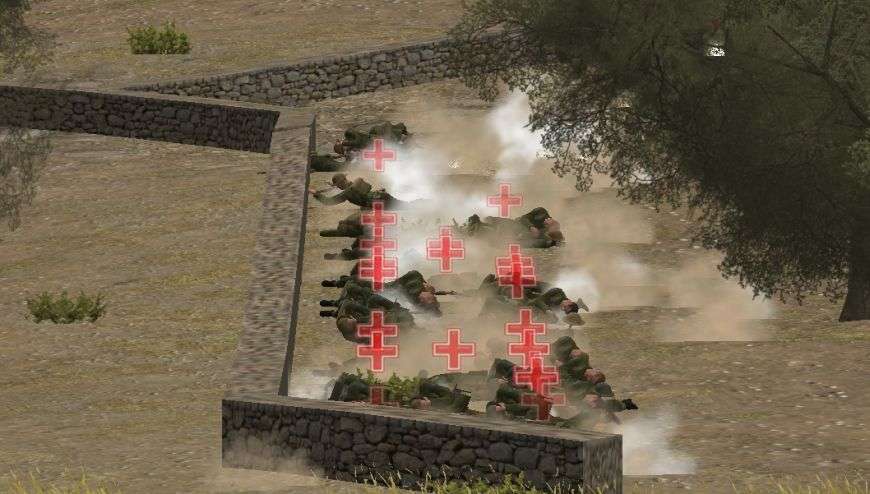
It becomes even more apparent soon after the turn starts as very accurate and painful artillery starts raining down on the Farm. The past barrages hurt my men some but this is murderous. My newly arrived Germans had no idea what they were rushing in to a few minutes ago.
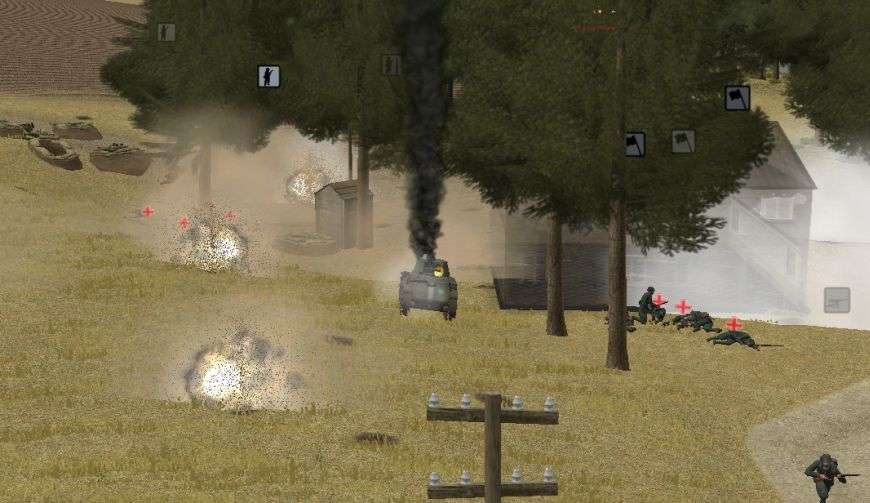
The barrage is so intense that the farmhouse itself collapses taking out everyone inside it. I'm not sure the number of casualties I took this turn but it's safe to say that any unit that's at the Farm is effectively out of this battle. I should be able to rally some units and cobble together some sort of defense once the artillery ends but this past minute has been horrible on my men.
The only silver lining to the whole thing is that my StuG was able to take out one of Penry's Shermans as it crossed the bridge. Despite the artillery falling my men calmly took out one of the biggest threats on the battlefield. If I can manage to neutralize all of Penry's armor and GMCs then it won't matter that my infantry in the Farm is broken and bleeding. My armor should be able to hold off the Yanks. It's a long shot but worth hoping for.
Orders
At BN my men are dug in and waiting the Americans to start moving in the woods towards the objective. I'm going to make them bleed for every bit of ground they try to take.
I am very worried about this Sherman I spot at the back of the map. I have a very bad feeling he represents a second wave of American reinforcements. I'm already holding on by a thread and more Americans, and especially more American armor, is going to make this quite the challenge. My StuG almost has LOS on the tank but not quite. I order him to dash forward just a couple feet in hopes of being able to bring my gun to bear. I need to take this tank and any friends he has with him out if I'm going to win.
-
Turn 34 - 37
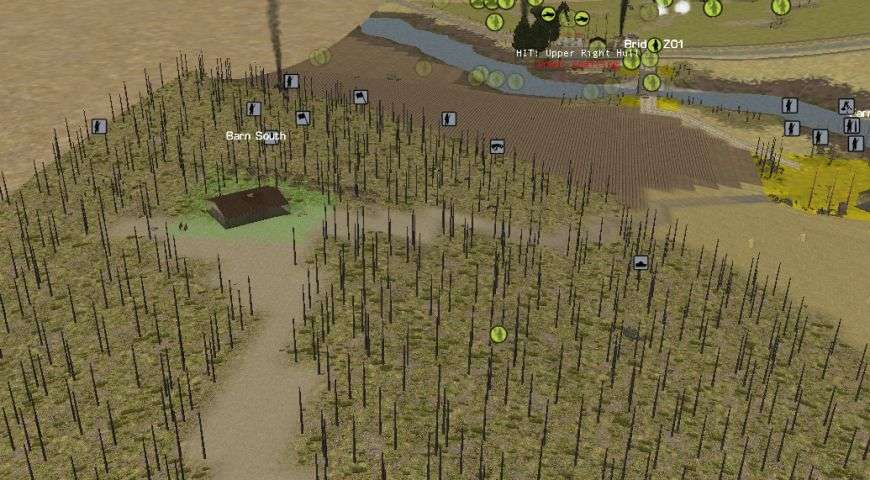
Things are not going well for me at BS. My men are either suppressed or fleeing and the Americans are starting to push forward. At this point I need to rally as best I can and try to make a stand at the barn.
It goes from bad to worse when I lose my HQ unit at BS. They narrowly survive a blast from the GMC just in front of them only to fall to a well placed mortar round that lands between the two men in the unit. My already fragile force is now even more broken.
And since the luck is clearly against me at the moment let's add one dead tank commander to the list. As one of the newly arrived StuGs tries to take position near BN the TC is hit and taken out. I suppose I should be thankful I didn't lose the entire vehicle. Still, with several Shermans running around I need each of my assault guns to be at full operation and this could definitely cost me.
-
I apologize for the silence. An infant and working 12 hour shifts has made AARing and gaming somewhat of a secondary thing. Hopefully I'm back at it.
Turn 34 - 37
Penry continues to push his men forward towards BN. Unfortunately I am having issues making continual contact with the Americans to fire on them.
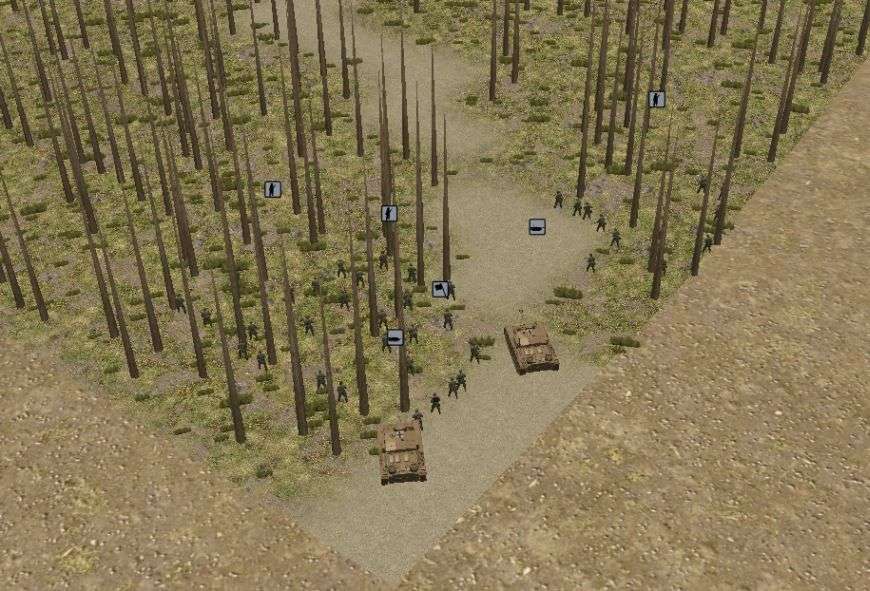
At least there's some great news for me. After 35 minutes of waiting my reinforcements finally show up in the back of BN. I get two more STuGs and a platoon of infantry. This should make Penry's efforts to take the objective much harder.
The German armor arrives at a fortuitous time for me. Feeling pressure from the American unit running around in the woods near BS I tried to have my R35 escape towards the Farm. Unfortunately as my tank cleared the trees and tried to make a run for it one of the GMCs scored a direct hit.
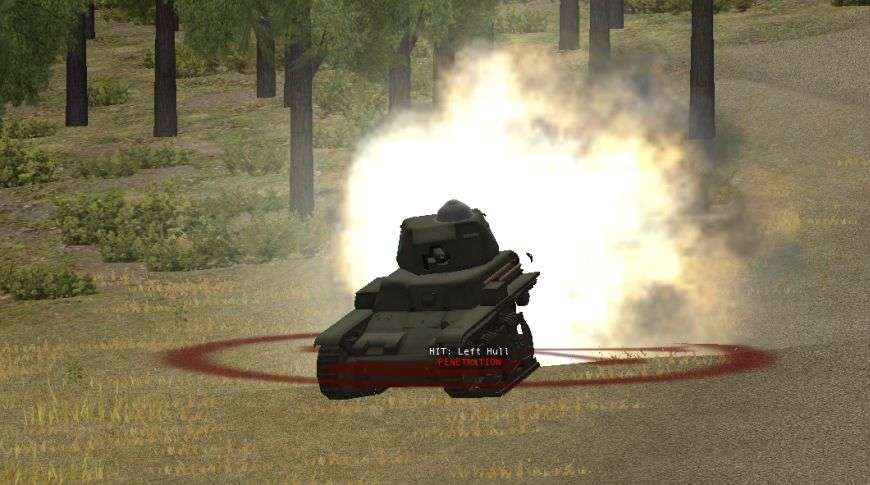
Having finished off my tank the GMC turns its attention on my infantry in the woods around BS. It only takes a few 75mm HE shells to send my men running.
As my first line of defense of the objective melts away I definitely start having some worries.
-
My god John, how do you find a this information? I'm in awe of all the goodness to read.
-
-
Turn 33
Well this turned out to be a very surprising turn for me.
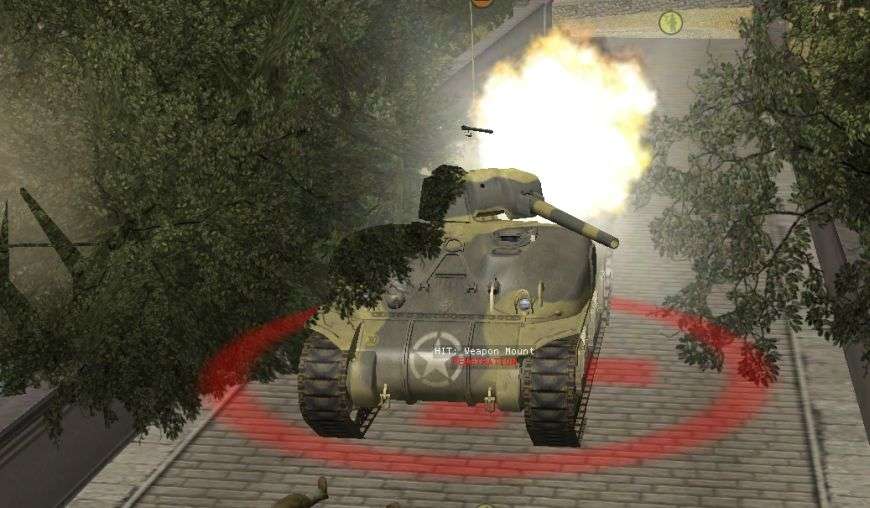
The minute began with the Americans making their move on BN. With my one StuG and R35 destroyed there, all that I have left in defense is a platoon of infantry. Penry is definitely taking advantage of his sudden reversal of fortune.

Things aren't all that easy for the US though. His infantry is hounded by long range small arms fire from the Farm and from BS causing them to go to ground from time to time. Even better either a MG42 LMG or a Breda at the Farm fires on the halftracks causing at least one crew casualty and also halting them at least momentarily. If I can stop Penry from sending in support for his infantry I can hold BN.
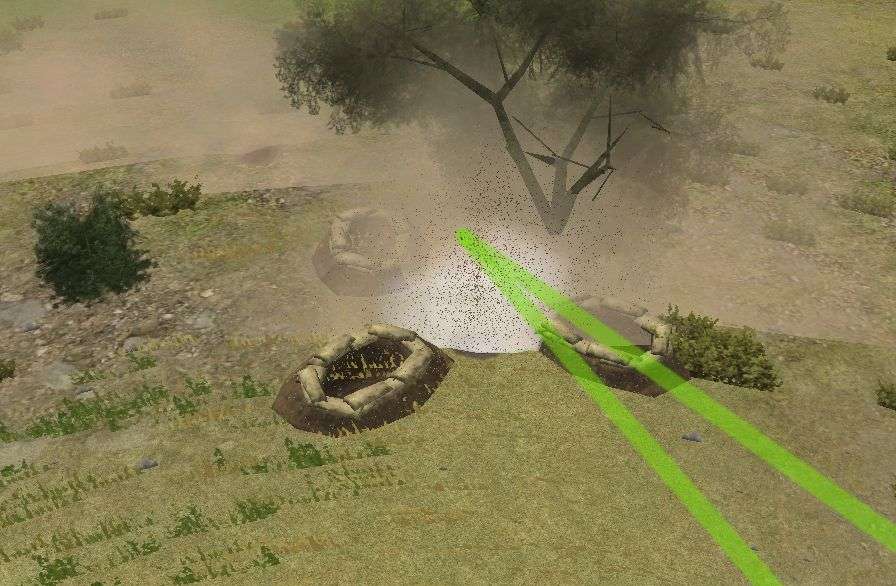
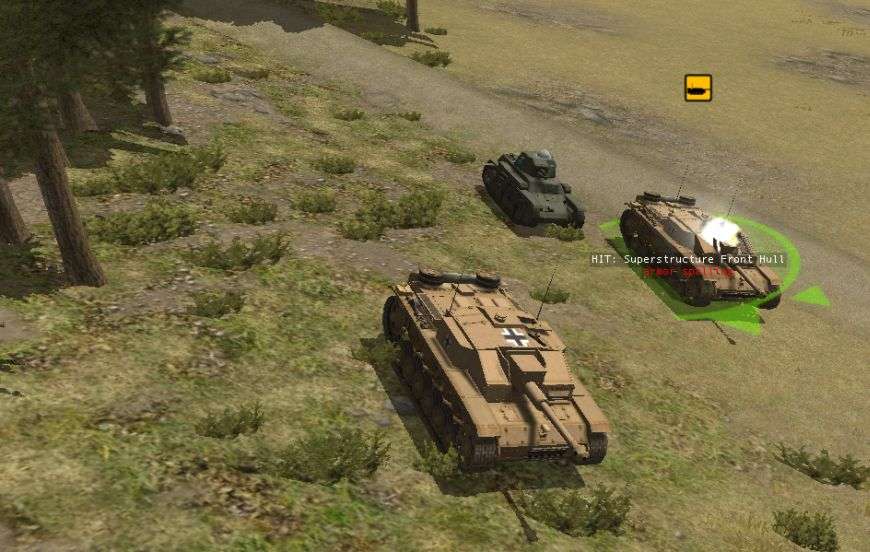
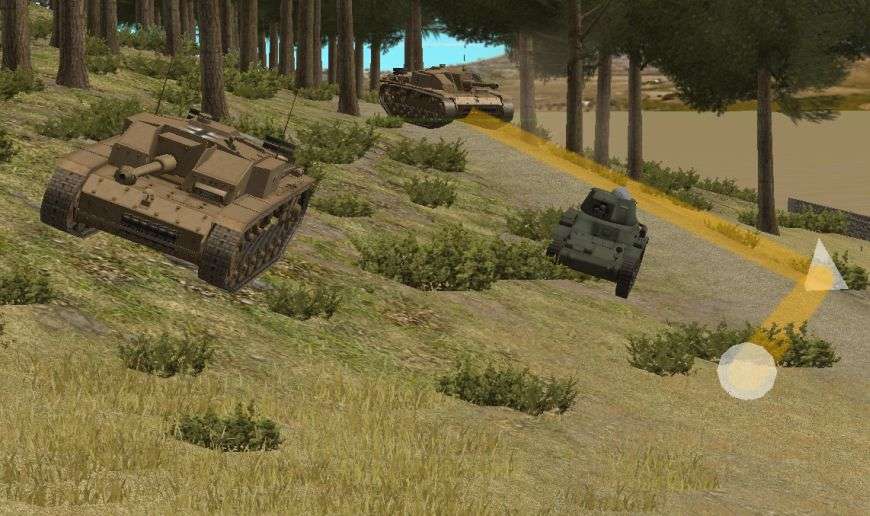
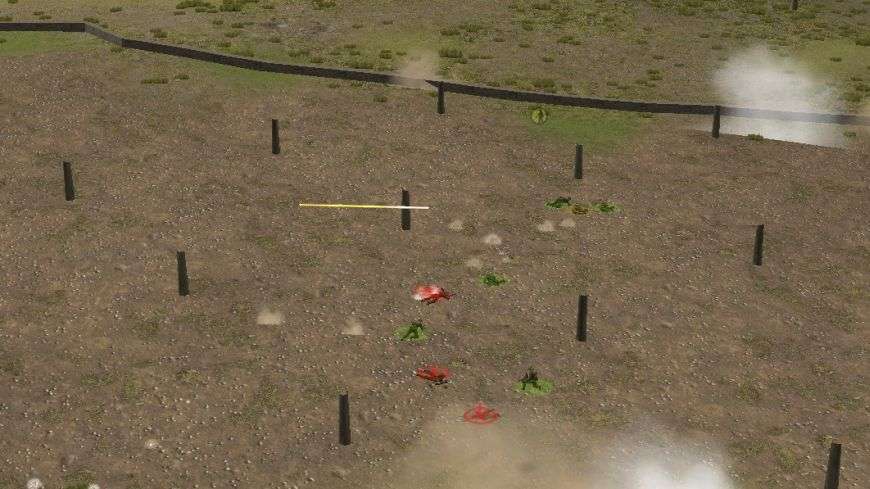
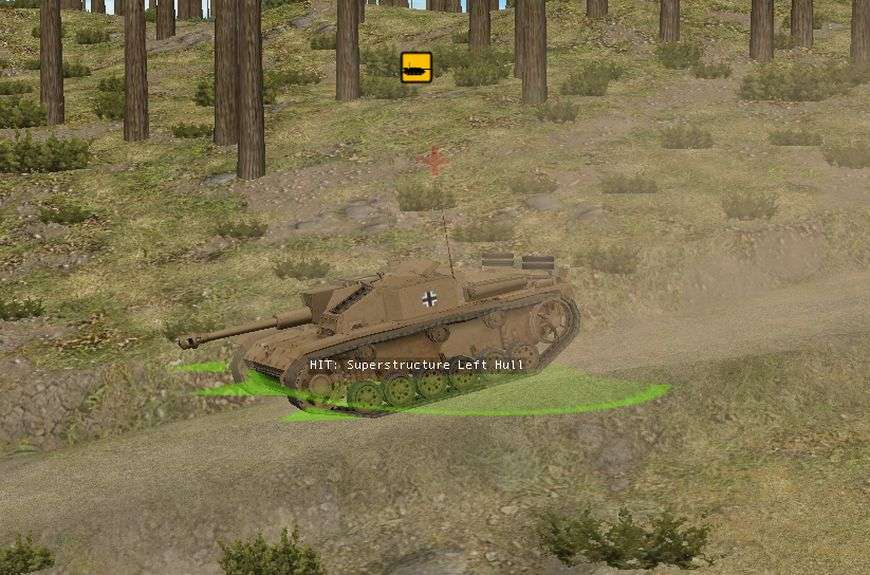
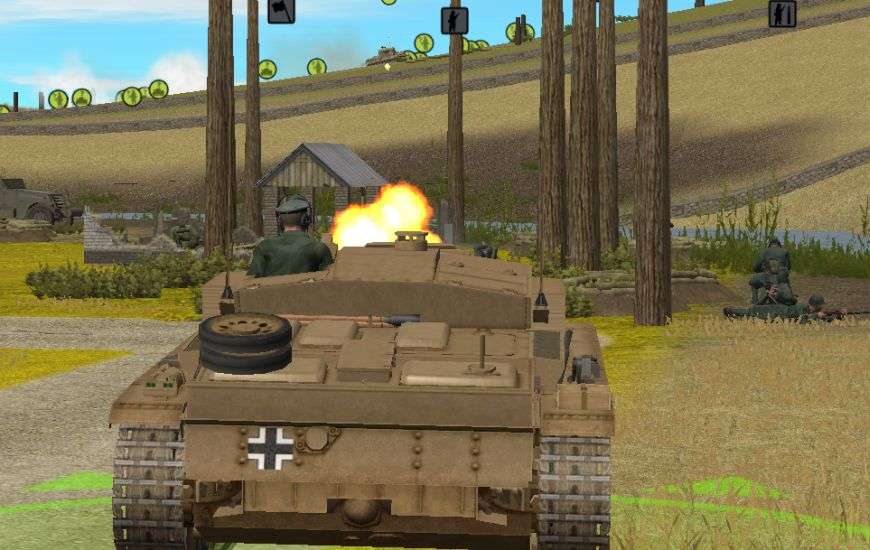
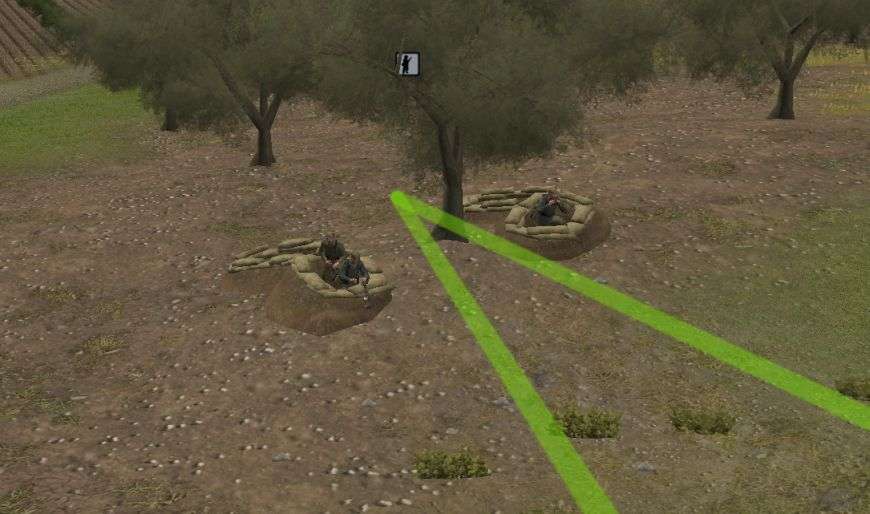
With that thought in mind, last turn I ordered my StuG to rotate to the right to try and cover the hill approaching BN. I have to say, that order paid off big time. As the Sherman exploded in a big ball of fire I actually loudly exclaimed "WOAH!" I had not expected my StuG to target the Sherman and was shocked when there was suddenly this large explosion. Suddenly this battle is feeling a slight bit more winnable to me. Now instead of 3 to 1, my StuG is only facing 2 Shermans.
Here you can see my StuG had a pretty good shot on the Sherman. How he saw the US tank through all the foliage is beyond me but I'm not going to complain.
Orders
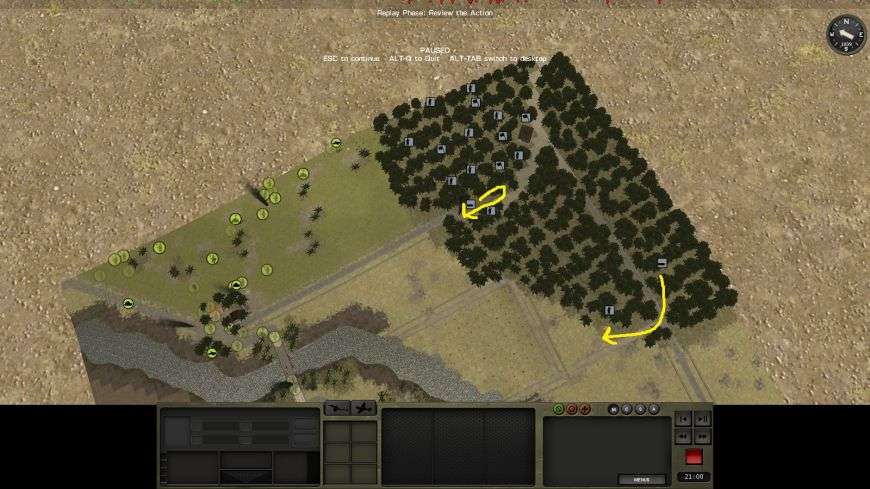
I've shuffled some of the infantry in the woods at BN around to better face the US advance. Penry is coming in more along the right edge of the woods and I want to ensure I have as many guns there to meet him.
I also find a rather big surprise in the woods on the back side of BS. Apparently the US infantry unit who made it in the woods a while back sneaked around my infantry screen and is coming up on one of my R35s. I order my tank to get the heck out of there and give one of my infantry teams the order to start hunting the Yanks out.
-
I'll throw up a YouTube video of the attack in the morning so you can watch the carnage. I'm still pretty bummed about the whole thing. Mostly because it would have been very easy to avoid by not bunching my men up so much.
I made it a point during my setup of spreading my men out against any artillery barrages and then I go and group up a whole platoon when I know there's a plane overhead. Stupid! Stupid! Stupid! Stupid!
-
Turn 30-32
Well all good things must come to an end and my dominance of the battlefield was pretty damn good. Looks like the Americans finally decided to really show up and kick my ragtag bunch of defenders out of the way. A squad of Shermans is going to be difficult to deal with.
Even more difficult with the loss of one of my StuGs almost instantly. I had ordered him to start moving in around the hill near BN last turn. I had thought that my assault gun was going to be able to have fun with Penry's halftracks. Talk about horrible timing on the arrival of those Yank tanks.
The first shell caused casualties to half the crew. The commander and gunner decided to bail out instead of stay and fight. Probably the right decision since a few seconds later a second and a third shell hit the StuG until it was obviously out of the battle.

My R35 up near BN found itself out in the open at an inopportune time as well. He too had just received orders to drive forward to start taking on American halftracks. I have to say I was very impressed with this little tank. It took multiple penetrations by .50 cal MG fire and several shells from the Shermans to knock this sucker out.

Orders
My remaining StuG has its work cut out for it. It is 3 on 1 and there's still at least one GMC still in the fight as well. The battle was called "Withdraw!" for a reason. I think the time will quickly come when I'll be withdrawing. I'll at least stick it out until my other StuG is destroyed but after that, time to bug out.
I will say I expected this from the scenario all along. The sides just seemed too imbalanced, me with StuGs and Penry with just halftracks. But now, things are definitely not in my favor. Maybe if a Mark IV shows up or something I may stand a chance. Actually now that I think about it I should have some more reinforcements coming from the woods near BN. I may not be quite out of this battle yet.
-
Turn 6
Everyone pay attention on how not to play the game. This turn Tiresias gets some of his money worth out of that plane that has been harassing me.
So my mistake here is so very simple and something I know better than to do. I have an entire platoon clumped up together and just waiting for something bad to happen to them. I made fun of the Luftwaffe pilot a lot in the past few minutes but he set up for a painfully beautiful pass this turn.
That hurts. That hurts a lot. I basically lost an entire platoon in one strafing run. I'm still happy I didn't lose the M10 but I'm not sure I'm happy with the trade off and there's still no guarantee that the German plane won't come around and inflict some more damage next turn.
Orders
Many in Bravo Company are still at "Tiring" so I'm letting them recover for at least one more turn before they move out. On the opposite side of the battlefield my recon HQ unit was able to crawl into the building where we killed the FO and have radioed in some artillery on the MG42. It's going to be about 8 minutes but that's okay, I have time.
-
BigDork,
Excellent news! The Abwehr has captured and distributed the manual for the M3 GMC. You are particularly directed to image 11 on page 52. There you can see there is indeed a fair amount of space in which an AP penetration might well encounter little in its path. Intel provided is expected to refine your aimpoint selection.
http://www.tankdestroyer.net/images/stories/ArticlePDFs/TD_Weapons_Chap11_Complete.pdf
Regards,
John Kettler
That's one heck of a find! Interesting and I can see why an AP round, if hitting the right place could go through and do little damage. However if it's head on or butt on, it would definitely cause some issues.
By big problem I'm having is that the StuGs are using AP exclusively to fire on the halftracks while the R35s are almost only using HE. I have a feeling that is an engine issue.
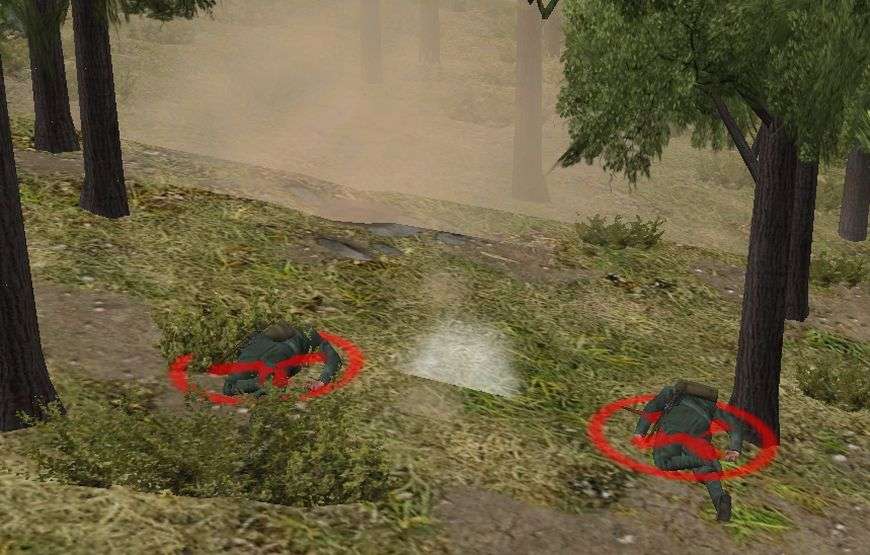
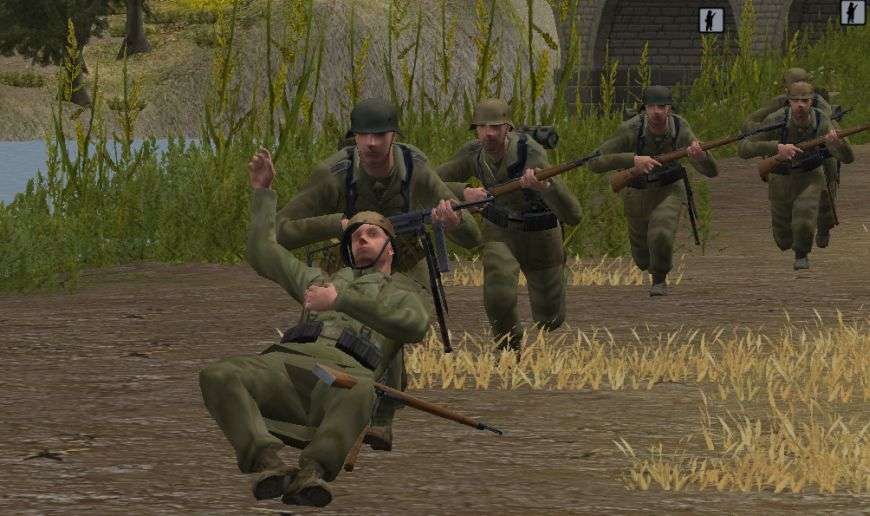
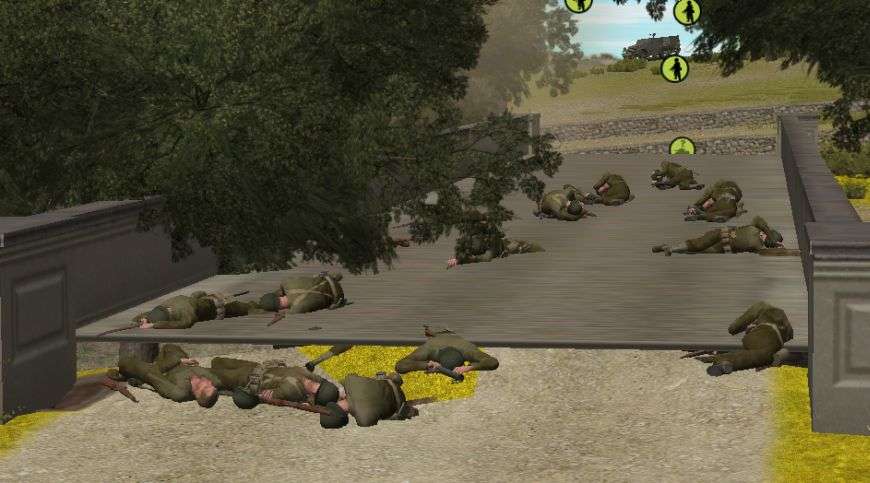
BigDork,Failed to remark, as I'd planned to, on the Totentanz (or is it the pas de deux du mort?) by the bridge. Comrades even in death!
Regards,
John Kettler
Several more comrades died this past turn. I think that bridge should be renamed Ponte della Morte... the Bridge of Death.
-
Turn 29
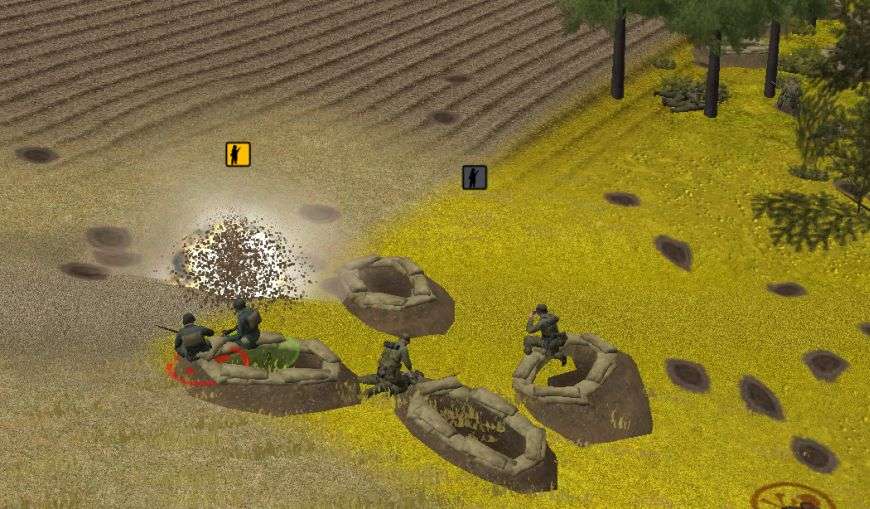
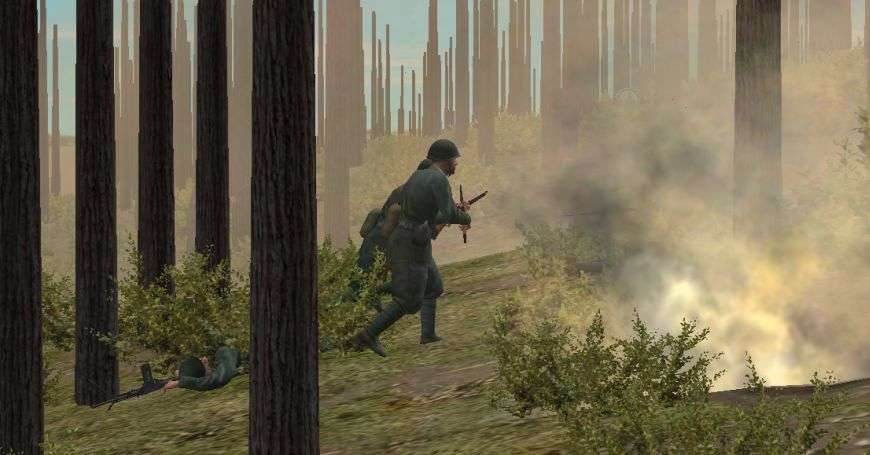
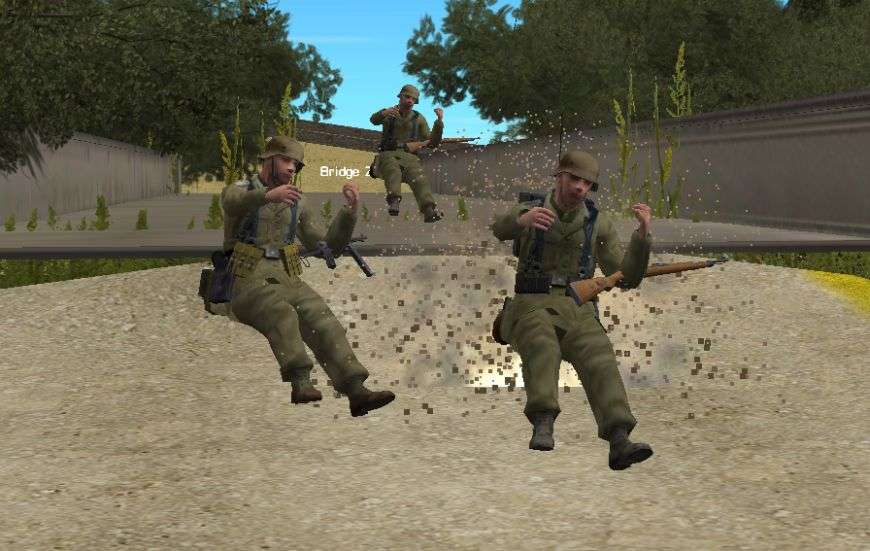
It's not all good news for me however. Penry gets his licks in as well this turn. I knew it was a bit risky to rush my Germans forward from Bridge Z02 to the Farm without any smoke but I didn't have the time to set them up with some concealment. That being said, casualties were light this turn with only two men from the infantry squads being taken out by small arms fire. What hurt slightly was that one of them was a MG42 LMG.
Far more painful was the loss of all but the assistant commander for the German infantry platoon. One of the American mortars must have spotted all the movement at Bridge Z02 and taken the opportunity to cause me some trouble. With one shell the German HQ team was neutered.
The mortar team didn't stop there however. With a few extra mortars Penry's men managed to knock out my gun and send the remainder of the crew running. With that, both of my field guns have been knocked out without a shot being fired. How very disappointing.
Orders
I don't have a lot of new orders for my men. The Germans are almost to the Farm where they will take over the foxholes the Italians dug. Many of those Italians are still in those holes, just no longer with us. I also had to order my FO to cease his incoming arty strike. I had called it in anticipation of losing the Farm but now that I seem to be holding it I am going to re-position it to focus on Bridge Z01. I have held the Americans to the bridge for the most part and if I can shock them with a good barrage I may be able to use the German infantry, supported by the StuGs to retake it.
-
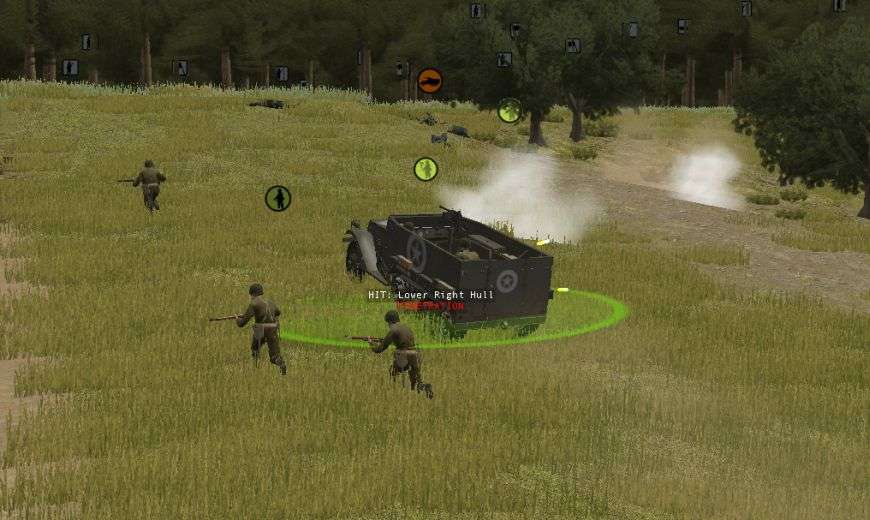
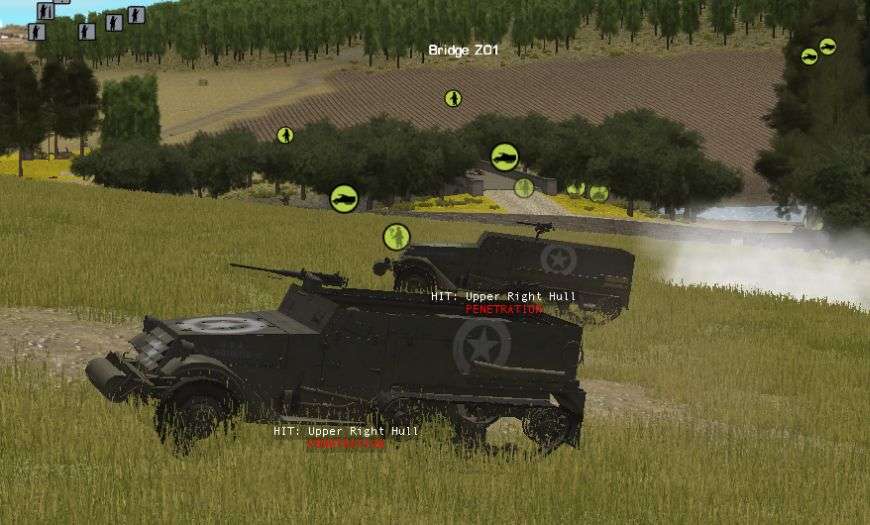
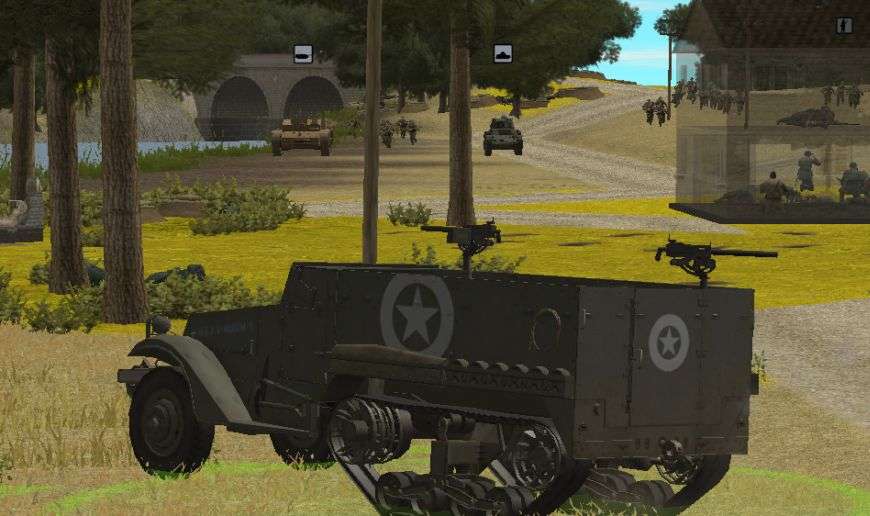
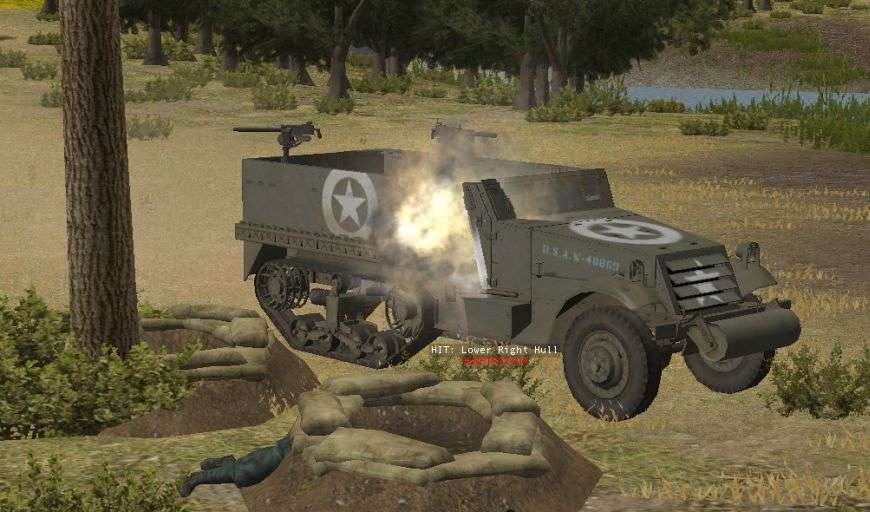
Turn 29
Well Penry is down a couple more halftracks. At this rate his guys are going to be walking all the way to Berlin. The first one is taken out by the StuG I had sent up near BN. As he hunts forward he spots a halftrack moving about on the far side of Bridge Z01. Using an AP round he puts it through the halftrack, stunning the crew. A few moments later my assault gun follows it up with another AP round finishing the vehicle off.

Then in a ballsy or desperate move one of the American halftracks races straight at the Farm. He's moving fast enough that at first my men have trouble taking aim. However as the halftrack stops to let out some men or whatever it was ordered to do my R35 opens up on it... with a HE round. The halftrack isn't taken out but the crew does suffer a casualty.


Canadians Attack! - BigDork vs Tiresias AAR
in Combat Mission Fortress Italy
Posted
Turn 19
Since mortars falling on B Company wasn't enough I also am able to make a sound contact with some form of armor cruising around on the back side of my left flank. Considering all that Tiresias has thrown at me so far, I can only imagine with this may be. Until I have some sort of visual contact to know what I'm facing I'm going to play it extra cautious with my armor. I'd hate to run one of my Shermans right in front of a waiting Tiger.
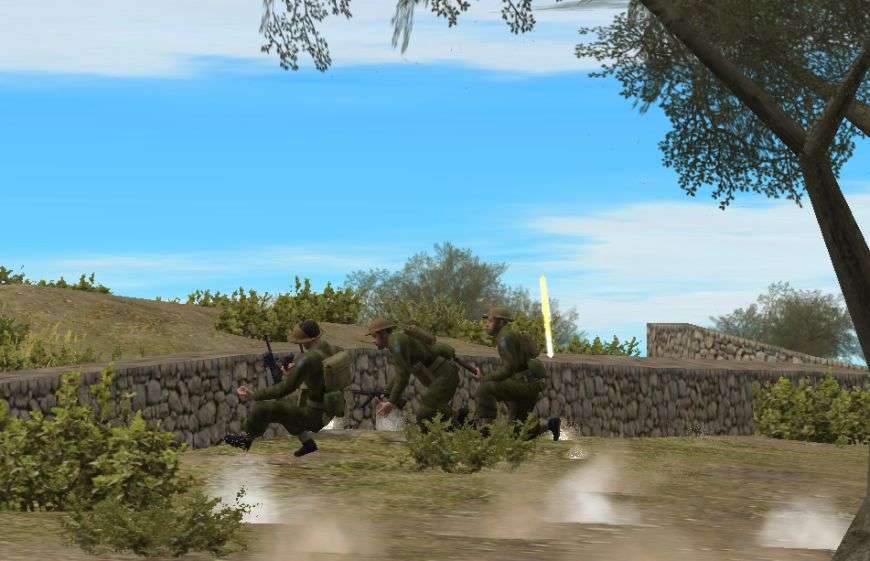
Up to this point in the battle I have been sitting happily on my side of the ridge, focusing on moving my forces on the left flank. However I decided it was time to get a bit of recon of the village and also remind Tiresias that there's still a force on the right. Much to my surprise my initial scout team manages to take up position along a stone wall on the German side of the ridge without instantly dying. They don't spot any Germans in the village but it's a good first step.
Turn 20
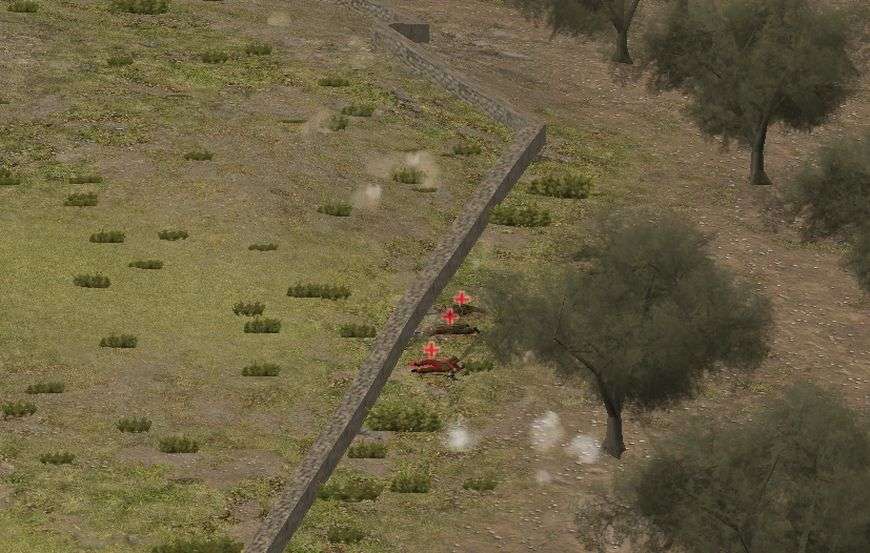
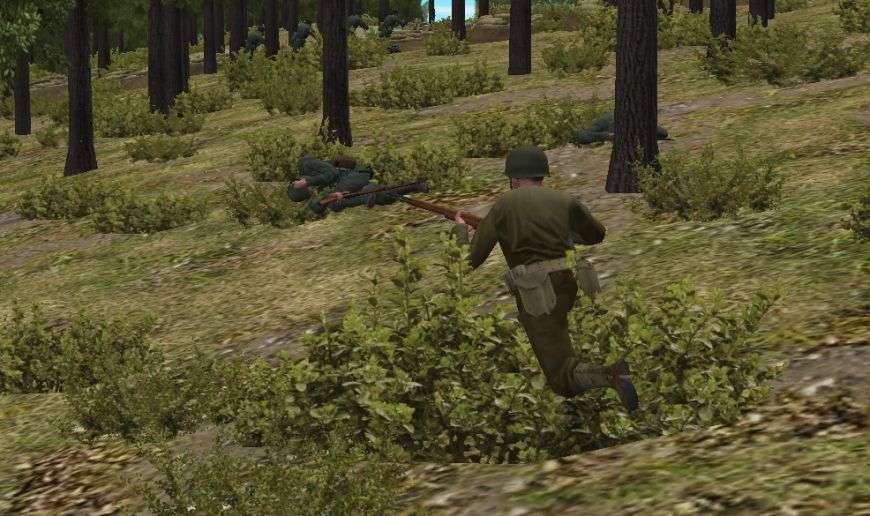
My second scout team I sent forward wasn't quite as lucky. They spot some Germans hiding in a building as they come over the ridge and start laying down some fire on them. Unfortunately for my men, before they can reach safety another German unit starts shooting and quickly takes my men out.
And on the left I'm still dealing with sporadic mortar fire. I had thought the strike was over and started moving my men forward again. A new barrage of mortars begins to fall sending my men scurrying back towards the safety of the wheat fields. I'm making some headway on the left flank it's just slow going thanks to these annoyances.
Orders
On the right flank I'm starting to move the remainder of A Company and some support units forward in preparation for the assault on the village. I want them to be prepared when it's time to strike. On the left, I'm moving my men around where the mortars are falling and doing my best to keep some momentum.