

BigDork
-
Posts
589 -
Joined
-
Last visited
Posts posted by BigDork
-
-
All the better to CRUSH his morale with your coming turns.
I'd be tempted to be content with denying movement to the degree that you can while you wait for reinforcements to arrive.
My only advice, having just finished reading "The Day of Battle" by Rick Atkinson (a good read of the Sicily, Italy campaign, which sometimes leaves you wondering how the Allies actually won, but execution of actual warfare is filled with difficult choices (thank goodness it's only pixeltruppen that I lead to their massacre)), is not to commit those reinforcements piecemeal. If terrain denial is working, accumulate what you can so it hits hard, rather than in drips and drabs.
Thanks some excellent advice. If I can keep Penry pinned down and clumped up I can hit him hard. I just need to survive him trying to do the same to me when his forces arrive.
-
Turn 13
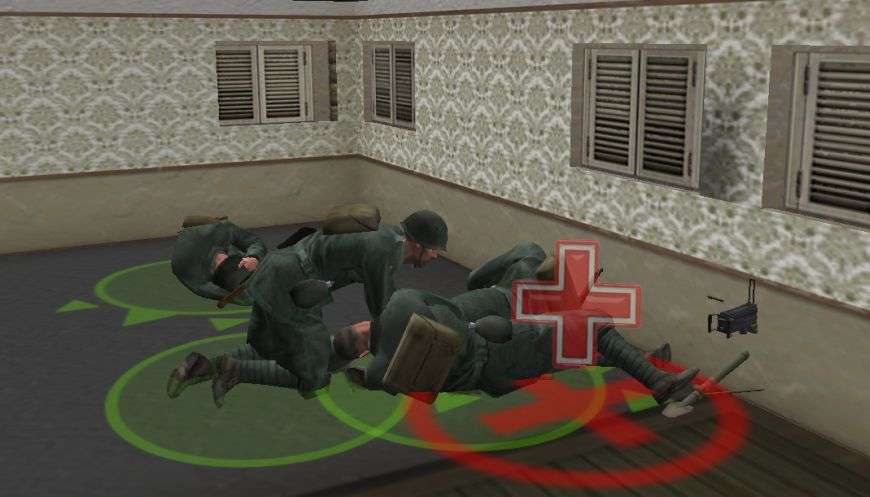
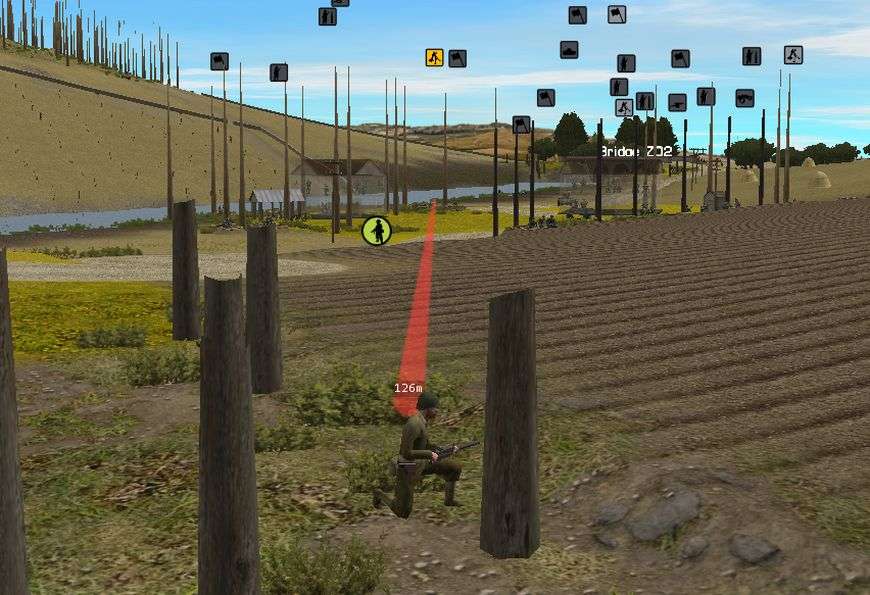
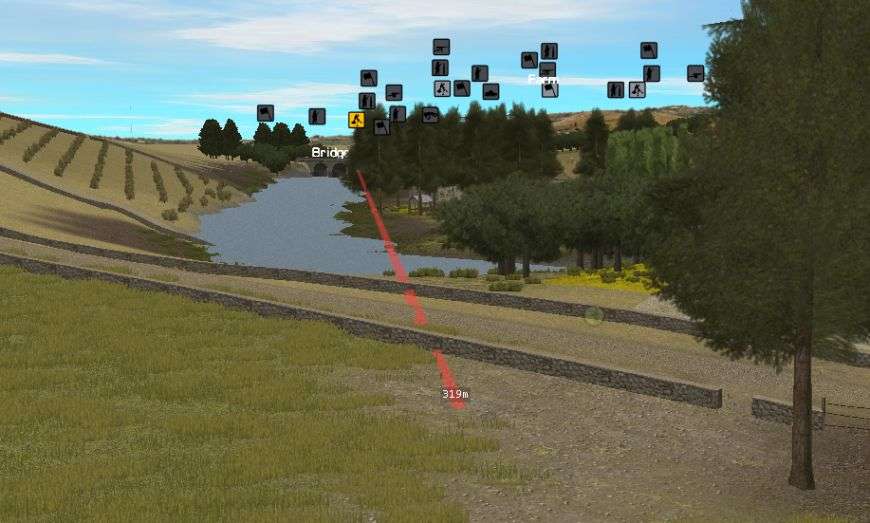
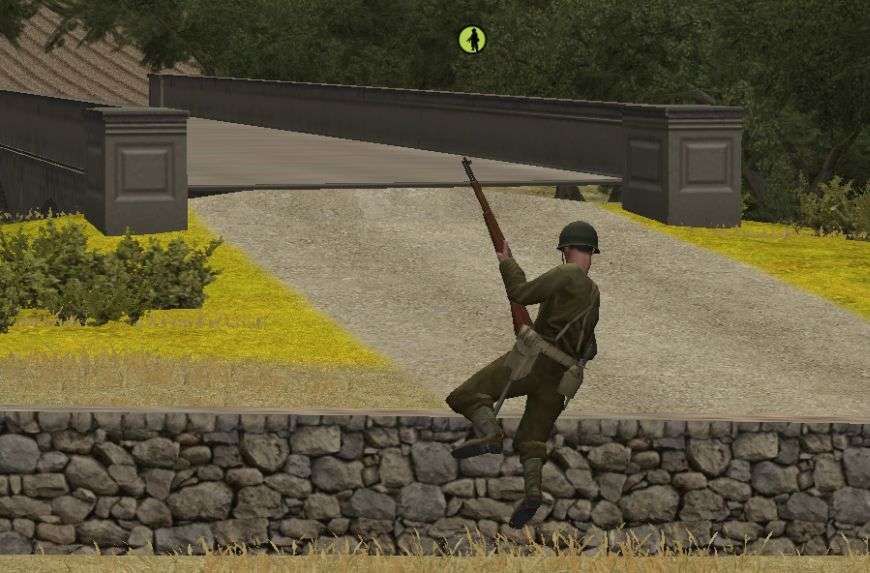
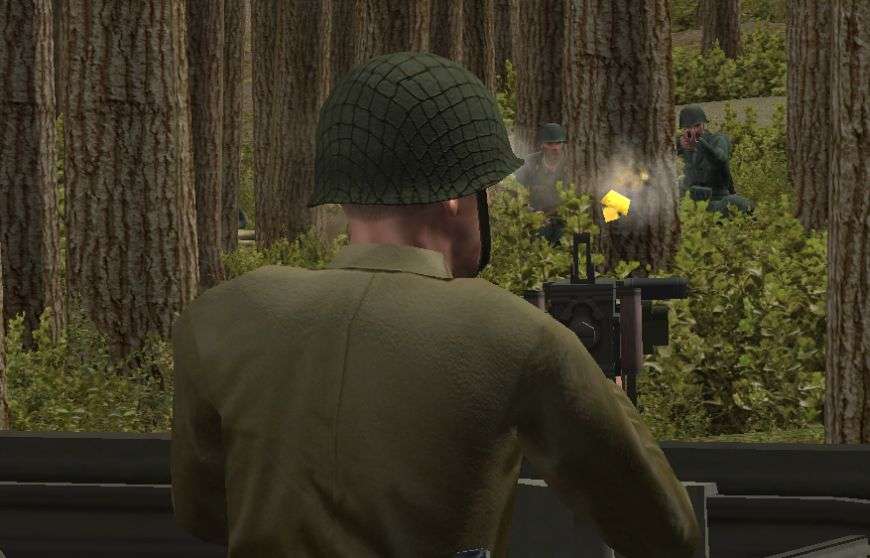
After the action of the past two minutes things quiet back down. One of my units fires on a halftrack with no real effect. Near the end of the turn my R35 at BN spots an infantry unit making a move down near Bridge Z01. The shot it takes is a beauty. It's a bull's eye! One man obviously taken out. Due to the small HE shell though it would appear no one else is injured. Pity.

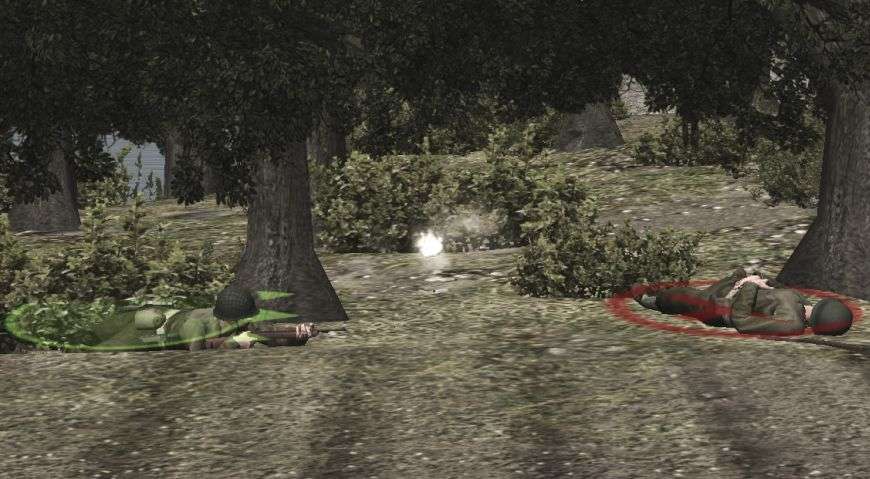
My infantry team is able to escape back into the woods near BN. They unfortunately suffer a couple more casualties before they reach the safety of the trees. Many of my men fell bleeding next to their foes.
Orders
I've given orders to my infantry at BN to swap places. The chewed up infantry are heading back to the barn to rest up and the fresh squad is moving forward. MY FO continues making his way from Bridge Z02 to BS through the trees. He still has a couple more turns before he arrives but I need him to hurry... I want him in place before the Yanks reinforcements arrive.
-
BigDork,
It looks as if your R35 is firing HE, rather than AP of some sort. Would you please take a look at your ammo rack and let us know, please? That looks like an enormous force concentration you have in the center, and you seem to be giving Penry one bloody nose after another. All in all, things look very good so far for the defense.
Regards,
John Kettler
I can confirm that it is firing HE at the halftrack. In turn 12 my R35 finished off the halftrack and it did the task with HE.
So far so good but we still have a long way to go and I have no clue what he's going to get for reinforcements. The battle clearly starts in my favor force wise but I have a strong feeling that will shift soon.
-
Turn 12
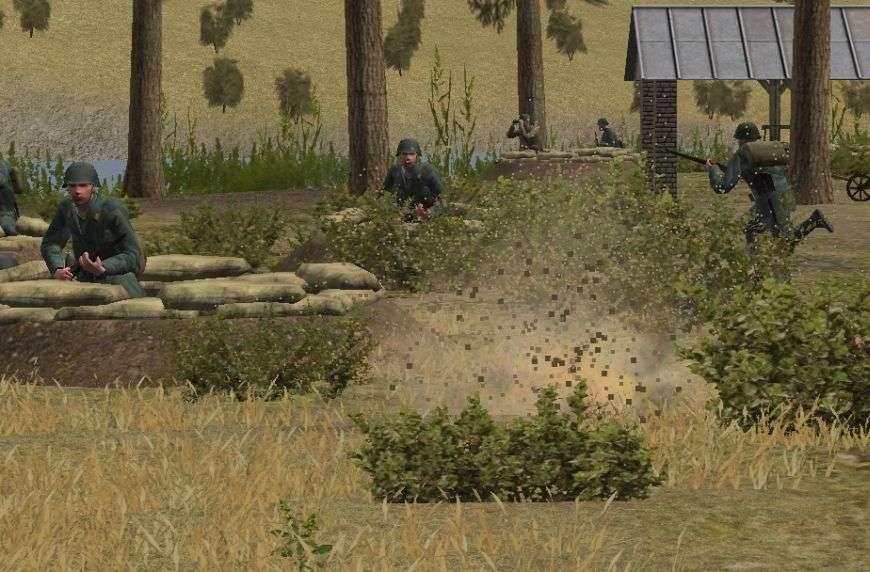
Well that didn't go quite how I planned it. I've got to give Penry some credit, it would appear he was prepared for the possibility of me coming out of the woods. That or he spotted my men and had time to react. As my men crested the hill an American machine gun team started sending burst after burst of hot lead their way. Quickly my men hit the turn and my rush down the hill was over.
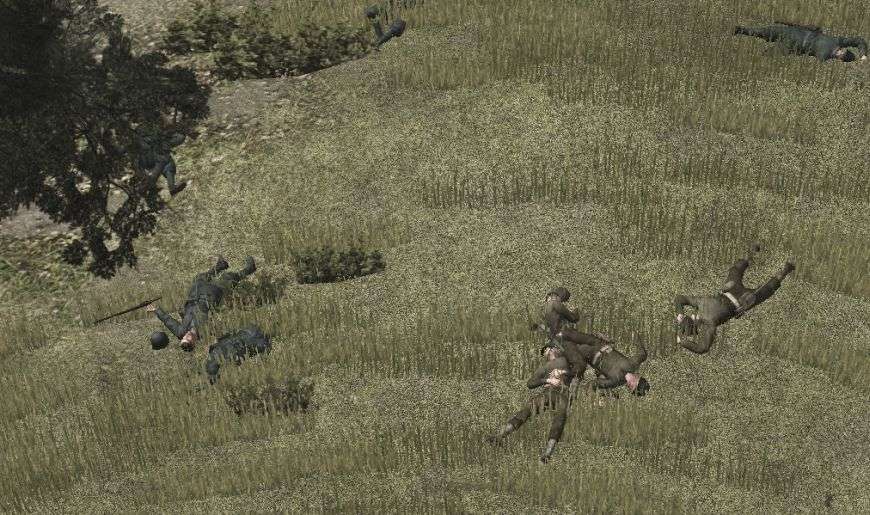
Moments later my men decided that a headlong rush downhill towards a machine gun with zero support was a bad idea. They picked themselves up and started heading back up the hill towards the safety of BN. Unfortunately for me four of the men have because casualties and they are far from safety. I knew I was taking a slight gamble and honestly I'm feeling kind of stupid for doing it. The battle was going well for me without this attack. All I've done is lose several men and give Penry a small victory that will improve his morale.
Orders
Things are going well for me with the one exception. I've ordered my one team to keep making their way back to the safety of the woods. Once they make it back I just may swap out the squad that got shot up for the fresh one I have back further by the barn. I'd rather have fresh infantry at full strength be my first line of defense when the Americans finally make their charge into the woods.
-
*Had to break it up into two posts due to image limit
Orders
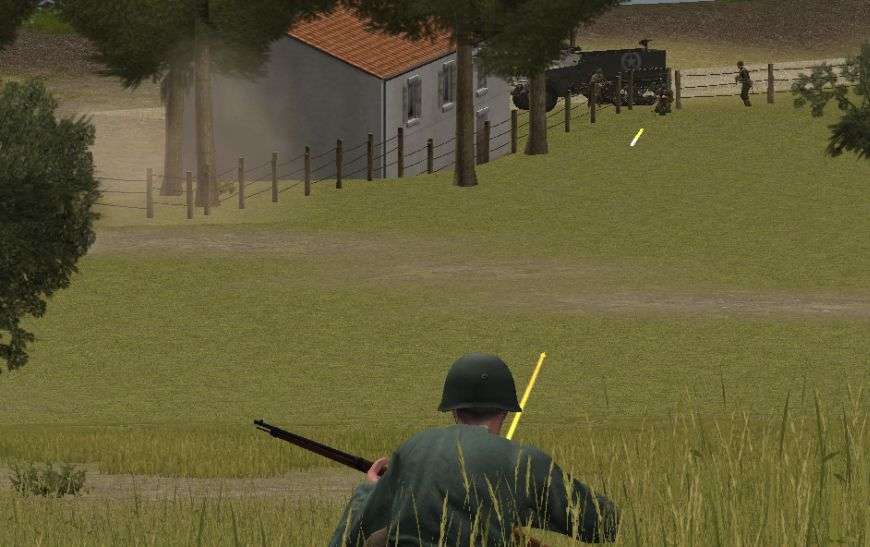
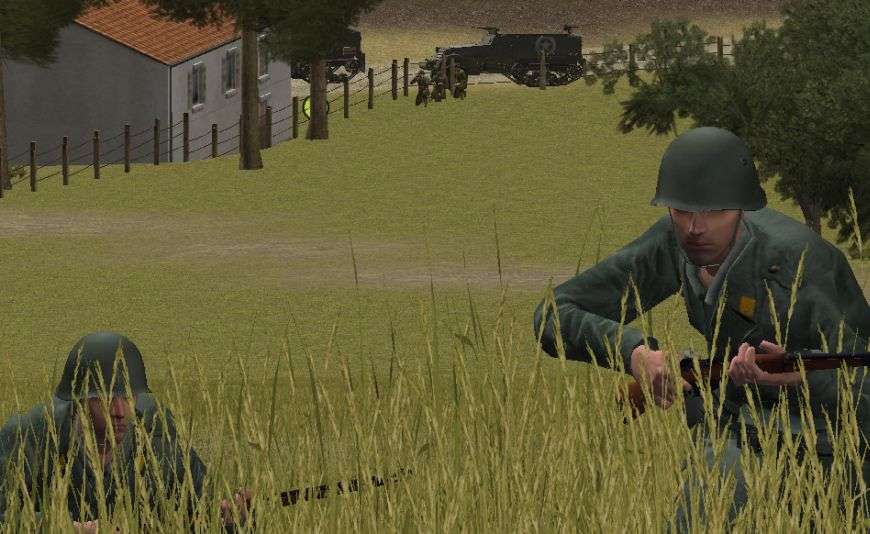
I have two things going on next turn. At BN I've got the infantry rushing down the hill moving closer to the mortar team I spotted a few minutes back. They are only going as far as the next group of trees though. Any further and they don't stand a chance in making it back alive. I want this to be more of a disruption and distraction and not a suicide mission.
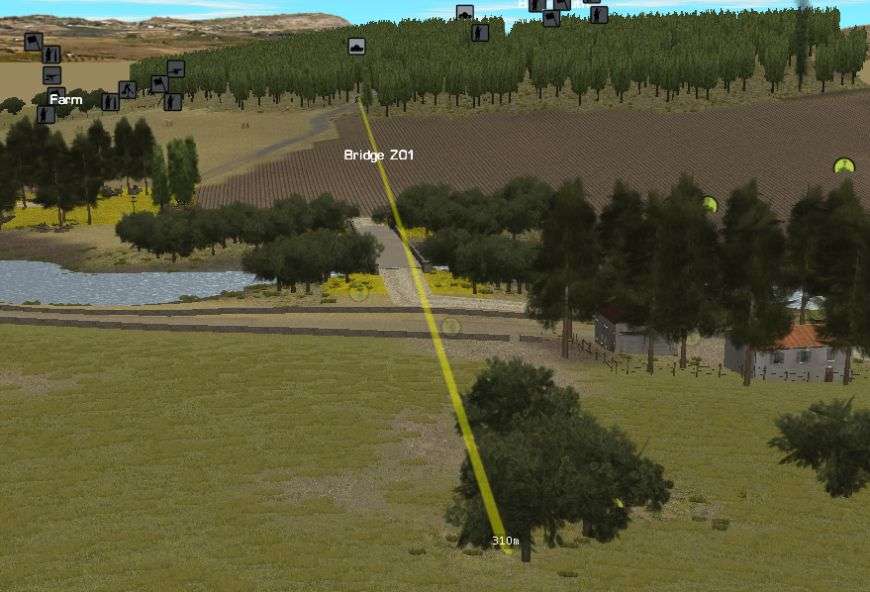
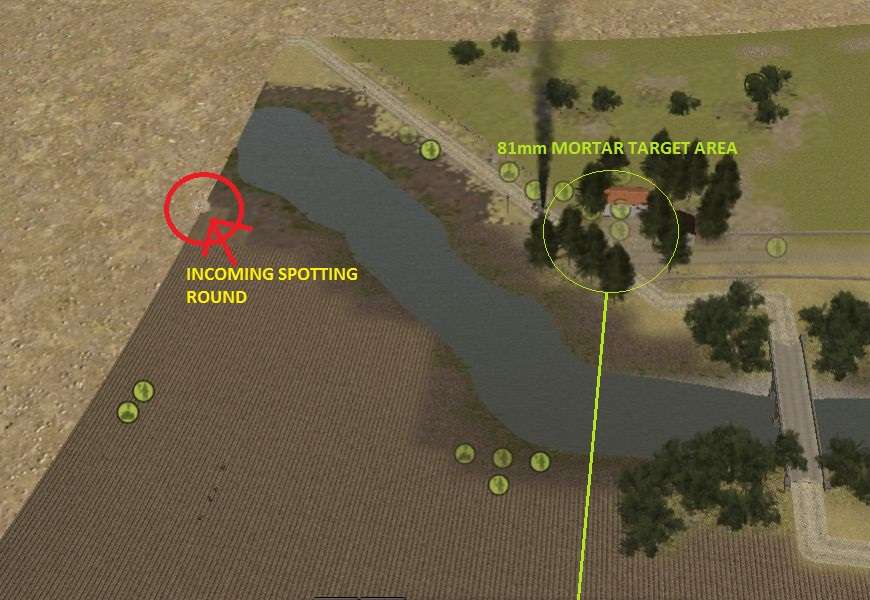
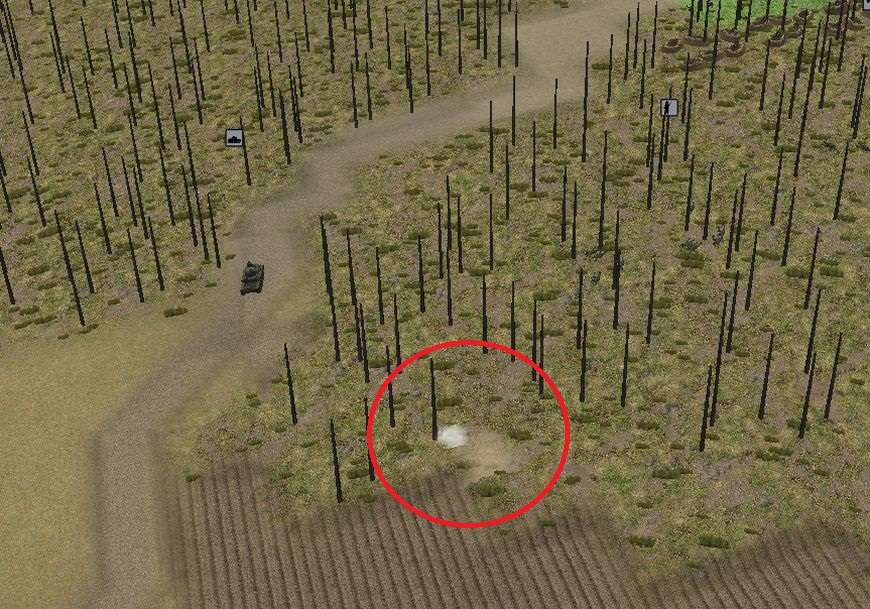
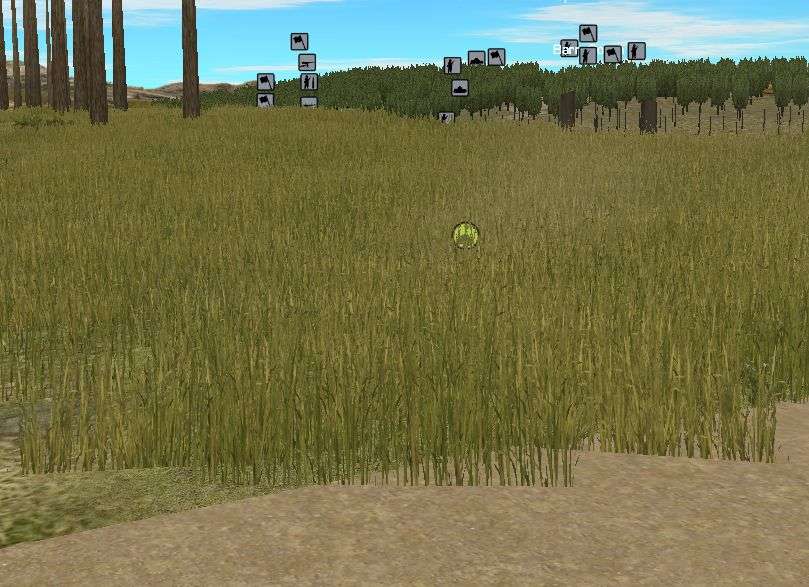
My 81mm mortar strike continues to be worthless. A couple more spotting rounds landed in the past minute (yellow circle) and none of them were anywhere near the target. I have the HQ unit at BS cancel the mortar strike and I will begin to move my forward observer from the back map near Bridge Z02 over towards BS. I've pretty much missed my chance to do a lot of damage to Penry right now since he's slowly spreading out his forces but if I can get that FO in position before the American reinforcements arrive it could be very, very good for me.

-
Turn 11
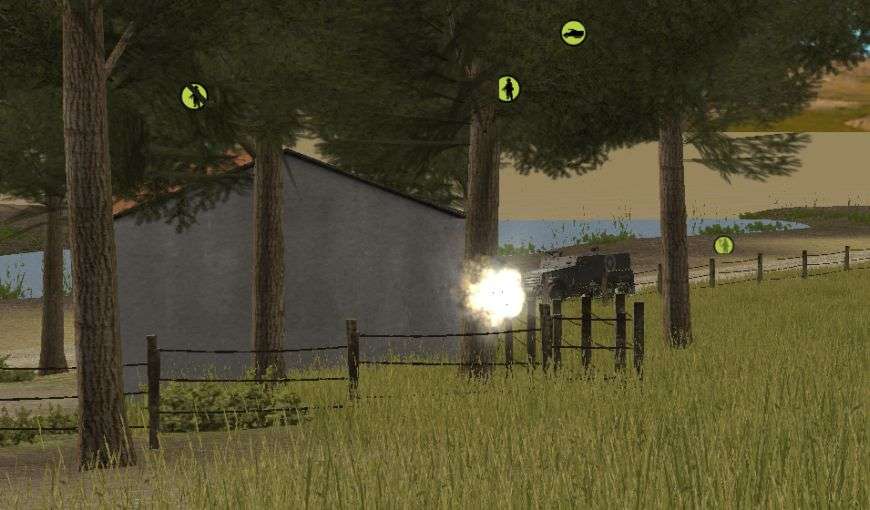
Penry is on the move this turn. A few of the American halftracks drive up towards the farm and open fire.
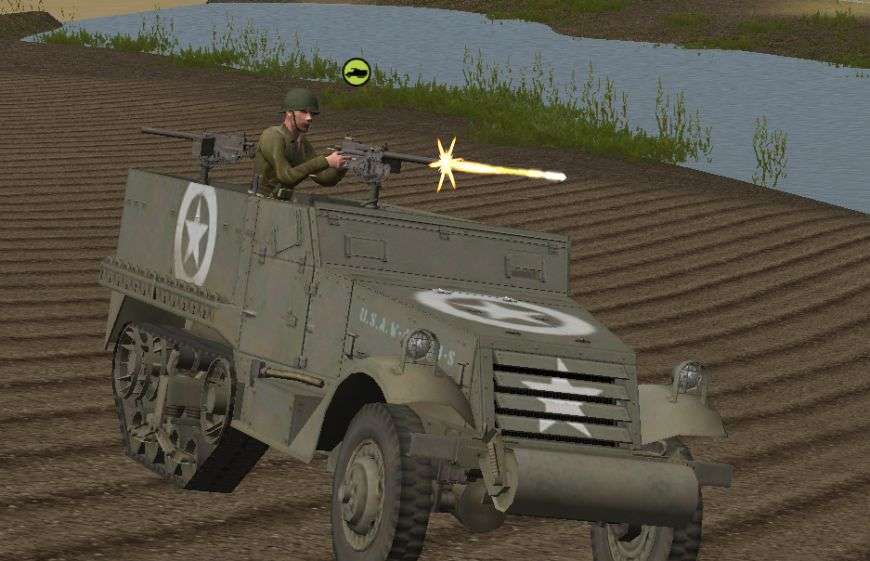
My Breda MGs seem to be the biggest target of the American gunners. I am thinking Penry is trying to suppress my machine guns in preparation for an infantry rush on the farm. While the walls of the farmhouse offer some protection they aren't enough to fully protect my crew. I suffer one casualty and the rest ball up for safety.
While the initial halftrack assault catches my men off guard the attack doesn't last long. My R35 positioned at BN perfectly to fire on Penry's vehicles. As soon as my tank starts opening up with it's MG the halftracks start to reverse and scatter.
The assault is further broken up when one of the halftracks is hit by one of my 37mm rounds. While the vehicle survives the impact the crew inside does not.
The minute ends with my infantry finishing up ensuring that the woods near BN are cleared and begin their rush down the hill. Next turn this will be just one more thing for Penry to worry about.

-
Glad to see that your TC learned how to CLOSE THE HATCH! That's why they put hinges on them, doncha know?
The one TC I did lose was just bad luck. The explosion that took him out was way back from his tank. I'm actually having my other R35 near BN open back up. With all the mortars coming in on Penry near Z01 I expect his guys will start vacating in a hurry. I want my tank to be able to spot that as much as possible and add to the mayhem.
Nice AAR. Aggressive defense. Yum.Glad you're enjoying it. I'm not the most aggressive usually on defense but in this case it seems like a good move to at least push a bit and keep the attacker reeling. Also it makes for a better AAR.

-
Turn 10
This minute was even quieter than the last. Neither side took a casualty and there was only a few shots fired. Penry is definitely hunkering down and either waiting for artillery, reinforcements, or both. My infantry hunting through the woods at BN took longer than I expected so they haven't began their rush down the hill yet. That will happen next turn.
Another spotting round came in for my impending barrage. It landed very close to the last round and not nearly close enough to the target area. I'm nervous that I'm about to watch a bunch of 81mm mortars be wasted.
Of note, this round landed in the middle of the stream. I didn't get any splash or explosion but it did smoke/dust for the usual 10 to 15 second or whatever. I wouldn't call that a bug but it's probably not how a mortar should act when it impacts water.
Orders
For the next turn I've ordered two of my Brixia units to open fire. One of the teams located at the farm is going to target the American MG team that is hiding out in the trees near Bridge Z01. Also, I spotted some Yanks sneaking around near a stone wall last turn so I am having my Brixia back at Bridge Z02 area fire near them. These two strikes along with my hopeful incoming mortar barrage should really ruin Penry's day even more.
I also order the R35 located at BS to area fire towards the mortar team it was firing its cannon on a few turns back. While the HE wasn't the most effective the MG should do a decent job of at least making the team get their head down. While they're eating grass my infantry can hopefully swoop in and take them out.
-
Well that is a great suggestion that makes a lot of sense. Next turn as I close with the Americans I'll definitely remember to give that order. I completely spaced on the fact the R35 has the MG.
-
Turn 9
This was another quiet turn that could set the stage for some action coming soon.
My R35 firing from BS proves to be pretty useless from what I could tell. The HE shell just isn't powerful enough to be worth the ammo usage. I may have caused the mortar team to hit the dirt but I can all but guarantee I didn't cause any casualties.
One of my Breda MMGs in the farm does spot a Yank machine gun team trying to crawl out of the cover near Bridge Z01. A few blasts from the machine gun takes out one American and sends the other scurrying back into the brush.
I froze when I heard the scream of an incoming round. This was it... the American barrage I was expecting was about to begin. I scanned the farm but didn't see any impacts. I checked BN and BS and didn't see any either. I replayed it a couple times but still nothing. And then I saw the round impacting back near where the Americans entered the battlefield. I had totally forgotten that a few minutes back I had ordered one of the section HQ units at BS to area target where the Americans were hold up. The round I heard was the first of my spotting rounds. This should get Penry worried.
Orders
Well having my tank area fire on the mortar team wasn't successful so I'm going to go back to my first instinct and have one of my infantry sections sally forth from BN. I'm going to have them hunt forward and make sure that the first American mortar team I shot up is indeed eliminated. If they are my men will then rush forward down the hill towards the rest of Penry's forces. I'm hoping that with the distraction from the mortars about to come in and now me going on the offensive I'll force him into action he's not yet prepared for and cause even more casualties.
-
BigDork,
Looks to me as though you're doing well for yourself. You're dishing out a lot of pain and didn't wind up with mortar treebursts over your foxholes. Am amazed you exacted no casualties when you smote that HT, but such things happen in war. Glad to see you've figured out how to fight your R-35 without getting the TC capped! As for attacking through the plowed field, at least he's with the grain. somehow, though, I suspect that, under the hood, he's still suffering a movement and fatigue penalty. Were he going perpendicular to the furrows, his men might be more survivable once prone.
Regards,
John Kettler
I think those tree bursts are coming. I have a feeling I'll be getting whacked by US artillery soon. As for his team being fatigued, it's no longer anything they're concerned about. The last man of that team got gunned down in the last turn.
-
Turn 8
After the action from the past few minutes this is a much quieter turn. I have a sneaking suspicion Penry has called in some artillery and is just waiting for it to fall. It's probably what I would do. It could be that in conjunction with waiting for the rest of his forces to arrive.
The mortars stop falling at the farm by my R35 over at BS continues to be harassed. The tank commander had previously taken refuge within his armor so there's no danger there. Even with a direct hit I'm not sure these smaller caliber mortars would do much damage. This is probably ammo best used against other targets later on.
The other danger for the American mortar crew continually firing is eventually someone was bound to spot them. One of my platoon HQs spots the mortar team hiding behind some trees on the hill on my left flank. Not good for them.
Orders
My first instinct was to order some of the infantry to sally out of the woods at BN, attack down the hill towards the mortar crew, make a scene and really throw Penry off. However BN is pretty important for me to hold and I don't want to risk the men. So instead I order the R35 to area fire back towards the unit area firing on them. Seems appropriate.
-
Turn 7
Knowing he needs to suppress the farm if he is going to move on either barn Penry starts firing some mortars at the farm. However he's using smaller 60mm mortars and that's not going to do a whole lot. In the entire minute he only gets one casualty. All that ammo for one casualty sounds like a good trade to me.
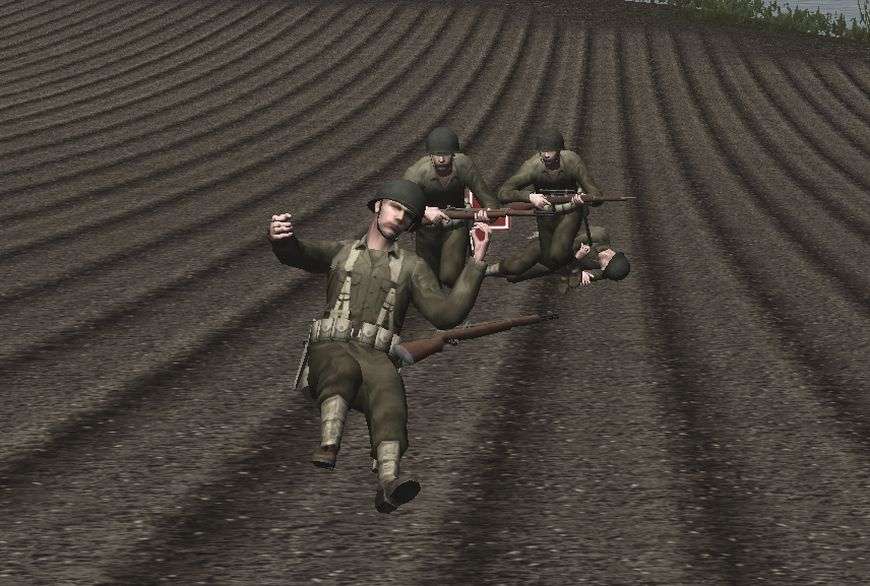
Maybe thinking that his mortar strike would be enough to stop the farm Penry orders a team to charge through the plowed field. Unfortunately for his men my guys are prepared and quickly take out half the team before the start hugging the ground.
Near the end of my turn my operational R35 near BN gets into the battle. The commander spots one of the American halftracks making a move for the bridge. Quickly he hops into the tank, slams the hatch, takes aim and fires. Despite being hit and catching on fire I don't think I managed to cause any casualties which is too bad since it was a HQ unit I saw jump out of the burning vehicle.
Orders
I'm feeling pretty good up to this point. I've suffered two casualties and have caused some significant damage to the attacking force. I don't think I need to do a whole lot in the next minute but that may change soon. American units are moving towards the farm close to the river bank. My men are having issues keeping view on the approaching men. If he finds a way to get close with some infantry I could be in trouble. I have a lot of support units there but not a lot of infantry. If I lose the center Penry would be able to focus on the flanks one at a time. I can't allow that to happen.
-
For anyone interested in following along from the American perspective you can check out Penry's AAR over at WePlayCiv.
-
I really like your arrows.
We can't all have awesome Photoshop skills like Bil. Besides, I'm lazy. MS Paint is good enough for me.
John, no one has any choice about what ammo their TCs try and use. And TCs don't have the AI to elect to use a less 'splody round to slip through canopy.I found the R35s in Clearing the Niscemi Highway to be very effective mobile infantry support. Their guns are quite sufficient to deal with any of the armour that's been mentioned as being available to the attackers in this scenario, at least, and so long as they stay out of 'Zook range, with their frontal aspect presented, they're immune to even .50cal, I believe, while buttoned. Spotting, as has been noted, is their weakness, but with a live commander and fairly broad keyholes (so they have a decent window of spotting opportunity), they should be a pretty strong inhibitor on the dogfaces movement.
My one R35 is so far shrugging off .50cal bullets pretty well. The driver isn't even all that spooked. I'm sure Penry will figure out soon that there's something wrong with the tank when he doesn't fire back but for now I'm okay with some ammo being wasted.
I do have some IMO good spots for my remaining R35s and assuming they do spot some Yanks the 37mm HE will be enough to cause some pain.
womble,Forgot about that ammo selection issue. Guess the memory circuit from CMx1 was off, causing me to seemingly recall a capability that wasn't there. Now that I think about it, I remember howls from the players over when "T" was used, and that was assuredly an AI issue. OTOH, didn't we have a choice in CMx1 to fire AP as baseline, with HE or smoke as options? Details are hazy, but I'm fairly certain it was something along those lines. If so, in some ways, especially since this is more of a sim than CMx1 ever was, I think we may've lost some tactical flexibility.
An R35 should be able to kill just about anything short of a Sherman, but definitely doesn't want a gunfight (except when shooting first from flank or rear) with a Stuart. That could end badly. And while 37mm HE isn't all that potent per se, it'll easily kill to at least 5 meters (that's what the 25mm Bushmaster HE round does) out and wound to even more. Would say it's going to smart if it lands on an AS with infantry there.
Regards,
John Kettler
If I spot anything that's Stuart or bigger I'm going to be a bit more conservative with my placement and use of the R35s. In fact I'm anticipating some bigger armor rolling in at some point and figure I'll be getting the same. I'm hoping for a MkIV or three.
-
Turn 6
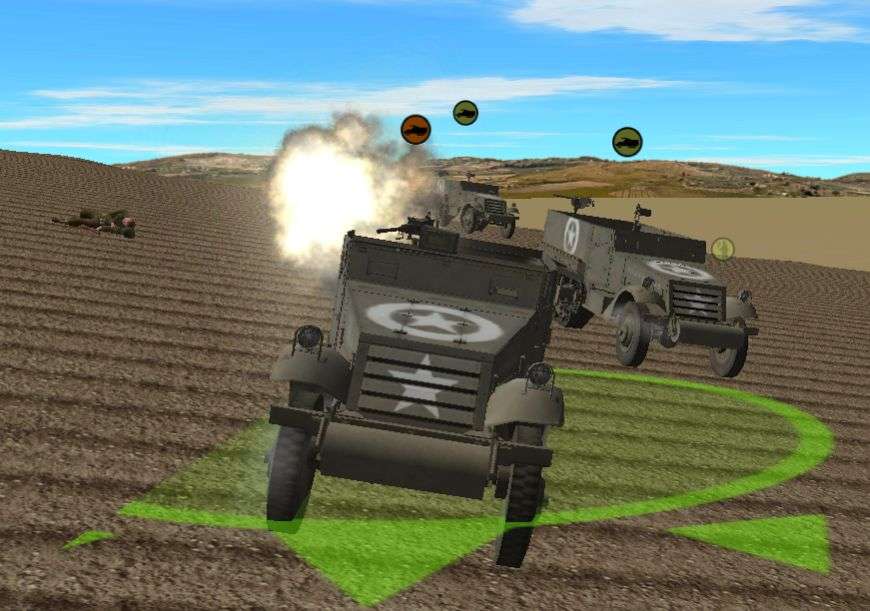
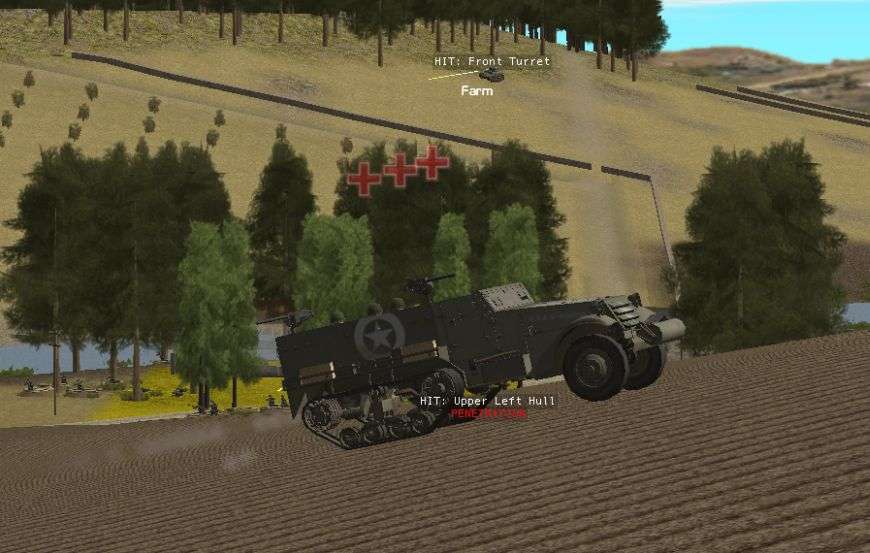
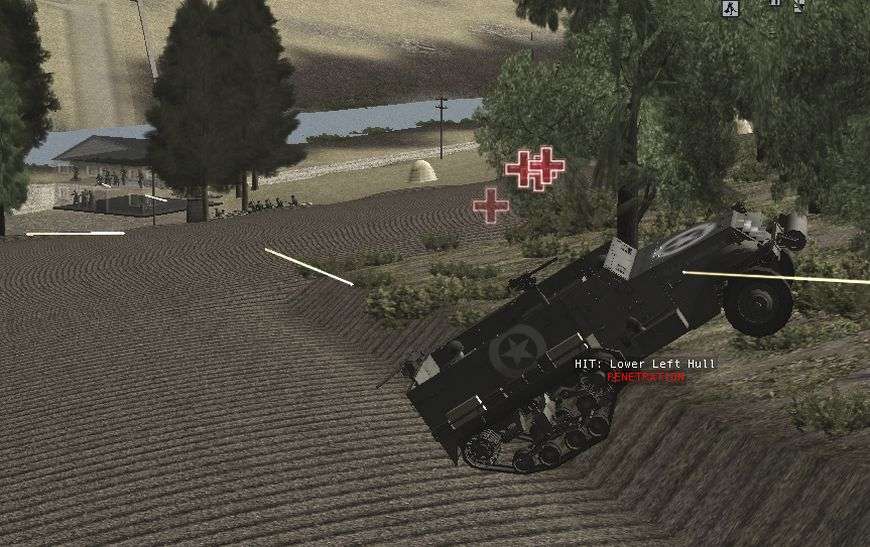
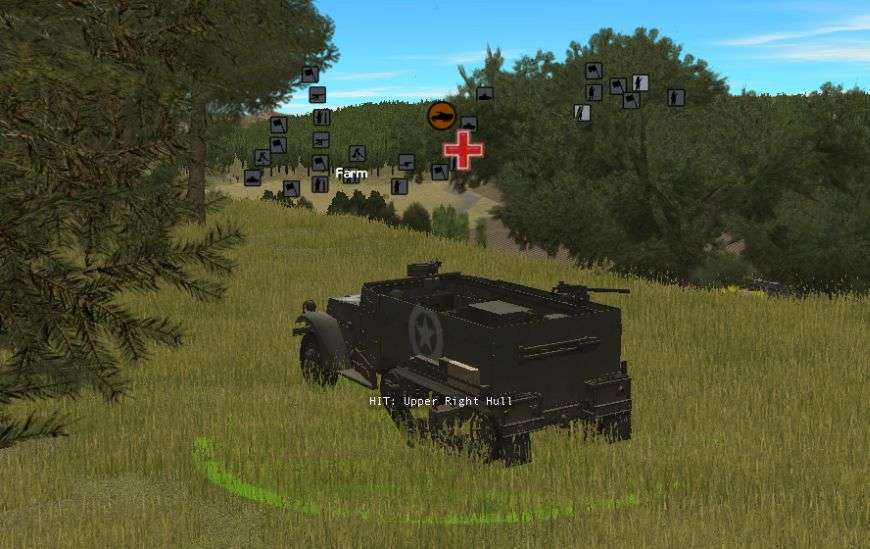
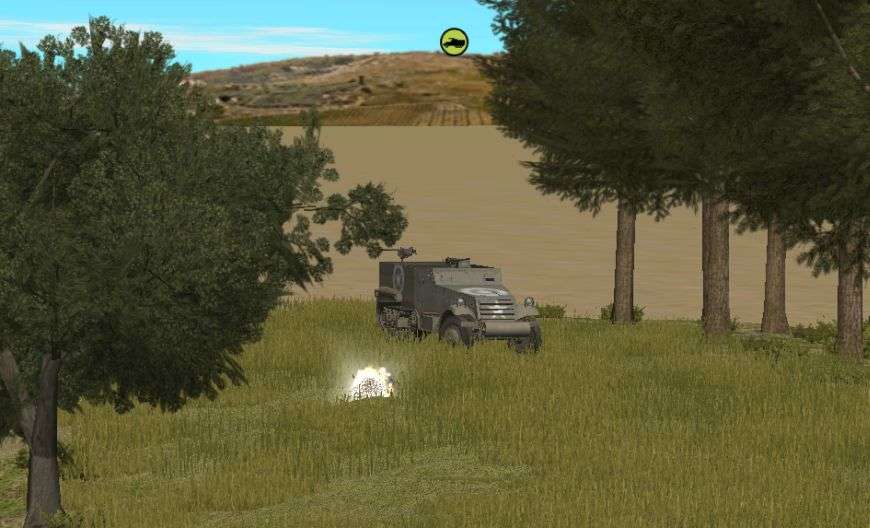
Man did I call it. That or Penry is reading my thread. As the new turn begins the halftrack up at BN lurches forward and takes off down the hill towards the relative safety. A few long range shots penetrate the thin armor but as far as I can tell there were no casualties.
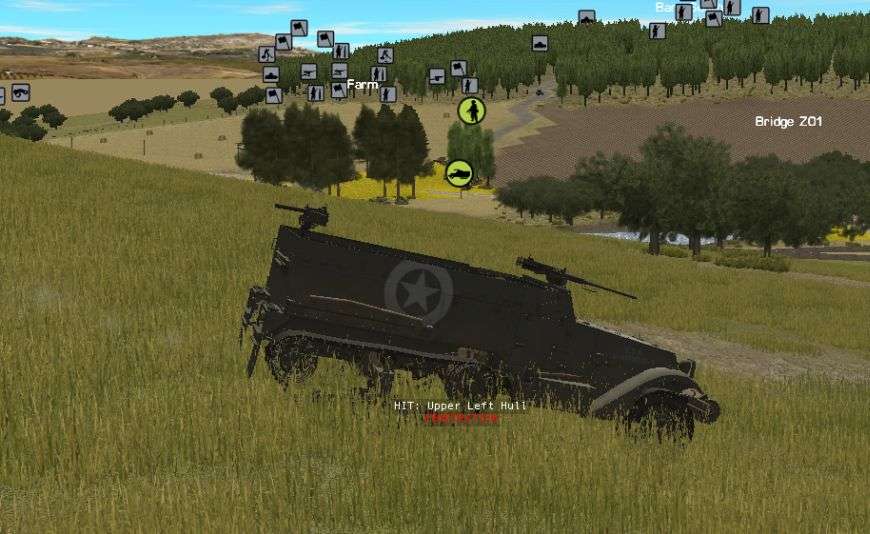
While Penry pulls back from BN he also sends a halftrack full of GIs up the plowed field towards BS. While he's able to get some decent info on where some of my units are it is a costly scouting mission. By the end of the turn only two or three Yanks survived and now they're trapped in the woods at BS with my platoon of infantry.
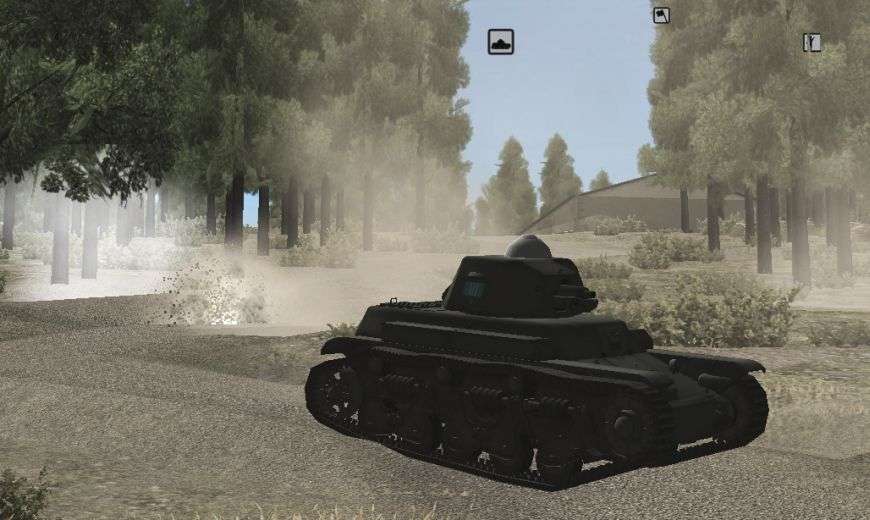
Also note the R35 taking hits in the background of the first picture below. This is the tank that lost its commander a couple turns ago. This little tank is doing an excellent job of distracting Penry which is about all it's good for. As I mentioned in the beginning, the spotting for these tanks sucks. Even though it's facing directly towards the Americans my driver spent an entire minute not seeing a thing.
Picture taken in Movie Mode
One of my squads down at the farm drew some attention as they were firing on the halftrack. A shell came from somewhere and landed dangerously close but thankfully only one man was slightly injured.
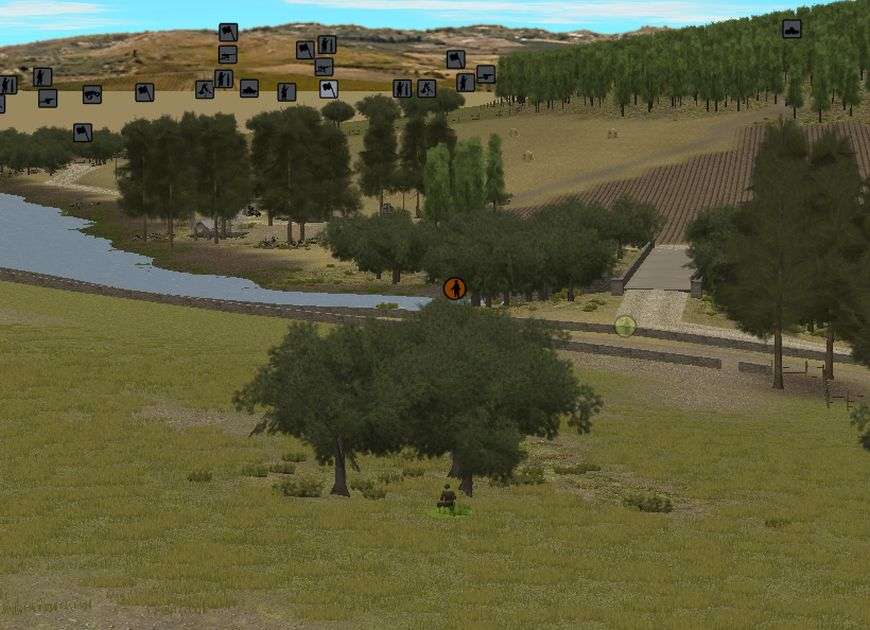
Orders
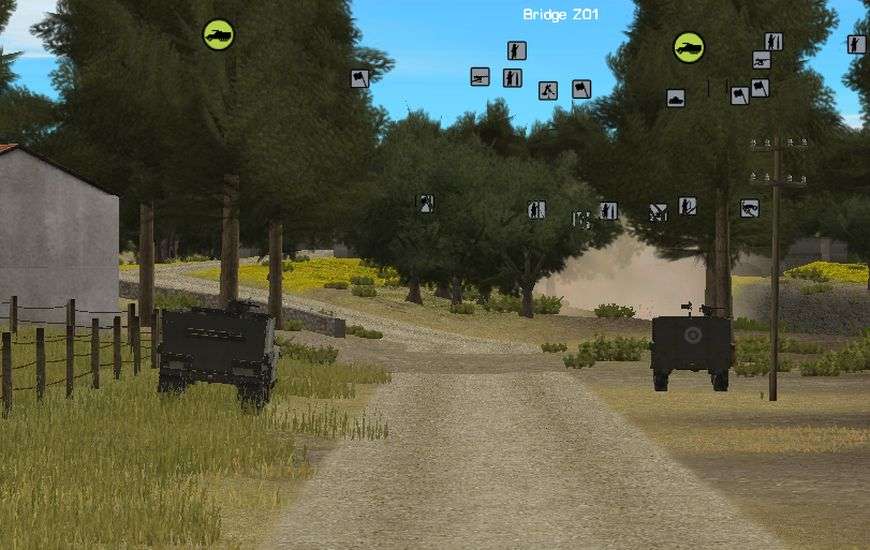
Here's a look at the battlefield at the end of six minutes. As you can see the Americans have gotten a toe-hold on my side of the river. There must be a ford or something because they sure didn't take the bridge. I'm starting to feel that Penry is at a loss for how to really push off and begin his attack. If I were him I'd probably drop some smoke in between the farm and BN and make a rush up the hill.
Next turn I have one of my infantry units in BN moving forward to ensure the mortar team is finished off. Down at BS I've given my screening infantry a larger covered arc so that if the Americans do start pushing into the woods they'll be met with a hail of bullets.
-
Turn 4
First blood goes to me! From halfway across the map one of my men is able to pick off the halftrack gunner. With the threat of the .50 cal MG removed Penry's vehicle is harmless and a very juicy target. I really, really, really want to take it out. But the mortar crew is still my biggest priority right now.
Second blood is Penry's and it is a bad casualty for me. One of my R35 commanders is taken out by shrapnel from an explosion. The thing that hurts the most is that the explosion was about 25m from the vehicle. It's just some bad luck and I'm sure not the last in this battle. I'm not sure but I think that this tank is now mostly useless. If nothing else it should be a good distraction until it is inevitably taken out.
Orders
Not a whole lot new to put here. My guys are still looking for the American mortar crew near BN and I'm still waiting for Penry to make his next move.
Turn 5
With the barrage over at Bridge 201 Penry orders some of his men forward. I only catch glimpses as they hop the fence and I don't spot anyone crossing the bridge. It would seem that Penry is playing things very cautiously. I think he's expecting me to have some nasty surprises for him on my side of the bridge. I'm okay with every minute he spends going slow.
Penry shifts his mortars from BN to BS. After losing one R35 commander I get real nervous about the others. I'm starting to think that the a lower ability to spot is far better than risking my TCs. I also have a rifle unit in the woods near where the mortars are impacting and I would hate to have one of those shells go long. Every man is going to count in this battle and it would be unfortunate to lose any unnecessarily.
The first break in the battle comes when my infantry in the woods of BN spots the American mortar team setting up. After the first few salvos one Yank is felled and moments later a second is as well. Penry has to know that his men he sent forward are in a real tough position and are probably doomed. His best bet is probably to load up the halftrack and haul ass back down the hill and hope for the best.
Orders
I don't have many orders to give my men for the next turn. We're in a good position and just waiting to see what Penry does next.
-
Turn 3
The build up continues and as far as I know blood still hasn't been spilled. My R35 at BS did take a shot on the halftrack but unfortunately and unsurprisingly the shot fell short. At the end of the turn though the halftrack is still near the top of the hill and not out of danger yet. I may still put a shell through it's nice soft skin.
The .50 cal gunner does spot my infantry lurking in the woods looking for the mortar crew. Thankfully there are plenty of trees in the way and they absorb the bullets instead of my men. I'm a bit disappointed that Penry now knows that I have infantry close by since that will make it a bit harder to get a drop on his mortar crew.
One of my R35s at BN crests the hill and spots Penry's men waiting for the barrage on Bridge 201 to cease before moving forward. Much to my frustration tree trunks keep getting in front of the HE rounds my tank is sending down range. If I could score a few good hits I would totally disrupt Penry's plans and buy me precious time.
Orders
Here's a look at the map as we get ready for the fourth minute of the battle. As I predicted the early fight was going to be for BN. My biggest priority right now is to find that mortar crew and eliminate them. If they are able to get set up and start firing on the farm things are going to get bad for me fast.

-
Turn 2
I was highly disappointed almost instantly. Penry's halftrack manages to find a small indent in the hill and disappears from the sight of my R35 before it can fire. So much for roasted Yank.
Mostly it's a quiet turn for the most part. My men do get a sound contact just behind the disappeared halftrack and while they fire a few shots they never get a solid contact. Near the end of the turn I do spot a couple halftracks waiting back behind Bridge 201. Unfortunately they disappear quickly but I do know that Penry is holding back for now, waiting for his barrage to end. There's not a lot I can do about it for now.
Orders
I don't do a lot in prep for turn 3. The only orders I give my men is near BN where I give one of the units a hunt order to start looking for that American mortar team that got dropped off. The last thing I need is for them to set up and start direct firing on the farm.
-
Turn 1
The battle begins with the scream of incoming artillery. The first shell impacts in some trees just north of Bridge 201. Boy did I make the right decision to not put my men in there. Throughout the turn shell after shell impacted around and on the bridge. Not only is Penry wasting valuable artillery but he's also making it so that he cannot rush across either. He will be forced to wait for his barrage to end.
Also we waste no time in getting our first contact. Penry drives a halftrack with a HQ unit and a mortar team up the hill towards BN along the edge of the map. A few of my units open up with small arms at approximately 100 meters and while there are some hits on the vehicle I doubt the Americans took any casualties. They are probably a bit spooked though.
Orders
I made the right decision to move one of the R35s up over at BS. He has a beautiful shot on the halftrack. I'm skeptical if the Americans even know he's there. They are about to find out though. It is an almost 400m distance and the short barreled 37mm cannon isn't the most accurate so I may not hit on the first shot but that halftrack doesn't really have anywhere else to go but up in flames.
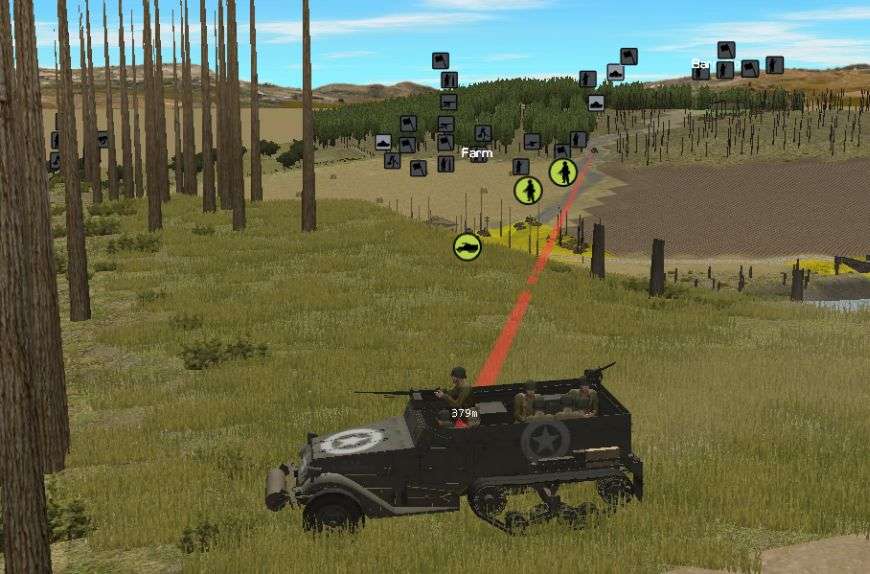
If the R35 doesn't get the passengers of the halftrack my infantry lurking in the woods will. Penry's first attempt at scouting out the battlefield is looking to be a painful attempt.
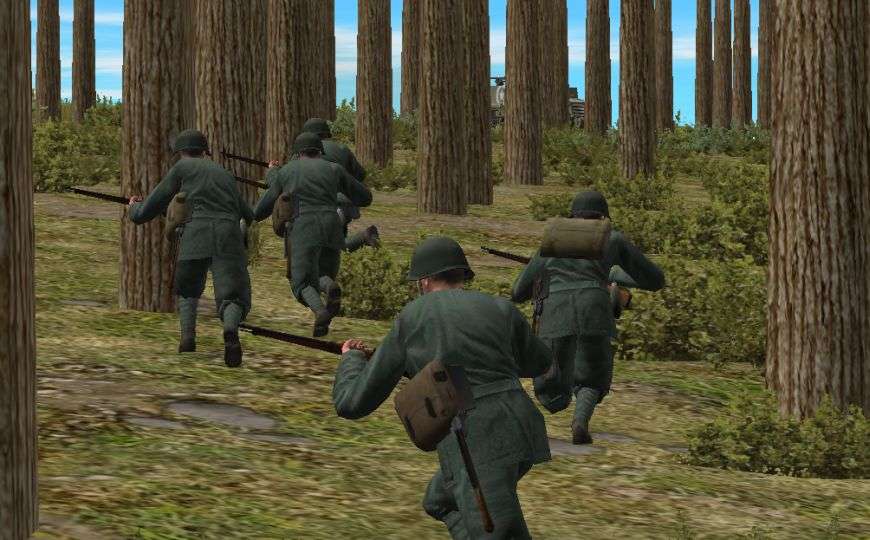
I will give him credit though. I do like the idea of trying to get a mortar crew up in those woods to fire down on the farm. That's a really good idea. He probably shouldn't have led with the team though. Sweeping the woods with a platoon of infantry first would have been a good course of action. But for all I know that platoon is right behind these guys and my infantry is in for a hard time. We'll find out soon.
-
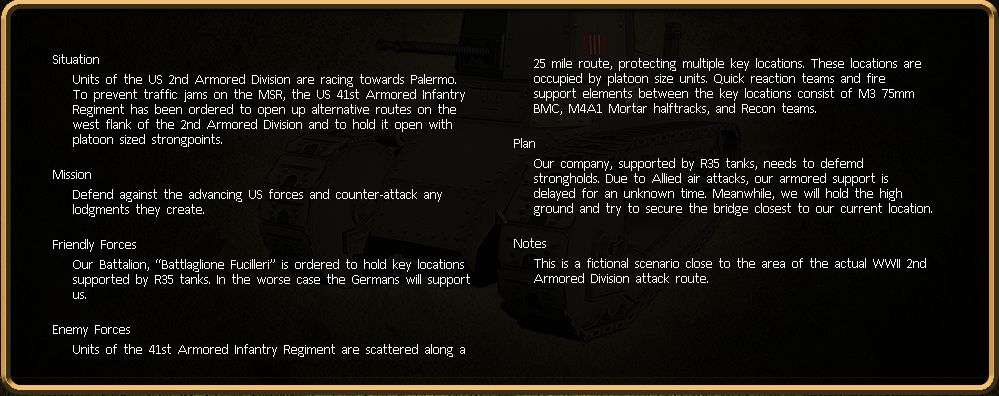
Setup
On paper things are looking good for me. I have a company of infantry, 5 light tanks, 2 47mm ATGs, 2 MGs, and 3 mortars. I also have some form of reinforcements that will come in at some point in the battle. But let's be honest, it's the Italians. Their infantry is brittle, cannot be split into teams, and their weapons are inferior to the Americans. The light tanks are R35 Renaults which leave a lot to be desired. The MGs are excellent and I am pleased to have the two guns to help me keep the Americans back. I'm also hopeful that the reinforcements are going to be German and not Italian. That could really help me keep the bridges.
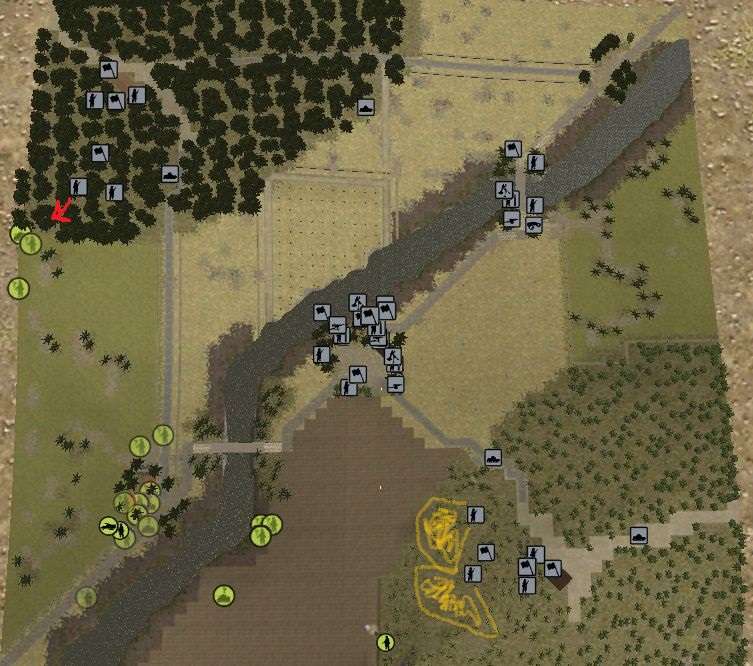
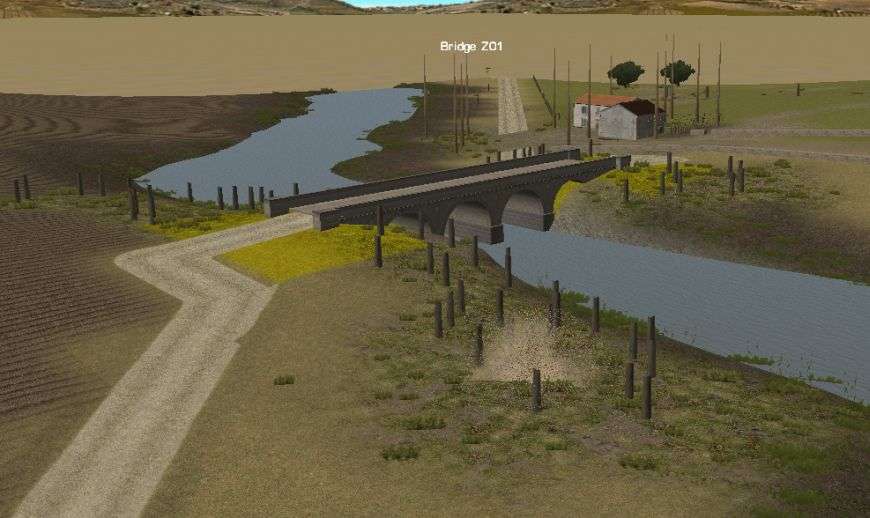
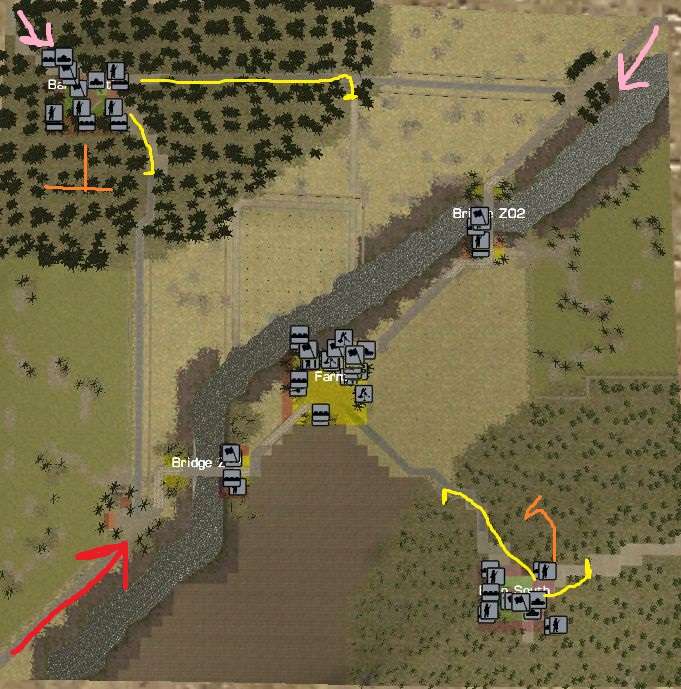
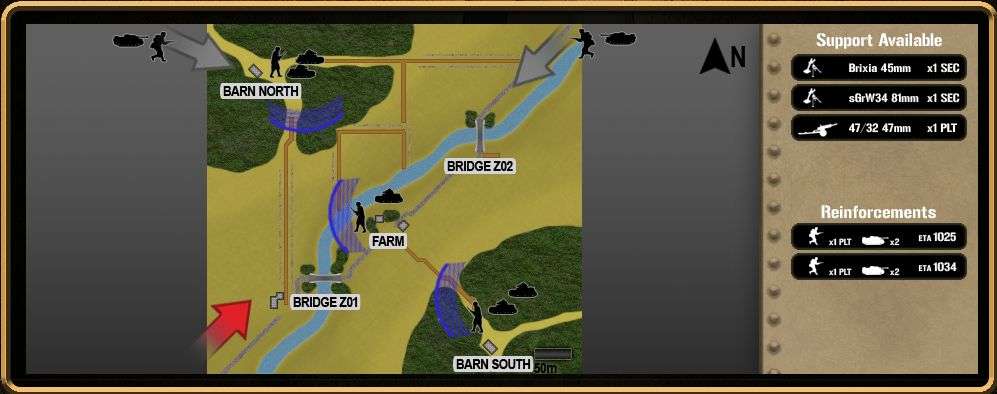
Here's an overview of the battlefield. My job is to hold the two bridges and defend the barns and farm. To me the most important point to defend is Barn North because I will have some reinforcements coming from the top left corner. What makes me nervous about that point is that it's on Penry's side of the river. I decided to move the men back from Bridge 201 and relocate that platoon to the Farm.
The red arrow is the direction that the Americans are going to be coming from. The orange lines are where I am moving some of my infantry around in the woods to screen a bit if the Americans push up at the barns. The yellow lines show where I will be moving my R35s around and the pink arrows show where my reinforcements will be coming from.
I predict that Penry will try to take Barn North (BN) before trying to push over the river. He's in a difficult position no matter what though. No matter which way he tries to go he'll have Italians on his flanks firing on him. If he does move for BN he'll be exposing his men to both my ATGs as well as the R35 I have a Barn South (BS).
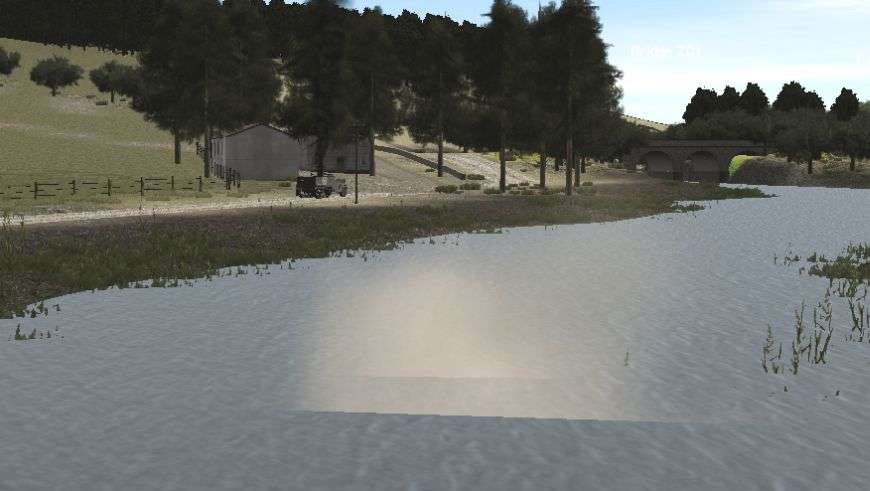
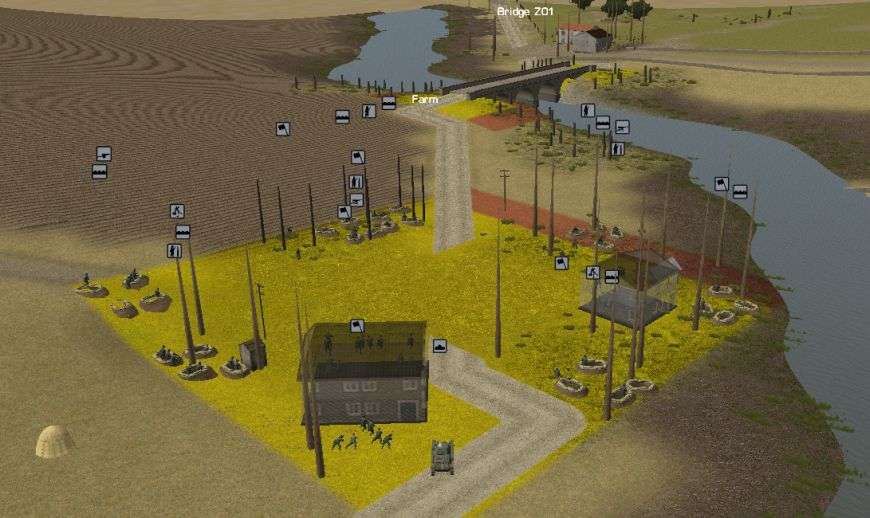
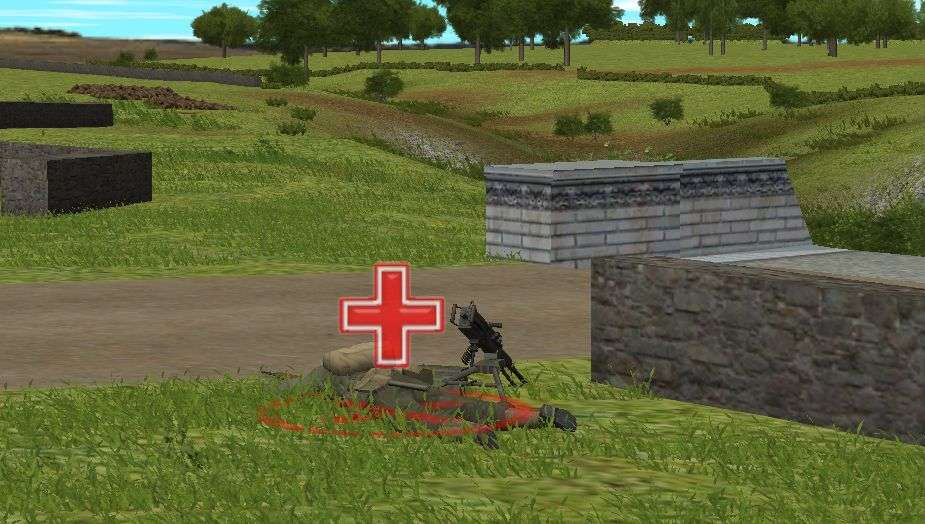
Here is the view from the back of the farm looking towards Bridge 201 and where Penry will be coming from. The majority of my support units are located here including two of the mortars, both MGs, and one of the 47mm ATGs. I also have one of the light tanks positioned to fire on the bridge when the Americans cross. I did try to spread them out some because I guarantee that Penry is going to pound this area with artillery/mortars and I wanted to minimize the damage.
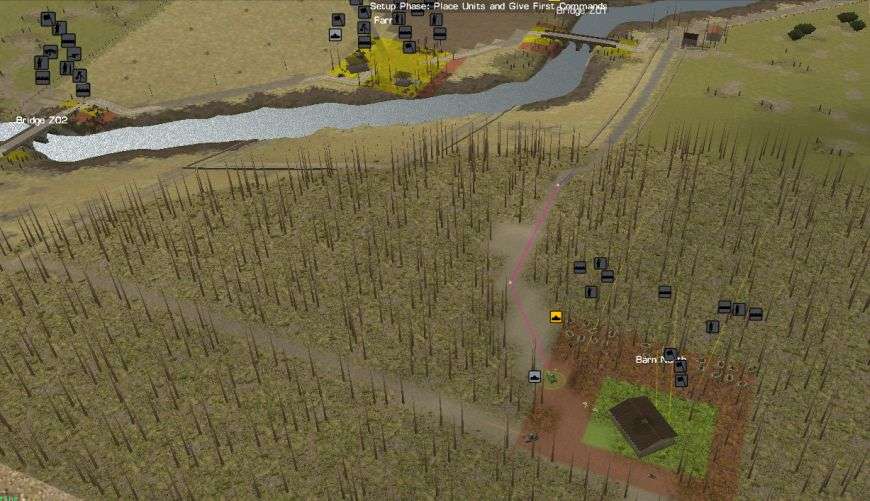
Here is a look at Barn North. I am moving each of the R35s down the road to fire on the Americans as they approach. I'm also moving one squad forward in the trees to provide a first line of fire if Penry comes through the trees.
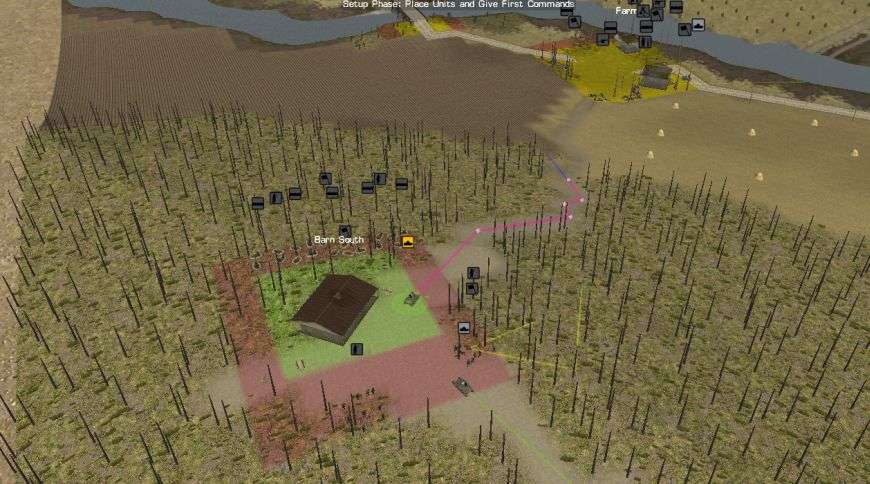
And here's Barn South. I'm moving one R35 forward to have sight on the bridge. I'm also moving one backwards to provide a last defense of Barn South if the Americans take the barn itself. Also like at BN I'm moving some infantry forward to provide a first line of fire.
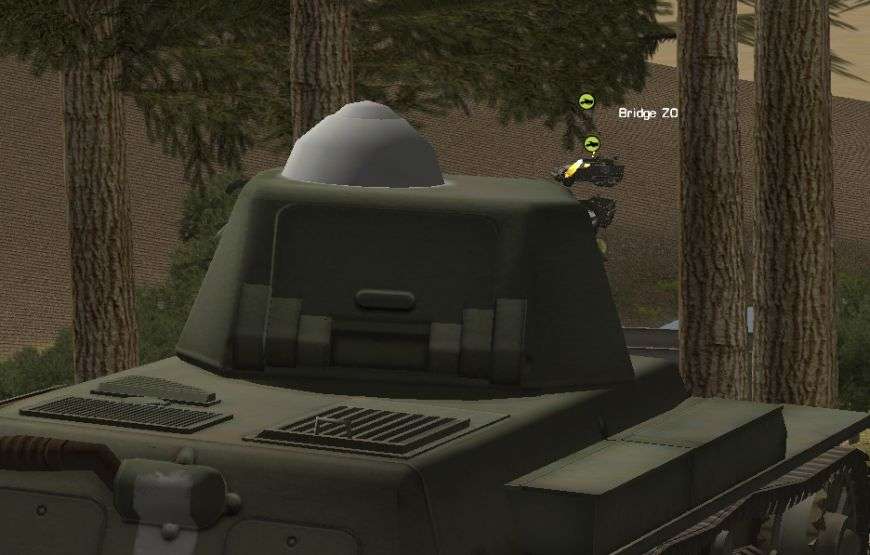
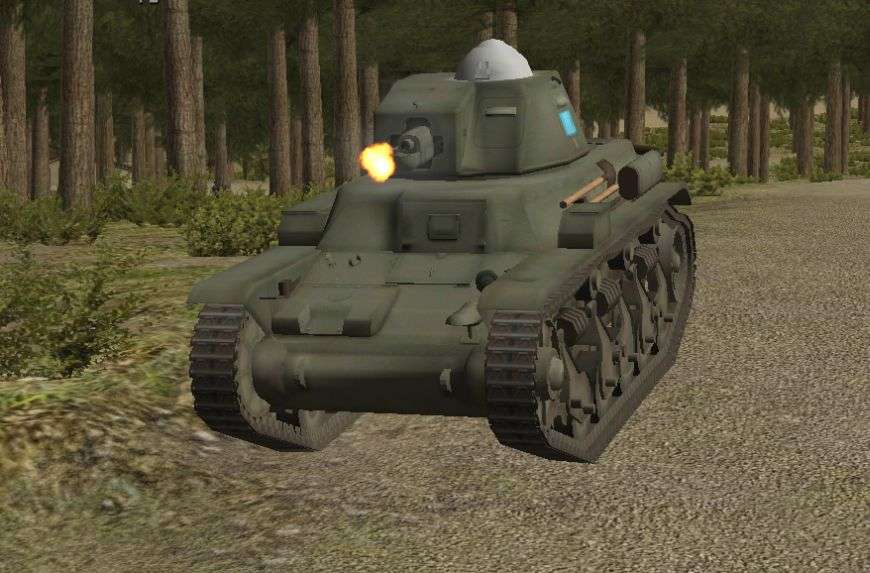
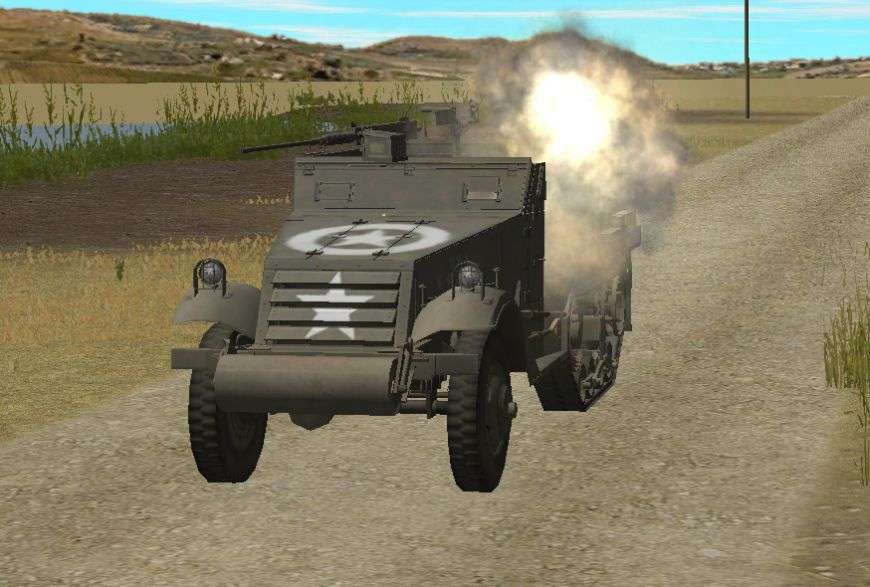
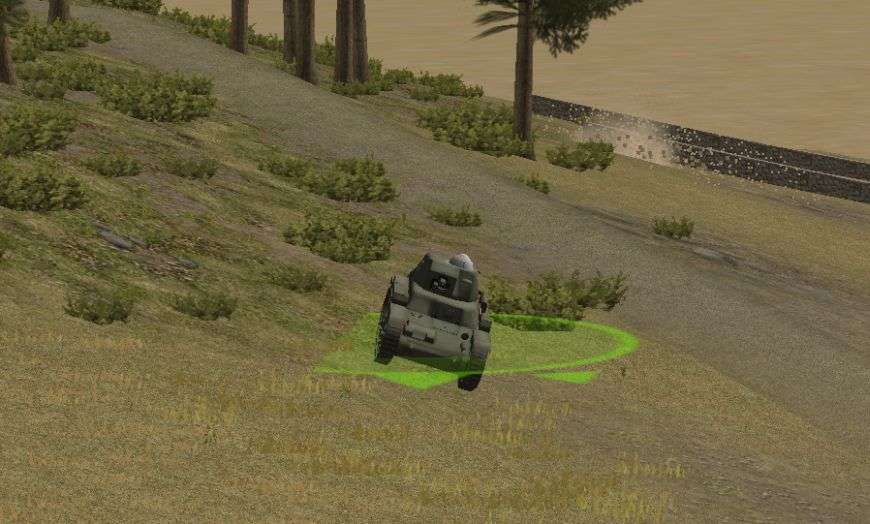
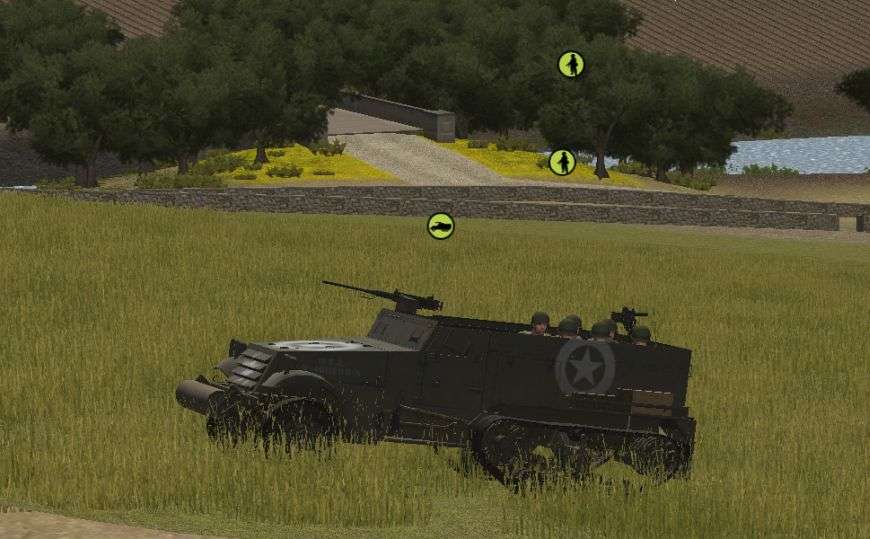
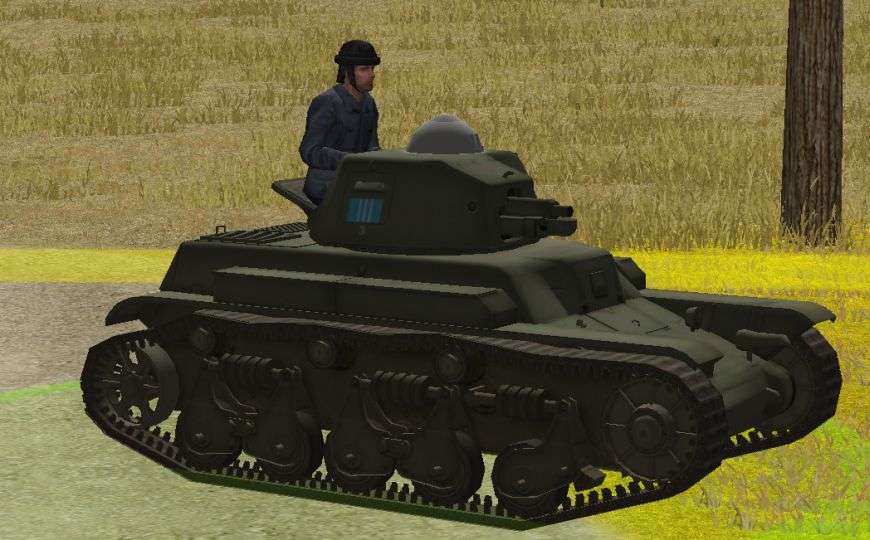
Here's a closer look at the R35 light tank. It has a two man crew, commander and driver. When unbuttoned the commander is dangerously vulnerable to small arms fire. Unfortunately when buttoned the visibility for the commander is horrible. The 37mm cannon will be pretty useless against anything other than soft skinned vehicles and infantry. I have pretty low expectations when it comes to these vehicles but I do hope that Penry will see them as a bigger threat than they really are.
-
Welcome to the newest BigD vs Penry extravaganza. My number one goal in this PBEM/AAR is to give everyone a good read and really let them follow along. I am going to strive to write my thoughts out more and also keep up with it. The number two goal is to win. I'm sick of losing.
We will be playing Ritirare! and Avanti as a doubleheader. This battle and the next are linked and played out on the same map. In this battle Penry is the attacker and in our next battle I will be coming back attempting to push the Americans out.
Ritirare! Withdraw! Well that's not a promising way to start this battle. When the name is a forceful call to withdraw I'm feeling like my men are in for a very rough time. As commander I'm going to do my best to ignore the orders from my superiors and hold the bridges without withdrawing.
INTRO
-
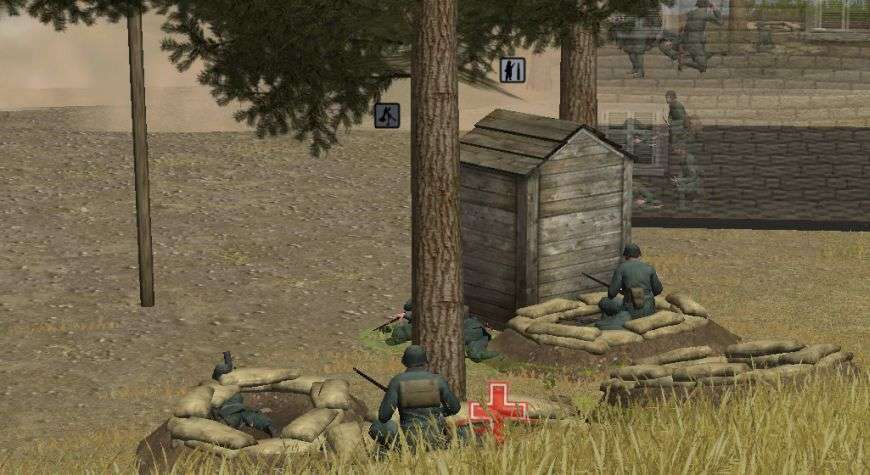
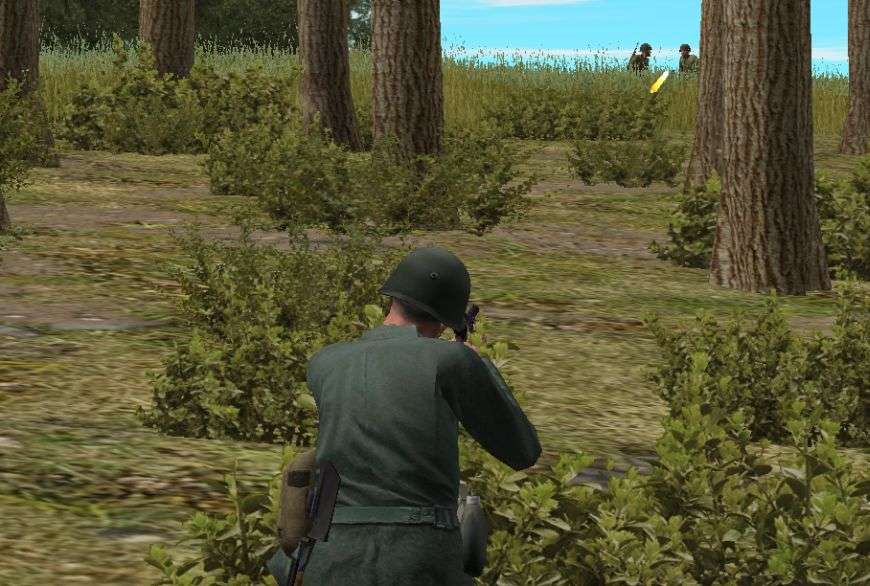
I have ordered my sole surviving MG42 forward to help the StuG keep the Americans two the left. I also have to MG42 LMGs coming forward as well. It proved to be a smart move, at least initially. My MG team spots a couple American units trying to sneak to the right. They also spot an American HMG set up behind a stone wall. After a few bursts of the machine gun one of Penry's HMGs is neutralized.
-
I'm preparing for the final push. My men are beginning to stage and catch their breath.
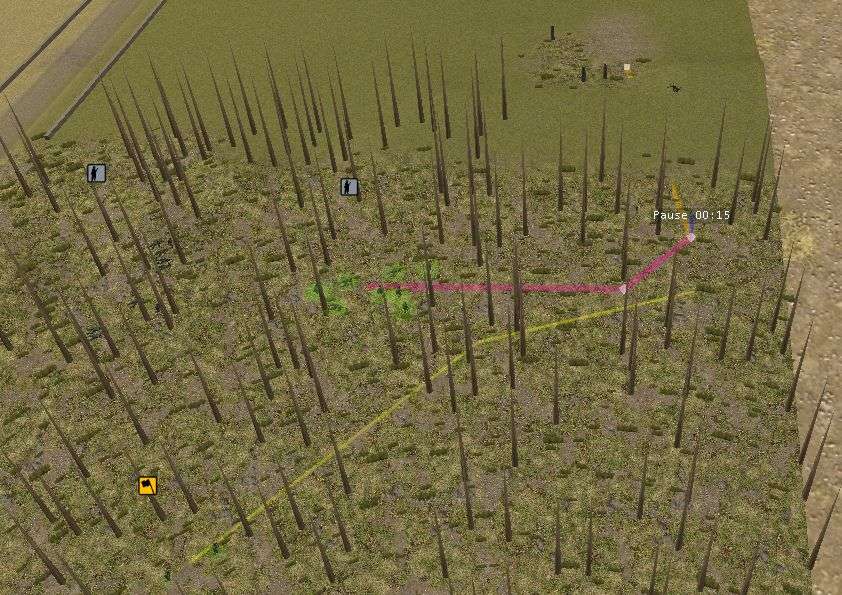
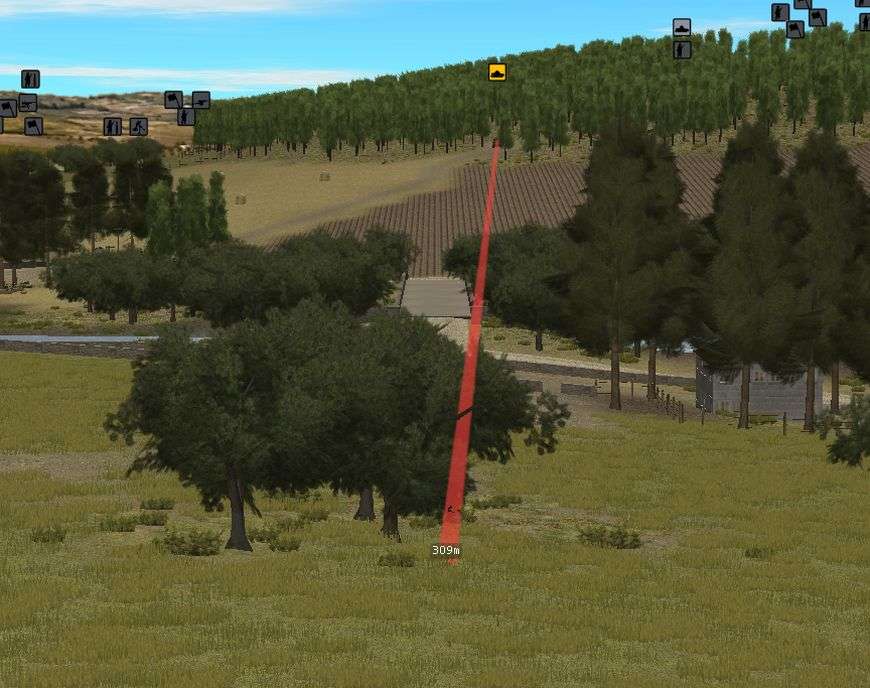
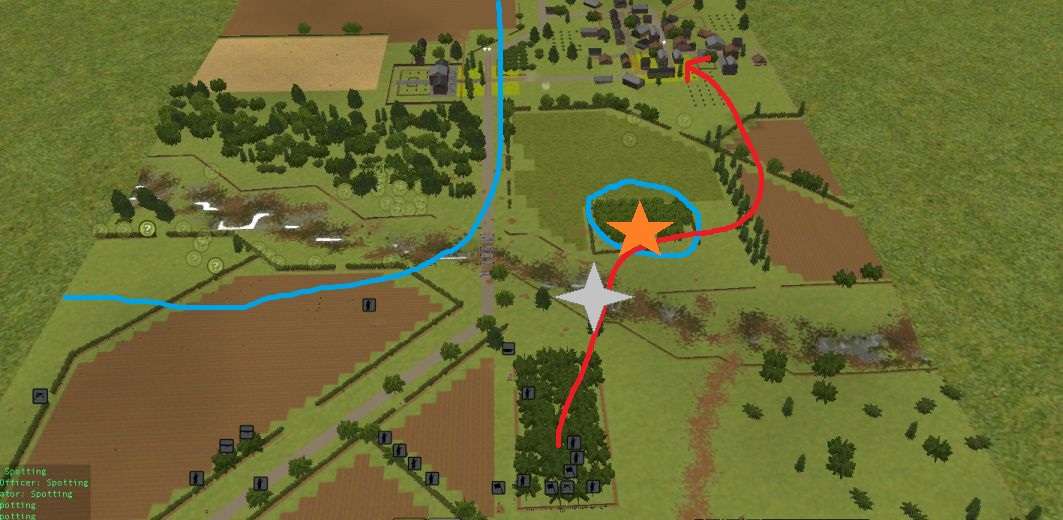
In the picture below, the red line is my projected path. The blue circles show where I feel the American troops are positioned. I was thankfully wrong and still have some 120mm mortars left. I'm going to call them in on the the stand of trees in my path (orange star). The grey star is where I will drop my smoke to help cover my men crossing the stream bed.
The only way this is going to be successful is if my StuG is able to keep the majority of Penry's men on the left flank. If I can keep them contained I should be able to push in and at least put up something of a struggle in the village. However if I lose the StuG or take even moderate casualties on the push to the village this fight is over.

Ritirare! Italian Defense AAR
in Combat Mission Fortress Italy
Posted
Dang thread went to the next page. Don't miss Turn 13 on the bottom of the last page.