

BigDork
-
Posts
589 -
Joined
-
Last visited
Posts posted by BigDork
-
-
35:00 - 34:00 Part 2
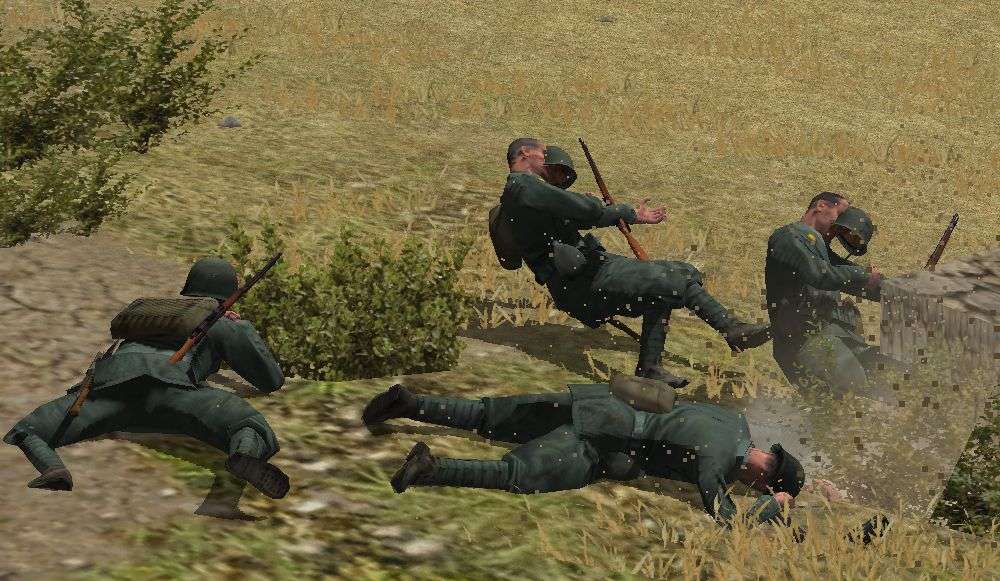
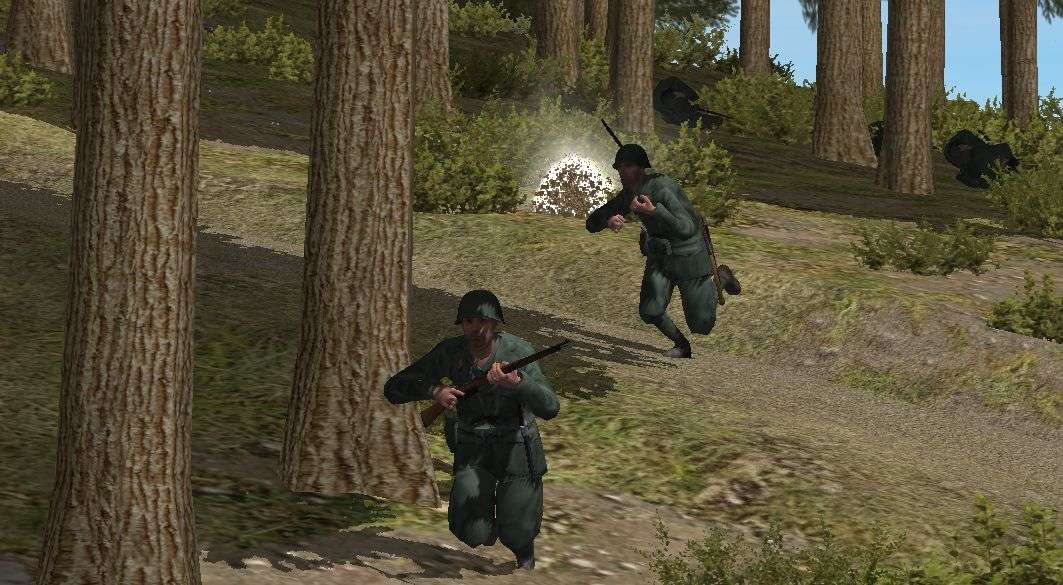
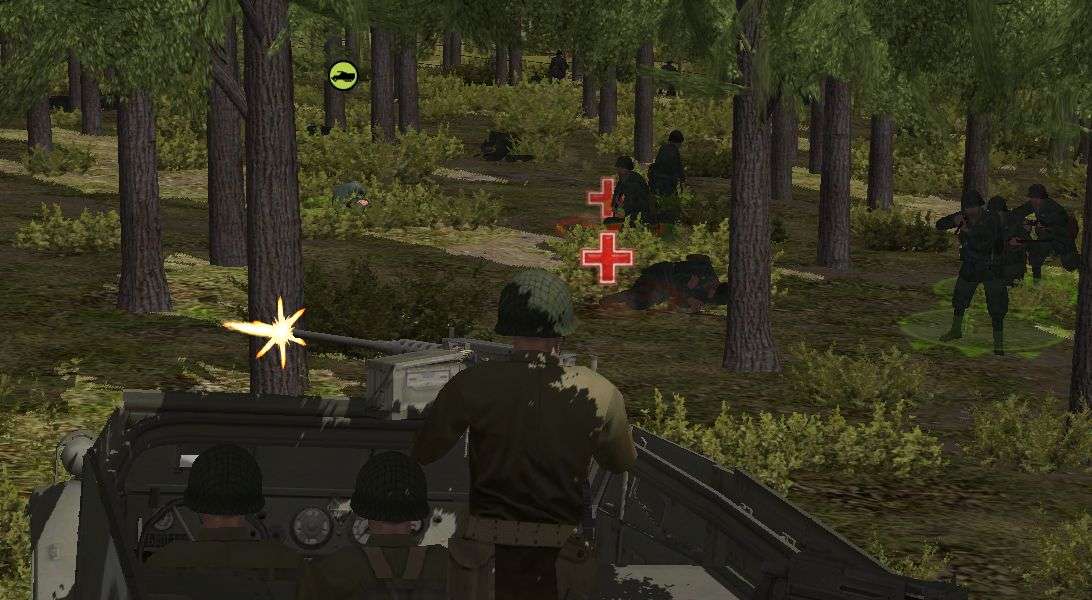
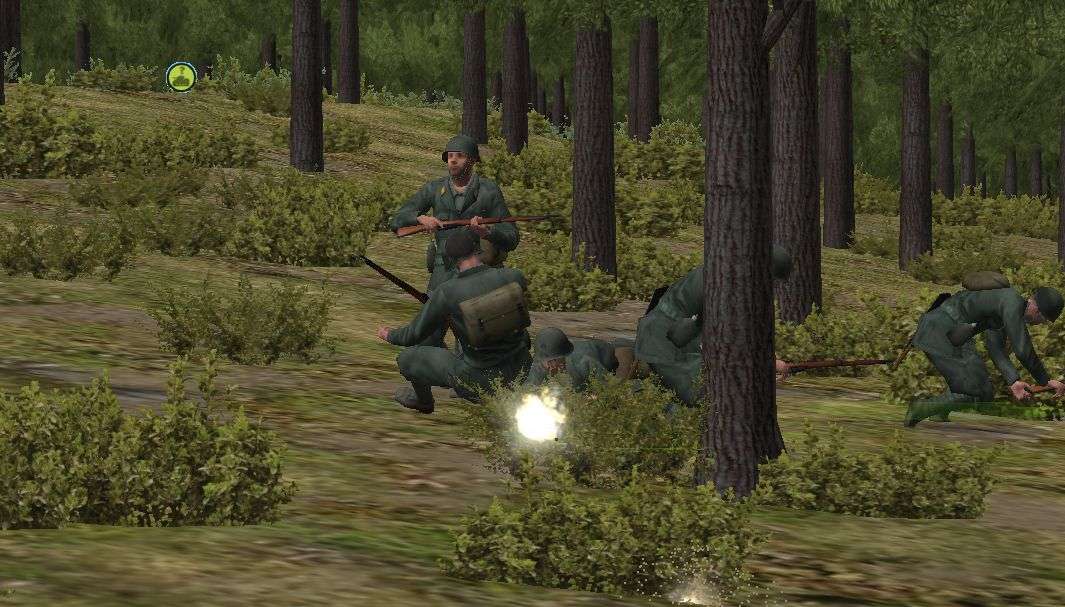
I knew Penry was going to be in for a surprise when some of my infantry popped up behind BN. I didn't expect for it to go as well as it did. My men were able to catch a squad of Yanks out for a stroll.
I'm sure the outcome had Penry less than pleased. I still have a lot of payback to give for the halftrack at BS but this is a good start.
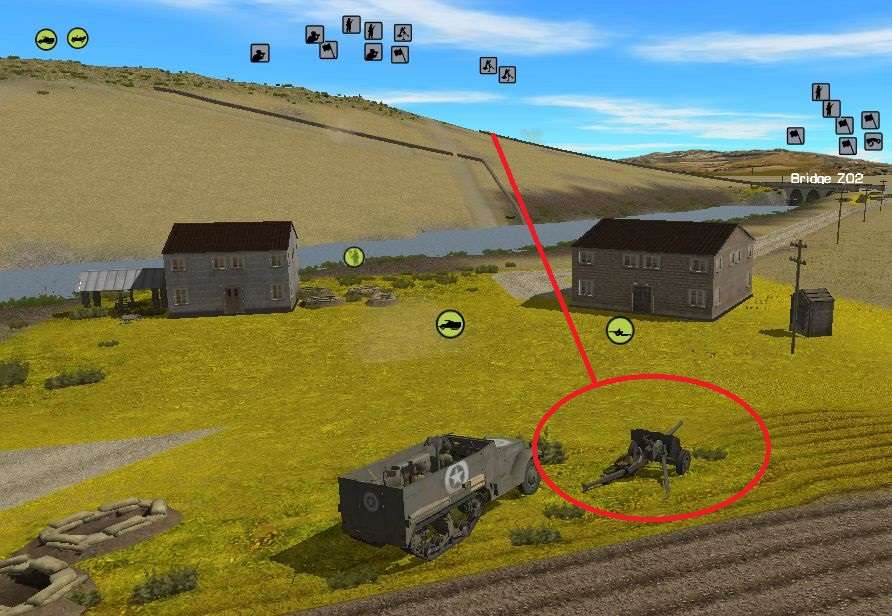
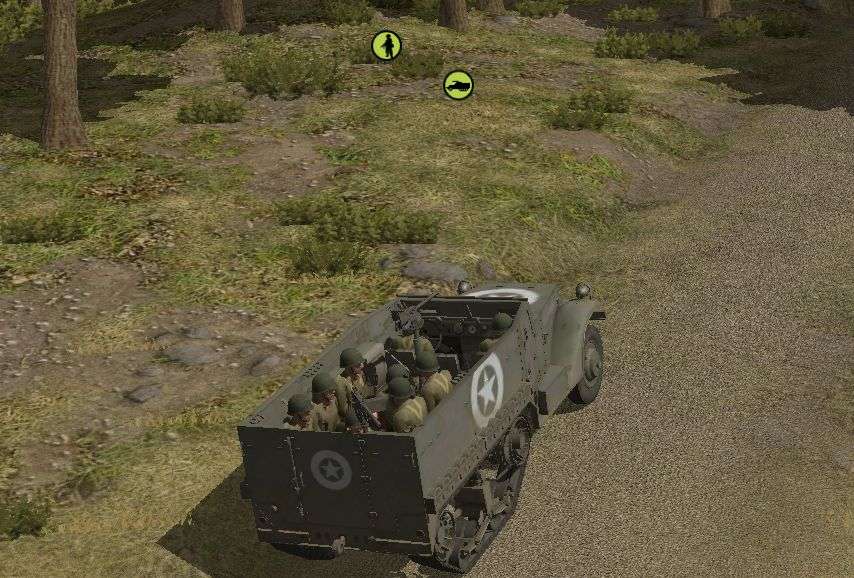
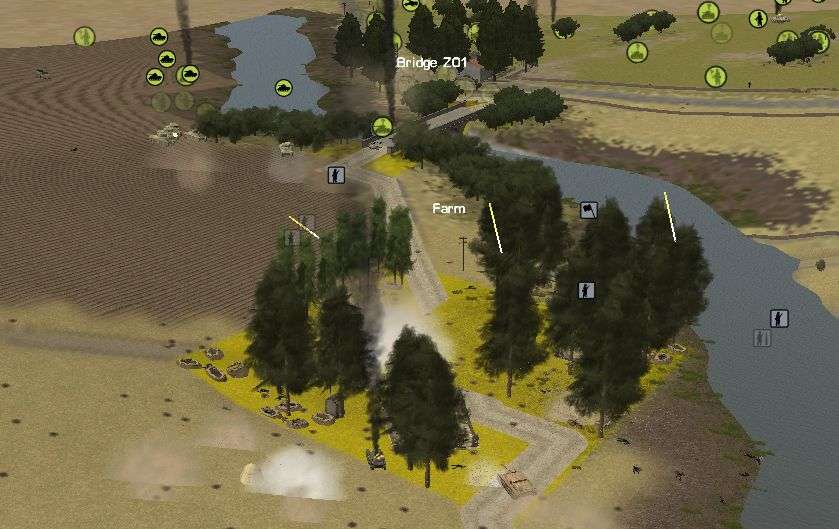
Planning
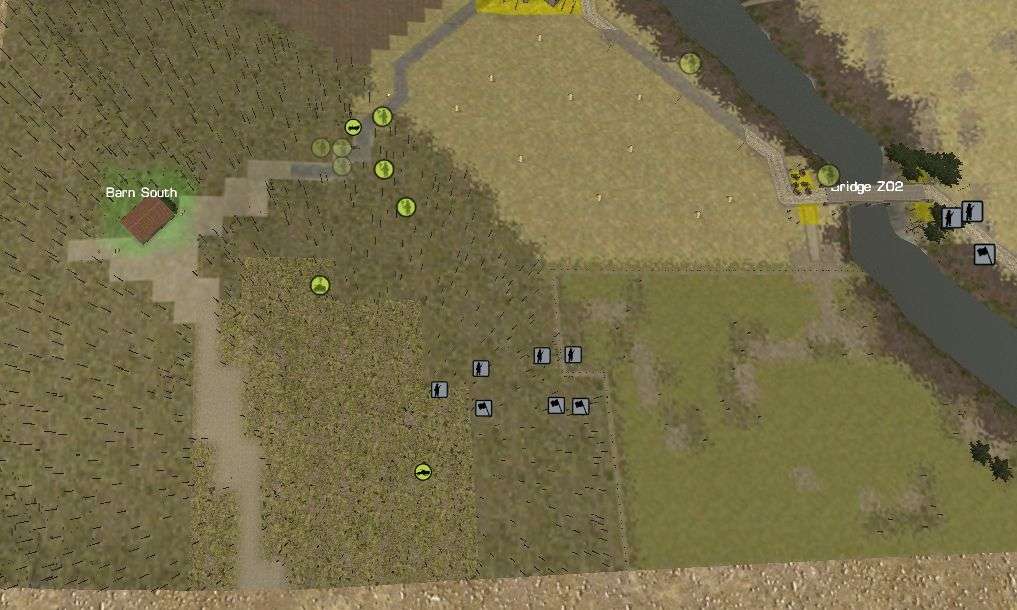
Here's an overview of the battlefield. The red X shows the Brixia that's been knocked out and down to one man (more on him in a moment). The orange stars are the incoming spotting rounds. The blue circle is the American mortar team and the pink circle is the ATG.
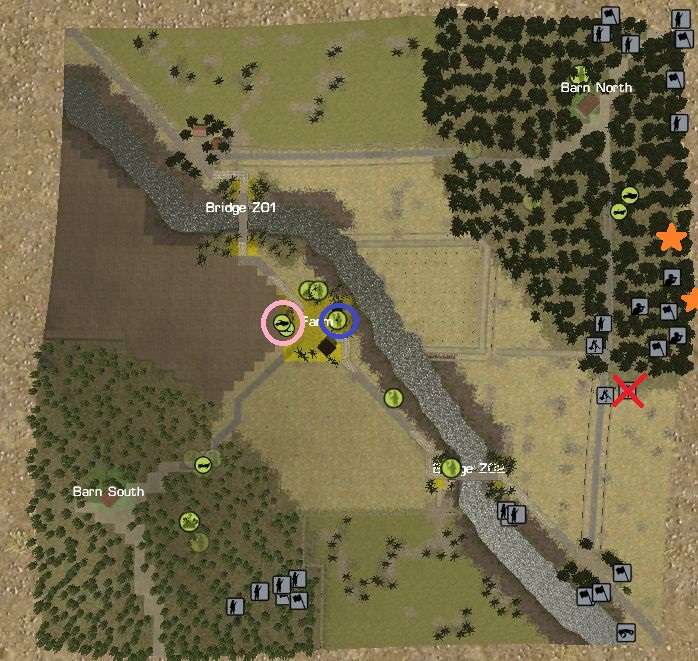
As started in my last post, I'm going to focus on knocking out the ATG with my Brixia teams.
Another big priority for next turn is getting my men out of the way of that incoming barrage. I'm running into some issues with that. There's a halftrack on the road near BN that allows shifting my men across the road difficult. I don't want to blindly run forward because I don't know what units Penry has laying in ambush. My only real option is to run backwards, back towards the center start but if that mortar team isn't knocked out my men are in danger there. Basically, I'm sort of trapped. I've opted to take my chances with the 60mm mortars. Seems safer than taking my chances with the incoming 81mm.
I have one of the newly arrived infantry groups firing on the rear of the halftrack. I'm hoping they'll at least spook the driver and cause him to drive into the barrage. That would be a thing to see. Also closer to the barn I'm moving my men in a bit to take advantage of the confusion I caused with the ambush this turn.
My lone remaining Brixia team member is being ordered to rush over to one of the teams. The team is down to 30 rounds of HE. My survivor is carrying 91 rounds on him. I'm hoping he can go resupply the active Brixia to keep up the pressure on the Farm. Even if he can't carry it all and needs to make multiple trips, it's worth it if I can keep my mortars firing.
-
35:00 - 34:00
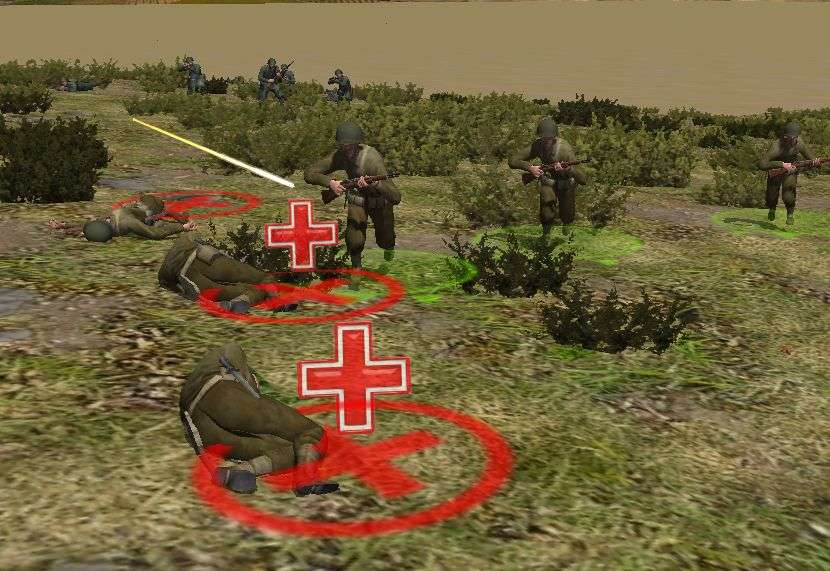
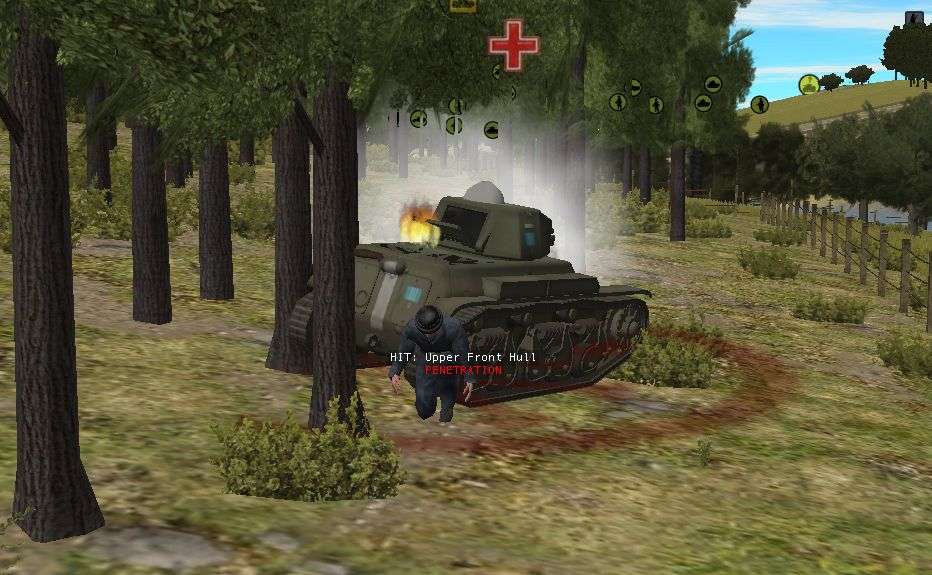
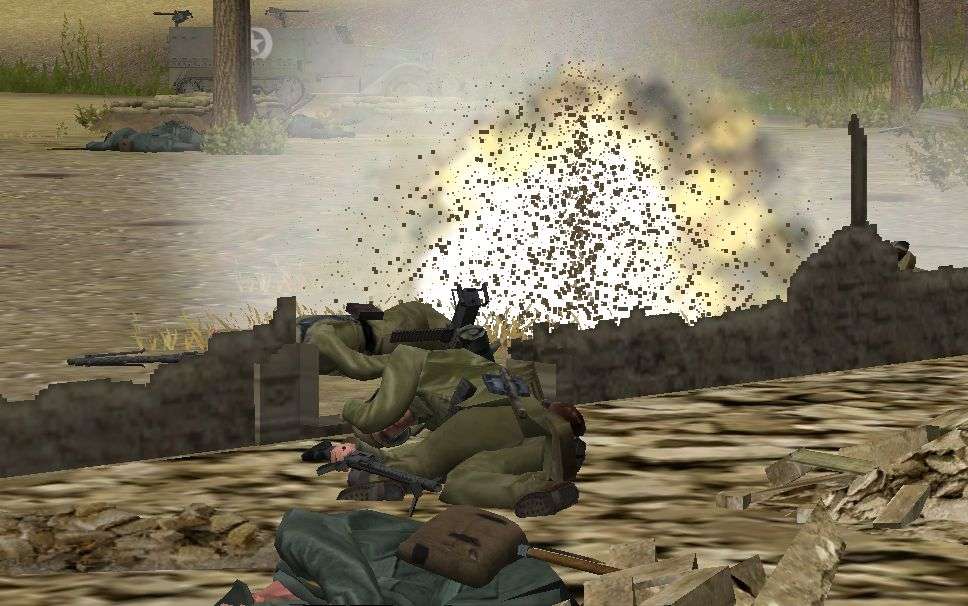
Well this was certainly a busy minute of battle. Unfortunately it started off with one of my Brixia teams being taken out by a well placed American mortar round.
I am able to repay the favor, at least somewhat as the turn goes on. One of my other Brixia teams fires on the location of the American mortars. Our 45mm shells burst in the trees above the foxholes hopefully adding to the deadliness.
I'm faced with more problems as well. Early in the turn the unmistakable scream of incoming artillery is followed by a spotting round falling uncomfortably close to my men in the woods near Barn North. Later in the turn it's followed by another spotting round that, while not right on target, lets me know that I better get my guys out of the area quickly.

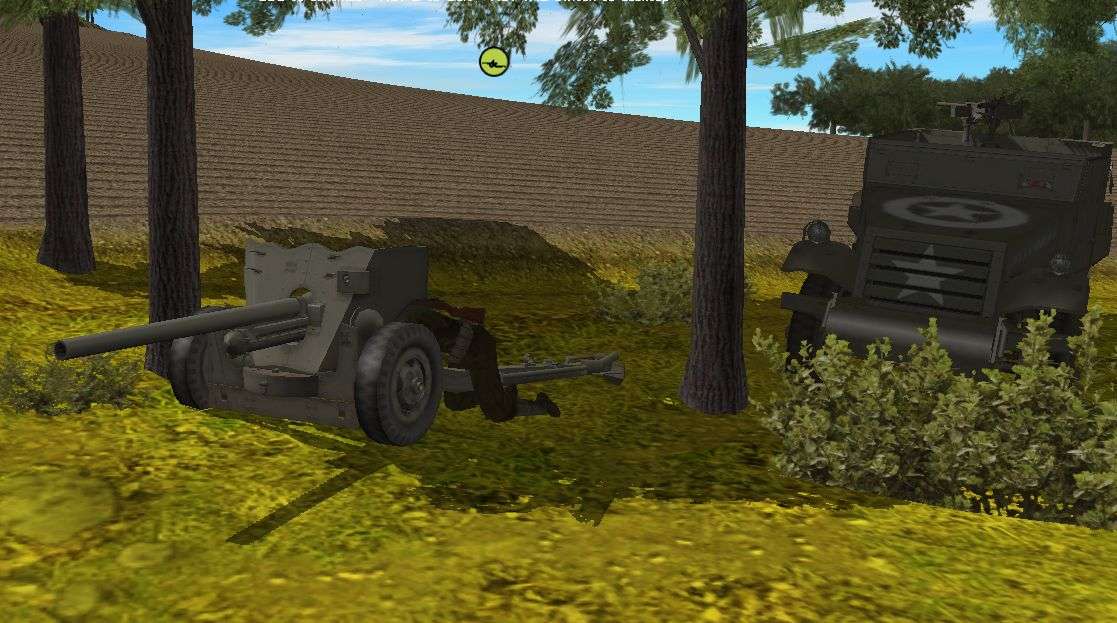
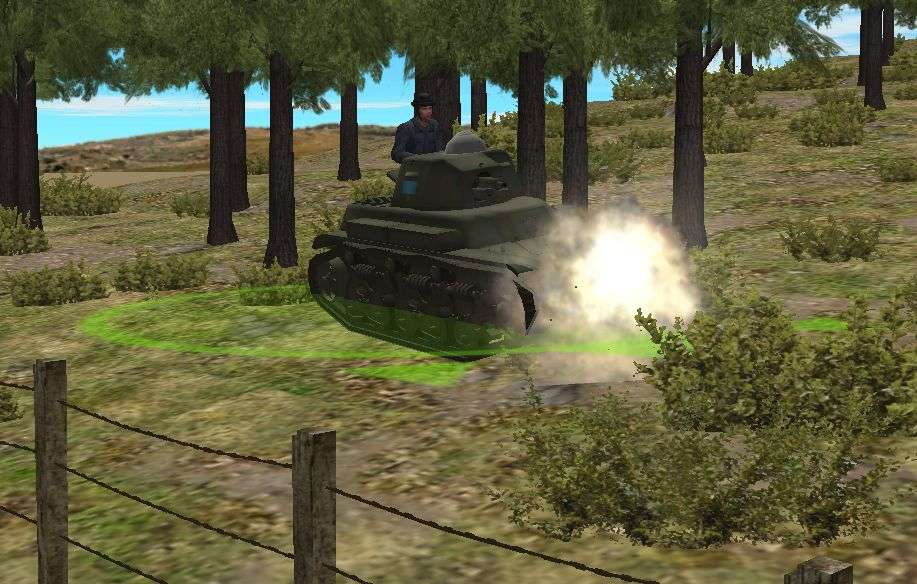
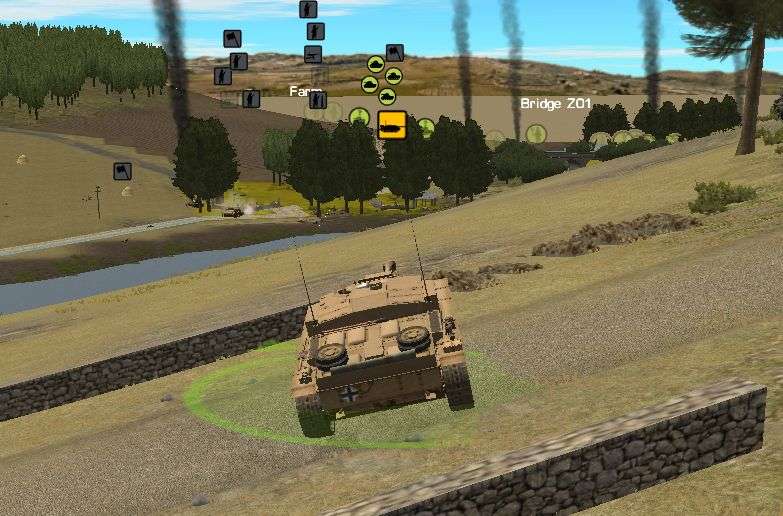
To add to the bit of good/bit of bad this turn has to offer, one of my infantry teams spots a 57mm ATG parked at the Farm. That's gotta go! That will make short work of any armor I bring onto the battlefield and it also puts my infantry at risk. Taking this out is now my number one priority.
Planning
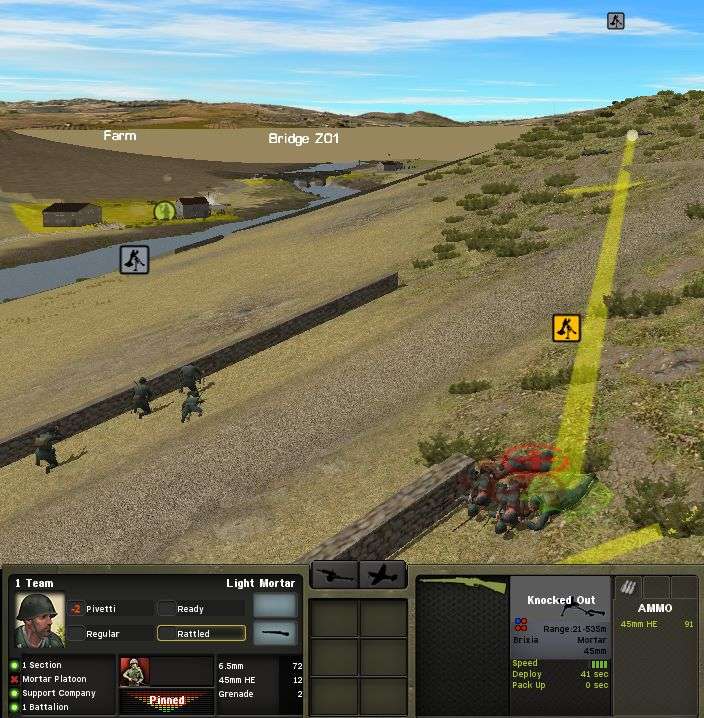
I've shifted the area fire of one of my Brixia teams to focus on the ATG. The mortar team doesn't have a visual on the gun yet, but it should. An area fire command should do well. My team also has 91 mortars it can use to try to knock out the gun so I'm pretty positive of my chances.
-
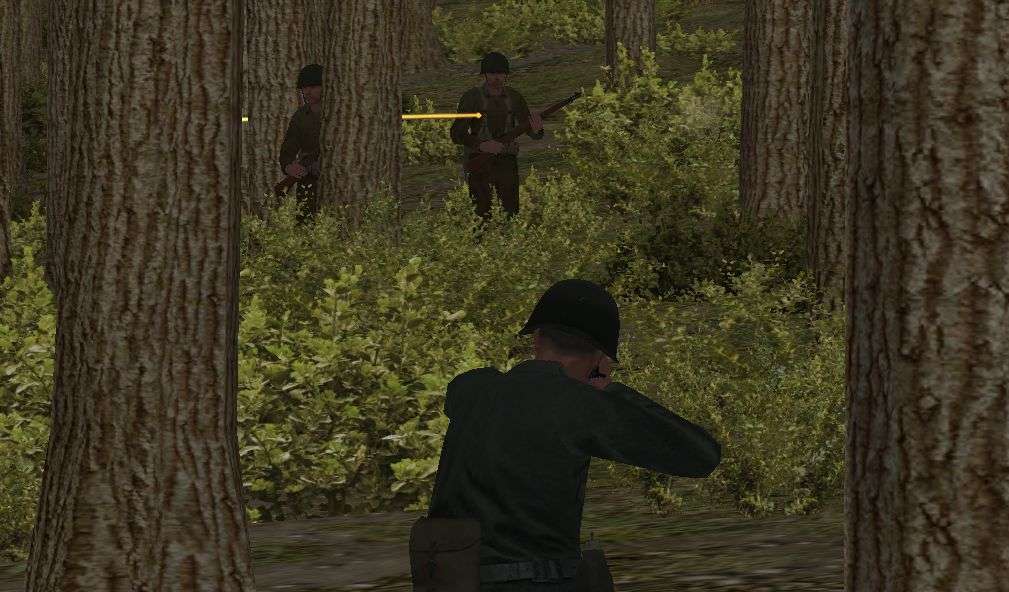
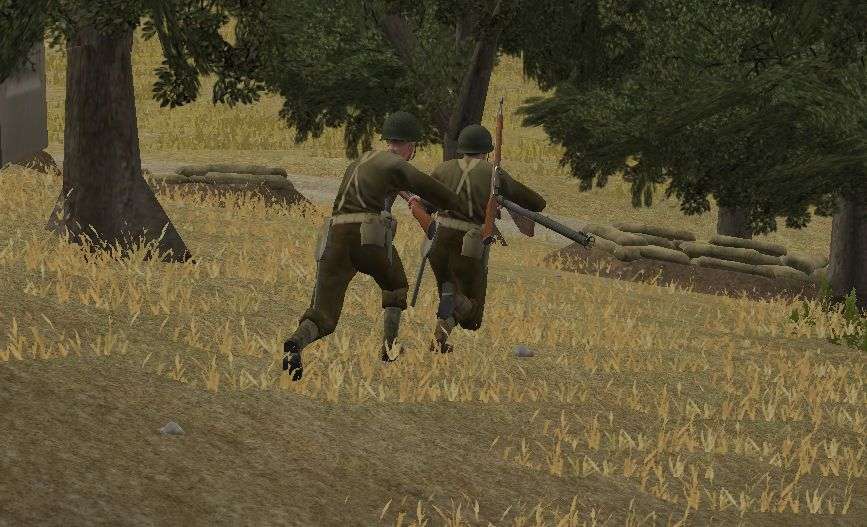
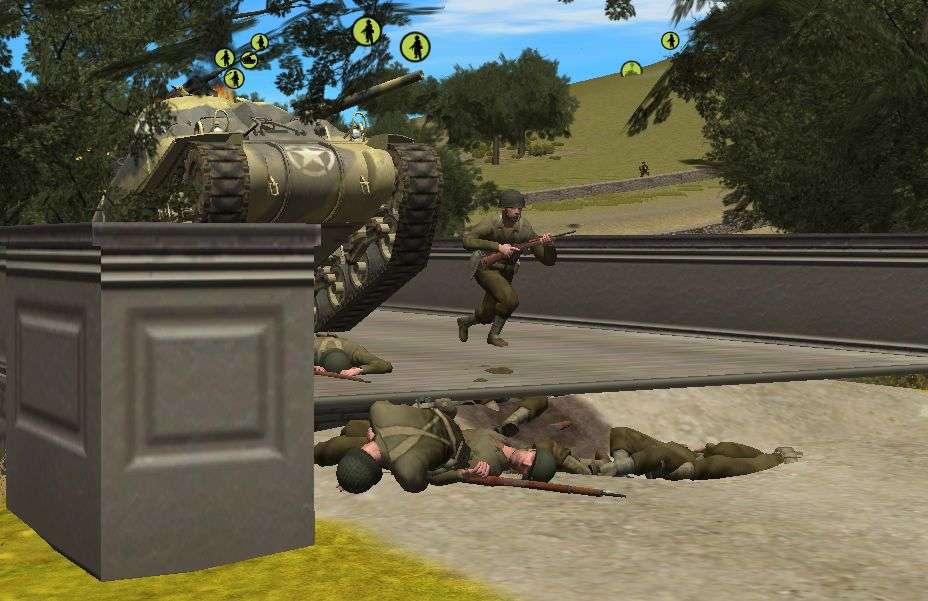
In the first screenshot above, is that a slight bug? My infantry man is running like he's carrying his rifle but it's obviously slung on his back.
-
37:00 - 36:00
The action quiets down some in the next minute. There's no action at BS. At BN, my men dodge a few 60mm mortars, nothing more.
36:00 - 35:00
Ordering my men to scatter and spread out worked out pretty well for me. One of my Brixia teams manages to spot the offending American mortar team down at the Farm. Their days are numbered.
If I can see them, they can see me. Sensing their danger the American mortar team starts firing on my Brixia crews. Thankfully the 60mm mortars don't pack too big of a punch and despite the close impact my men are unscathed.
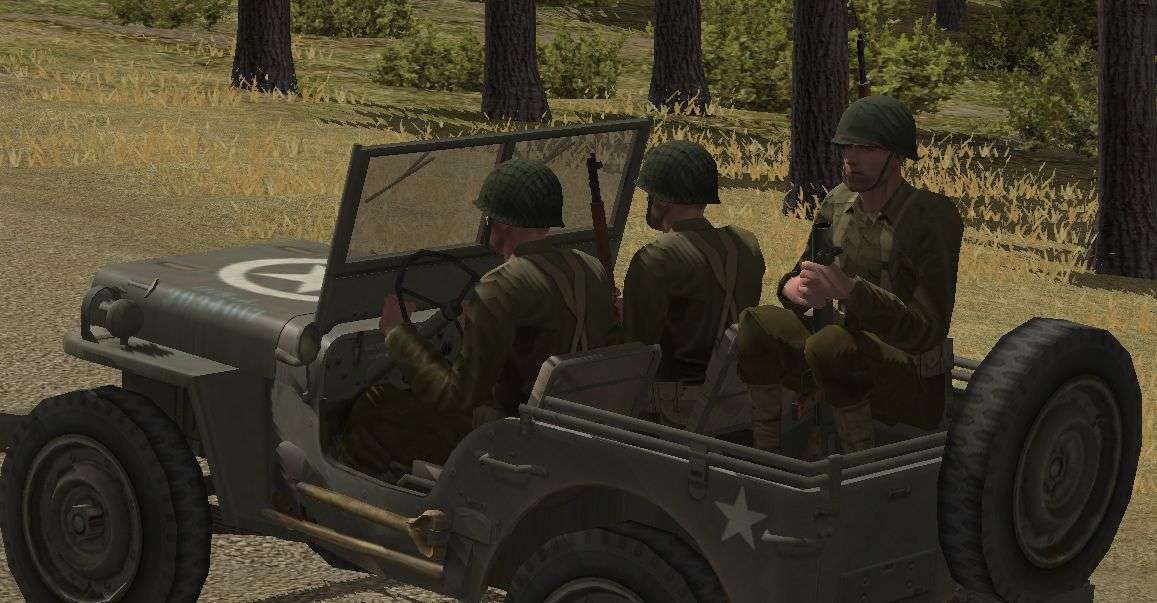
Near the end of the minute I spot a bazooka team hitching a ride in a jeep towards BS. That's a rather peculiar place to send them. I don't have any armor up there at this time and I doubt that my reinforcement armor will be coming that way. Perhaps Penry plans on sweeping my remaining men aside and then firing bazooka shells down on the Farm or Bridge Z02. I'll have to be on the look out for these guys in the future.
My prayers have been answered... sort of. I get some reinforcements in but it's not the R35s and Semoventes I'd been promised. Instead I get the company HQ showing up in the center. Far more useful and interesting is the arrival of 1st Platoon in the rear of BN. Boy is Penry in for a surprise next turn when he finds I've got the barn surrounded.

Planning
I'm planning on having my newly arrived infantry take up position to start putting pressure on BN. I'm also going to start moving in from the front with the squad I moved up from the center. Halftracks are still a threat so I'm not going to decisively engage but I hope to start being a nuisance until my armor arrives.
I've ordered my three Brixia teams to fire on the Farm. Besides the mortar team I've identified two other fox hole positions. Each one is about to start getting pummeled with rapid fire 45mm mortar goodness.
-
Proud not carried away, frustrated not drooling; living in good times must be done carefully, otherwise easily Queer. Life is proud it is easy to carried away, one carried away do not know what his last name, so the evil thoughts and evil deeds will Chenxi infiltration. Adversity must be extremely patient, or easy early mortality. Easily frustrated when life gaffe, a gaffe not know their future, so negative and Diablo 3 Gold despair will Chenxi infiltration. Mo gains and losses to be carried away by the moment, he must be prepared to refrain grown arrogant, complacent. Intoxicated with victory means stop and pause, lose vigilance. Life on the road to never let up, victory is just a small signpost. In order to achieve the final victory, if they work hard, try, try again.
So not only am I fighting the Americans but Penry is bringing the Chenxi as well? All is lost! Retreat my brave Italians, retreat!
-
That half track - ouch!
Oh, it is never good when your plan involves prayer. Remember the old saying the lord helps those who help themselves

I'm helping myself to some prayer. And if I pray long enough, the tanks will arrive. Now whether their arrival was through divine intervention or not can be debated.

-
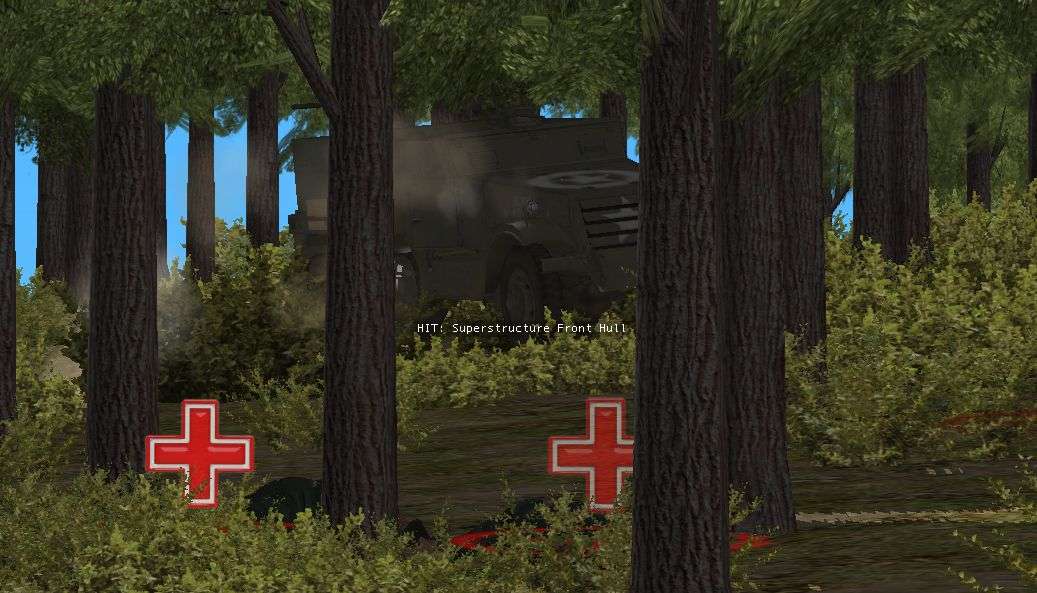
38:00 - 37:00
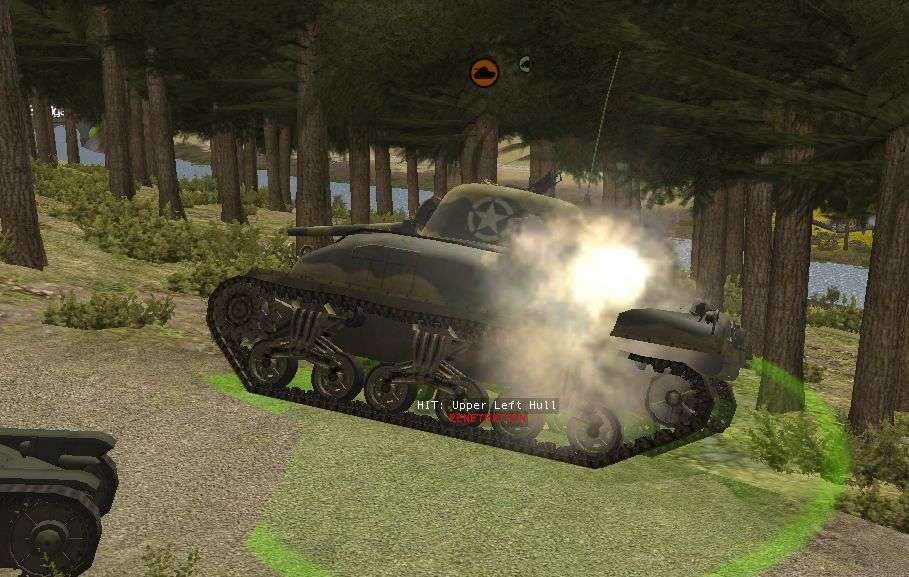
Che bellezza! The halftrack is no more. I did not expect it to explode and go up in flames. A nice bonus to be sure. The only disappointing thing is I watched the driver hop out just before the explosion. Now I just need to track him down and put an end to his miserable existence.
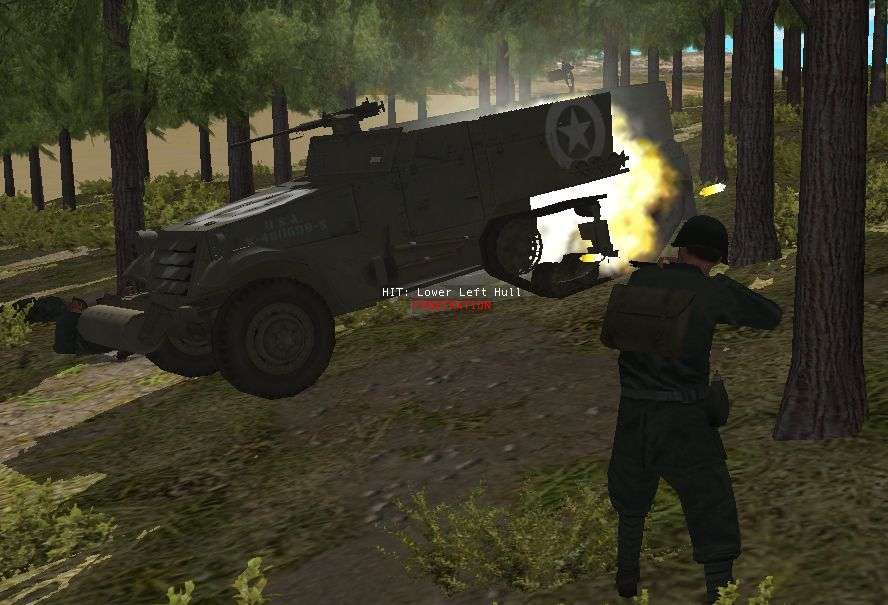
I managed to not lose a single man at BS this minute. Can't say the same for BN unfortunately. My Brixia gave away it's position when it started area firing across the battlefield. An American mortar team must have spotted us and sent some love our way. The first shot exploded in the trees above my team, taking out two men.
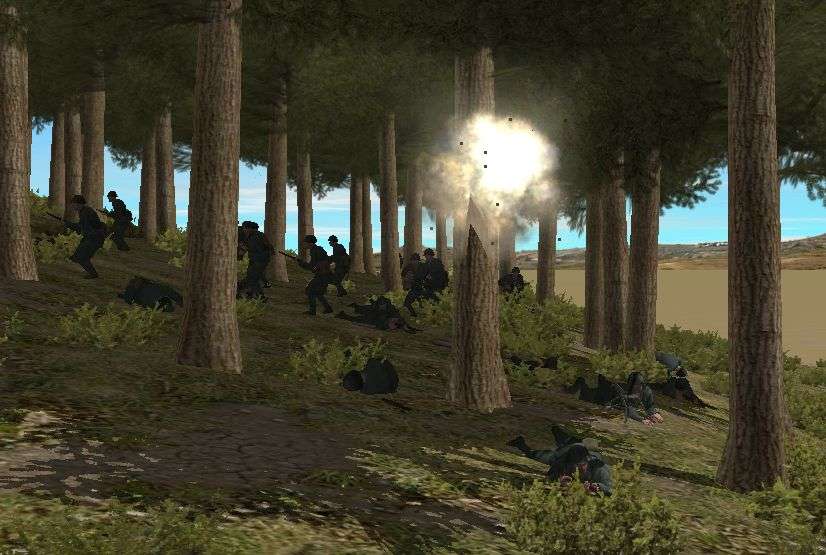
Two more mortars make their way towards BN and each one causes more casualties. As you can see, my men are very bunched up at the moment which is bad, bad, bad news.

Planning
SCATTER! I order my men in BN to run this way and that. I need them to spread out to minimize the damage that American mortar team is doing. I'm also hoping to spot them so I can send some Brixia rounds back at them.
I've also ordered the remainder of the one infantry squad to make their way up to BN. I've got more sound contacts than before and the battle is definitely shifting focus over here.
-
Glad you enjoyed it Blackcat.
-
It's a minute of ups and downs for me...
39:00 - 38:00
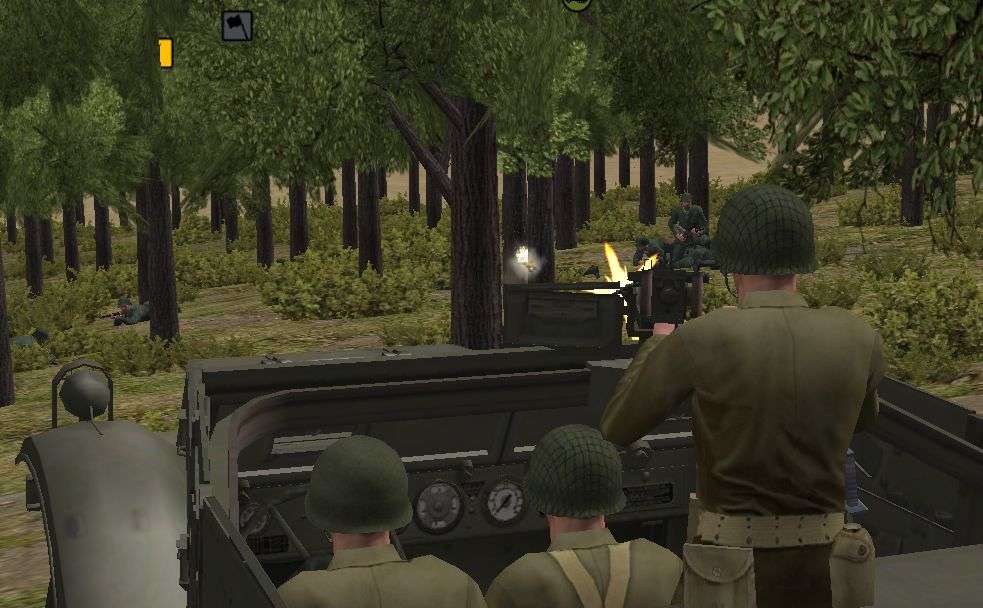
Things go from worse to worser when the second halftrack makes an appearance in the woods. My men instantly start firing upon it. That driver doesn't seem to be as brave as his counterpart and starts backing away almost instantly. I'm taking it as a small victory in itself.
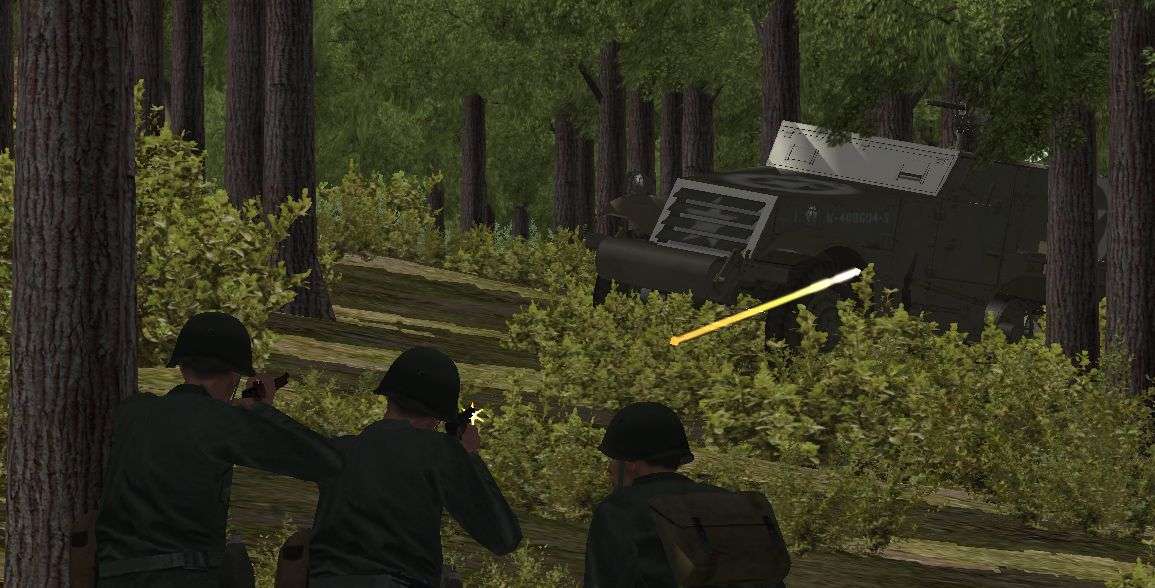
Things do start looking up as in the span of about 10 seconds we manage to take out two Americans in the halftrack. There's now only the driver left so the vehicle is vulnerable and my men no longer have to fear the MGs.
As I'm busy worrying about the remnants of my force at BS I almost fail to notice a halftrack filled with infantry driving up towards BN. Just great. I need to hold that hill and this will make it that much more difficult.
Planning
At BS, I've ordered what remains of the closest infantry group to assault the hobbled halftrack. I'm going to get some slight revenge. Very slight. Up to this point, I've lost 16 men to this devil.
I'm having my Brixia area fire towards BS. There's a bunch of American sound contacts moving in on my men and I'm hoping to cause some issues. I am skeptical to how effective this will be but it should at least give Penry a little pause.

I've also already relocated a second Brixia and an infantry group up from the center to bolster my forces in BN. The more I think about it, I think I'm going to pull in the remainder of that squad next turn to counter Penry's movement of men. I have to hold BN.
-
41:00 - 39:00
The clock ticks by and more of my men fall near BS. The only thing that keeps me positive is knowing that each second that passes we're closer to reinforcements arriving to help us clear the field of these accursed halftracks.
Finally a little luck. After many grenades being thrown at the halftrack one finally finds its mark. It's not enough to stop the American vehicle but at least it will remind them that they aren't invulnerable.
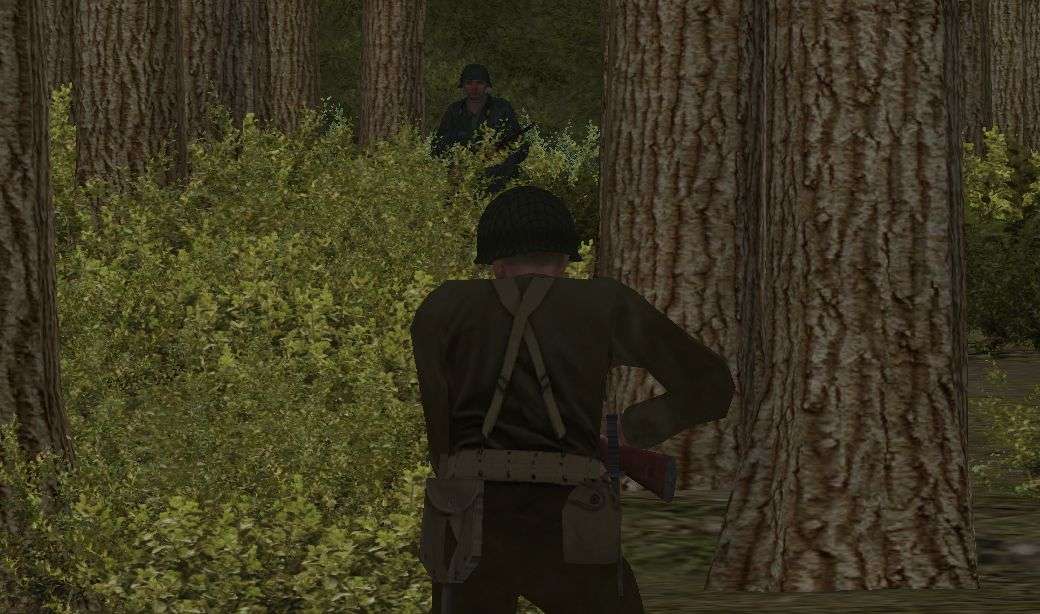
As the minute draws to a close my men holding the defensive line near BN spot an American scout slowly making his way through the woods. We've got a surprise for him.
Planning
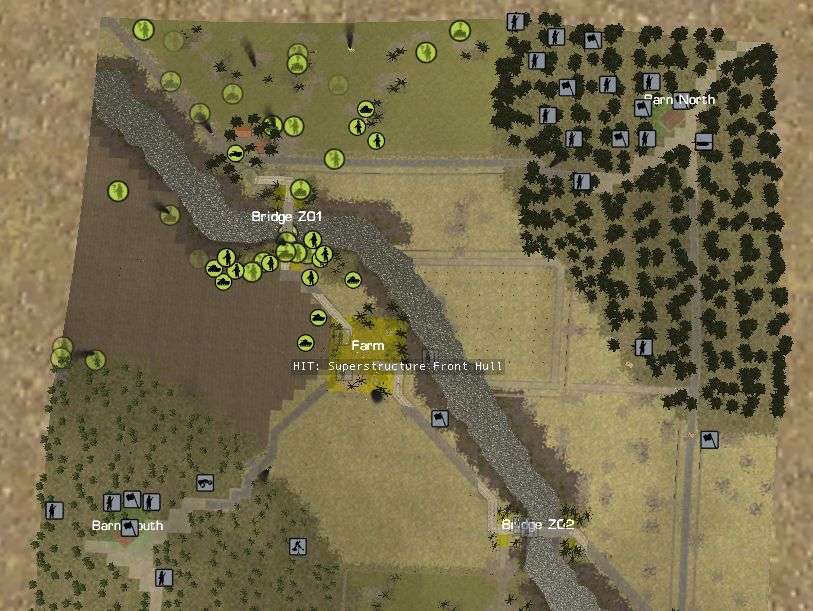
With things going poorly at BS it's important to me that I maintain my foothold on the woods near BN. If I'm going to safely making it over the bridge and into the Farm it's imperative I hold some high ground.
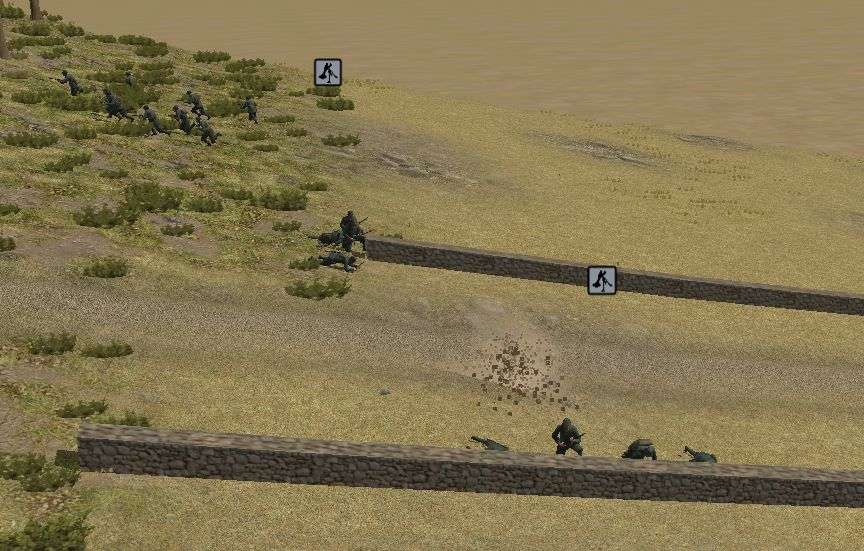
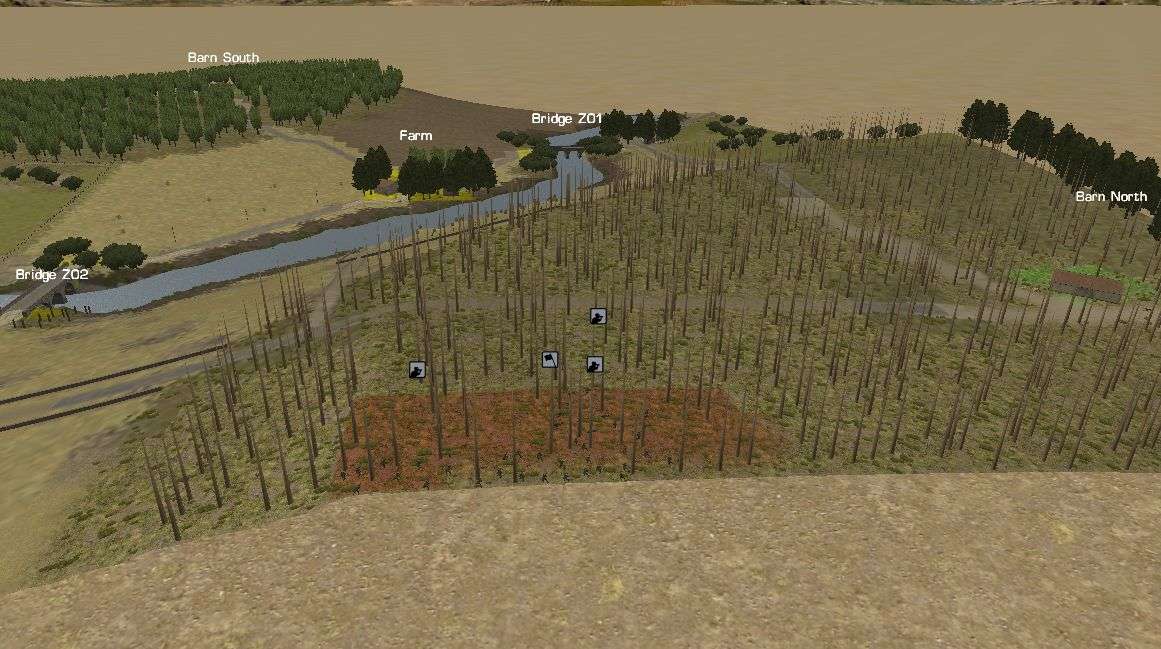
Here's a look at the south portion of the battlefield 5 minutes in. As you can see my men have been pushed back and there's a large force of Americans looking for them. There's not a lot I can do but engage them when they pop up and keep hoping for some lucky grenades on the halftrack. I'd kill for a panzerfaust right about now.
-
Turn 43:00 - 41:00
Well it doesn't take much to convince the American bazooka team that their cover is blown. While dodging fire from both sides of the valley this team makes a cowardly retreat all the way back to the Farm. To my disappointment we don't manage to spill any American blood.
Even more disappointment is in store for me. I spot a third American halftrack. This one is hanging out near the Farm. As I'm learning painfully at BS, there's little I can do to harm these halftracks at the moment. I will have to just dig in and wait for reinforcements. Thankfully my R35s and Semoventes should make scrap metal of Penry's vehicles.
Finally I draw first blood. Up near BN my men spot an American just sitting around along the edge of the road. A few bursts from our rifles later and that American is now laying along the edge of the road. I am quite happy to see that it was a leader of some sort that we took out. Hopefully it's the bloody commander of this force.
While I'm not ready to take the bridge yet, for fear of what's on the other side, I am moving my men forward to take up position. As one infantry group moves forward they're greeted by a single mortar shell. I hope this isn't the beginnings of a barrage and only a random shot. My men are somewhat crowded there and don't have a lot of places to run to if it is indeed an incoming barrage.

Oh, and the slaughter continues near BN. Penry's halftrack is driving around at will gunning down my men. To their credit, my men bravely fire back in hopes of stopping their tormenter but so far it's been futile.
Planning
Pray that my armor arrives soon.
-
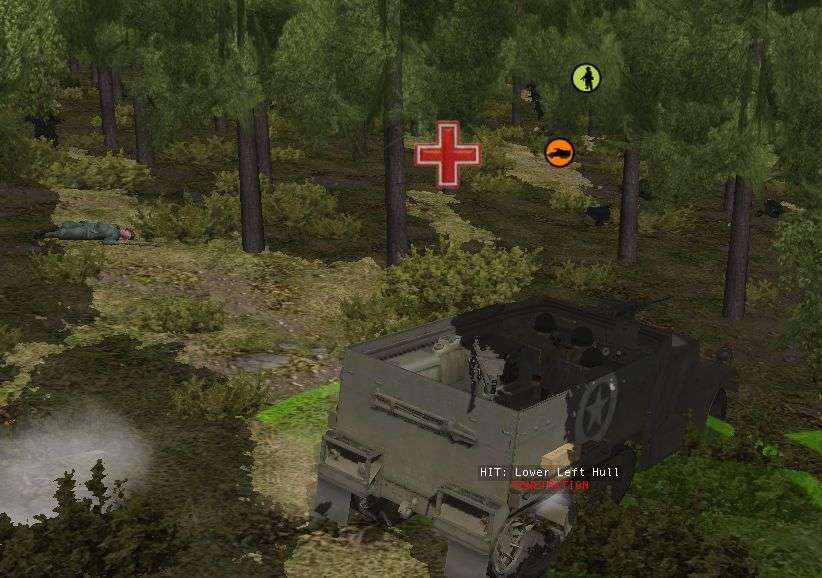
44:00 - 43:00
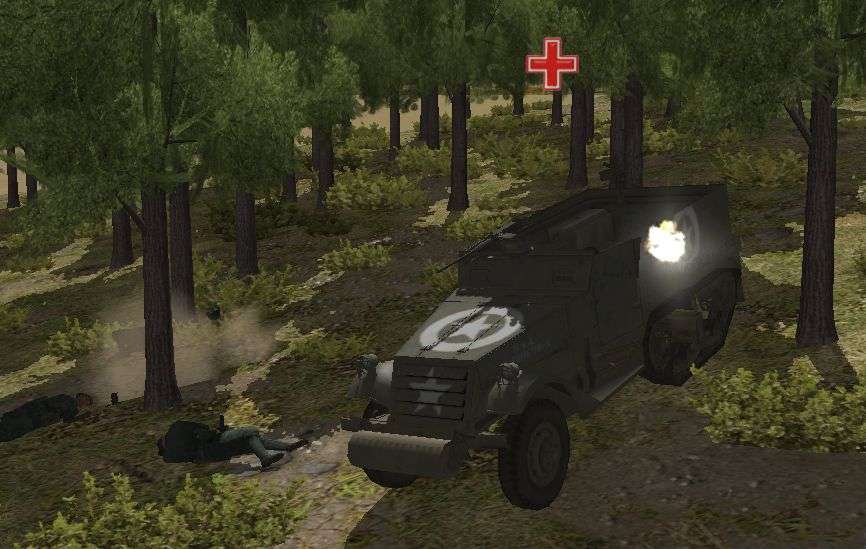
Not off to a good start. Before my men have a chance to turn around and prepare for the enemy, the "thump thump thump" of a .50 cal calls out and my men start dying.
A few seconds later my men spot the culprit. An American halftrack is making it's way through the trees straight at me... guns a'blazing. My men's first reaction is to hit the dirt due to the incoming fire. But then several raise up and shoot back at their attacker. Unfortunately, while the armor may be thin on the halftrack it's enough to protect it from my men.
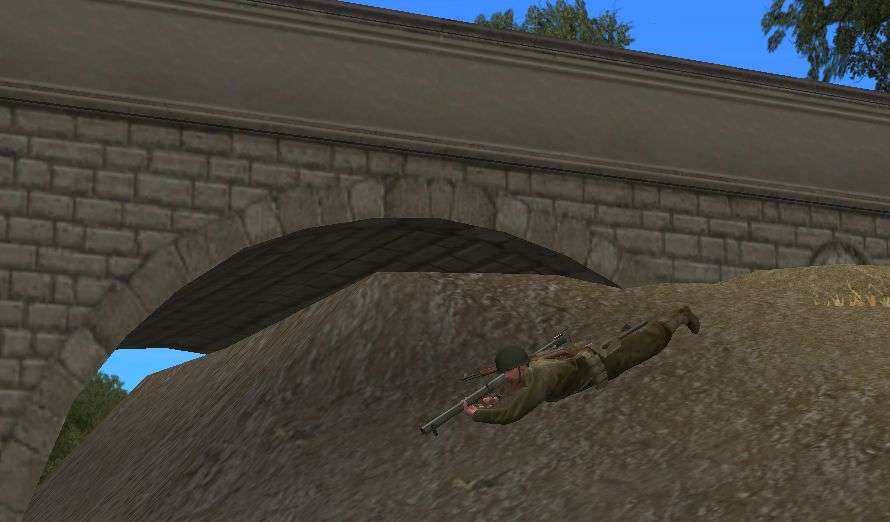
It wasn't all bad luck this minute. One of my men up in the woods near BN spots a bazooka laying in ambush near Bridge Z02. No doubt he's hoping to remain hidden until my R35s arrive. It's such a shame I spoiled his surprise.
Planning
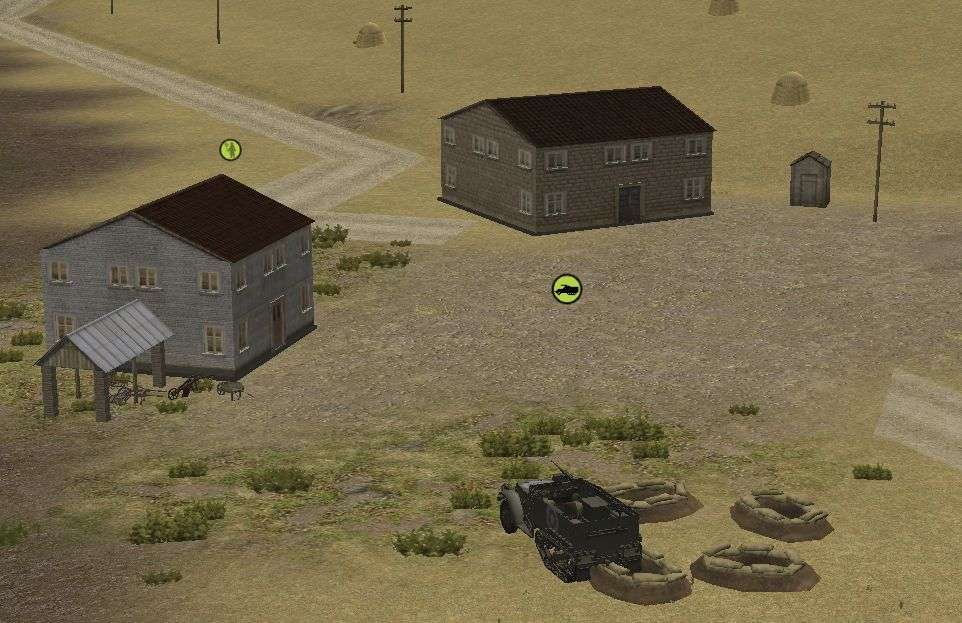
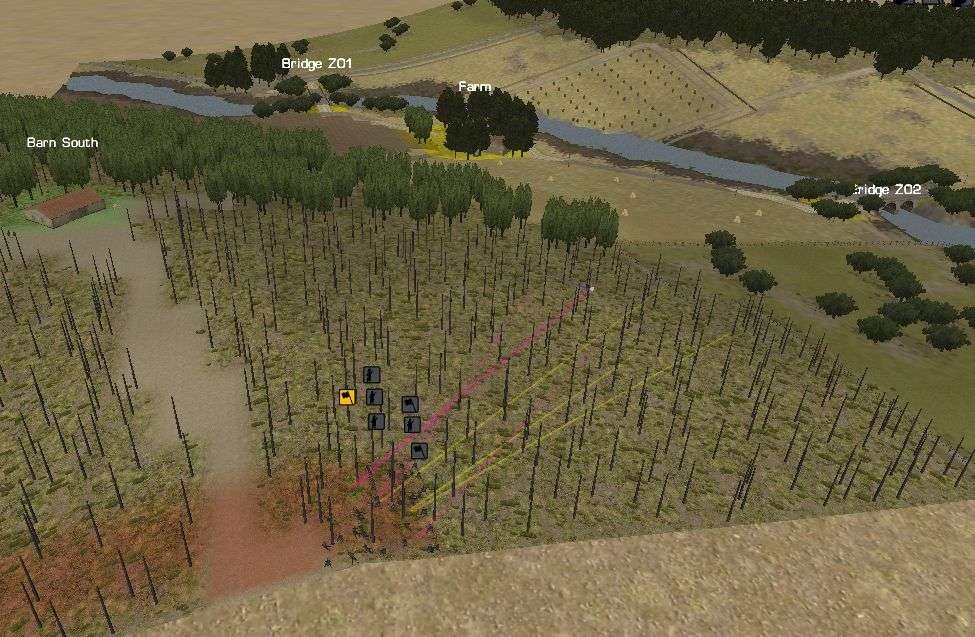
Here's an overview of the map a couple minutes in. Not only are we facing the one halftrack near BS but Penry has driven a second halftrack, full of infantry, up from the Farm. My plan is as before, hope to defend the woods with one squad while the other covers the bridge. I'm going to have my men in BN fire on the bazooka team and see if I can't get lucky with some long range fire.
-
45:00 - 44:00
Almost instantly my men hear mortar noises coming near Barn South. We don't make any visual contact but as the minute passes it becomes clear that it's moving closer and closer.
Planning
I order one rifle group to stop and try to ambush whatever American vehicle is coming our way. I have two hopes. One, they don't know we're here. Two, it's not a Sherman or something big. My men have zero ways to stop enemy armor.
-
Ciao! Benvenuto!
Having been driven from the valley by the Americans in our last battle, it is now up to me to drive the invaders out and do my part to thwart their plans.
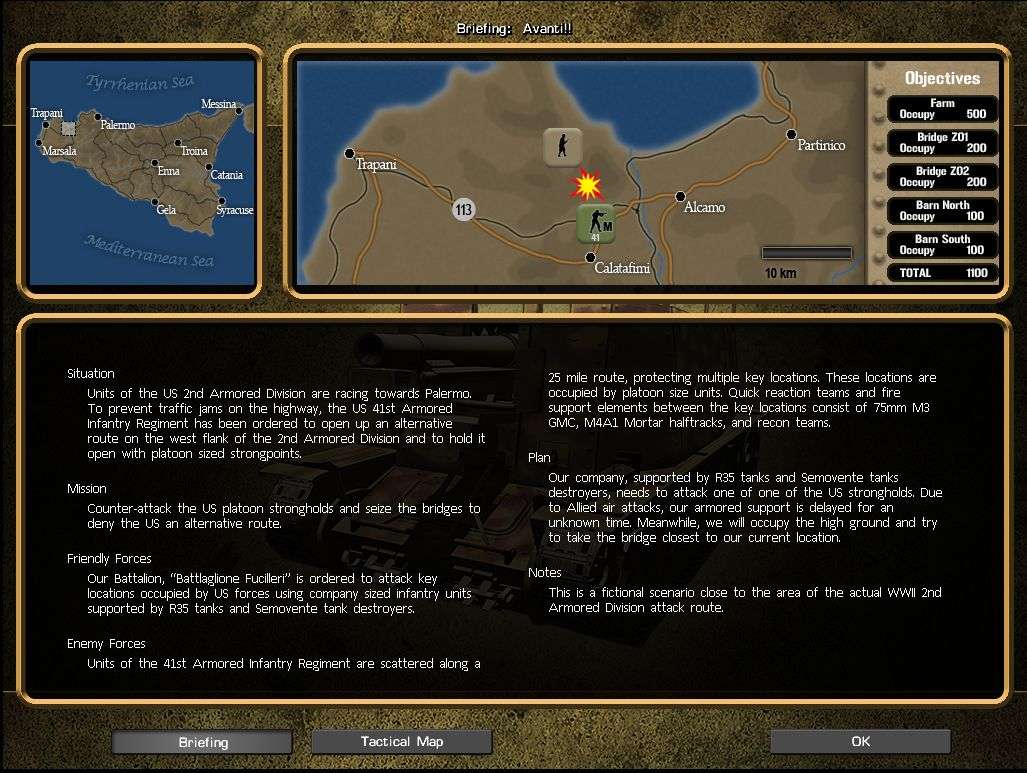
So I've got a company of infantry supported by the finest armor the Italians are fielding. Seems doable. So here's the plan...
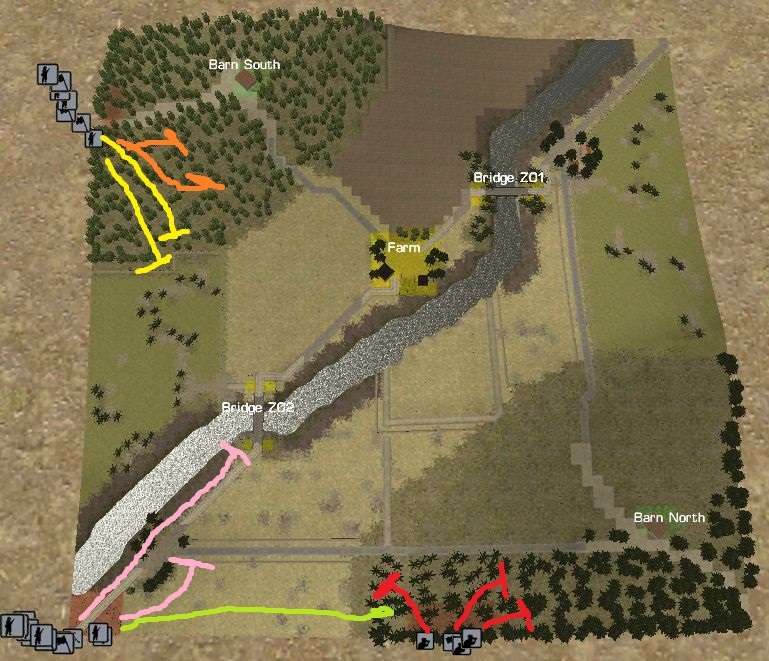
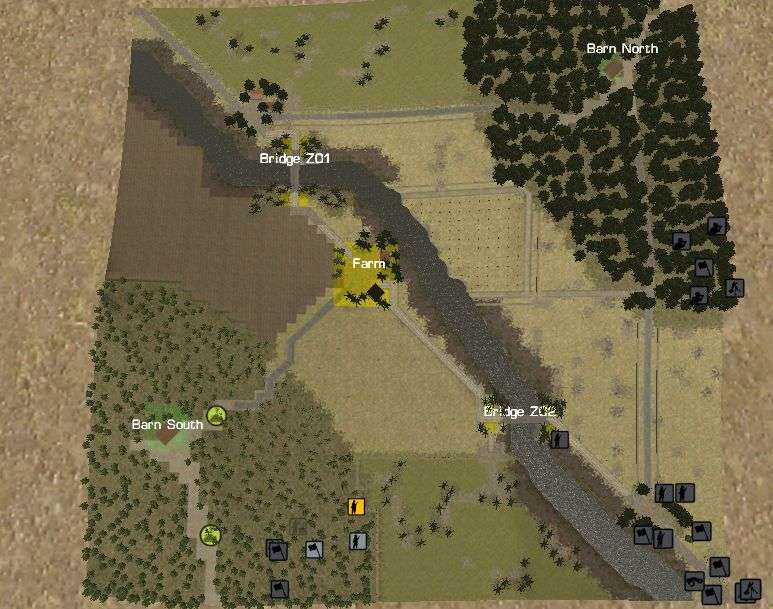
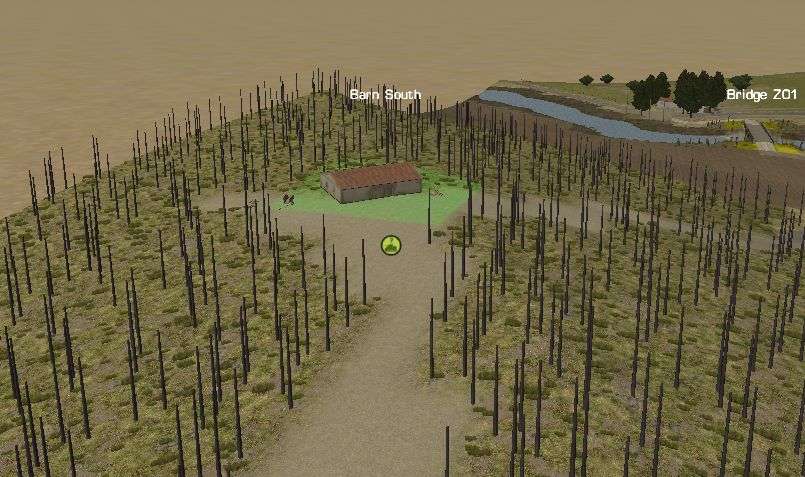
At Barn North (BN) two squads are going to take up a defensive position in case the Americans come investigate while the third squad is going to take an overwatch position on Bridge Z02.
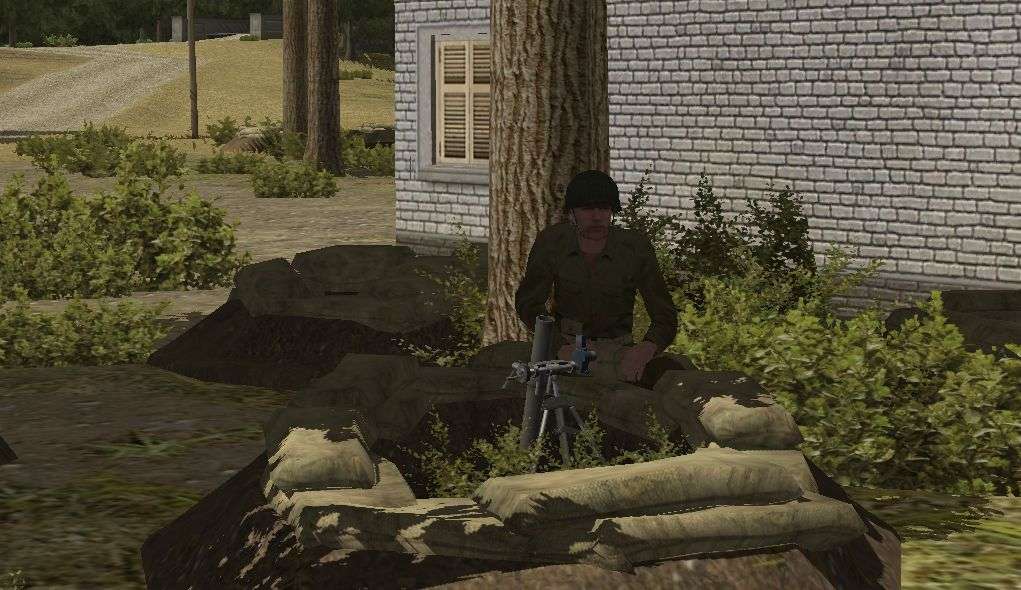
At Barn South (BS) one squad is going to provide overwatch on Bridge Z02 while the other squad holds off any Yanks coming from the barn.
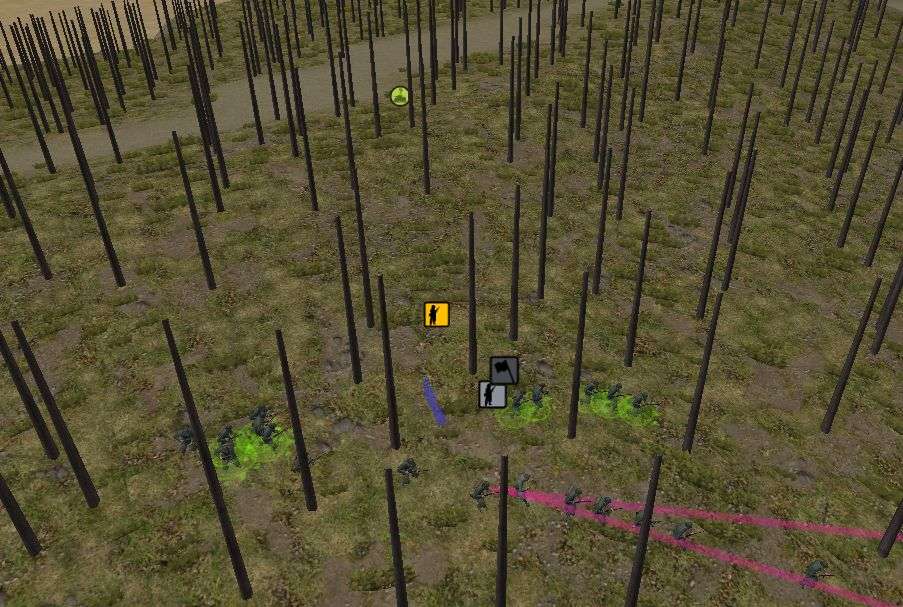
With my center group, I'm going to push one squad up the river to get close to the bridge while on the other side of the road, my remaining squad will take up a position behind a low stone wall. I'm ordering one Brixia up into the woods near BN to hopefully have an excellent firing position on any Americans holding the bridge.
Overall my initial plan is to scout out where the Americans are at and wait for my armor to arrive.
Barn North
Center
Barn South
-
Reading through BDs AAR, it seems to me that he might have placed too much importance on holding the barns, especially when it must have been obvious that I was holed up in the valley and wasn't going anywhere near them anytime soon. Just look at how many men he has around the northern barn at endgame!
Two reasons for the importance on BN. A big part was I knew that I would have reinforcements showing up there and it would have been disastrous if you had full control of it. Also, at one point I was convinced that you were going to make a big push for BN before moving on the farm so I moved my men from the back bridge up to the farm.
As womble pointed out, more men in the valley would have just led to more death from your mortars. With the exception of the farm there wasn't a lot of cover down there. I should have put men in the woods back more from BS. They would not have been necessarily near a VP but they could have caused some pain to your guys.
I think my biggest failing in this battle was not using my armor well enough. If I'd kept my STuGs more in the battle I could have stopped you from dominating the valley with your Shermans.
-
Final Thoughts
What a battle!!! Talk about one with some serious swings. I have a hunch Penry was thinking of throwing in the towel at one point and if so, I'm so glad he chose to stick this battle out.
It took Penry a bit to get things going. I think he had some poor planning in the beginning. If he'd dropped a bunch of smoke before his first big rush I think things could have gone far differently and much worse for me. But eventually he got things rolling and wow did the battle get good. I should have used my StuGs far better. I basically sent them off die one at a time. Stupid.
Things were over when the Shermans showed up. There was nothing I could do to stop them. I had a faint hope that by hunkering down I could get a draw with the casualties I caused and holding the two barns. That didn't quite work out but that's okay by me.
Stay tuned, the second part of this battle should be starting soon!
-
Over the next few minutes very little happens. I have my men hunker down and await death or the order to retreat. Needing some intel or just being cocky, Penry orders a Sherman into the woods near BN.
Turn 00:59 - End
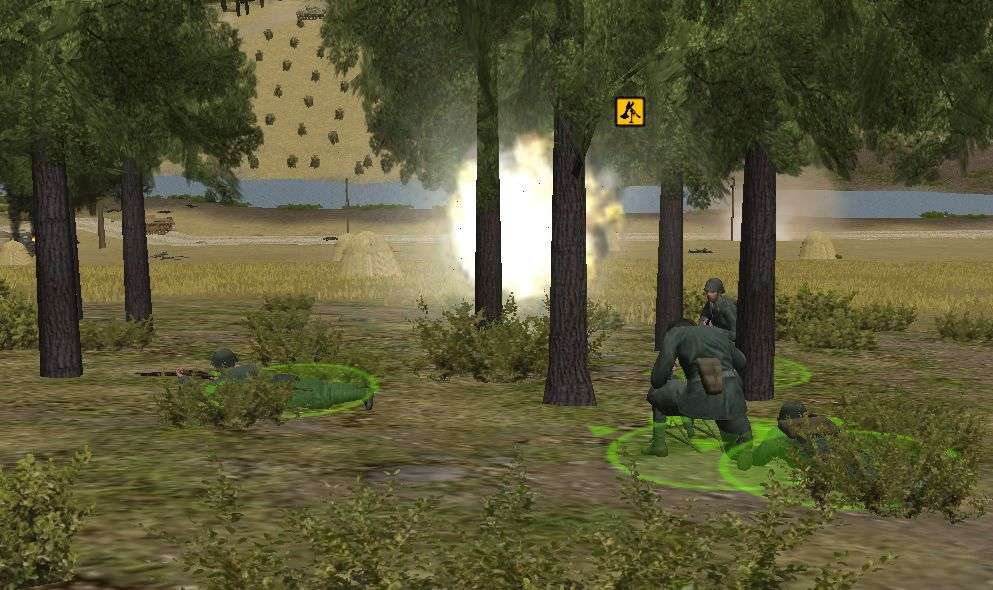
The Sherman drives into the woods, fully aware that my infantry is lurking about. As the Americans engaged an Italian unit, I ordered two brave German soldiers forward with a pair of rifle grenades. The first shot is a hit! Unfortunately I quickly learn it wasn't a killing blow.
My brave soldier stands firm and lines up his next shot even as the turret starts to traverse his way. With a silent prayer he pulls the trigger and hits again!

Despite a second penetration it isn't enough. A quick burst of MG fire and it's over. That man earned a medal but it will be awarded posthumously

Several more minutes play out without much of note. A few more Italians are blasted by the Sherman at BN before it reverses to safety. Other than that I sit and wait for the end.
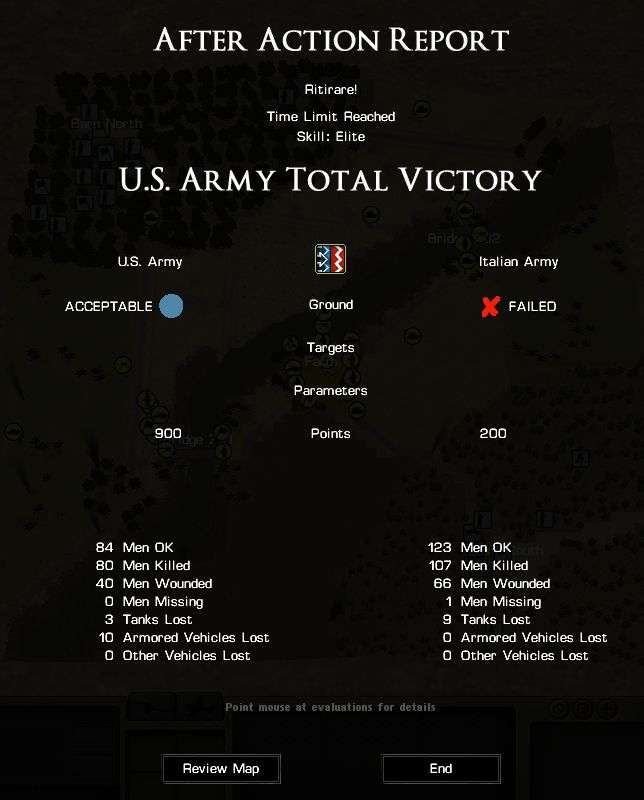
I'm in no way surprised by the end results. I knew that even with holding BN and BS that Penry was going to carry the day. I'm very pleased with my kill total in both men and machine. While we lost the fight we made the Americans pay for this plot of land.
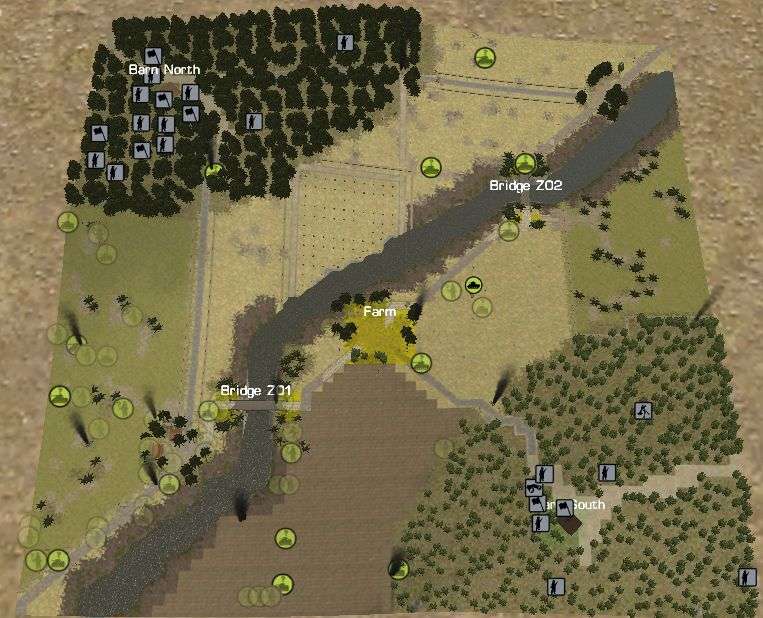
And here's the final map. As you can see, there's green everywhere.
-
Turn 08:59-07:00
My one hope for causing a bit of pain for Penry was a mortar team in the woods of BS. Unfortunately they are spotted by the Americans before they can take out any halftracks or cause serious hurt to the men rushing the Farm.
I knew it was probably futile but I had parked my remaining Italian tankette on the border of the woods near BS, out of sight of the Americans but with a firing lane on the Farm. It proved to perform about as well as I expected. They didn't spot anything or shoot at anything but they are drawing some fire.
Unfortunately my last StuG is drawing fire too. Accurate fire. I had attempted to relocate it from one side of BN to the other. The position he was in before was completely unusable so instead of leaving him back on my side of the hill and daring Penry to come get it I tried to drive it around the back. Bad idea.
The R35 was soon to follow. With him gone I'm officially out of armor and hope and soon... men.
-
Turn 12:59-11:00
The combination of incoming artillery accompanied by direct fire from the Shermans easily and quickly breaks and destroys my meager resistance at the Farm. The position is lost and I have no hopes of being able to retake it with my current forces.
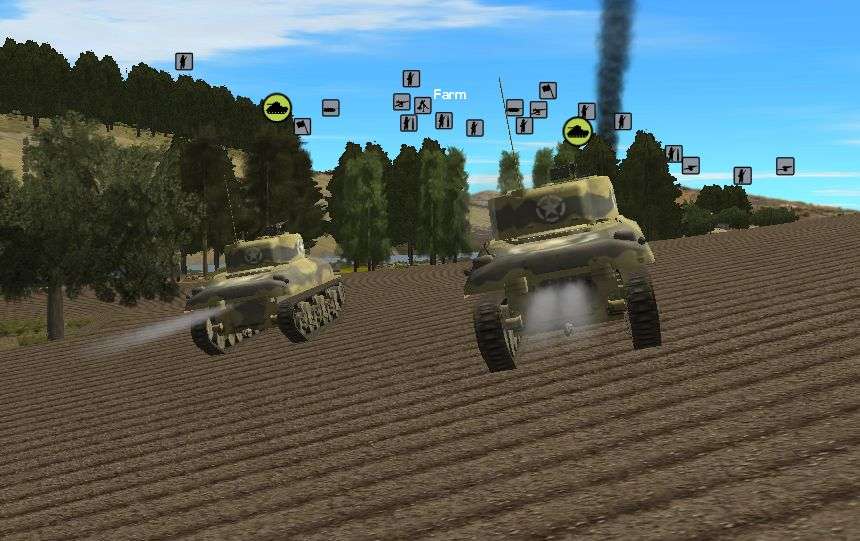
Knowing that the Farm is ripe for the taking Penry orders his men over the bridge, past his fallen men and burning tanks and towards the objective. Unlike before where my men stopped the Americans at the river crossing, this time they easily made it.
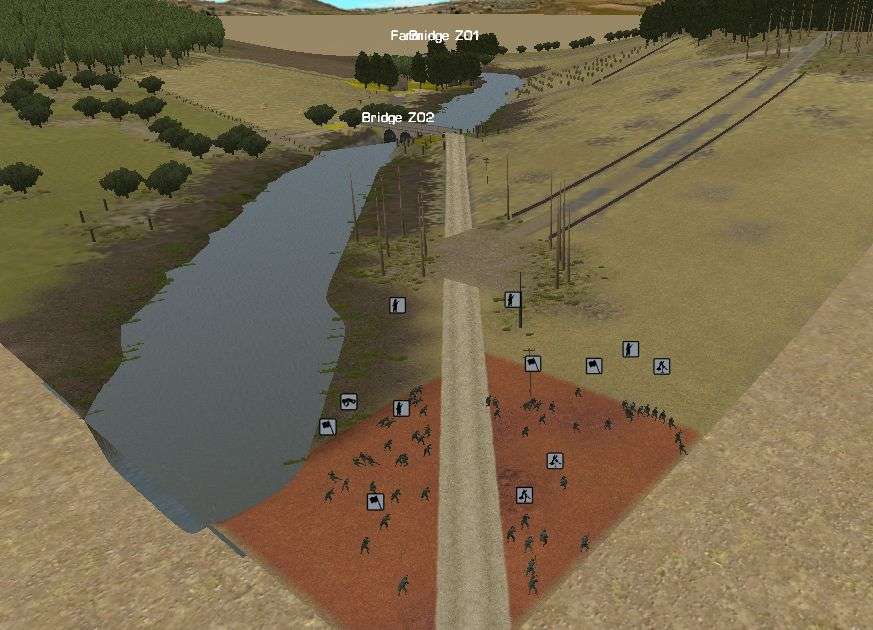
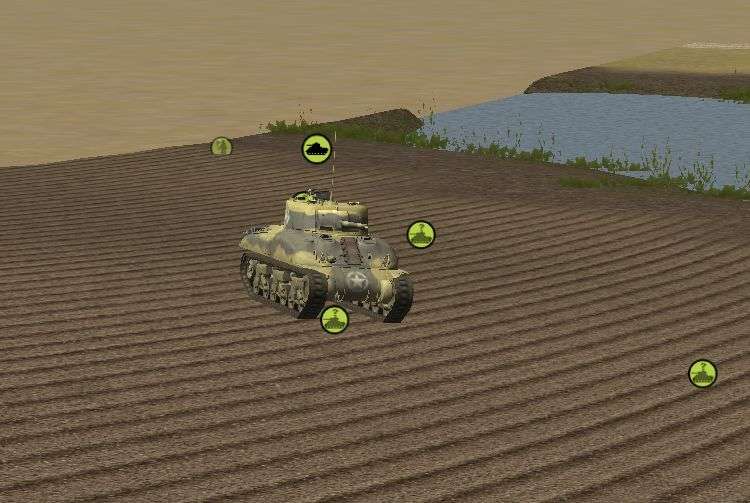
Here is an overview of the map at the 11:00 mark. All that green on the Farm side of the river spells the end of the battle for me. Those three Shermans fanned out are firing on anything that moves. With no way to neutralize those tanks, there's no way I can win.
Planning
The Farm is lost but the battle isn't over yet. I still hold both barns. And while Penry can easily drive around and blast my guys from the fields. Let's see if he's brave enough to drive those tanks into the woods.
-
Turn 13:59 - 13:00
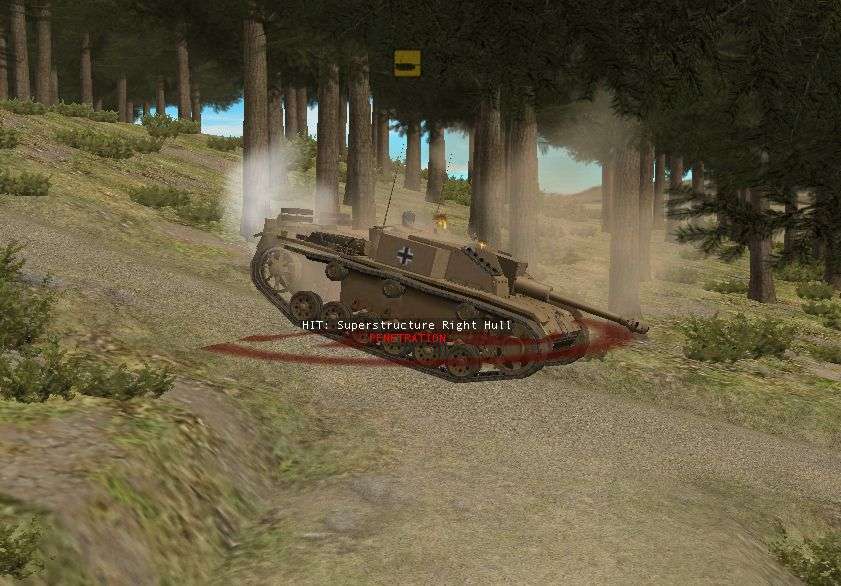
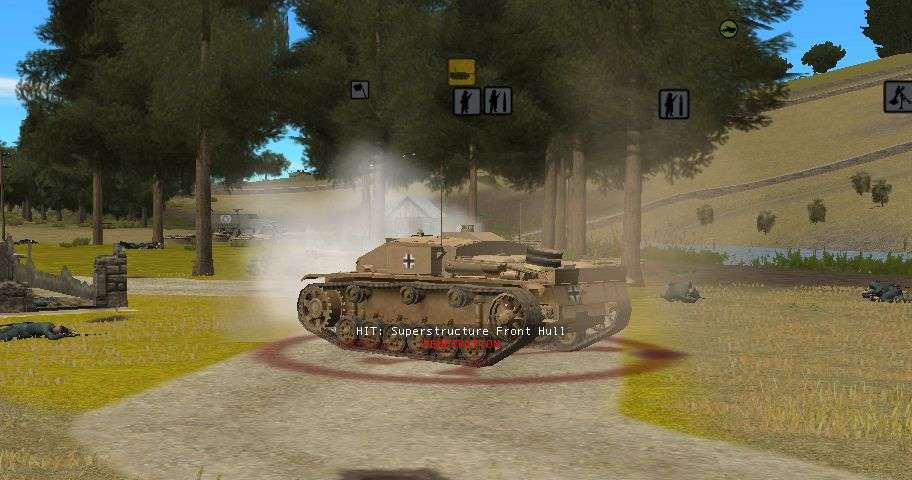
Well, so much for that. My StuG is taken out without even firing a shot. I had really hoped he would have gotten at least one Yank first but no luck.

And the no luck thing continues with my StuG up at BN. As he rotated to try and engage the newly arrived M4s one of the halftracks manages to get a hit. It's not a killing blow but some damage is done. In the following seconds my StuG is hit by one of the Shermans and again by the halftrack. None of the hits knock the assault gun out but there's spalling and crew injuries.

My StuG did manage to get a single shot off before backing behind the hill towards BN. I am irked that he missed with those five juicy targets all right next to each other. I'd give my left leg for a fighter-bomber to show up right around now.
As the turn ticks down the unmistakable scream of an incoming round is yet again heard. And again the target is the Farm. As if things weren't bad enough there already. Another barrage is going to totally destroy what little defenses I have left.
-
Turn 14:59-14:00
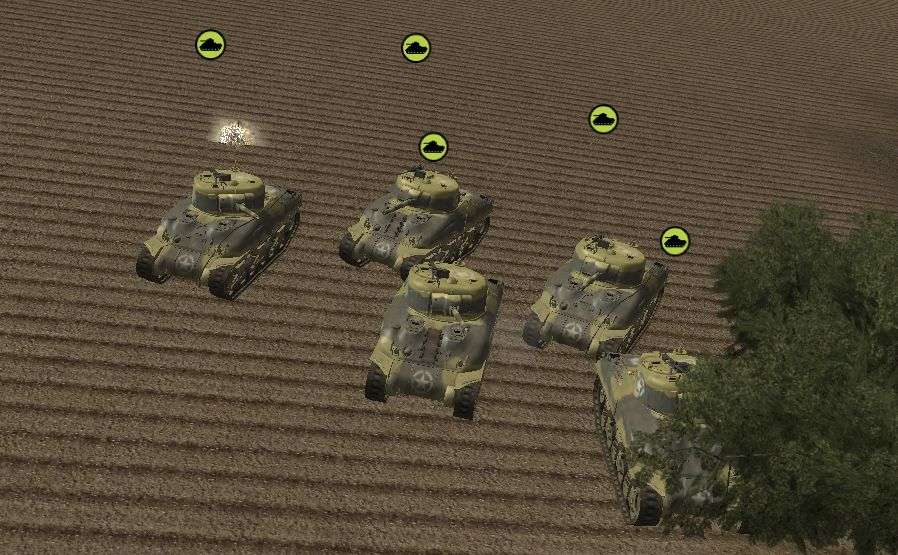
The battle takes a serious turn for the worse when I suddenly spot one Sherman and hear several others coming from behind the hill. A few StuGs vs a platoon of M4s aren't great odds in my favor.
Sure enough, a few seconds later I spot several more American tanks joining the fight. I suddenly have a bad feeling about how this is going to go down.
The new arrivals waste no time in silencing my assault gun I have at the Farm. Things were already tenuous at the Farm and the loss of my StuG will only make it that much worse.
As the minute ends I find one of my remaining StuGs staring down four Shermans. The odds are bad but I'm hopeful that he'll at least remove one American tank from the fight.
-
I think I could totally convince the wife that me buying Market Garden is a great reward for completing the race. Great idea Yankee!
-
Hrm... I'm running a marathon in 9 hours. I could sleep or download the game. I reeeeeeaaaaaallllly want to play the game. Damn you BFC! Why couldn't you wait a day?
-
Crap, that's tough going! I've never seen aircraft, in my limited experience with them, be that effective.
-F
I'm actually considering myself lucky. All the big bombs did little to no damage and I survived with all my tanks intact. Yes my infantry losses to the plane hurt but that was partially my fault for lining them all up way to nicely. Still, 30 infantry is a great trade off for a couple tanks IMO.
Not been on in a while but this AAR is one of the first things i started to read.Quite enjoying it,keep up the good workGlad you're enjoying it! Sorry that it's a bit slow as far as updates. Tiresias and I are only doing about 2 turns a week or so due to our busy schedules and also not every turn is all that action packed. But I'll update it as often as I can.
I have a request. Instead of turn numbers could you identify the turn by the clock time? Please. Something like Minute 32 or Minute 32-31. That makes it much easier to keep the two threads in sync.You are turning out some great screen shots - keep up the good work.
Great idea! I'll make the change with the next update.
Also, thank you very much. I try to get some good ones in there.


Avanti! BigDork vs Penry - Italian Domination
in Combat Mission Fortress Italy
Posted
Thanks for clearing that up for me. Well if nothing else I'll relocate my Brixia once they run out. They can buddy care and scavenge.