

Fredrock1957
-
Posts
484 -
Joined
-
Last visited
Posts posted by Fredrock1957
-
-
Turn 34-33 - Continued

1st Platoon Movement orders; I am having Hauptmann Freidrich exit his vehice and go to ground in the field north of 1st Platoon. Meanwhile the core of the platoon has orders to tighten up for potential flanking attack.
I order Obergefreiter Jacob,s Scout Team to move east and cut through a hole in the hedgerow and work his way into the angled building on the North East side of town. If the enemy decides to exit town this way on the initial attack Jacob's 3 MP-40s will mow them down.

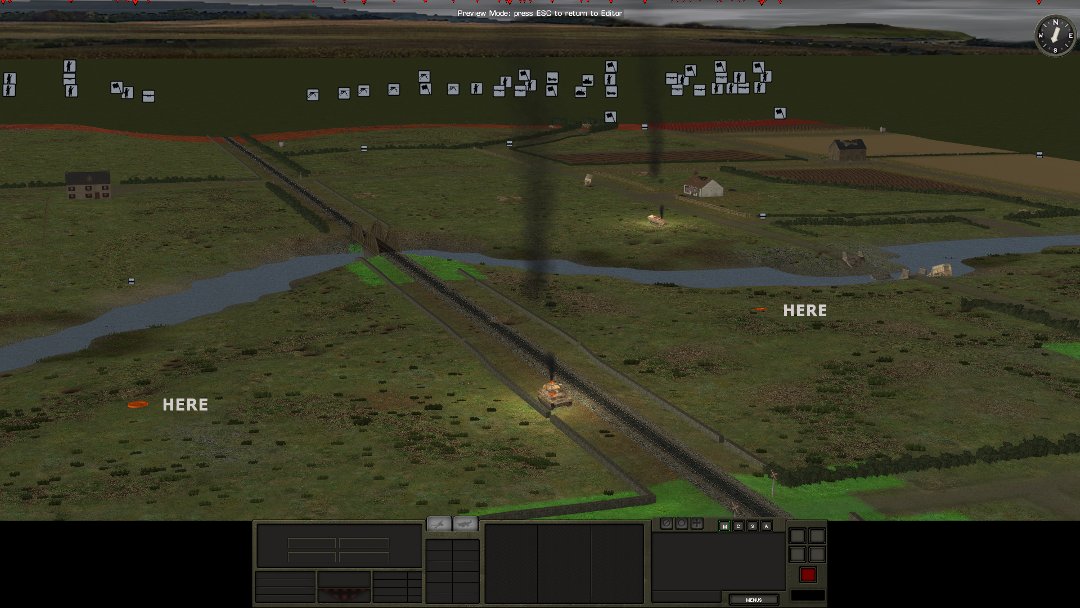
Here are the 3 proposed attack routes for Leutnant Jen's 3rd Platoon... I will initiate via the squad behind the building coming right up the right side of the road and upon hitting the intersection have the other teams move down the side LOA's (Jump off in 3 minutes)

I need to put the Squads/Teams back together for 2nd Platoon, currently there is no sound contact activity in the area and with full squads they can 'assault' when the time comes. (I usually split squads early to perform recon/scout functions but when getting ready for attack I prefer them as a whole).
-
Turn 34-33

Ok, looks like my scouts have caused some damage and it is time to start to prepare for the upcoming attack. I believe I will initiate the attack in 3-4 minutes after my mortar rounds fall on the East-South-East side of town..
3rd Platoon will lead the attack, and bust into town through 3 separate corridors, my goal is to clear out the first two row of buildings and then send some scouts deeper into town... Sound contact are at a minimal in this area so I feel I can get a foothold on my initial attack..
Team Kitzler and Freudlund are ordered to sit and wait for ambush possibilities, if the enemy passes them by they could become a thorn in the GI's ass as the battle gets going.
I have ordered a last minute change for my 81mm mortar strike; originally ordered as an area strike of about 60m in circumference, I have 'adjusted fire to a linear fire based upon sound contacts... The additional delay of one minute should also ensure arrival on enemy troops (I Hope...lol)
1st and 2nd Platoons will wait a few minutes after the initial attack to see the enemy's response and to provide flanking support.
Also I will tighen up Leutnant Froschauer in the PzIV and Obergefreiter Kinkel in the StuG in support of 1st and 2nd platoons. I am concerned that these weapons are not as potent in this LOS and will need to ensure that infantry clears up the areas pretty good before moving into the outskirts of the town. Once I have decent controll of the east end of Lumbres, I will move the StuG and PZIV in to town to defend main roads..
The next three screenshots show the position of 3rd Platoon led by Leutnant Jens.


-
Turn 35-34 - Continued

The potato masher goes Kaboom... Not sure of the damage but based upon the Sound contacts I hope for good results... I am afraid for Molek's team as they are basically surrounded...

Movement orders for the turn consist of:
Team Kitzler: quick move to woods 10m west of position and setup for additional ambush.
Team Freudlund: sit and wait, arty on the way so they are stuck in place... Hide
Team Molek: fight, fight, fight, cause as much carnage as possible... again Molek is trapped, such is the life when set to ambush in front of the lines... I hope he was a volunteer...
1st Platoon, Leutnant Hinirichsen gets orders to tighten up his units and keep an eye westward for the multiple sound contacts coming his way.
2nd Platoon, Leutnant Jork starts to tighten up his platoon also... diring the last minute a infantry team eliminated two GI scouts in the area...
3rd Platoon, Leutnant Jens keeps his troops in postion for the initial attack, I order Jens to move up about 8-10 meters and get in position...
-
Turn 35-34 - Continued
Action B...

At the same time about 80 meters North of Obergefreiter Kitzler's team, Obergefreiter Freudlund's Tank Hunter Team sitting and waiting has their ambush triggered by multiple GI's appearing right in front of them..

The MP-40 and MP-44 show their awesome short range firepower as GI's start to stumble and die...

The few GI's that try to escape over the wall fall victim also... I count at least 6-7 GI's dead... another good ambush that was worth the waiting... (I actually hate the wait part as a player, but it does pay off frequently in the long run... patience, patience, patience...)
Action C...

And once again almost at the same time another 120 meters North of Obergefreiter Freudlund's team, Obergefreiter Molek's Scout team identifies GI's moving down the Northside road... Molek grabs a potato masher and releases....

What is interesting here is that due to the short LOS Molek only see's one GI and then throws his grenade to a point he cannot see (He is leading the moving GI... that is pretty cool and I have never seen it before...)
-
Thanks Vincere... glad someone is reading the DAR...

Minute 35-34
Minute 35-34 has some good action and it looks like some of my sit and wait paid off... Three key areas of action where I fell I inflicted some decent damage to the enemy.

See below for A-C action screenies...
Action A...

Obergefreiter Kitzler's Scout Team who moved into the corner of the field to cover any approaches is sitting in ambush. All of a sudden GI's appear (at least two sets of contacts) and Kitzler's team opens up with their three MP-40's...

Some carnage ensues and I count at least 5 enemy dead without a single shot being fired at Kitzler's team... I need to run his team out of there based upon sound contacts, or else they are going to be wiped out.
-
The Campaign is on the same maps with the same battles (12 out of the 18 from the allied campaign)... but there is modifications to some of the force mixes, objectives, etcIs this campaign the mirror image of the Allied one just with the player on the opposing side or are they significantly different? If so in what ways?Thanks
-
Then, on the review screen there were 2 TRPs on the German side of the map. I assume they were Allied TRPs. There was no sign of any others. Definitely something wrong with the German TRPs.
Those are Allied TRP's... I have sent files to BFC for their review... we will see what happens...
I'm reading the book by Milano and Conner on the German 352nd infantry division at the moment, called Normandiefront, which is a great companion for this campaign.This is a great book, a must read about the fighting in and around Normandy from D-day to St. Lo, all from the Axis perspective...
-
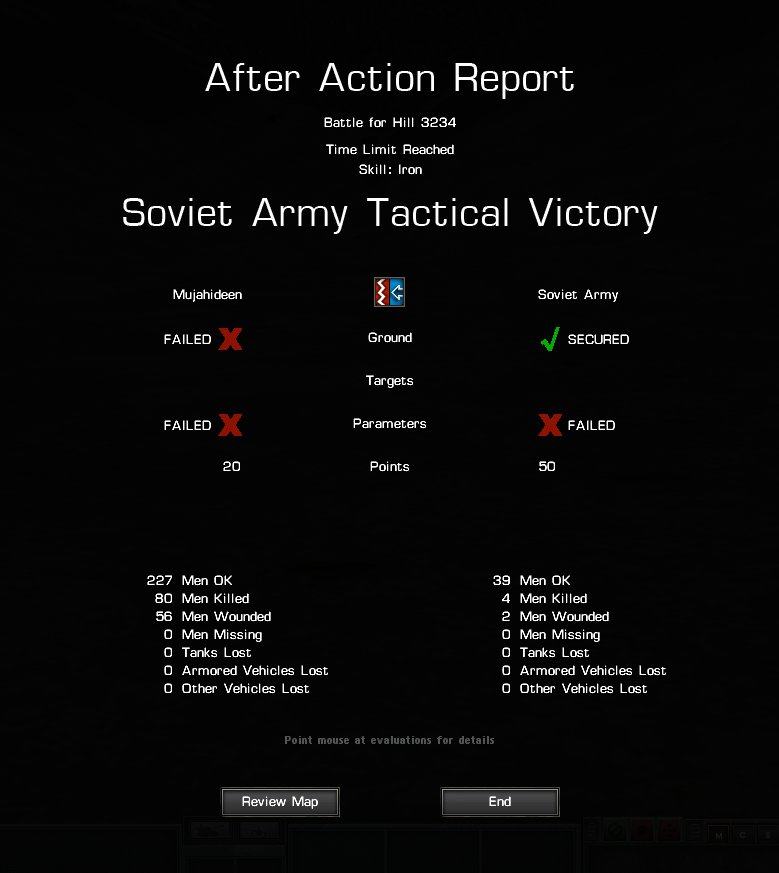
I received 4 HQ at around the 80 minute mark, also received Air Support Units earlier in the battle... All 4 HQ's appeared in the NW corner of the map... It didnt seem right when it happened, and I really didnt do much with them in the 10 minutes I had them....Thanks for posting your AAR. You say the HQ's appeared as reinforcements? How can this be?:confused: This was not supposed to happen, I will take a look and see if I made a mistake somehow.I went back to see if I had the save games but I scrapped them along the way to save space...
Again I thought the battle was excellent... The constant determination of just how much firepower to lay on the enemy to surpress vs calling for Arty while you have them surpressed is a tough thing to do... At the end I was basically out of ammo across the board...
A great fight, I wouldnt change a thing.
-
Thanks whitehot78... I am in the process of bringing Major Nosov (who is now a Colonel) out of retirement and having an addtional campaign with him leading his new forces.... Will keep you posted...i have finished the campaign yesterday, with a soviet total victory. i just wanted to say that its been the most enjoyable campaign i played on this game, much better than the default twos.. please give us more! -
Minute 36-35
Well the gallant Obergefreiter Schumacher trying to get to safety after identifying a major GI attacking force, makes it about 40 meters and then succumbs to a rifle shot.

RUN Schumacher RUN!!!

A sad day for the 1.116 Battalion

A concern arises as a sound contact appears to the east of Scout (Moler), How did a unit get there and what is it... This concerns me.
The schedule for the 81mm rounds to arrive is two minutes and I will make a judgement next turn if I should adjust to increase the delay another minute or so. So far the American advancement has been slow, but now with all the sound contacts it seems like the main force is coming in from the west on both sides of the road...

This turn I will 'tighten up second and third platoons. Third platoon will make the initial attack right down the road into the east end of town... When they get the go order I want them to be in perfect position. Town assaults require many different movement orders to be executed properly (I have played around with this in my multiple play tests of Sie Kommen II, so stick around for something really different)...

I will tighten up first platoon though I am still concerned about what is directly west. I will keep moving Hauptmann Freidrich forward in his 251/1 till he will reach the Tank Hunter Team hidden on the side of the building out front of this defense line.
Also will bring up the PzIV a little farther, when 1st Platoon attacks the PzIV will be in support right behind it.
One big concern I have is the lack of HQ assets to perform on-call arty if my FO gets taken out... I will need to get the three platoon HQ's in good position to call arty but not expose them (will be interesting in this LOS/LOF limited view)...
-
I finished this off and the battle was different from what I am use to. There is plenty of action and tactical decisions, especially timing and placement of Arty... but as the defender you basically have no Movement per se, except for some HQ's that arrive as reinforcment... As far as reflecting what happened historically I think it is spot on... Overall a great example of a recreation of a historical occurance... Thanks for creating it.
-
Minute 37-36 *** FIRST CONTACT
Tank Hunter Team (Schumacher) makes first contact with an American Patrol approximately 20 meter behind their hiding postion.

Schumacher opens up with his MP40 and takes out a GI...

A different angle...

Schumacher sidekick, Soldier Woikin tosses a grenade at the other GI's that are spotted...

KABOOM...

Woikin is shot and killed while Schumacher watches... Schumacher is slated to run (while spraying MP40 fire in the direction of the GI's) to the nearest gap in the low bocage and dive through to the other side... we will find out within the next minute if he made it...
The only other action on this turn is all my 120mm Harassment fire is done on the town of Lumbres... Its time to start getting ready for the attack...
-
/* Campaign Header*/
[PLAYER FORCE] red // options are: blue/red
[HUMAN OPPONENT ALLOWED] no // no/yes
[bLUE VICTORY TEXT] Major General Gerhardt of the 29th Division is pleased with the way you conducted this campaign, a job well done.
[bLUE DEFEAT TEXT] Because of your incompetence the Allied front has been held up indefinitley, the war will go on till 1950.
[RED VICTORY TEXT] Ein großer Sieg!
[RED DEFEAT TEXT] Sie Lost, Adolf wütend werden!
/*Battle #1*/
[bATTLE NAME] goincountry // note, do not include “.btt”, just the file name
[WIN THRESHOLD] draw // total defeat, major defeat, tactical defeat, minor defeat, draw, minor victory, tactical victory, major victory, total victory
[NEXT BATTLE IF WIN] allinamorning
[NEXT BATTLE IF LOSE] allinamorning // a blank signals an end of the campaign
[bLUE REFIT %] 100
[bLUE REPAIR VEHICLE %] 100
[bLUE RESUPPLY %] 100
[bLUE REST %] 100
[RED REFIT %] 100
[RED REPAIR VEHICLE %] 100
[RED RESUPPLY %] 100
[RED REST %] 100
/*Battle #2*/
[bATTLE NAME] allinamorning
[WIN THRESHOLD] draw
[NEXT BATTLE IF WIN] sector114124
[NEXT BATTLE IF LOSE] sector114124 //
[bLUE REFIT %] 100
[bLUE REPAIR VEHICLE %] 100
[bLUE RESUPPLY %] 90
[bLUE REST %] 90
[RED REFIT %] 100
[RED REPAIR VEHICLE %] 100
[RED RESUPPLY %] 80
[RED REST %] 80
/*Battle #3*/
[bATTLE NAME] sector114124
[WIN THRESHOLD] draw
[NEXT BATTLE IF WIN] counterattack //
[NEXT BATTLE IF LOSE] counterattack //
[bLUE REFIT %] 100
[bLUE REPAIR VEHICLE %] 100
[bLUE RESUPPLY %] 90
[bLUE REST %] 90
[RED REFIT %] 100
[RED REPAIR VEHICLE %] 100
[RED RESUPPLY %] 80
[RED REST %] 100
[bATTLE NAME] counterattack
[WIN THRESHOLD] draw
[NEXT BATTLE IF WIN] canalbridges //
[NEXT BATTLE IF LOSE] lakeland //
[bLUE REFIT %] 100
[bLUE REPAIR VEHICLE %] 100
[bLUE RESUPPLY %] 90
[bLUE REST %] 90
[RED REFIT %] 100
[RED REPAIR VEHICLE %] 100
[RED RESUPPLY %] 90
[RED REST %] 100
[bATTLE NAME] canalbridges
[WIN THRESHOLD] draw
[NEXT BATTLE IF WIN] highwaysong //
[NEXT BATTLE IF LOSE] highwaysong //
[bLUE REFIT %] 100
[bLUE REPAIR VEHICLE %] 100
[bLUE RESUPPLY %] 90
[bLUE REST %] 90
[RED REFIT %] 100
[RED REPAIR VEHICLE %] 100
[RED RESUPPLY %] 90
[RED REST %] 85
[bATTLE NAME] highwaysong
[WIN THRESHOLD] draw
[NEXT BATTLE IF WIN] wetlands //
[NEXT BATTLE IF LOSE] wetlands //
[bLUE REFIT %] 100
[bLUE REPAIR VEHICLE %] 100
[bLUE RESUPPLY %] 95
[bLUE REST %] 90
[RED REFIT %] 100
[RED REPAIR VEHICLE %] 100
[RED RESUPPLY %] 90
[RED REST %] 100
[bATTLE NAME] theolefarmstead
[WIN THRESHOLD] draw
[NEXT BATTLE IF WIN] onemoretogo //
[NEXT BATTLE IF LOSE] allthewaytohell //
[bLUE REFIT %] 100
[bLUE REPAIR VEHICLE %] 100
[bLUE RESUPPLY %] 85
[bLUE REST %] 100
[RED REFIT %] 100
[RED REPAIR VEHICLE %] 100
[RED RESUPPLY %] 100
[RED REST %] 100
[bATTLE NAME] wetlands
[WIN THRESHOLD] draw
[NEXT BATTLE IF WIN] theolefarmstead //
[NEXT BATTLE IF LOSE] theolefarmstead //
[bLUE REFIT %] 100
[bLUE REPAIR VEHICLE %] 100
[bLUE RESUPPLY %] 90
[bLUE REST %] 90
[RED REFIT %] 100
[RED REPAIR VEHICLE %] 100
[RED RESUPPLY %] 70
[RED REST %] 80
[bATTLE NAME] onemoretogo
[WIN THRESHOLD] tactical victory
[NEXT BATTLE IF WIN] allthewaytohell //
[NEXT BATTLE IF LOSE] //
[bLUE REFIT %] 100
[bLUE REPAIR VEHICLE %] 100
[bLUE RESUPPLY %] 85
[bLUE REST %] 100
[RED REFIT %] 100
[RED REPAIR VEHICLE %] 100
[RED RESUPPLY %] 90
[RED REST %] 80
[bATTLE NAME] lakeland
[WIN THRESHOLD] draw
[NEXT BATTLE IF WIN] highwaysong //
[NEXT BATTLE IF LOSE] highwaysong //
[bLUE REFIT %] 100
[bLUE REPAIR VEHICLE %] 100
[bLUE RESUPPLY %] 100
[bLUE REST %] 100
[RED REFIT %] 100
[RED REPAIR VEHICLE %] 100
[RED RESUPPLY %] 80
[RED REST %] 100
[bATTLE NAME] allthewaytohell
[WIN THRESHOLD] draw
[NEXT BATTLE IF WIN] //
[NEXT BATTLE IF LOSE] //
[bLUE REFIT %] 100
[bLUE REPAIR VEHICLE %] 100
[bLUE RESUPPLY %] 100
[bLUE REST %] 100
[RED REFIT %] 100
[RED REPAIR VEHICLE %] 100
[RED RESUPPLY %] 80
[RED REST %] 100
-
I went back and checked every file that has to do with Counter Attack on my system and they all have 2 TRP's... The script file has
[bATTLE NAME] counterattack
[WIN THRESHOLD] draw
[NEXT BATTLE IF WIN] canalbridges //
[NEXT BATTLE IF LOSE] lakeland //
[bLUE REFIT %] 100
[bLUE REPAIR VEHICLE %] 100
[bLUE RESUPPLY %] 90
[bLUE REST %] 90
[RED REFIT %] 100
[RED REPAIR VEHICLE %] 100
[RED RESUPPLY %] 90
[RED REST %] 100
I cannot for the life of me think that would eleminate the TRP's....
-
I went back and took a screenie, here is the default in the setup of the TRP's
Hope this helps
-
Minute 38-37

3rd Platoon is in position to start the attack. Next thing to consider is the timing of the attack, I am leaning to go by the 28-30 minute mark.

I am happy with all my locations and at the point where I can wait and see what unfolds. I have three ??? areas of concern as I don't know what the Allied Forces consist of in these areas, but I do have recon units in position to hopefully identify and cause some damage as enemy units show themselves.
I will be plotting a 81mm Mortar attack to the east of town, I am waiting on Tank Hunter (Walke) to ID what should appear next turn. With the FO and the TRP rounds should be on target within 2 minutes. I am very comfortable with this approach area.
Towards the Northwest a new 'Contact' has appeared, not sure what this is will have to wait on this. These units might determine my time of attack as I don't want to get flanked from the North. Because of this sound contact I am going to move the HQ's (Freidrich) and the 251/1 towards the west. I will need someone to 'call' arty if this new 'Contact' turns out to be sizeable. I will like to get the HQ up to the defense line of the Tank Hunter Team within the next 3 turns.
All is quiet with the 2nd Platoon on the South, I will keep slow moving up the StuG towards the crossroads.
So not to much to report as I sit and wait, when the action pops I have a feeling it will be intense.
-
According to the .btt file that is in the campaign folder and thus imported into the campaign, there are two TRP's for the Axis... Check in the woods to the Northeast and Northwest of the RR Bridge on the far side of the river... they should be there..Loving the campaign so far. One question though... I am in the setup phase of the "Counterattack" mission. The briefing says there are 2 TRP's, but I don't see any. Is that a mistake in the mission text or is my game messed up somehow? -
Minute 41-39 - Continued

I radio Leutnant Jens and inform him he will be leading the attack and he orders his men to move into some preliminary positions to catch a glimpse of how far forward he can advance before he will attack. I am hoping that these units are not identified. A look around the area shows two nice size craters in the woods on the north side of the road. I think I can make the Allies believe the main attack is coming from Leutnant Jens direction, and when they migrate to the East side of town I will hit them from both the northern and southern flanks (Will be great if I can pull this off).

With Jacob's Scout Unit at the end of the hedgerow on the Northeast of town I still have not seen the sound contact move (or even be identified) . I feel comfortable in starting to move 1st Platoon (Hinrichsen) in and around the wooded area so they can get into position for the attack.

Also Hauptmann Freidrich and Leutnant Froschauer are moving into position to support 1st platoon with attack.

I believe Tank Hunter Team (Walke) will be the first to have contact within the next minute.
Overall I am happy with my plan and the overall location of my troops, I believe my plan will work, but the key is 'When to trigger the attack', too late and I might not be able to root the Ami from the town, too early and I might be in trouble trying to hold the town...
It is time to sit back and respond to my opponents actions and not to rush into anything. I sure hope that my opponent is not getting much 'intel' on my troops and that is driving him crazy... Plus it looks like 2-3 more minutes of Mortar fire on town, then I will hold off on the fire before bring my 81mm units into play...
I would love to get some feedback on how screwed up my plan may be or not be...
-
Minute 41-39

The west side of town is still a big question of what is there. I have many ? contacts and it looks like some are coming out from town (scouting perhaps) and some are coming eastword from the main road area. I get the feeling that my opponent is starting to question where my units are. With a maximum LOS of about 35 meters it is quite easy to hide from him, the down side, I see some of his units but have no clue what they are... I have a feeling over the next few turns the Tank Hunter teams will be lilghting up something or will get lit up themselves.

I have 2nd Platoon (Jork) in the exact spot where I want them, each has a cover arc of about 30 meters (See HQ for area)... I will leave them in a hide and observe position here until the attack starts. In the next few minutes I will bring the StuG up the road another 50-75 meters if all stays quiet.
My goal on the south side is not to give away this position till the last moment.

On the east side of town I have identified a depression that I would like to slip a scout and/or a squad into. I have determined that I will be initiating the main attack with 3rd Platoon (Jens) coming out of the depression and from the woods and building beyond.
-
This looks really fantastic, how does one get a copy of the beta
-
Minute 44 - 43 - Continued
The next three shots show the detailed movement orders for 1st, 2nd, and 3rd Platoons. I want 2nd Platoon to keep an eye on the crossroads and lay in wait for the main attack on the town.


-
Minute 44 - 43
Well my 120mm Mortar Fire is falling on target in town. As seen below there is destroyed vehicles from the previous days fighting.

Everything is looking good with my harassment fire, shells will be dropping for the next 7 minutes... This should delay the Allies from marching straight into town, and also keep the paratroopers in town surpressed.

Movement plans for the next few turns are as planned from previous turn with the addition of Obergefreiter Schumacher's Tank Hunter team moving south to have a better view of the road (I need to Identify the ? Contact that just appeared south of him). Also in red you can see Obergefreite Jacob slow move forward to the west, now there are three ? contacts and I want to better understand what I might be dealing with here.
I get the feeling my opponent is trying to get units away from the town and maybe counter-attack with them later.

-
Sergei, thanks... I am using a gamma correction in Gimp on this graphics, because the battle is at night, so that isn't really how it looks... Only mod for grass is Veins_TerrainDesaturation....Whose grass mod is that?Ignore the above, keep going, this looks good.
-
I agree with all of Pak40's ideas, it would be nice to fill out AI Plan 1 and have an option that all the other plans fill in the same groups/orders (then you can go to Plan 2 and take it off 'Not-Used' and make modifications to any of the groups/orders...
The layout of roads would be nice, though I don't think it would be cost effective IMO...
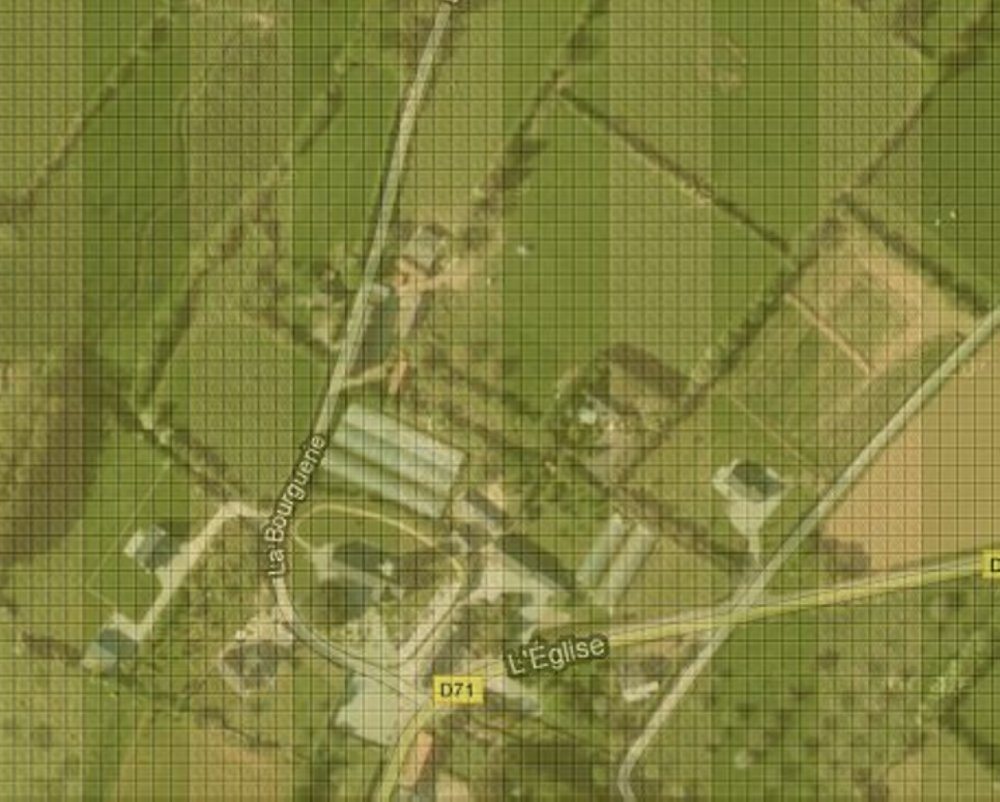
Overlay or imposed maps would be a nice feature also... but right now I am using a duel monitor setup and I have a square grid overlay for 100m or 50m Google maps... So I put that up on one monitor and use the editor in the other to copy the info... it is to scale.... see below...
An UNDO Button would be just AWESOME...

Battle DAR: Sie Kommen 2 (Axis)
in Combat Mission Battle for Normandy
Posted
First off great stuff stoex...
To give you some insight on the barrage... The allies are moving into the area and have victory conditions they must meet... recon (via either air or patrols or map identification) indicate that the highest point on the map is a ridge in Sector 124 that overlooks the potential main objectives... Thus upon moving up to Sector 114, a bombardment of the highest ridge area (which you call 'Spotting Ridge' and is in Sector 124) on which could be the best potential enemy location, is performed... That is the premise...
The other thing which is tricky to present as a designer is the 'terms' one is limited to as what a battle is called... for game play sake Sector 114, 124 is a meeting engagement, but from the breifing (I could have presented more here) the scenario is acutally an attack by the two sides for the same key ground... (There is nothing to really state this... 'Double Probe', or 'Double Atack' would be nice but is not available...)... From you comments I have learned that a better description of the overall scenario in operation terms should be included and in the future I will make sure I include this info...
Keep up the great work on your DAR, I find it entertaining and would like to see how it works out for you... Sector 114, 124 is one of the tougher scenarios withing the campaign for the Axis to win... Good Luck...