
GreenAsJade
-
Posts
4,877 -
Joined
-
Last visited
Posts posted by GreenAsJade
-
-
Yeah, get in line Ken - John has made so many enemies with his barrage of controversial postings you might have to bequeath your spot in the line to your grandchildren though


GaJ
-
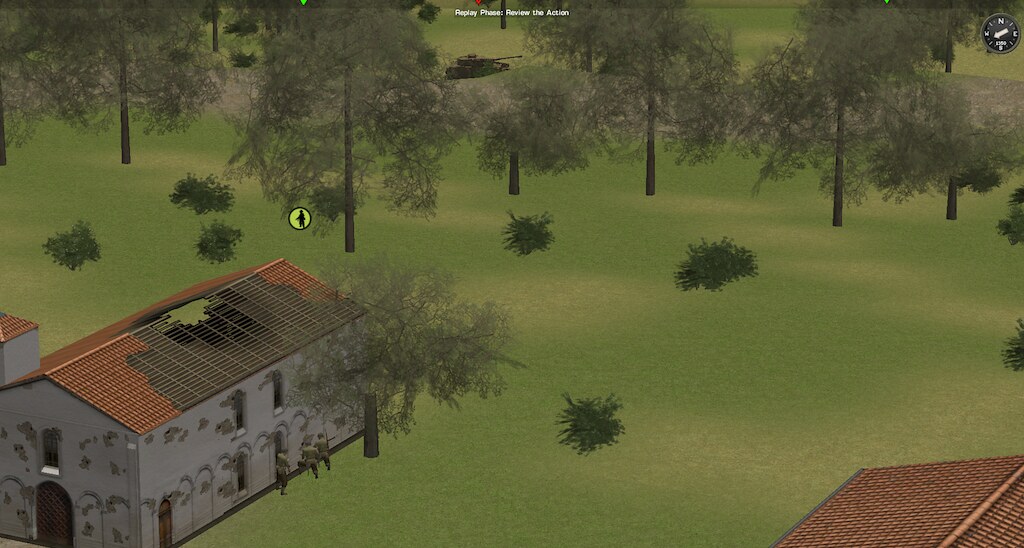
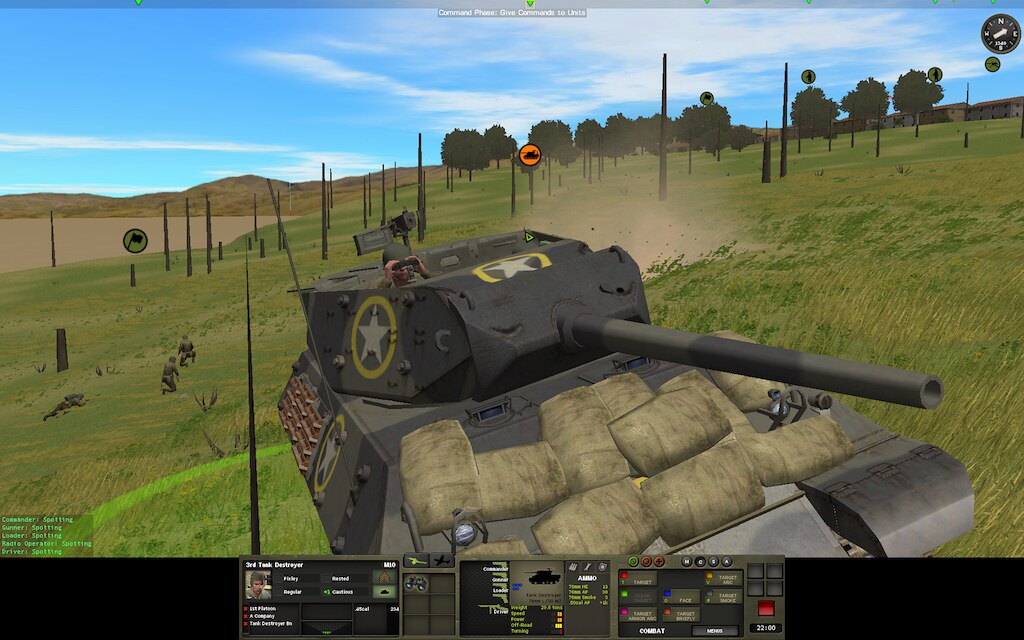
Closer to SMI, Bil's infantry made another attempt at pushing past Hill 172, only to be repelled again. One squad that ran far fowards was taken out by my rangers, a second was taken down by my M10, which I pushed further left this turn, and a third ran away off to the far left.
Meanwhile, my tank crew survived shelling by the JgPz, and high-tailed it out of there towards the end of the turn... they have their eyes on SMI, nothing is getting in their wa.
Overall...
GaJ
-
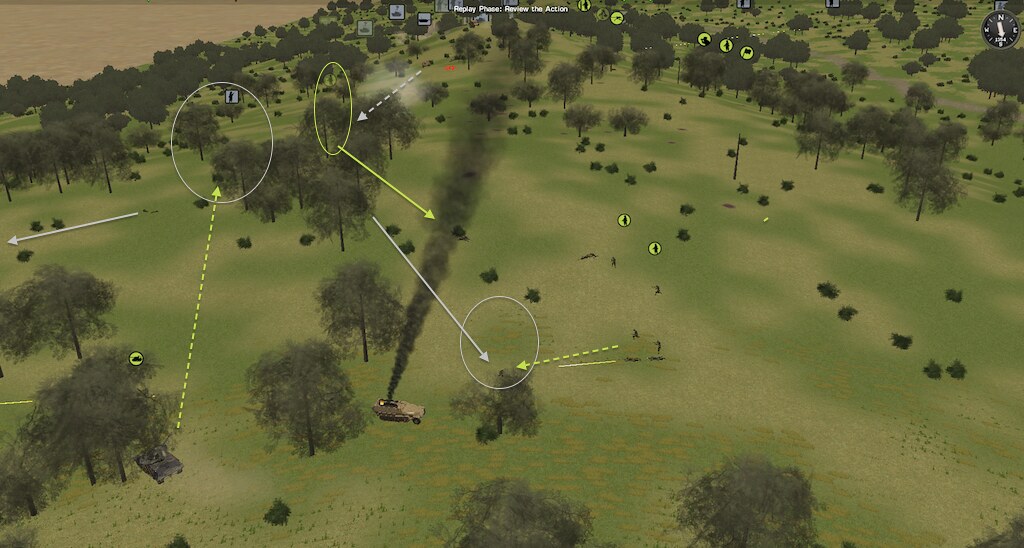
Over on Hill 153 Bil's Brummbar fired one HE shell at a building in SMI, then for some reason pulled right back. I'm not at all sure what it was worried about, I thought it had command of the whole field right where it was
 As you can see, I got a couple of smoke rounds onto the hill, which help to make this at least a little harder for it, for a short while.
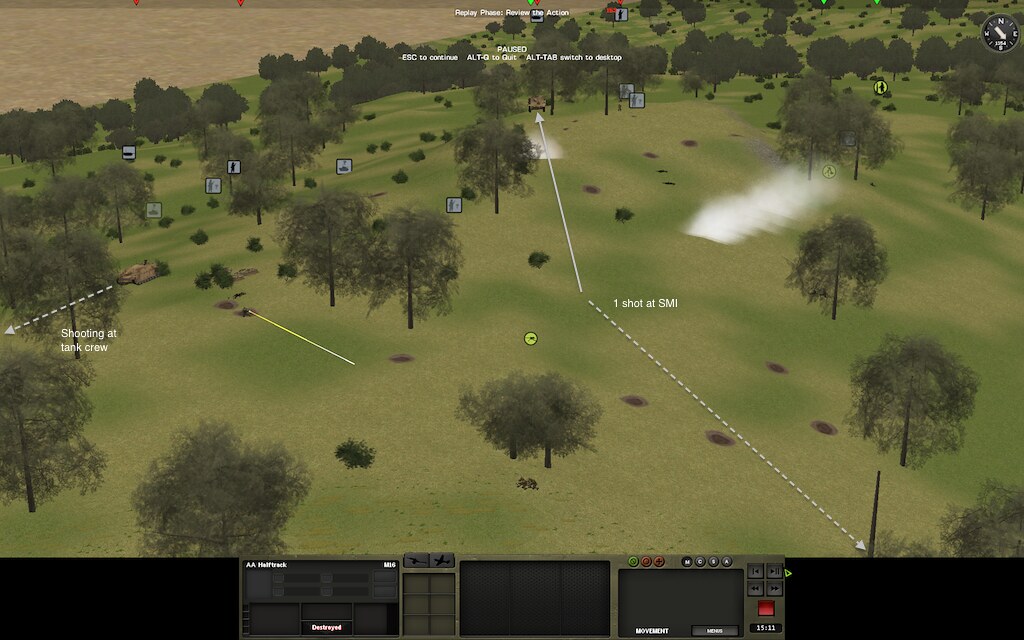
-
It would have been nice to get more mileage out of the AAHT, but not a bad swap.
There is a second PzIVh that was driving up the main road of Tame next to the one I knocked out - it is obscured from my M10 by only a tiny rise in the road.
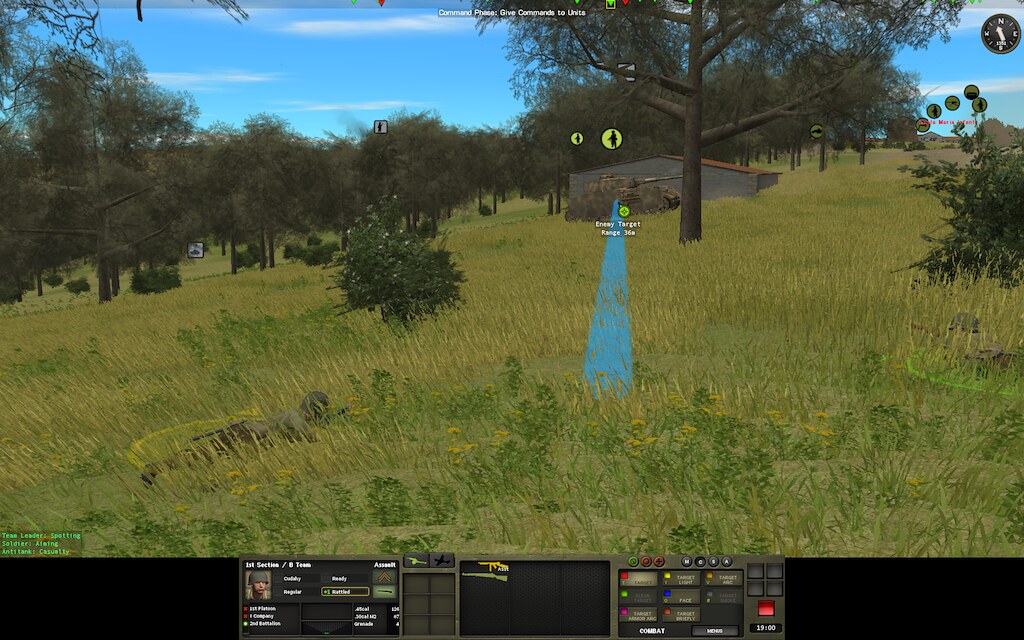
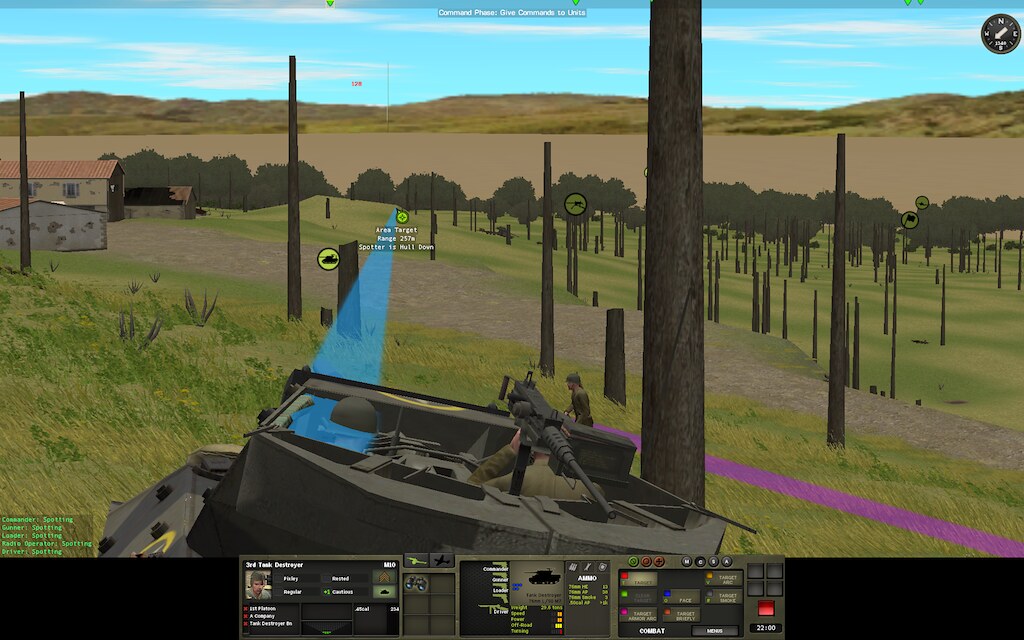
In the middle, there were a number of surprises. The first is that Bil has pulled his Elefant back across to the middle, and it is coming over the rise to the main road as this movie ends. Accompanying this surprise is the surprise that my crazy ATG completed deployment, and can see the Elefant!!
The trees are off in this picture, so that you can see what is going on. With trees turned on, I'm sure you can imagine that the view is actually very obscured - there are a few sets of branches in the way. Add to that the fact that the ATG ended up facing south, so it has 90 degrees to turn before it can shoot at the Elefant ... and the fact that the Elefant is unbuttoned and I can't do anything about that ... and we have another suspensful moment!
-
At last, the weekend!
With work dramas fading and a beer in hand, I can return to getting whupped at CM.
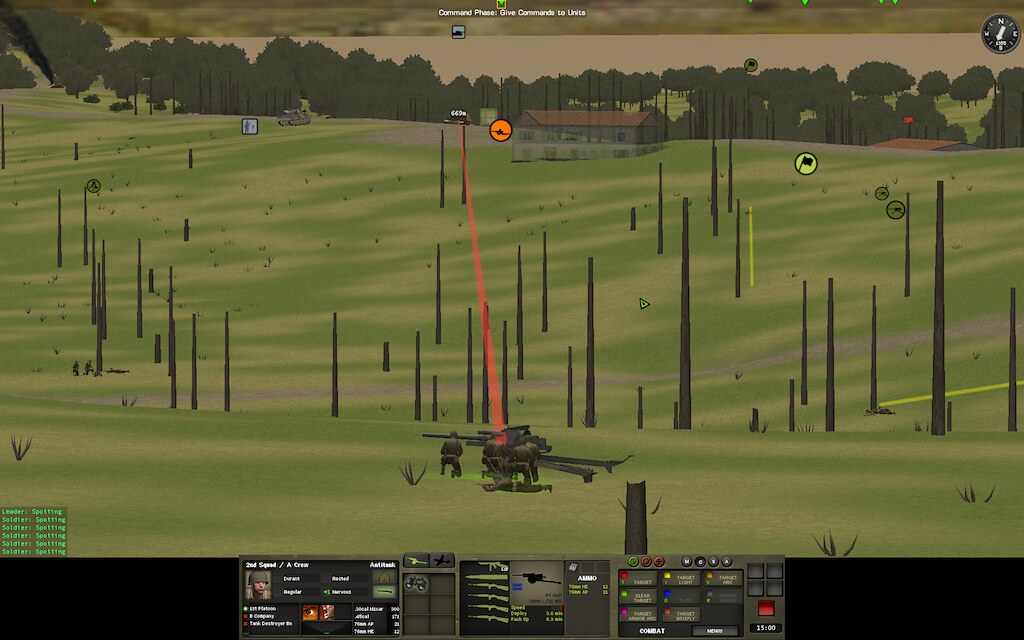
Movie 55, 0:16-0:15
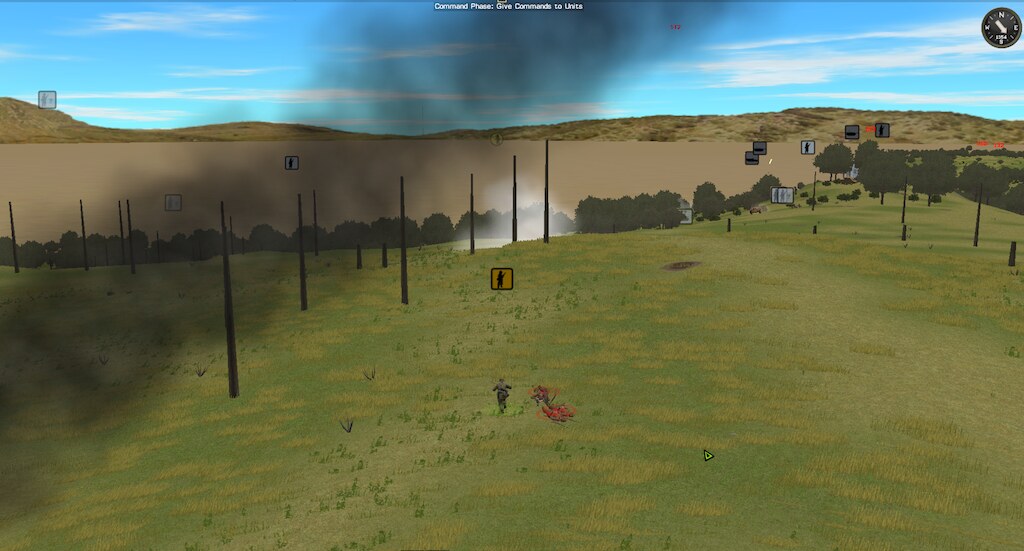
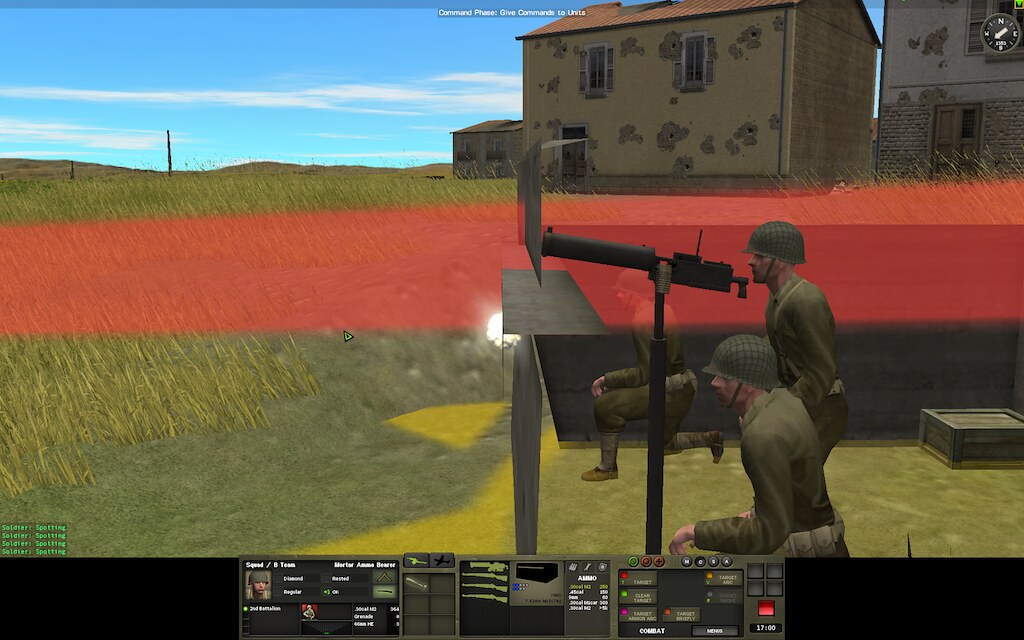
With Bil's infantry about to crest a little rise on the way from Tame to SMI, it seemed timely to open fire with the AAHT at that likely location ... I wanted to do an area fire, because the AATH gunner was still distracted trying to rotate the gun through the driver protection stops - something an area fire order would cure.
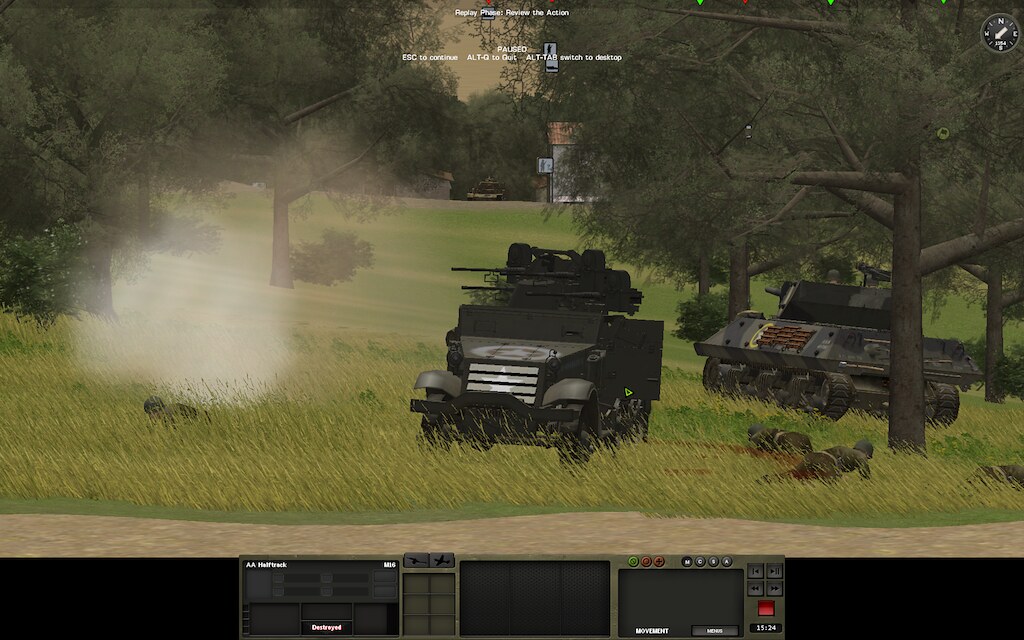
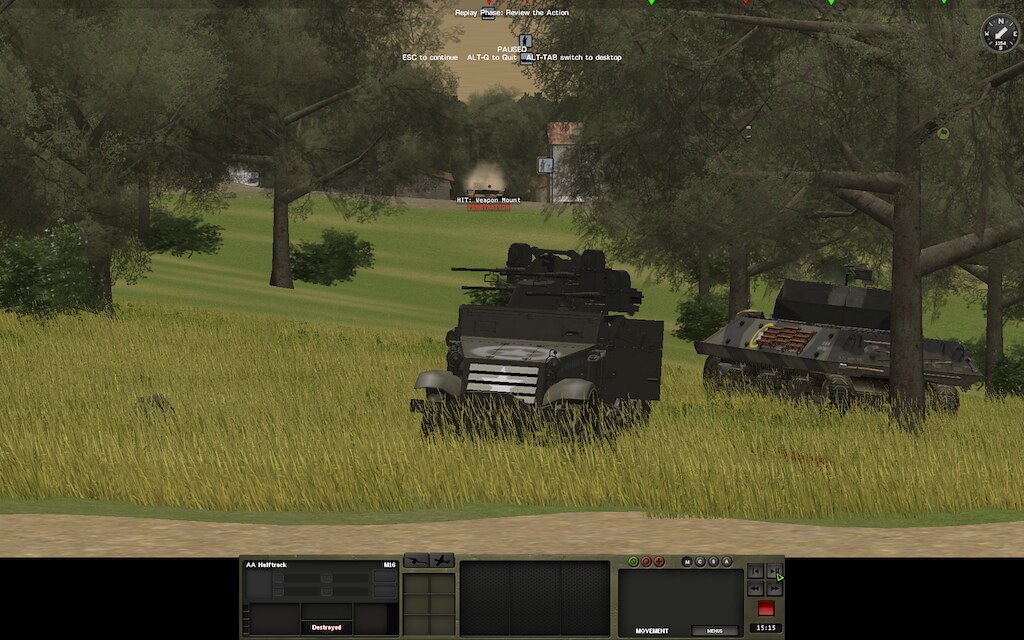
Well - I don't know if it was due to the area fire, or going to happen anyhow, but one of Bil's PzIVh's creeping up through Tame spotted the AATH after it started firing, and blew it away.
... which revealed him to my M10, who responded in kind...
-
Sorry for the delay - dose of RL on my side.
Sneak preview: yay, I killed another PzIVh. Report to follow.
GaJ
-
Or, allow him to surround YOU.
Joking aside, in some senses this is what defending SMI has been about.
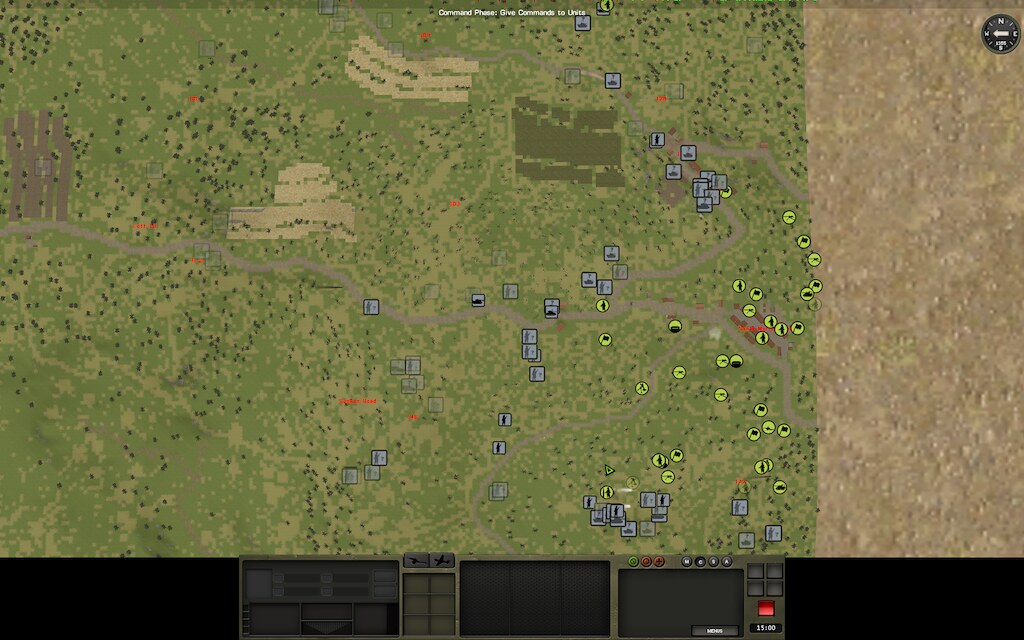
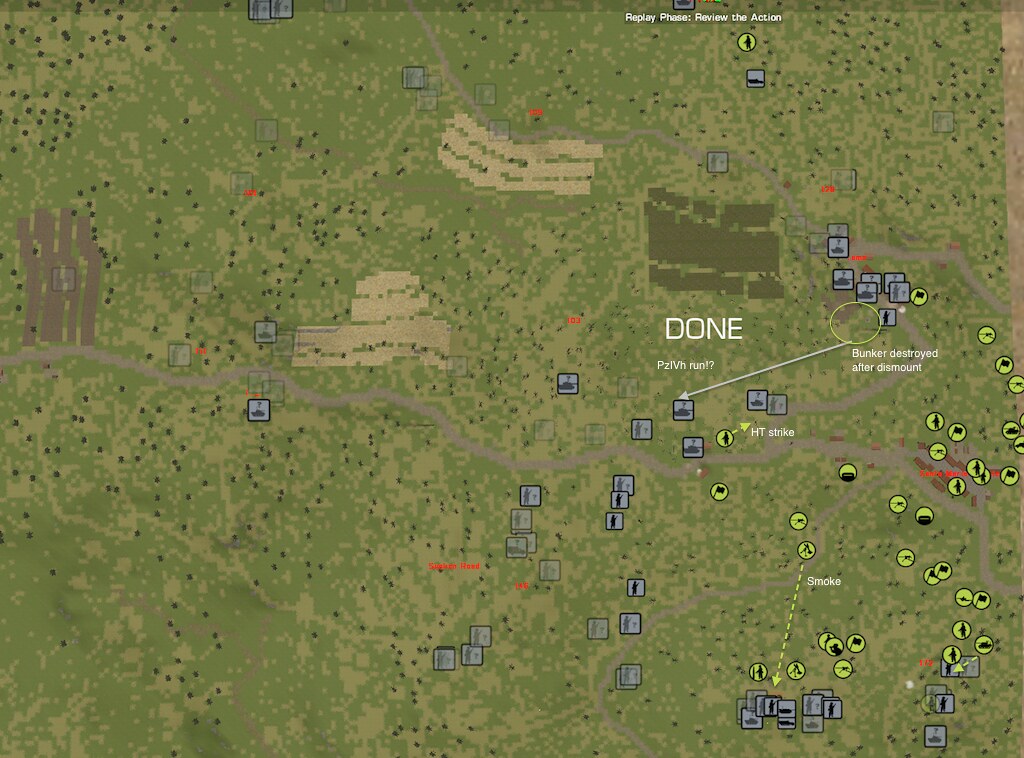
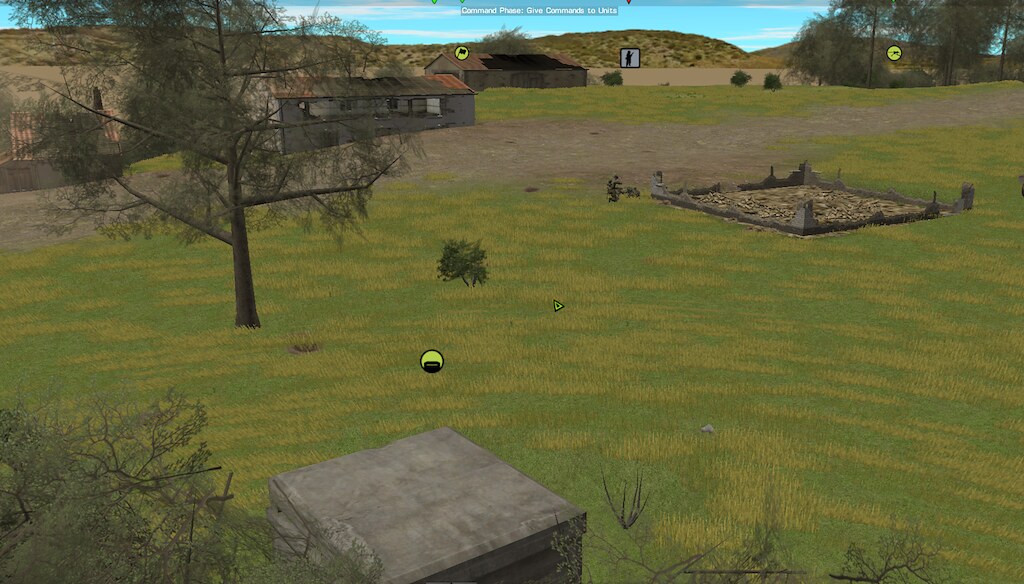
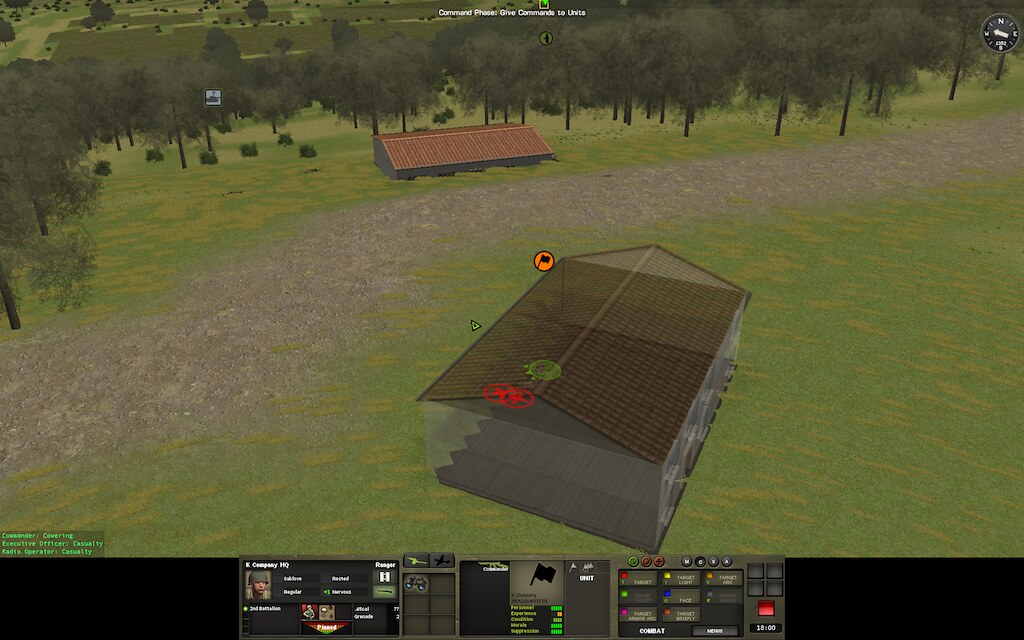
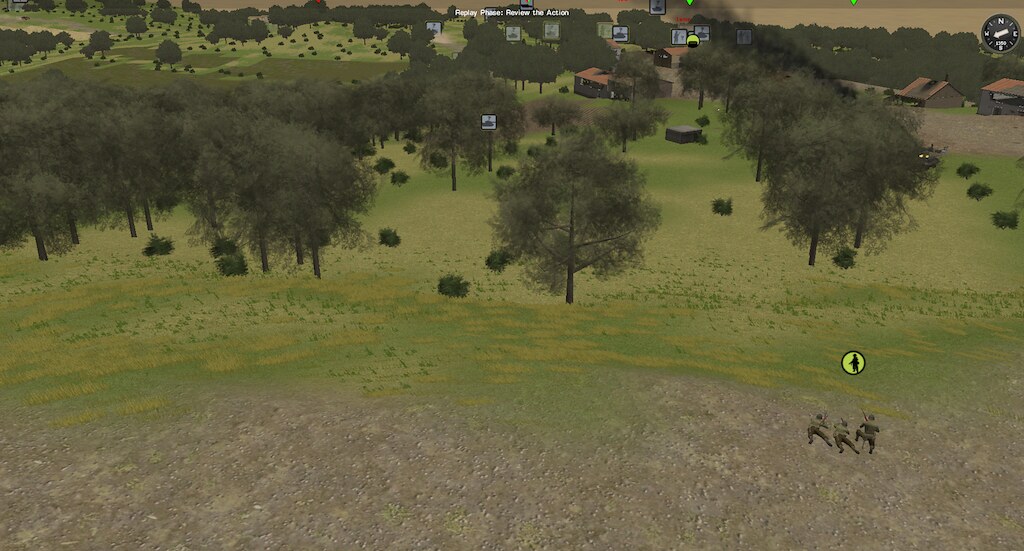
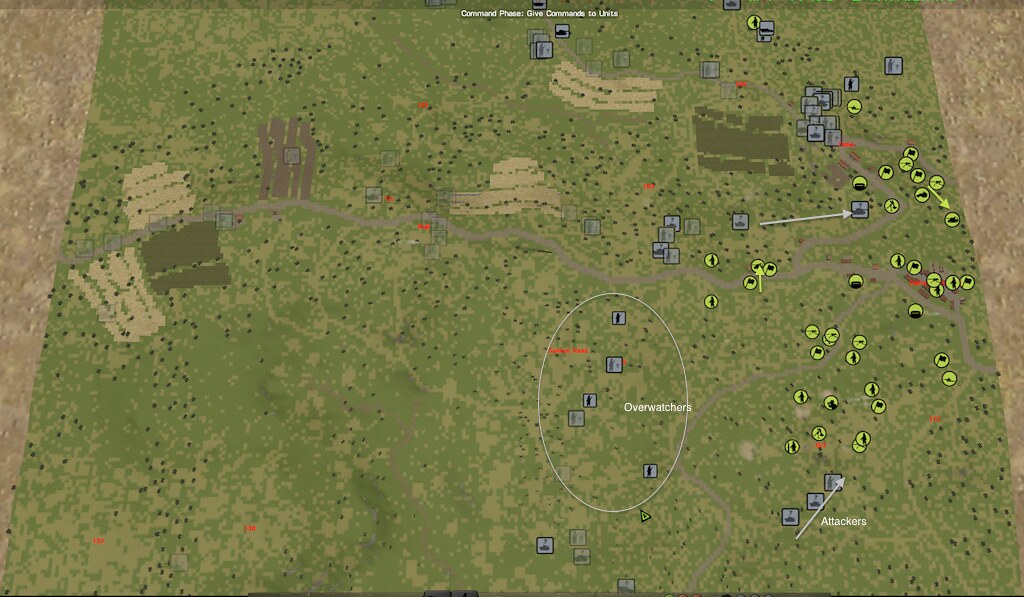
In the last hour of play, Bil has been working his way towards an assault on SMI. Inflicting damage as Bil approaches has been hard due to the wide range of expansive approach paths, and the failure of my plan to use Bunkers+ATGs to force some sort of engagement. None of the intermediate VLs has been particularly defensible, in the sense that a defending force placed there could have a hope of surviving or inflicting significant damage on an incoming force before dying (except Tame: that should have been defensible).
But now that Bil is focussed on one objective, I am "surrounded", which also means that I can actually meet his incoming force with more than just a stretched-thin set of listening posts.
The sheer compaction of my force actually means that at least they can work together, where before I failed to arrange that (allowing myself to be spread thin).
Sure, I'm surrounded by a massive incoming force, but at least my guys are surrounded together, not isolated from each other
GaJ
-
I've been doing some area firing. On the left, the valley is so wide open that its pretty much a long shot to intersect a target (interestingly, last turn one of Bil's squads ran _under_ the area fire directed at them, benefiting from approaching on the downward slope! On the right, near Tame, maybe I should have done more: I was slow to give up on the idea that the bunker would spot a good target!
GaJ
-
The next shot is a rare sight:
... the last man of one of Bil's squads running away. Boohah!
This encounter was on "my" side of Hill 172 - I had spotted these guys along side the HT that I knocked out two turns about, and pushed the M10 out wide of them to get a free shot at them.
Oh - my 4th Tank Crew are _still_ alive! The HT that they wounded ran away! They are starting to think about going hunting!
My plan to ambush Bil's forward troops in Tame from the bunker was not favoured by the fortunes. They popped out, but got taken down by fire from further back in Tame before they could do any damage.
Last thing to mention: by the sound of it, it seems that the PzIVh from near my bunker in Tame when wizzing back over to the centre right. I have no idea what that is about!
GaJ
-
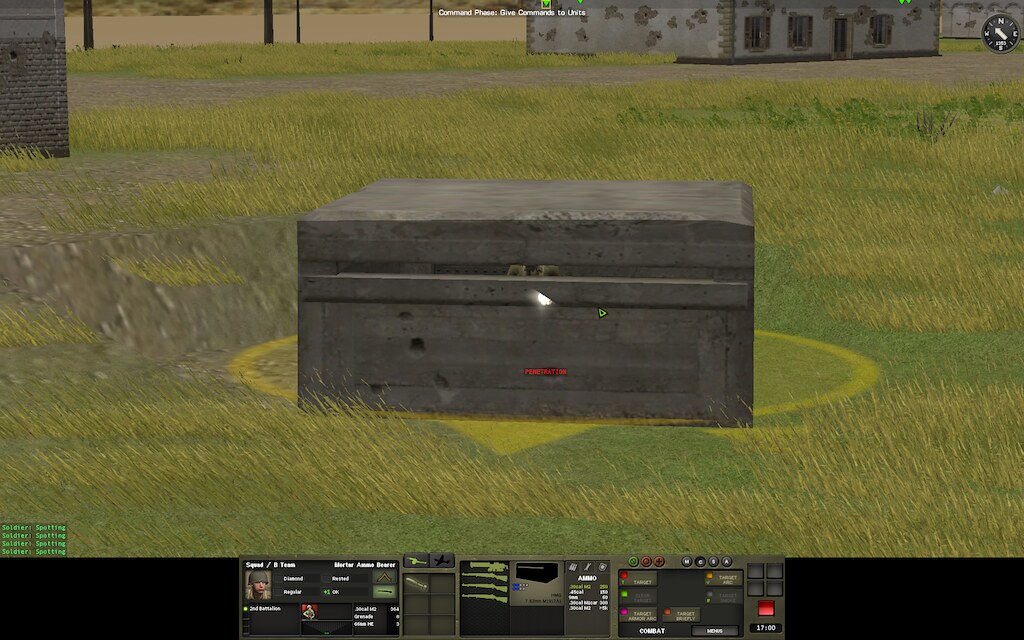
Movie 54, 0:17-0:16
My bunker that reported "penetration" last turn didn't even blink! Weird. I wonder whether a penetration in the last microsecond of a turn somehow disappears into the inter-turn wormhole?
Anyhow, this bunker is as resolute in refusing to spot the incoming infantry as the one over on the right. If that doesn't improve in a turn or too it will be really frustrating: the centre left valley that it watches over is now filling up with perfect HMG targets.
On the centre-right, I had popped a bazooka team over the road to try to sneak up towards Tame and look for a side shot on armour supporting a strike on SMI.
Unfortunately, they encountered an HT "prematurely". The encounter went OK: they did not waste their precious HEAT on the HT, and took out the gunner with their rifles instead:
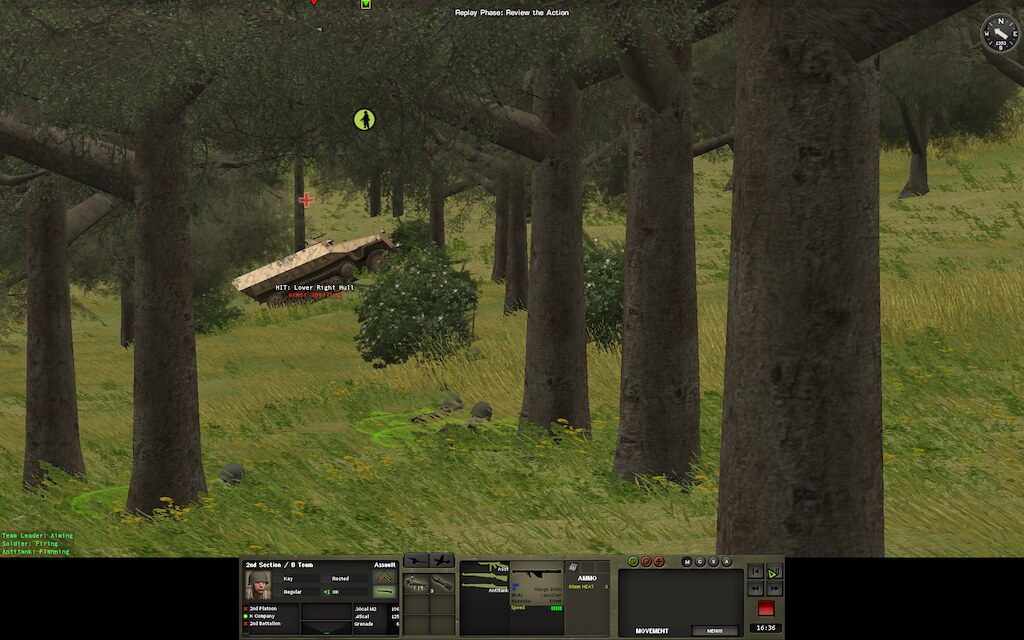
... but now their cover is blown. They need to run away this turn, and start over with a new tank ambush spot.
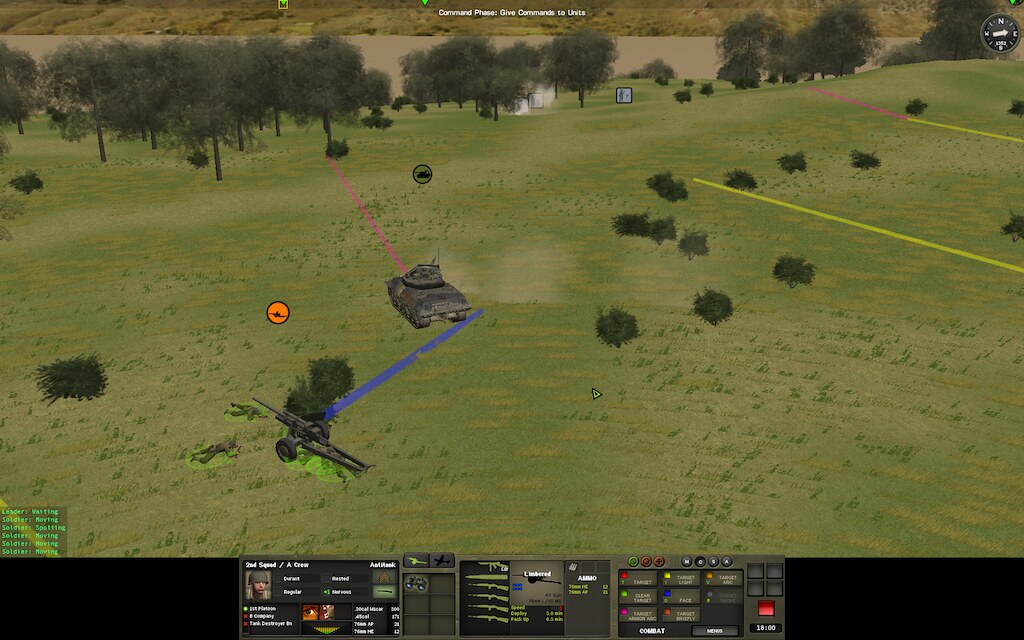
Over on the left, things are rather interesting. Bil has established his Brummbar (which is now being reported as a Sturmpanzer!) and JgPZ on Hill 153. I have a few units in this area:
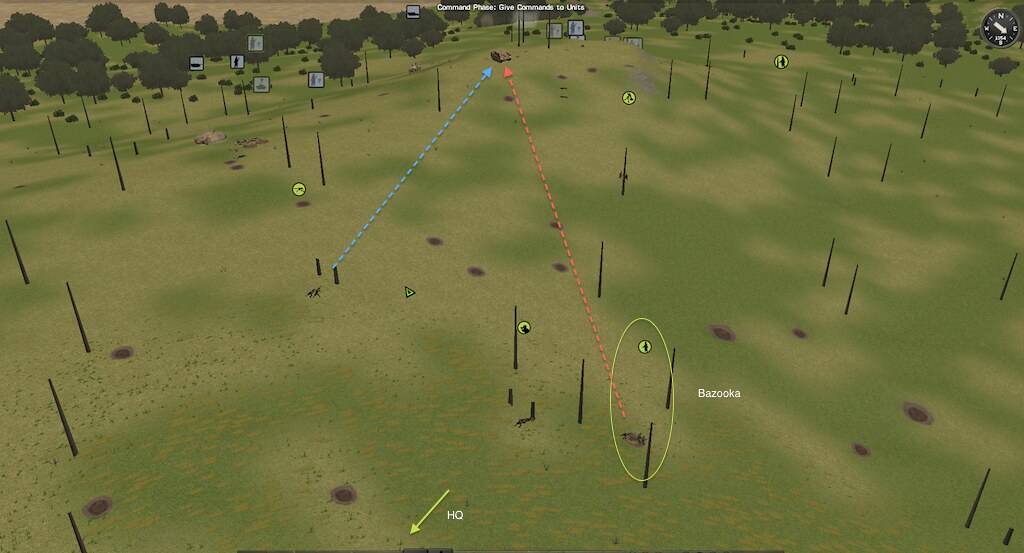
I would so like to arrange for the bazooka to get a side shot on either of those two tanks. The JgPz is not at all vulnerable at the moment - it's surrounded by inf. However, the Brummbar has come forwards ahead of the inf screen (maybe because the inf don't want to get expose to the various MGs in the valley). After looking at various options, it seems the best thing to do this turn is hide with the Bazooka, scout and HQ (all of whom do not have LOS to the Brummbar at the moment) and wait to see what it does. I have also called for smoke in front of it (from the other side of the valley).
-
Movie 53, 0:18-0:17
Well, FWIW, the indestructible PzIVh is still operating: it started shelling the building where my CO was previously. Fortunately those guys decided to get out of there this turn
I think that if Bil is area firing an insignificant building like this, then it probably means the tank is immobilised... yay!Bil's front line has pressed past the useless bunker near Tame. This bunker is slow to spot or fire on anything, still. This being the case, this turn I've decided to "dismount" the crew ... we'll see whether this can give Bil's front line troops a little surprise:
In more bunker action, right in the last spit second of the turn, a shell smacked into my "centre left field" bunker:
A bit of a cliff hanger for that asset!
On the back left, my "Hunt"ing M10 didn't get very far - I think his hunt was cancelled when he fired on the running-away unit that was near the dead HT. He'll push out around to the left further this turn...
GaJ
-
I think the gun is actually pointing down to fire the death blow at my poor guy!
GaJ
-
I'm not sure if you need _such_ good marksmanship: just spray the HT with automatic weapon fire
I'm also not sure if the PzIVh is finished off or not: it disappeared off my radar when it killed the last close assaulter. So I think that the best I can hope for is immobilisation: the gun was still working. It is the same PzIVh that the bazooka hit earlier: the sequence was last turn 1) Close assaulters fire small arms as it drives by 2) Bazooka hits as it stops on the main road 3) It reverses back to near the close assaulters. This turn they ran direct at it and did their best...
GaJ
-
Movie 52, 0:19-0:18
My brave rangers fought the indescructible PzIVh to the death (theirs).
Here is the last thing I saw:
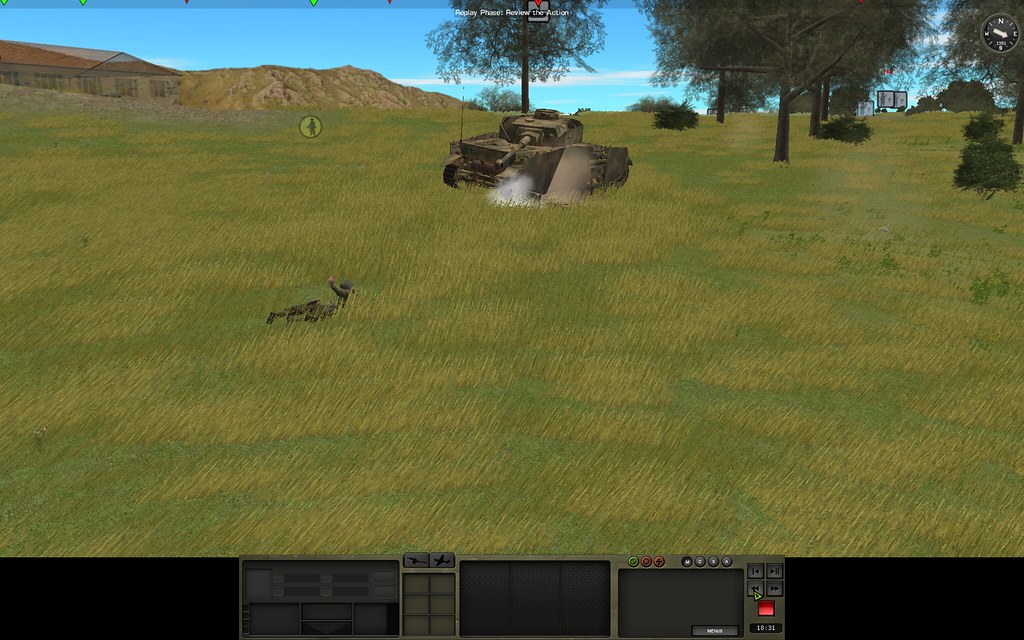
They got 3 grenade hits on it ... I guess only time will tell how much damage they dealt.
The last HE blast from the PzIVh also took out some of the commanders in a house, on the other side of the road!
A side story I really only just noticed this turn has been "4th crew, M10". They got left behind as a pulled out from Tame ... they've been spotting Bil's forces coming around the far right, but I hadn't given them much hope of surviving. But they are made of stern stuff: one is looking after his mate (Medic) while the other is fighting off two HTs!
There was plenty of action on the far left also ... another M10 tank crew did a sterling job of scouting and made life a bit harder for some of Bil's initial probe around the left. At the same time my M10 over there managed to head off an HT before it could come and wipe out my ATG:
This may pause the left hook for a little while ... Bil's own armour on this side is still far back behind Hill 153.
Unfortunately (as you can perhaps see in the picture) the ATG is suffering the same redeployment blues that the other one did on the right side: it's supposed to be "deploying", but the men are all "moving". I'm not at all sure it will get back in action even if Bil doesn't shell it where it sits...
GaJ
-
GreenAsJade,
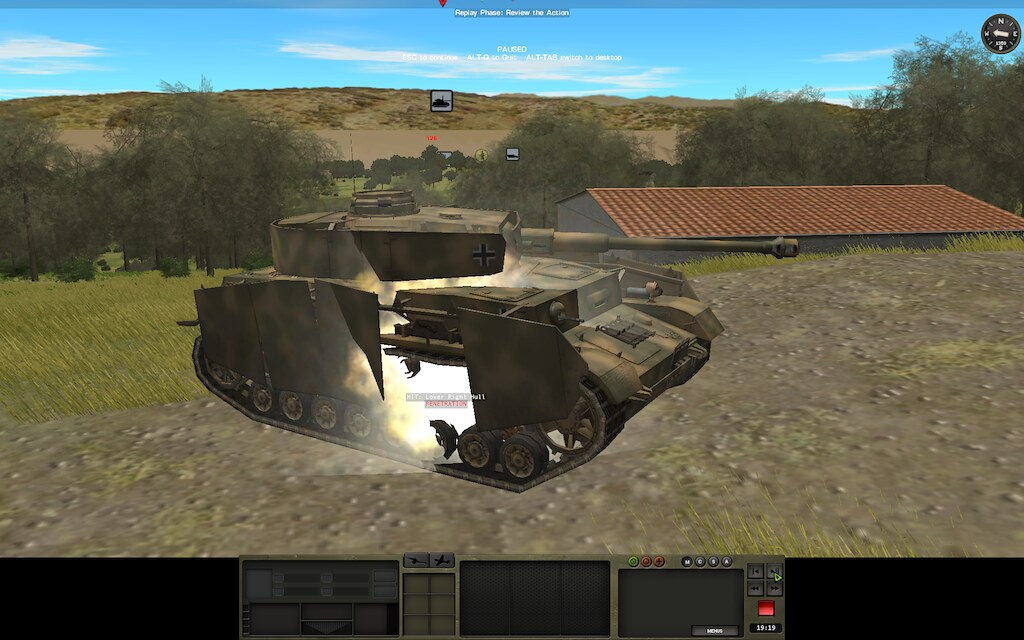
A bazooka hit where the correctly modeled (WYSIWG) skirt armor wasn't? Outstanding!
I thought y'all would like that.
While it's unfortunate you didn't get an outright kill, I feel safe in asserting you still hurt that Panzer IV/H. Why? Been there myself.
mmmmaybe.... it backed off pretty fast - I reckon if the damage modelling had been _really_ realistic, it should have thrown a tread, with an explosion right there on a travelling wheel... but I'm not betting any farms on it having more than a rattled crew, if that.
GaJ
-
Another PzIVh kill opportunity - not quite as good as the previous one - also did not come to fruition this turn.
Last turn Bil rushed a PzIVh up the centre right, well ahead of its infantry screen, to take out my mortar that was smoking Tame. At the end of last turn it looked like this:
... in the absence of an infantry screen, a good opportunity for a bazooka side shot. So my guys rushed across the road, only to find...
... nothing!
Possibly they should have gone just a little further, to allow for the possibility of the PzIVh heading towards Tame instead of continuing to press forwards against my AAHT, that is over on the right. I kinda didn't want them running into the Landsers coming up through Tame though.
It was very tempting to hunt on down the slope, but in the end I decided on the discretion option, and snuck these guys back up the slope to wait for another chance.
Meanwhile, the bunker took another penetrating shot, lost two guys, but remains operational but not spotting anything, still. Bil has set up a HMG on the slopes leading up to Tame - the bazooka guys could see it (another reason to pull back) but the bunker (which has LOS to the HMG) hasn't spotted it. If ever there's been a useless piece of kit to bring to the battle, this one is it!
Last of all, I had been repositioning my ATG that was watching the central ridge - the one that took out Bil's HTs. It's position was no good for dealing with the left hook that Bil is making, and I wasn't anticipating any more AFVs up the middle (since I know where they all are). There was a good route out of sight of the Tits and the left approach to go to a point covering the left hook. Unfortunately, my ATG can see Bil's inf coming up the centre left, which means that they can probably see it. Life expectancy: low!
GaJ
-
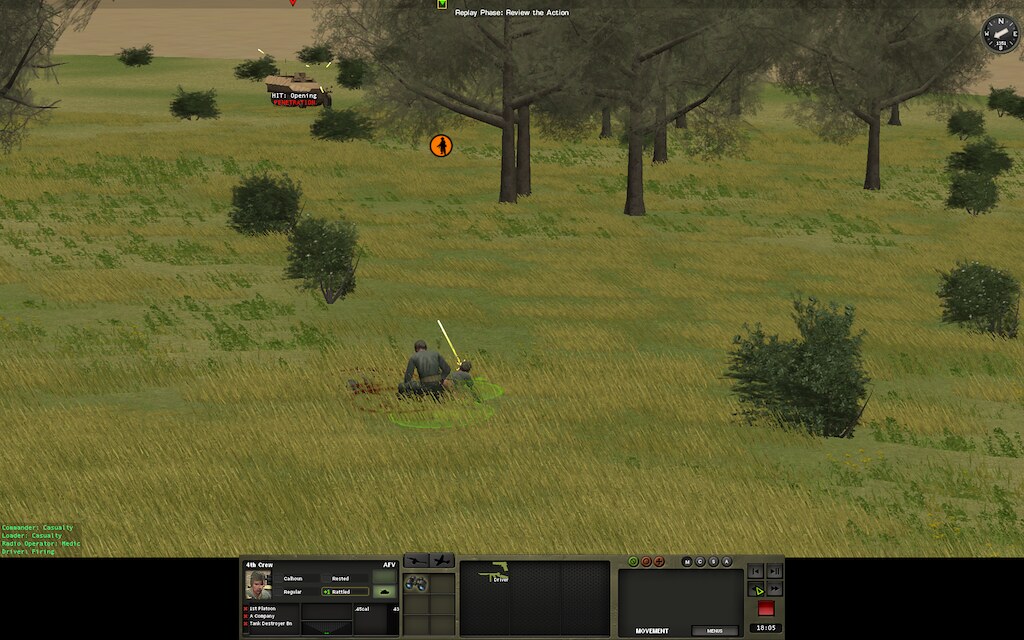
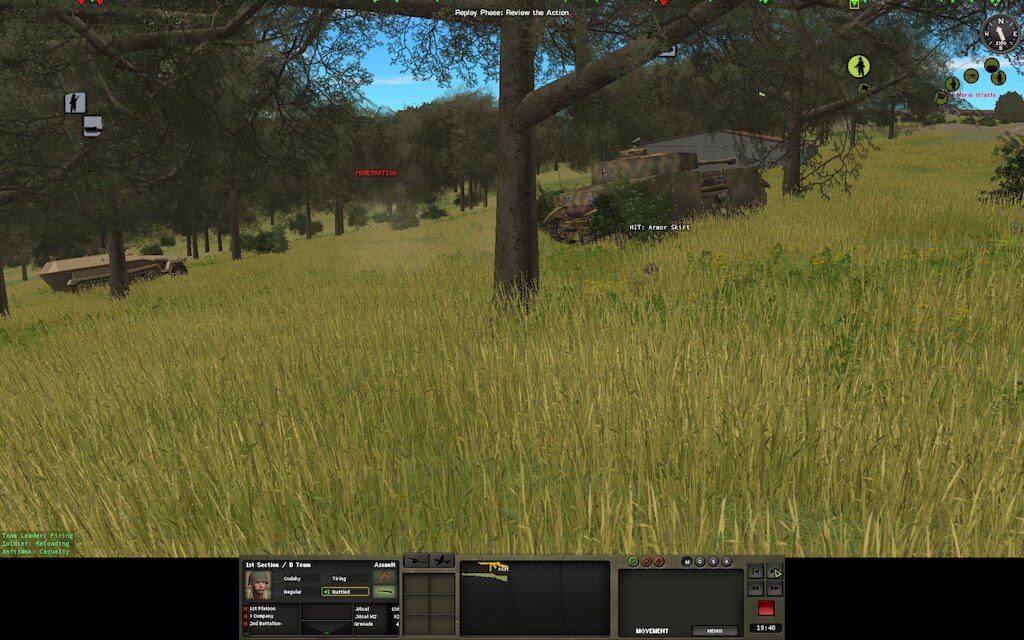
The next few seconds should have been full of joy, as the PzIHv drove right along side, broadside, my wating bazooka team:
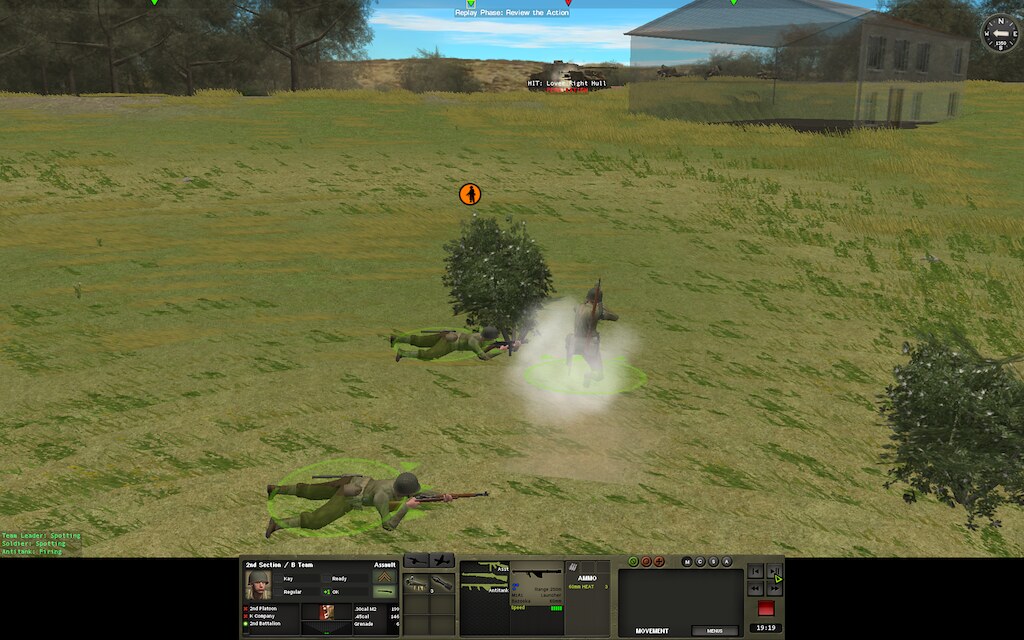
These guys did everything you could ask of them: they nailed the PzIVh through the gap in its skirt:
... but alas no joy. The indestructible PzIVh reversed back over the road, and is just out of grenade range of my snakes:
... who continued to fire their rifles at it.
-
(I skipped reporting Movie 50, there being nothing interesting to report, and it was quicker to just get the game moving along!)
Movie 51, 0:20-0:19
A modest amount of excitement for my guys this turn, with carefully laid traps being sprung ... but in the end I remained SOL.
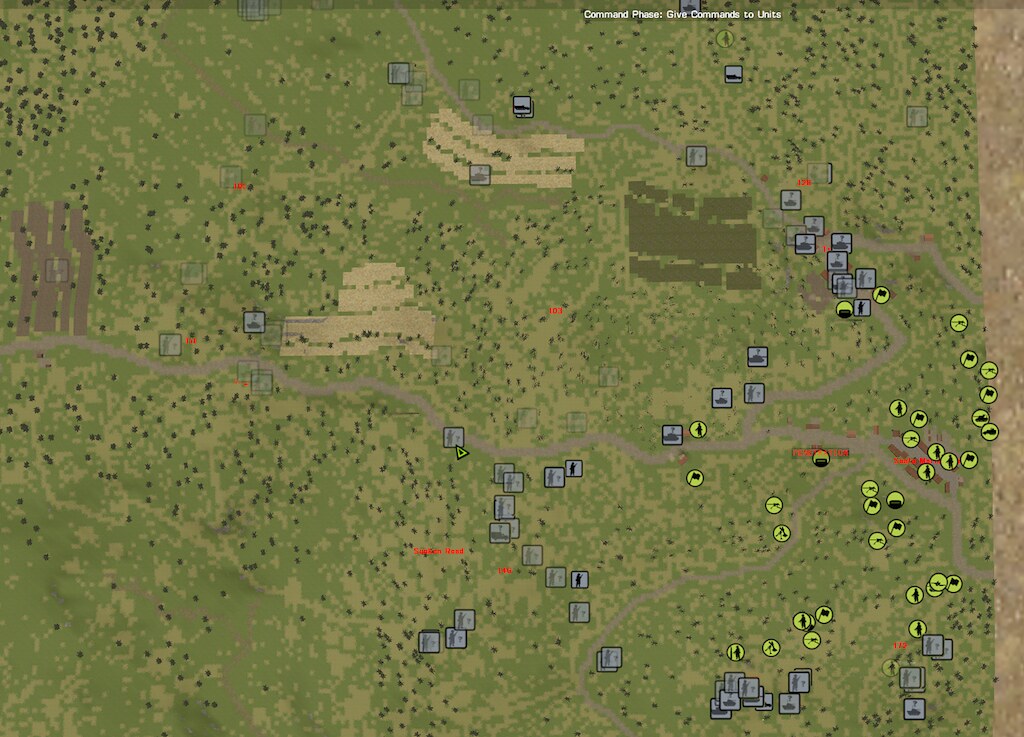
Here's an overall orientation:

In the centre, Bil has become gung-ho - as I mentioned, he has largely unfettered movement on the centre right, and he decided to press over the crest to the centre left as well, I guess under the watch from The Spur. A PzIVH along with a gun halftrack rushed past my waiting snakes-in-the-grass, who opened fire :
Sadly, this fire failed to take out the TC, and for some reason they didn't throw grenades. Maybe they were a little too surprised to get those off quickly.
At least they went on to bag one of the crew of the HT, while the PzIVh crew were obviously having conniptions as the driver continued following his orders to rush over the road, while the gunner was trying to return fire on my guys:

-
Movie 49, 0:28-0:29
While we're on game mechanics, I do have an actual bug to report this turn.
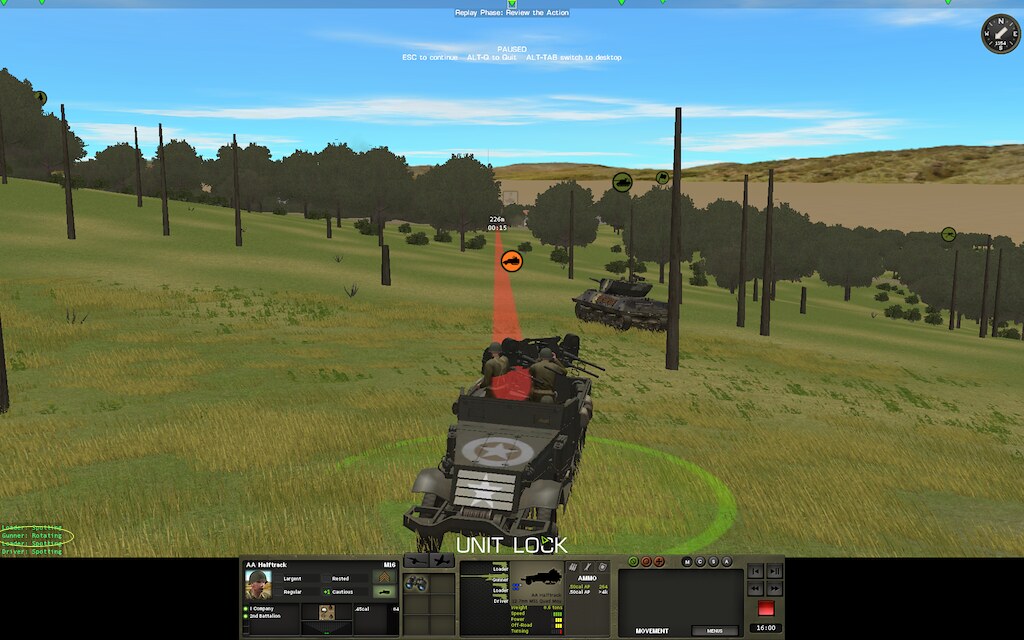
As you know (if you read from the beginning) I did some preparatory testing of how this new machine the "AAHT" works before playing the game - figured out the ROF and angle of fire.
The nice thing is that it can fire through a very wide angle - right up to about 45 degrees of straight ahead.
Unfortunately, it gets stuck when on one side and ordered to swing to the other. Here we see an AAHT firing forwards at it's extreme limit of forward fire:
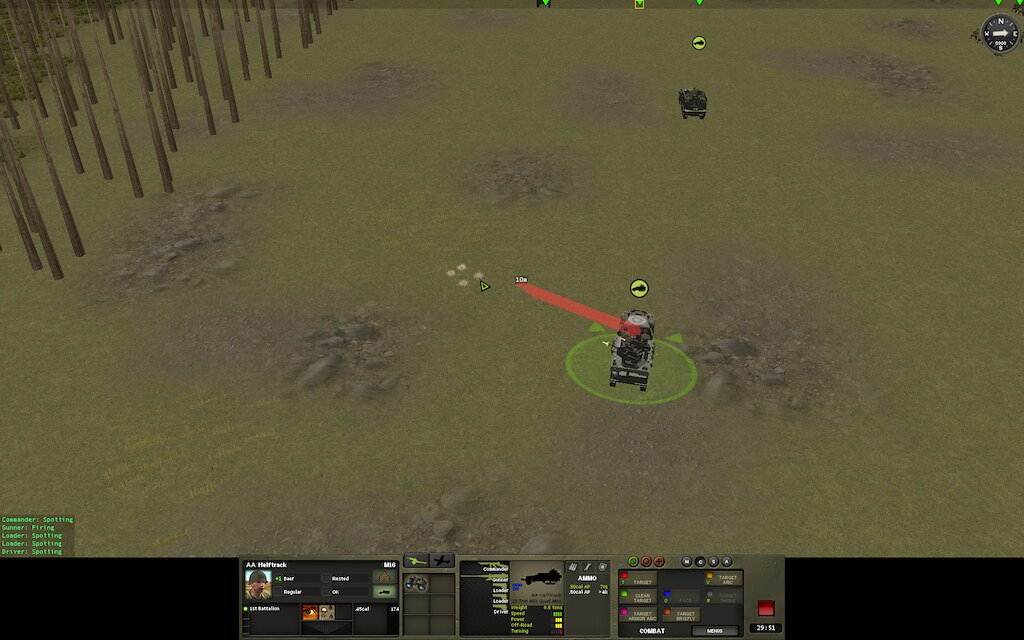
Now look what happens when it's ordered to fire on the other side:
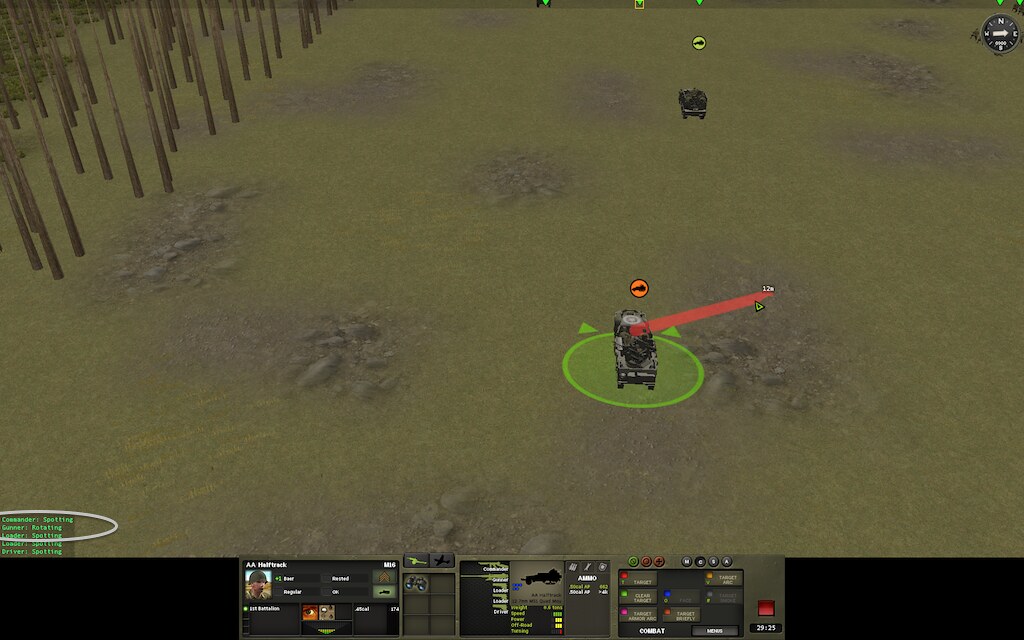
... the gunner sits there "Rotating", but not moving. It's easy to see how this happens: the AI computes the rotation, then the gunner obeys, but his poor little AI brain doesn't know what to do next when the gun hits the stop. This doesn't happen if you order fire into an unavailable sector (eg straight ahead): then the driver turns the vehicle before the gunner starts rotation. The problem is only when the gun needs to go 'the long way around'.
Well, this is what happened to my AAHT in Tame this turn. It pulled out, but had the gun on the wrong side ... so it didn't commence area fire as ordered.
As a bug, it's not the end of the world: I'm sure it will be easy to fix, and to work around it you just need to give a fire order to the rear before changing sides. Something to be aware of if you've been inspired to try to use this beast more effectively than I've been able to
So back to the actual game: my M10 pulled back out of Tame without being wacked by the PzIVh, so that is something.
Bil is now taking advantage of his unfettered movement options up the middle, and it sounds like he's rushed a tank up towards to top of Tame. As I mentioned last time, I could hear it before, and tried to take a passing shot at it with my M10, by popping over into the cover of a building (cover from the right hand nasties, Elefant etc). But it moved forwards too fast: my M10 didn't get a look at it.
On the left, my forces in the valley are now encircled.
GaJ
-
BTW, I have Alt-T'ed of course - I mostly play with trees on. There are leaves intervening, but no more than the amount that Bil's tanks had when they picked off mine.
Curse him and his hawk-eyed Nazi commanders...
GaJ
-
Oh, and GaJ... keep up the good work. Reading Bil's stuff (this AAR and others) I know he's a tough opponent. Not only is he very good at tactics, but he knows how the game works to a degree few others do and he is quite good at applying that knowledge to his victims. I mean opponents
Steve
Thanks for the encouragement - sorry about moaning and groaning as I play your beautiful game. As I've said before, it's pretty hard not to moan and groan when you're being whupped. I am not complaining about the spotting mechanics, only my bad luck.
GaJ
-
There is foliage involved: the M10 is looking through a tree - you can see the trunk of it in the earlier picture. However, this is a similar situation to Bil's tanks taking out my M10s through the trees.
The actual LOS at the PzIVH is like this:

And with the M10 deselected:
It's possible I can see the grass at the feet of the tank, but not the tank. It seems more likely that I just haven't spotted it yet...
GaJ
-
One thing to be said about this: you make your luck. Bil obviously knows that I have a couple of open topped AFVs in this area, and he's shelling it. This is causing them to be skittish and button up. As a result my spotting chances are reduced. That's making your luck.
I think the images of the modelling of buttoned and unbuttoned are interesting as a curiosity ... I was trying to see for myself "why might it be that being buttoned is so much worse?" ... and I was also curious about why only the gunner (or whoever that is on the left) pops down. But I don't think this really affects how well the tank spots in-game. They aren't modelling the photons going from the sun, bouncing off the PzIVh and into the guys' eyes. There is some formula, with an element of chance and depending on buttoned state and other factors, that determined whether my M10 spotted. I rolled snake eyes, but Bil loaded the dice with mortar fire...
GaJ
-
Further to the right, I had another spotting challenge. I've been in two minds whether to talk about this, because the way I see it, it is just normal battlefield frustration: if things don't go your way, they seem bad It's been sad to read the resulting complaining about bugs and so-on when I've reported these previously. But ... I'm here to report what happens, so here it is.
Unfortunately, I correctly predicted where Bil's PzIVh would pop up next, but didn't get to spot it.
See the PzIVH that popped up neatly where my M10 was sitting waiting for it...
See what the M10 sees:
Dang, they haven't picked up the PzIVh yet. (It's actually the HMG team just in front of the M10 who can see the PzIVh).
The first thing you might say, looking at these pictures, is "that dummy GaJ has got his M10s buttoned up again". And it is true that in this picture the gunner (I guess?) has popped down, and the M10 is showing as "buttoned". But there's a bit more than meets the eye. First of all, the gunner only just popped down, in response to a mortar round in the last second of the turn, shown in the next picture. The M10 was unbuttoned with the PzIVH was there in view for 5-10s before this.
I wondered why it is that the M10 is so bad at spotting.
This is what the buttoned M10 looks like:
It seems to me that this TC is still getting a pretty good look with his binos. Even more interesting (to me) ... this is what an unbuttoned M10 looks like:
... I'm not convinced the visibility is that much better. Sure - an extra person looking, but not much more field of view, eh?
Anyhow, be that as it may, this M10 has not spotted the PzIVh, so I'll give him a short pause plus area fire target at where the PzIVh is, then pull him back.
GaJ


 As you can see, I got a couple of smoke rounds onto the hill, which help to make this at least a little harder for it, for a short while.
ALLIED : Gustav Line BETA AAR Round Two - Eye of the Elefant
in Combat Mission Fortress Italy
Posted
On the previous page
GaJ