
landser
-
Posts
501 -
Joined
-
Last visited
-
Days Won
4
Everything posted by landser
-
Now 30 minutes in to battle four. Played for nearly four hours last night. I could play a couple of entire missions in some campaigns in that time. But here I'm managing a rate of about one turn every fifteen minutes. I continued to move (Panzergrenadier) 2 Company toward the Brickworks with a platoon from 1 Company attached to add weight. This advance is supported by a Mark IV platoon and the bulk of the support and Stummel tracks, as well as artillery. The rest of the armor is on the road or to the left of it to take advantage of the open ground and clear fields of fire, supported by the other two infantry platoons from 1 Company. After 15 minutes without having spotted any enemy armor I was a little spooked. Where are they? I continued to probe up the left, and the leading Mark IV platoon came under fire from well-concealed assault guns positioned at the edge of Cimne at a range of around 2000 meters. Lost one Mark IV knocked out straight away (another platoon leader), another took a hit with spalling, and a third took a turret penetration, killing the commander, but the tank reversed out of the line of fire. I reacted aggressively, pushing the remainder of the battalion forward to get more barrels in the fight. The SU-85s were tucked behind hedges, hull-down and difficult to spot. In some cases they got off three shots before being spotted. As we got these spots and the battalion came up we began returning fire. A fourth Mark IV was hit, incapacitating the TC, and the crew dismounted (what's the difference between dismounted and abandoned?). Our weight of fire began to tell and all visible assault guns were knocked out. These duels are so tense! So much depends on the outcome, and with rounds flying downrange each direction it's both fascinating and terrifying to watch. The dismay or elation felt with each hit or miss never gets old. But here, because I had massed my armor, we had the numbers to emerge. Once the battalion was fully committed to the fight, we were exchanging shots three to one, and that rate of fire, and the fine German optics, won the fight. This shot suggests my man was just a little bit faster, and evokes the sniper duel scenes from Saving Private Ryan and Enemy at the Gates. The poor gunner. Forgive the total lack of graphics mods, just haven't gotten around to it. With an hour and a half left on the clock and a number of objectives taken, not to mention significant enemy armor losses, the battle is going well. Crossing the open ground before Cimne is still ahead, but the initial clashes have gone well.
-
I like keeping reserves whenever possible. I'm 15 minutes in to battle four and while most of my infantry is forward, each company has a platoon still mounted on the road, tucked in little lanes near intersections to allow me to (hopefully) quickly commit them when and where (or if) they are needed. In battles one and two I kept the pioneer platoon in reserve and never sent them forward as I didn't see a need or the right opportunity to commit these troops. Of course, as recounted, aircraft found them anyway, so it's not always a foolproof way to conserve them. Just some lucky speculative artillery fire can put paid to these sorts of plans. The 'phantom reinforcement' I mentioned was nothing of the sort, I simply misunderstood. The second panzer platoon was actually a panzergrenadier platoon, who arrived, and a panzer platoon, of which only the platoon leader arrived and I didn't notice his lone tank among the reserves at a glance. The reinforcing tanks have also been arriving in better shape ammunition-wise, with an average of about 30 rounds each of AP and HE in their racks. The starting armor just happened to be the ones that saw the most action in the previous battles. Fifteen minutes in and the battalion is fully deployed, with my armor massed on the left. I have just one Mark IV platoon committed right of the road, but the bulk of the support/Stummel halftracks are attached to them on the right to add weight to the advance on the brickworks. Infantry is probing forward, but not much contact so far, just a few trucks and some infantry. I have yet to spot any Soviet armor, which is spooky. I want to make special mention of the AI's opening artillery fires. In Combat Mission I dislike when scenario designers hit the setup zones with first-turn artillery barrages. It seems cheap in some sense. But well-done to the designers of Blunting the Spear. Instead of hitting the setup zones, the artillery is instead fired on obvious approach routes and intersections. In two places these fires stopped my advance and disrupted my timetables, and forced me to alter my plans and re-route my forces and the third I managed to dash some mounted panzergrenadiers through it but that was sheer luck not to take casualties. But I thought this was a wonderful way to use prep or first-turn arty strikes but without sticking it to the player. Nicely done.
-
Yes, I like reading these sorts of things too. For that third battle, the first with Panthers I sent one company of infantry up the left, to capture and hold the two farm objectives, but nothing was there aside from a couple of T-34s which were quickly taken out by flanking them with a Panther platoon. The infantry then hooked wide left remounted in Opels to hit the to the left side of the village, with one platoon left behind to occupy the farm and to lay fire in to positions around the town, but probably only succeeded in keeping heads down. Another infantry company was sent up the right, had dismounted and were approaching the town through the woods when the AI surrendered. My infantry never really got in to the fight in this one, though a lot of effort was expended keeping them moving. If the AI hadn't surrendered they were in good position to hit the town from each flank. I won that one with just Panthers and artillery. I think switching to airburst once the T-34s were dealt with caused a lot of casualties around the town. The battle really swung in my favor as my forces approached the town. I had called in the indirect 88s to where I had seen some anti-tank gun fire earlier, which hit a Panther without penetrating. Gotta watch those replays closely eh? My approaching forces flushed the forward Soviet troops who fell back smack in to the 88 barrage and were wiped out. Seems I got the guns too even though I got no spots on them the entire battle. One thing I struggle with on the attack is keeping my crew-served weapons effective. With mortars it's not so bad since they can be called in with observers, and their positions aren't vital as a result. But the HMGs have been essentially out of the fight for the whole campaign. They got a few kills in the second battle in town. But otherwise I find it difficult to get them in to a position to help out before the battle has already rolled past. That's not a new problem in Combat mission, but I've never really found a good way to utilize them on the attack that doesn't also unduly jeopardize them except in certain missions when a few choice positions are easily gained. 2508 meters is a hell of a shot. That's a mile and half! Got me beat, longest so far is 2269 in this one, so far.
-
Thanks, and well done on the campaign. I started the fourth one, but as it's the third battle by the left flank, ammunition is low and some tanks have empty racks or close to it. About 5 minutes in a reinforcement message appeared, and it looks like I should have gotten two tank platoons at that point, but nothing spawned. I need as many tanks as possible since many are so depleted at this stage. I've lost three Mark IVs in previous battles, so I doubt that's caused the phantom reinforcement. Is it possible in Combat Mission campaigns to have the spawn locations 'blocked' by existing units?
-
Had a look at the map and setup zones for the fourth battle in Blunting the Spear (left flank force with Mark IVs and panzergrenadiers). How'd you do in this one Warts? It's the one where you are to take control of Ciemne. It has about fifteen terrain objectives, which are all occupy, so should require a fairly complex plan I reckon. The German end of the map is more restricted, but also provides a lot of cover to position the forces, which is good since the deployment/setup zone is one of those central 'just arrived by the road' types, and everything will need to be moved in to position instead of placed there. A third of the way up the map it opens out quite a bit. So covered approaches and open enemy ground essentially. I think I recall this one from a few years ago and if I am not wrong the Russian commits his assault guns here. Terrain analysis shows the main push has gotta be up the right toward the brickworks, and some armor deployed on the left to make use of the excellent fields of fire from those positions. But that will also expose them to the enemy anti-tank units. I'll be counting on the boys having polished the Zeiss lenses after the last battle. Map is about 3000 meters long so I expect some long range gunnery duels once again. It didn't go un-noticed that an additional 40 minutes are on the clock, so I suspect it's considered a tougher nut to crack.
-
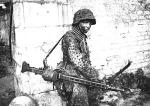
Great shots Bozowans, thanks for posting. I rarely watch the action from such an intimate point of view. These shots look great, especially cropped and even the flowers, which I never even notice when I am commanding from 130 feet up. That last shot, showing the skirmish line, wounded being attended to, casualties, more men running past and the tank as well is a fantastic image.
-
Good idea Ian and thanks, I might just try that. But I may also just wait until after the campaign completes and test it then, if I should decide to go through with engine 4. If I knew it worked and was backward compatible I would probably upgrade tonight since I really want to know how many casualties they caused, but it's not the end of the world if I don't and just through the map review I already know it's 'a lot' I however, want to finish the campaign more than discover the kill tally. Appreciate your help.
-
Thanks mate. I imagine it's a no go, but worth an ask. To save folks from having to page back to see the question I'll ask it again I moved to engine 4 for CMBN, but my CMRT is still on engine 3. I suspect the answer is no, but I was wondering, if I upgraded to engine 4 could I reload a save of a turn already played to see the F/O kill stats? I'm very interested to see the numbers from the artillery in that last battle. I wouldn't want to endanger this campaign mid-way through, but even afterwards if I upgrade I wonder if these stats will show even though the turns were not played under engine 4. I suppose it comes down to whether engine three does indeed track them, it just doesn't display them. Engine 4 added display of F/O kill stats, correct?
-
Yes, I said Pete and company, because frankly I don't know who made up the rest of the team, but everyone who had a a hand in making this campaign has my thanks. Authors, map makers and testers all did a fantastic job as I am having a great time playing Blunting the Spear. The maps dish out a sparkling brand of combat, with a nearly perfect blend of long range gunnery duels and close-in combat. The huge, open maps bring me out of my comfort zone and have me conducting the battles in a more grand style, battles of maneuver in the operational sense, or it imparts that feeling, even if it's still a tactical problem at heart. Having tank battalions armed with high velocity 75s gives the player a hell of a lot of firepower, and combined with the strong artillery support gives the player all the tools he needs to overcome it, as long as the tactics are sound. My cautious approach to Combat Mission battles is working well, preserving my forces. With an hour and twenty minutes on the clock there is ample time to play properly, with recon and maneuver. And as mentioned last post I am enjoying the whole problem of effectively getting, and keeping, my infantry in the fight. I moved to engine 4 for CMBN, but my CMRT is still on engine 3. I suspect the answer is no, but I was wondering, if I upgraded to engine 4 could I reload a save of a turn already played to see the F/O kill stats? I'm very interested to see the numbers from the artillery in that last battle.
-
The scale of these battles is interesting. On many CM battles once you get the infantry in the fight, they remain on their feet the rest of the battle. Moving forward, but on foot. In this campaign, having a battalion on such big and open maps means you need to move your infantry companies with transport or they'll take forever to get where you need them and be exhausted and late when they arrive. I've enjoyed the whole operational feel to it, coordinating this transport, clearing it's way and providing overwatch. The left flank force has a lot of halftracks, but the right flank force have trucks, which are highly vulnerable of course, and it takes a good plan and planning to get these troops to the positions you want them and in a timely manner. I usually avoid big battles for this sort of reason, this sort of micro, but for whatever reason I am really digging it in Blunting the Spear. Oftentimes you bring a platoon forward to unload, assault an objective, clear it, then remount in a different location to set off to the next one. After restarting the battle to erase my nightmare second turn, I ended up scoring a total victory, with the AI surrendering with 34 minutes on the clock. My artillery was highly effective in this one. The TRPs were well placed and I was able to keep pounding the enemy's strongpoints through the battle. Tank losses were 26 to 1. I had 20 casualties, and some of those were caused by aircraft. I was surprised when the battle ended, but after seeing the map review and how effective the artillery had been, I would have thrown in the towel too if I were the Russian. Who knows how much differently it would have gone had I accepted the loss of the Panther platoon? After the mulligan though it could hardly have gone better for the Germans who shot well and shrugged off the hits the T-34s got early on that could have swung the battle had they penetrated instead.
-

CMx2 WWII? Scenarios & Quick Battles?
landser replied to markshot's topic in Combat Mission - General Discussion
Yes indeed. But I imagine most around here are of a certain vintage eh? No idea what the average age of CMer's is, but if I had to guess I'd reckon 50 or thereabouts. That's slightly in my rearview, but yeah, been around a while. I was on the staff of Frugalsworld for years and if you moved on in to Falcon 4 you'd have visited there I'm sure. Combatsim was my first forum really, and was in to Steel Beasts, EAW, MiG Alley, Flanker 2.0, all the Jane's stuff and those sorts of sims at the time. Seems an age, but it's 'only' been twenty years. And of course that was just about the time that CMBO came out and here we are -
Haha no doubt. If you caught the Monty Python reference, that's how I felt like when Arthur asks Bedivere "who leaps out of the rabbit?', my well laid plan had come to naught. But it reveals one of CMs strengths in that it never plays exactly the same way twice ya know? Not randomness, but maybe variability is the right word?
-
CMx2 WWII? Scenarios & Quick Battles?
landser replied to markshot's topic in Combat Mission - General Discussion
You're good to go I'd say. Unless you only like playing night battles or battles on Tuesdays, then you're not going to run out of stuff to play. And if it appears you might, add Shock Force 2 to extend your playtime by another decade. Are you the same Markshot from Combatsim and Shoot to Kill fame? -
Trees. Some T-34s are positioned behind a tree line opposite the left side of the setup zone so it was a combination of obstruction --physical and sight I reckon. Range was around 1150m. But it's certainly an outlier. I could re-run that turn a hundred times without having eight straight misses I would think. The T-34s didn't miss and scored penetrations straight away. Later, those hits became ricochets, so such is war. The difference is I can restart if unhappy.
-
Oh man, battle three. Not sure if anyone cares much about what happens in my campaigns, but this is the sort of stuff I enjoy reading so I'll put it out there. Did the terrain analysis for the third battle, this one the 'right flank force' with Panthers. Big, open map, and when you see it you think well now this will place a premium on gunnery. Got all set up, with the idea to just get eyes on the right flank, and push up the left with the limited starting units. It's only the leading element of the kampfgruppe, with a platoon of Panthers and mostly HQ type units. Issued the opening orders to get eyes forward leaving the armor hidden in the trees until I could get some spots and see what's where. Got spots on a few T-34/85s and issued orders to the tank platoon to inch forward to the edge of the trees on turn 2. I hope I could keep my tanks from being spotted until at least they could open fire. Pressed go and the Panthers dutifully moved forward and got spots and opened fire. The platoon conspired to miss their first eight shots, and at the end of the WEGO segment two were knocked out and two were reversing, with casualties, and essentially out of the fight. I sat back and said aloud "Perhaps if I built a large, wooden badger" So yeah, I restarted and kept my armor keyholed to await the rest of the KG. This time it went much better, my boys shot well, and 20 minutes in we've lost just one while knocking out a number of T-34s. The Panthers have shrugged off a lot of turret hits, so I'm somewhat fortunate that so many are still in the fight really. But they are, and combined with the generous artillery on call, things are going well so far. I still need to get on the objectives, but those are all soaking up HE at the mo, so no hurry with an hour left. But if it's like most of my campaigns I will dawdle too much on the approach and be forced to rush them at the end.
-
CMx2 WWII? Scenarios & Quick Battles?
landser replied to markshot's topic in Combat Mission - General Discussion
I think it comes down to how broad your tastes are, and which titles you play. If you have say SF2 and CMBN you have a ton of content. If you enjoy single scenarios, QBs and campaigns it will be a long time before you run out, if ever. If your titles are CMRT and CMFB maybe you will. For campaign players with only some of the titles this point can be reached. -
CMx2 WWII? Scenarios & Quick Battles?
landser replied to markshot's topic in Combat Mission - General Discussion
I'd rate the replayability as 'limited'. It's funny you mention senescence, as I've been saying lately that forgetfulness is the key to enjoying a Combat Mission campaign a second time. AI plans help, but only go so far. I'm replaying the CMRT campaign called Blunting the Spear. I played it three years ago, and while I recall the maps, the other details are lost to time, so it regains the ability to surprise me, which is key. A case in point. Here's the map for the opening battle of the CMBN tutorial campaign Task Force Raff. (Incidentally, there was talk in another thread about whether any scenarios had any pre-spotted units and this battle was mentioned, and here those units are) It was also the battle in the demo, which was my first taste of CMx2. When I played it then, I suffered significant casualties, with an ill-judged assault on St Martin Farm, and a Sherman and Greyhound knocked out along the road. When I recently got back in to CM after a layoff of about a year I reinstalled CMBN and played Task Force Raff to get back in the flow. It's a nice little campaign, a great primer for CMBN as it is fairly easy, has attack and defend, paras, bocage, off-board artillery and a nice combined arms battle at the end. Playing the first battle a second time years later the AI surrendered with zero American losses. Partly perhaps this result was down to my improved ability and understanding of CMx2, maybe also affected by engine changes, but mostly I'd say it's down to simply knowing what's what and where. I knew where the AT guns were and I knocked them out before they could fire a shot, and one of them I knocked out before it was even spotted, as I knew where to bring my mortars down. I knew the enemy were Ostruppen which, shall we say, lack enduring motivation and determination? So I had a much better plan this time, since I knew what to expect. With campaign content limited for Combat Mission, the equally limited replayability is a weakness in my view. But getting older and allowing some time to pass can help to mitigate the issue As for QBs, I play them a little bit, but the limitations of the purchase UI and options make we stay away from them for the most part, aside from PBEM games, which is their best use in CMx2 for me. I enjoyed QBs in CMx1 more than the newer games. There are some really fantastic QB maps. But I miss the Combined Arms setting for the AI purchase, and while the maps are great, I miss the random map generation too. Sure, it could throw out some wacky stuff, but it never bothered me. Campaigns is where it's at in Combat Mission for me. There are some very talented folks generous enough to share their work with us and I am grateful, because playing CM campaigns the first time is a great experience. -
George McClellan would be a more aggressive player than me I think. But I think it paid off in the desired manner. Lost the two tanks, a couple of tracks, 15 KIA and 27 WIA while knocking out 13 Soviet tanks and causing around 220 enemy casualties and 16 prisoners. I want to preserve my force if I can to carry on through the remainder of the campaign. Or that's usually my goal when playing core-force campaigns. I don't always pull it off, and manage my share of debacles, but I was pleased with the outcome here. You're right about the Russian infantry anti-tank capability. But they also have sappers with satchels. I saw in the map review they were deployed astride one of the avenues in the center of town. I had chosen to ignore that part of town so they suffered a few losses to my artillery but otherwise remained hidden and saw no combat, and didn't drop any bombs on my engine decks. This part of the town must have held the two 'hidden' objectives which were Radzymin West and Radzymin Park. With no visible objectives I saw no compelling reason to commit myself there and the Russian scored some points for it as a result. Had a look at the third mission and I hope my Panther gunners bring their A game as it's wide open. Set my TRPs and did terrain analysis but yet to set up and start. Should be interesting, especially if the Russian has committed his armor here (and you know he has)
-
I've only seen three of them so far this go-round and I am loving the sort of combat these maps dish out. A mix of long range gunnery duels and close in urban fighting. But so far the urban isn't too dense for me. A perfect mix. In order to deflect attention from the fact I thought one of my squads carried 30 panzerfaust... I'll turn this in to a thread about Blunting the Spear. Spoliers to follow. First though, I actually paid attention and answered my own question. There are both panzerfaust model 30 (designated by the 30) and 30k (designated by the K) in this mission. You all know that already. I finished the second mission, and because time ran over, I was able to capture all objectives. Scored a minor victory. I saw that the Soviets scored 300 points for two terrain objectives which were not labeled on the map and 400 points for Friendly. What is that, they stayed above their casualty threshold, or something else? No worries, just curious to how it's scored. The Russian aircraft made a return right as time ran out and went nuts. First it attacked one of the knocked out (and burning) Russian tanks. Then it came back to strike a couple of my Mark IVs, causing a few casualties, several penetrations, and the tanks were abandoned. But because it went to overtime I was able to remount the crews. If I had run out of time, would these tanks (abandoned but with surviving crews) have carried over as part of the core force? That aircraft also attacked my pioneer platoon, heretofore uncommitted in the campaign and mounted in tracks under the cover of trees way at the back of the map. That was a tough one to take I lost two Mark IVs in this battle (I mean permanently considering the re-mounts), and both were knocked out by this well-positioned T-34/85. Clearly though we got our revenge. I committed the mass of my armor on the right, and you see the result. There are two more penetrations on the left turret from a flanking Mark IV who also got a spot. All hits were during the same WEGO segment and brutal it was. And a cool shot which I would caption with "You ain't kidding"
-
I'd be interested to see your final campaign tally. But no obligation of course. I've managed to get through mission two in nice shape, with only the three tank losses as mentioned. But I also didn't go for all objectives. The writing was on the wall 10 minutes in to mission 2 and I decided to forgo the two farthest objectives. So that's why I expect a draw. I'm cool with that. I value my pixeltruppen more than the objectives, and I reckon that since poor scores won't end the campaign I may as well try to arrive at the final battle with as much weight as possible. But still a long way to go. Did much better against the armor in mission two, as I reckon I let about half the tanks exit in mission 1. I'm finding if I can force the tank combat at long range the Mark IVs have an advantage, optically I would guess. Inside 1000m or so and the T-34s are a fearsome opponent. And the way they are tucked in to every nook and cranny makes weeding them out a challenge. Great job on these maps Pete and company!
-
The thing is there was a time when I knew this was the type and not the quantity. Perhaps what threw me (the excuse) is there is another squad in this campaign that has a 30k but the icon has a sort of cursive K on it. Not sure what it is. And the one with 30 is just a single, so no small number for quantity as well. And the fact that there are so few in the battalion made me conclude all ended up in the same squad through some programming quirk or maybe gremlins. How's the campaign going Warts? I drew the first but kept losses really low. I had played this campaign a few years ago but couldn't recall the enemy strength or disposition, so I was cautious, especially on the near side of the river. Lost just one tank, but a number of enemy tanks must have escaped due to me taking my own sweet time. Lost one FlaK to artillery. On the second now with about 10 minutes to go. Probably going to get another draw, or maybe a tactical victory? Again low losses, two more Mark IVs, and the other FlaK to an air strike. They were ripping away at each other but the Sturmovik, or whatever it was, won. Great maps, great battles, with some fun long range tank duels. Longest kill so far at 2269 meters. Soviet submachine gun squads are murder in towns. Next up, some Panther goodness. Big open map if I recall, but I'll see shortly.
-
Quite embarrassing it is. Yes, that is what I see. I thought this was the whole battalion's worth as none of the other squads seem to have them. I'll double check after I fire up the mission later, but I am sure I am seeing what you show and simply misunderstood. Thanks for the help.
-
I see, no buddy aid, and I can only imagine how long it would take to run 'round snapping up 30 panzerfausts off of fallen comrades. I only noticed it after starting the second battle. So I assume the game assigned them all to this squad. I do have a save, as I am playing that mission still. I can attach the save later if necessary.
-
Now why would I do that? No I didn't do it, intentionally anyway. Buggers went and scarfed up all the fausts for themselves they did. If I cannot distribute them, I will redesignate this squad as the panzerfaustenjaeger and woe be to them. And no mods aside from Juju's UI, as I suspect that is vital info. Engine 3.
-
I recently started the Blunting the Spear campaign. I played it several years ago, but don't recall much aside from the maps. I find forgetfulness a key component when playing a campaign a second time. Anyway, in the second mission, with Radzymin Town and Rail Station, it seems all of my panzerfausts are in one squad. None of the other squads have them, and this squad has thirty. Is there a way to re-distribute these to other troops? Too late to do it in this mission, as there is only 30 minutes left on the clock. But if I encounter it again I wonder what can be done?
