

hcrof
-
Posts
1,124 -
Joined
-
Last visited
Posts posted by hcrof
-
-
Sorry guys, just for clarification, the whole team got wounded (red) and the UAZ destroyed. I have only one FO left who is capable of calling in artillery but obviously my officers can call in what is left of my mortar support.
I was in a bit of a hurry last night and didn't read my post as thoroughly as I should!
-
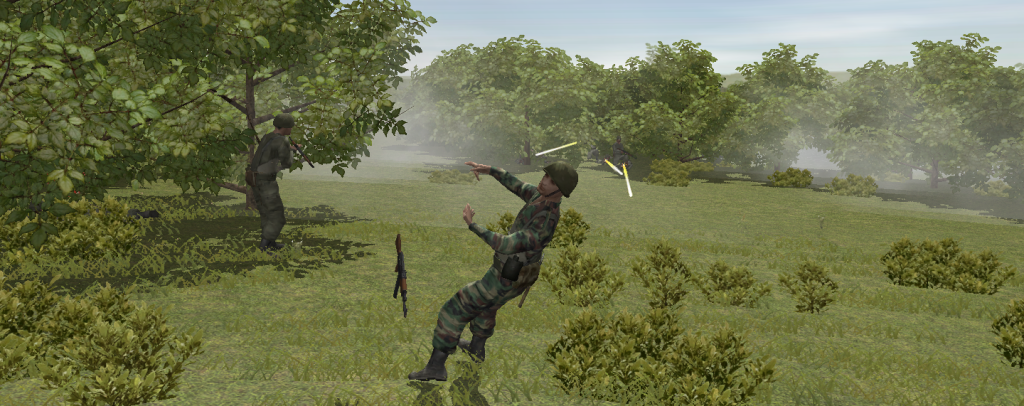
As the men ran to set up an all round defence around the position they just took, bullets came cracking out of the trees, cutting down 2 men and wounding another!
Not knowing where the fire was coming from, they fled in panic - abandoning their newly gained position.
Their platoon leader wasn't stupid though, he had ordered a second squad to work their way up to the treeline in order to flank the enemy. As the enemy security detachment opened fire they were spotted and a hail of bullets and grenades cut them down. There were few survivors.
He then heard his own security detachment shout out - enemy BMPs cresting the hill!
Those BMPs would be driving into an ambush - their route took them less than 150m from the hidden RPG teams waiting for them...
I love little platoon sized knife fights
 I must have killed at least 10 or 12 of his guys for the loss of 6 of my own, and now his BMPs are driving into an RPG team I put to cover my back!
Apart from that, not a lot is happening right now - I am trying to get as many of my men safely to the south side of the map as possible. I had a couple of near misses and my FO team got shredded by a well placed 73mm a few meters away from their UAZ as they were speeding down the road - only 1 left! My tank has only just got going though - I hope his tanks dont get eyes on it!
-
Both tanks now desperately retreated, trying to get away from the enemies surrounding them. The first took a 73mm hit to the turret, then a 115mm round just as it destroyed the BMP. The crew bailed and began to crawl away.
The second tank continued crashing back through the trees as round after round hit from all sides. The gunner took shrapnel in the arm and the driver, as the only unwounded member of the crew, fled the vehicle. As he ran, the tank took more and more hits until finally the wounded beast died.
In the south the enemy was almost destroyed. The few survivors ran backwards into the trees where they were again outflanked, taking more casualties. At the last moment however, a grenade rolled into the triumphant soldiers and exploded – killing 4 men instantly!
One of my tanks just took 16(!) RPG/73mm hits from 3 sides this turn alone. That I think gives you an idea of how badly they were outnumbered and surrounded!
I have managed to get my bailed out tank back into action which kind of makes up for the losses on north hill but I still think Mike has 2 tanks left in total.
North:
1 Tank, 8 BMPs, 1 platoon of infantry with extra RPG teams?
South/BRIDGE:
1.5 platoons of infantry, 2 MG sections, at least 3 BMPs, 1 tank, 2 ATGM sections
I have:
1 tank (missing crewman), 1 ATGM section, 2 plt infantry, 2 MG sections, 11 BMPs
Given that the balance of forces are equal but Mike occupies the high ground, an objective and roads to shuttle troops around I think I might offer my surrender and congratulations.
What do people think?
-
Well I lost my last tanks (sort of)
 Read below
 -
The left hand tank spotted the enemy vehicles coming over the hills and backed into a defensive position as the friendly infantry took positions in the moonscape of the hill.
The squad spotted the enemy tanks coming round a patch of trees first and unleashed a torrent of fire at one. The RPG hit the thick turret armour however and the commander ducked into safety. Continuing the advance, his tank fired a shell that caused the infantry to dive to the ground.
My tank aimed as soon as the tanks entered its sight picture and sent a round through the side of an enemy tank. As the crew began to bail another round crashed into them but as the third round was slammed into the breach, the commander spotted an enemy BMP less than 30m away!
My second tank continued to push forward into the trees, round after round hitting the thick armour. It spotted a bailed out enemy tank and put a round in for good measure. Suddenly an enemy BMP was spotted at point blank range!
Without waiting to reload the gunner put a long burst of 7.62 into the enemy vehicle and the unbuttoned gunner disappeared in a red mist.
'Infantry at 2 o'clock!' Shouted the gunner and the turret slewed round to engage.
'HEAT up!'
Another enemy round crashed into the turret and the loader screamed – covered in spall from the side.
'BMP at 12 o'clock!' Screamed the driver, slamming the tank into reverse
The turret swung round again and the gunner took aim but as he pushed the fire switch the tank crashed backwards into a tree and the round went high.
Tearing its way though vegetation and bouncing into craters the wounded tank fled backwards as the gunner frantically scanned for targets in its way...
In the south the squad kept shooting as friends ran to outflank the enemy patrol. There was little return fire but one man fell just as a huge flurry of grenades exploded in the bushes. A few men tried to run towards the river but they were cut down.
As the platoon overran the shredded remains of the enemy they spotted a few disappearing back into a field. They had to pursue them!
Enemies are cut down as they flee into the forest (South Ambush)
Wow. Mike has really thrown all in, I honestly don't know where he has found all of these troops! In the north I now estimate Mike has 9 BMPs and at least 1 tank, even with the heavy losses he has already taken. As for infantry I have no idea – my tanks have taken so many RPG hits from so many directions I have given up trying to find their positions.
I have given up on HILLFARM and everyone that can get away is now retreating to BIGFARM. Those that are left (My 1.5 tanks and infantry) will make a last stand. If I can destroy Mikes last tank then we are back on an even footing but by now I think Mike must have taken heavier losses than me!
In the south my ambush went well. I destroyed approximately one squad for the cost of one casualty of my own and spotting rounds continue to fall on the south hill. I have also ordered a mortar barrage near HILLFARM. Hopefully any infantry Mike moves in to hold the place should get a nasty surprise!
The next question is do I attack in the south and attempt to trump HILLFARM by taking BRIDGE? I suspect him to be greatly weakened there with almost no defenders. In the real world no one would be that bloody minded but this is a game...
-
Heh, I would love to see one too! Although from the next post it seems to be more of a desperate gamble. I think he saw all of those tanks and panicked - I think not only has he thrown in his reserve, he has also shifted men from his defence!
-
The three vehicles wheeled round in a rough formation and began to make their way through the trees. One of the tanks received small arms fire, killing the commander but it kept moving and put a shot into the enemy location. Just as it halted to deal with the enemy infantry properly it spotted the last enemy tank! A round through the side of the turret quickly put it out of action and the turret swung around again, hunting down the infantry.
The BMP on the left spotted an enemy carrier and halted, letting off a round that caused the vehicle to immediately brew up. Another carrier was beyond the first and as soon as the autoloader slammed another round into the breach the BMP fired again. A second shot finished off the enemy as a third enemy carrier began to reverse into the BMPs sights.
Suddenly, an RPG screamed out of nowhere hitting the front and as the crew bailed there was another huge explosion – two more enemy tanks had just crested the hill!
Two enemy BMPs began to bombard the farm from the south, causing the remaining structures to collapse. As the infantry inside fled to better cover, round after round hit my tank from the trees. First the tracks were knocked out, then eventually a weak spot was found and power was lost – the crew had to bail!
In the south my infantry lay in wait watching the hill when a soldier heard something.
'Sergeant, there's movement to our left.'
Everybody lay absolutely still listening. Soon it came again – something was moving in the trees!
The signal was given and everybody rolled over, they couldn't see **** in this wood!
A helmet appeared, followed by a man, followed by another. In single file they were trying to push their way through the foliage as quietly as possible. They had no idea their enemy was so close...
No order was given. Suddenly everyone opened fire wildly, sending burst after burst into the trees. In the confusion some froze, some dropped to the floor, some ran.
The sergeant saw three men fall but there could be an army of them in there.
'Keep shooting!'
Mike has just declared all in! The cards are on the table now and suddenly I am outflanked and outnumbered in tanks now! This will be an interesting fight, I will definitely lose HILLFARM now but how many vehicles can I take with me?
My BMP did its job magnificently, not only did it destroy two of Mikes carriers, it also took the hit from his tanks and hidden RPGs. I could not have asked for a better screening action!
Meanwhile one of my tanks has luckily stopped in a position where I can almost definitely get the first shot in on one of Mikes T-62s and the other destroyed another. I am now heavily outnumbered and surrounded in the forest but hopefully I can do a bloody last stand. If I can destroy his last tanks that opens up the possibility of an attack in the south to take BRIDGE. Mike walked straight into my troops and I am beginning to maul a whole platoon of his infantry! This looks like this battle will end up in a bit of a Pyrrhic victory for whoever wins
Meanwhile, my spotter rounds are beginning to fall on the south hill...
-
Thanks for the support guys, I think I can give Mike a pretty bloody nose!
It seems he has got fixated on the farm which has allowed my flanking move
In the north Mike has at least 5 BMPs, 1 Tank and about 4 squads of infantry I think (plus assorted panicked squads and AT teams that may still be dangerous). Against that I have 3 tanks (4 if I can get my bailed out tank back in the action), 5 BMPs and a few MG teams/HQ squads.
In the south Mike probably has an Infantry company minus a platoon or two to defend the bridge and the town and a platoon of 3 tanks. I have an infantry company spread out in a dispersed defence in sector but missing most of an infantry platoon and some carriers.
Now that you have got me to spell it out I seem to be in not such a bad position, even though I have taken some horrific casualties in the north. Mike seems to be probing with one infantry platoon in the south and they are supported by Tanks and their organic carriers at least, maybe another infantry platoon at most. If I can ambush him and cause casualties I might attack but right now the force balence does not favour me I think.
Overall, I think I can regain HILLFARM with a bit of luck but I don't think I can take BRIDGE. The score will then rest on casualties and I think that Mike is winning on that front.
-
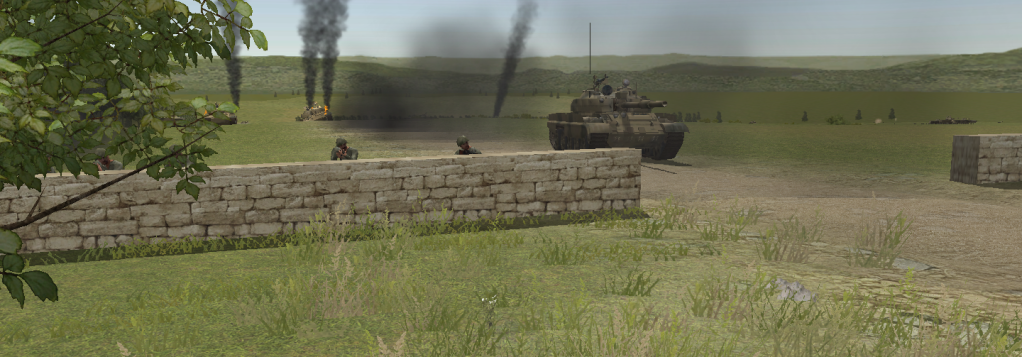
On the left, the remaining tanks began to move again, covered by smoke. Quickly they rushed up to the treeline, past some friendly infantry who where choking and spluttering on the fumes as they ran. There was noone there! Broken orders came over the radio, all troops were to support the attack on the farm!
The men at the outskirts of the farm watched the tank rev its engine and drive into the swirling smoke. Their way was clear and they vaulted the low stone wall as one, running towards the farm buildings.
Fire came from their right and one man fell but the rest rushed into cover and took positions near the windows. In front of them were a lot of enemies, perhaps a platoon or so, with their vehicles.
They let off a couple of bursts, hoping that their tracer would guide tank fire onto their target.
The massive crash of a tank gun the other side of the wall caused more dust to pour from the damaged ceiling but there was no explosion – it was shooting at other, unseen enemies.
Enemy tank!
The squat, wide shape of a T-62 was emerging from a cloud of white smoke ahead...
My tank supports its infantry in HILLFARM
My tanks on the left have managed to completely outflank Mikes troops! All I have to do is swing round and attack him from behind!
I have a BMP protecting my own flank but the real muscle will be provided by 2 tanks that will approach from the flank. They will hunt through the trees and attack Mikes tank and BMPs from behind
Meanwhile I have a tank and some assorted infantry in HILLFARM itself, they will have to be careful though, Mikes tank could easily take them out right now.In other news, there is movement in the south. Mike is probing again but he will have to hurry up because I have mortars beginning to zero in on his avenue of approach!
-
Right now I am thinking that I should have been more agressive from the start to seize and hold the north hill. I even said it was Mikes decisive point!
I will do a full debreif at the end but the battle isn't over yet!
John - what do you mean by Liddell Hart? Wikipedia didn't turn up much
-
I thought about this but realistically I had 2 options - press forward into a near suicidal attack or give up the whole battle. For entertainment purposes I chose the former, there is no reinforcement of failure because I have no reinforcements!
I will just have to claim there was a breakdown in communications
-
I got a minor victory in this mission. It was ages ago so I can't remember the details but essentially I started near the airstrip then split my forces in 2 and each went for 2 objectives. They leapfrogged over to each objective and on the way they spotted quite a few of the enemy.
In the end I didn't make it to all 4 objectives but I didn't get spotted so I got a minor victory. The briefing did say I wasn't expected to make all the objectives so I played it very 'stealth' and avoided contact by the largest margin possible. All they got was a few question marks.
-
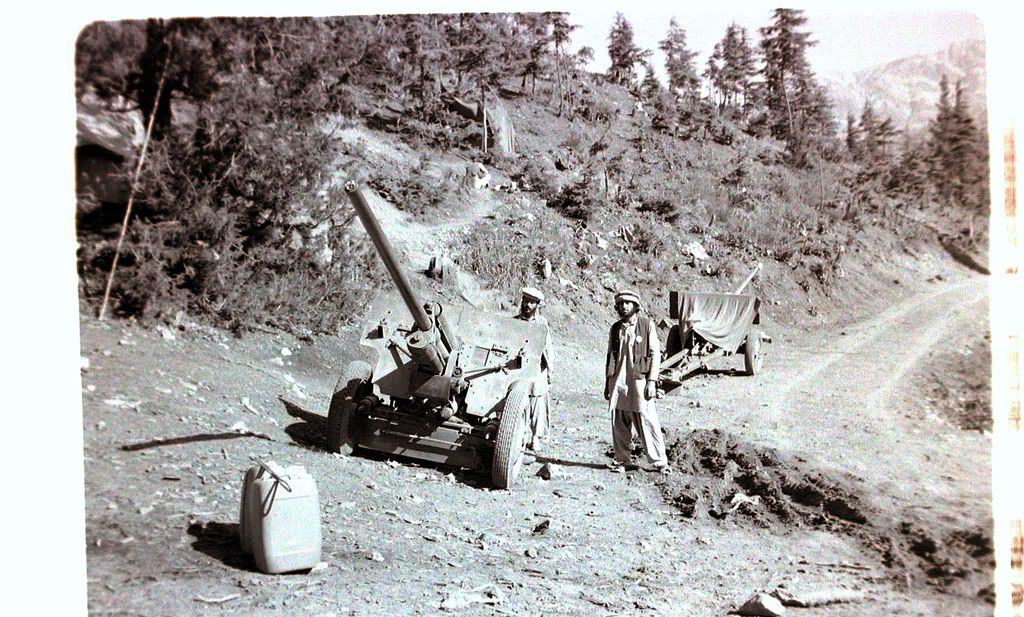
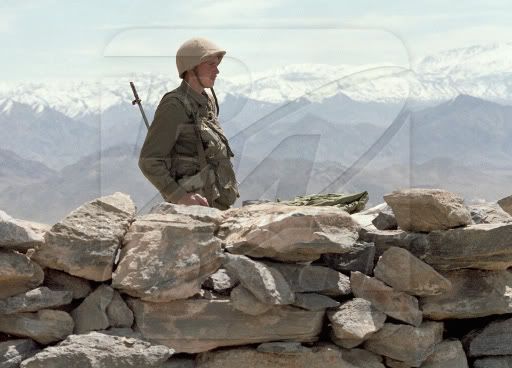
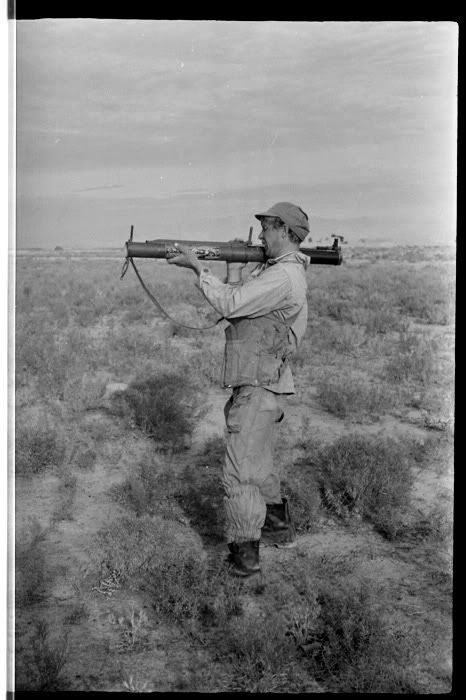
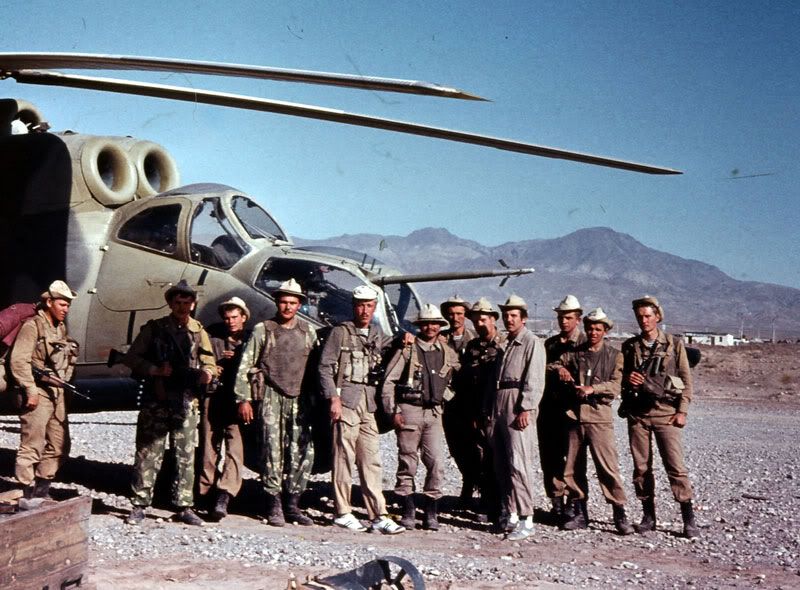
Next, the Mujahadin:
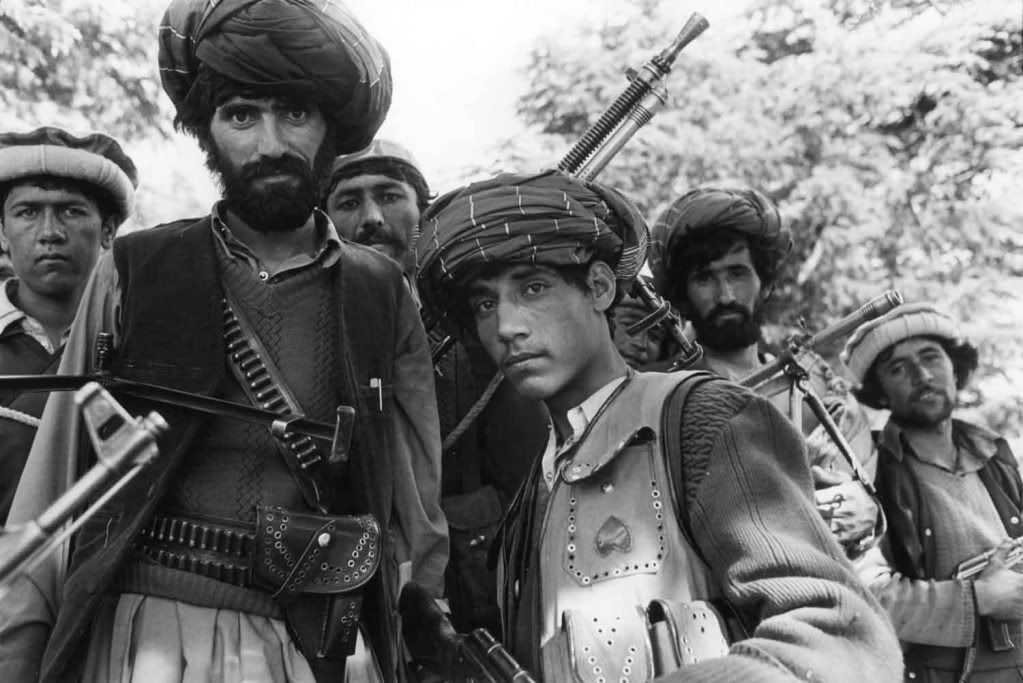
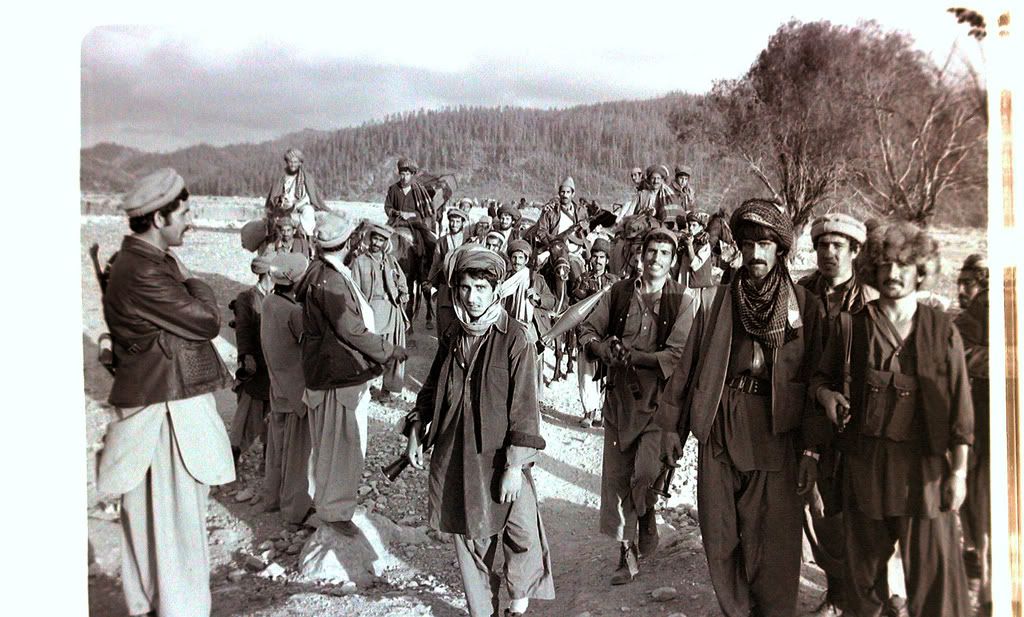
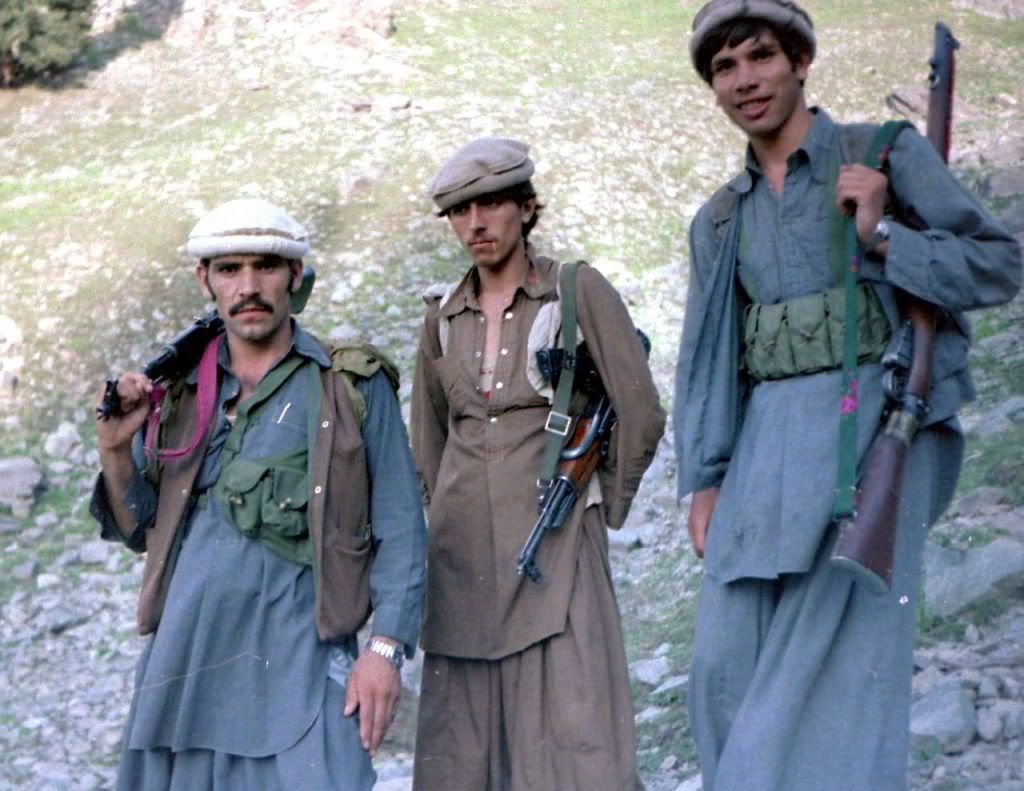

I can see modders having a field day with this game!
-
-
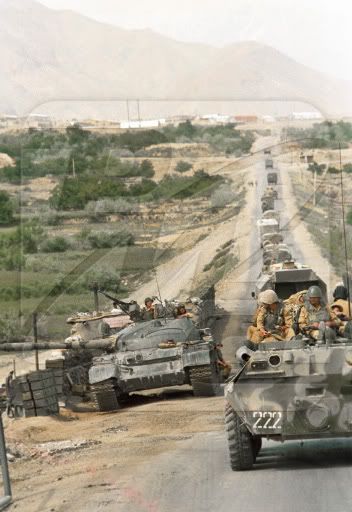
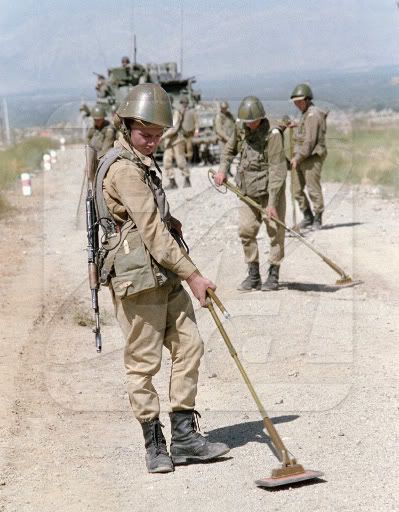
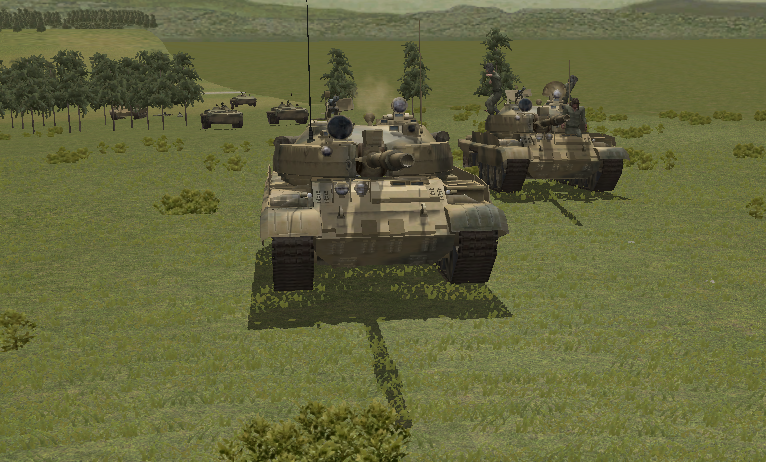
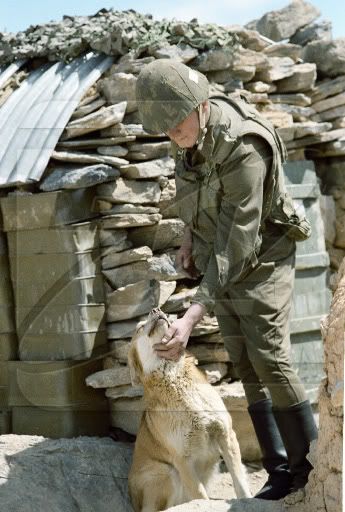
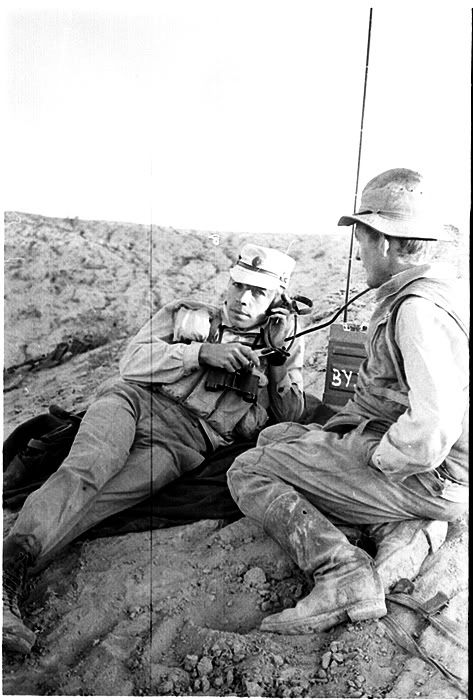
Just to give people an idea of what the two sides actually looked like, here is a couple of pics I pulled off MP.net
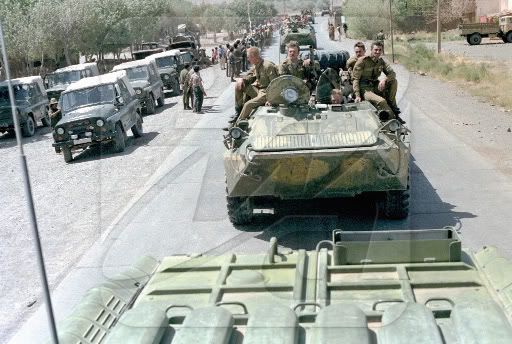
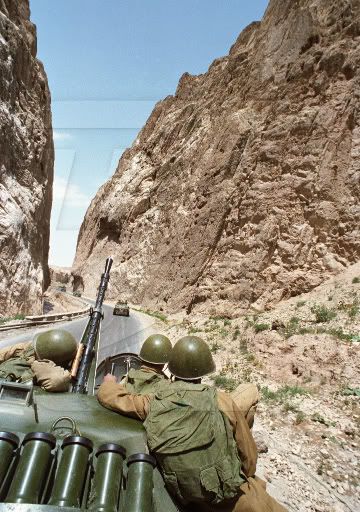
First of all, the Soviets:
-
lol, yeah you're probably right

I get emotional when my carefully constructed plans go wrong. I don't complain when I get a break!
I don't think I can win this now but hopefully I can at least give Mike a bloody nose!
-
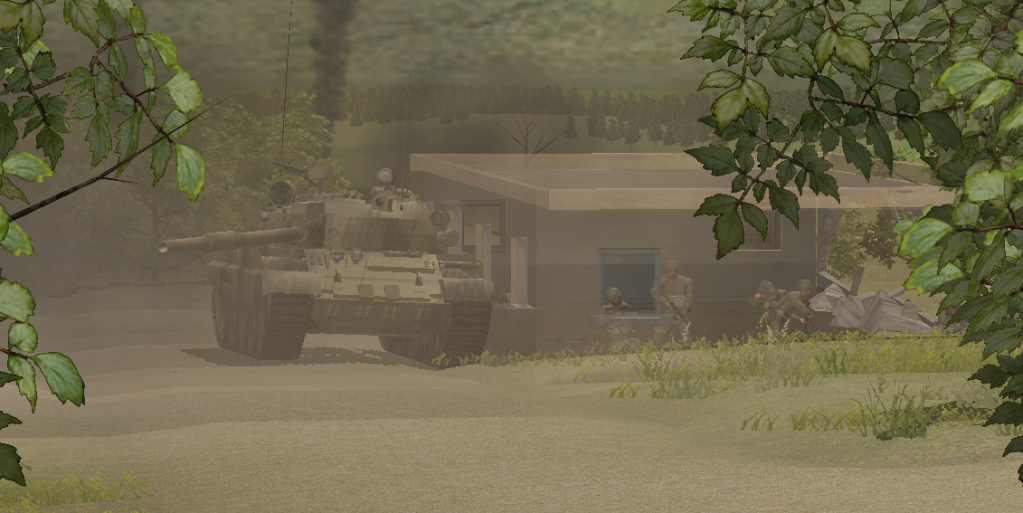
Watching the infantry struggle towards the farm, the tank commander made a decision. A BMP wasn't enough, the grunts needed something thicker skinned.
The tank crested the hill and immediately fired, sending HE into a building. Shooting stopped coming from it.
Give it another one!
As the loader slammed another shell in the breach, the commander looked to the left to see an ATGM streak past into the trees but he couldn't sit and watch.
HE up!
Fire!
The breach slammed back and a huge plume of dust added to the swirling smoke and fumes around the ruins of the farm.
Time to earn our pay boys, Forward!
My tank advances past the infantry after eliminating the HILLFARM defenders
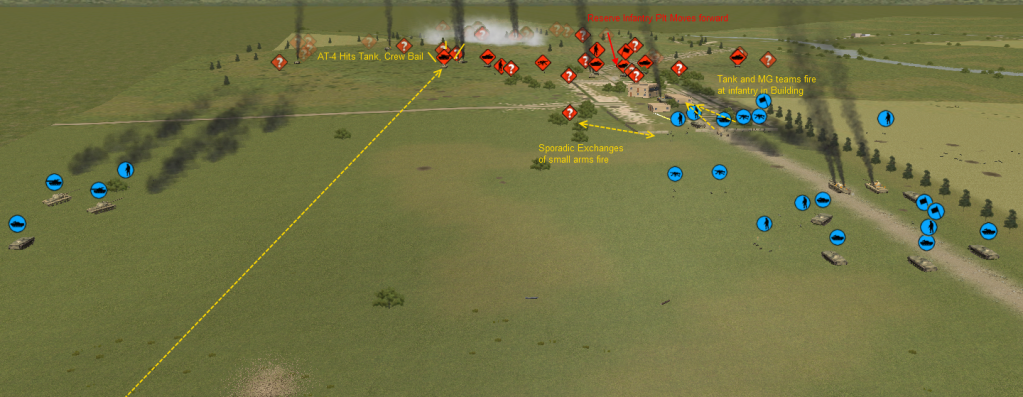
My tank blasted away the last of the HILLFARM defenders and a lucky shot from my overwatching AT-4 has destroyed one of Mikes precious tanks! Mike might have rushed forward a fresh infantry platoon in their carriers but a hole has been torn in his defences – lets hope I have enough men to exploit it!
My left hand tanks will use the smoke to get into the trees and then they will attempt to roll up the flanks of the defence. Meanwhile, I will rush a rag tag bunch of infantry into what is left of HILLFARM to try and fend off Mikes counter attack!
-
snake eye - after the game I will publish the map and you can look at it yourself. I personally feel that because Mikes defenders are highly mobile in their vehicles, they would be able to attack me from the flanks with your plan.
Also when I finish I will talk about lessons learned
-
The attack pressed forward but on the left, 2 BMPs got confused and couldn't decide where to go, unscreened by the smoke ahead, they both got killed by the same BMP who then proceeded to kill all the dismounts who exited the vehicle. On the right, my tank deployed smoke in the wrong place but luckily no more shooting came from the right. Unfortunately, a BMP appeared from the front and killed one of mine.
Right, that's it. A pathfinding error kills at least half of my remaining infantry. I'll just have to put that one down to 'friction'. This attack has turned into a bit of a comedy of errors – absolutely nothing went as planned through a combination of Mikes willingness to put troops in harms way and sheer bad luck
-
As they he looked into the farm, the TC saw a huge explosion as a shell from his partner tank tore into a BMP.
HEAT up! Shouted the loader
Before he could give an order, the commander heard the screams over the radio from the other tank. They had been hit! Not knowing where the firing was coming from he gave the order to exit the vehicle.
There was a brief scramble as the crew rolled over the side of the turret and it was not a moment too soon – following the remains of the other crew they ran from the tank, just as it was hit by a second round.
In front of them, the second wave of the attack surged forward firing, there were evidently a lot of enemies in those trees!
Mike has rushed a lot of BMPs into the trees and a tank that he left sitting out the artillery barrage has just opened up, destroying a tank, bringing the total to 3 dead tanks in this turn alone!
The attack sweeps past a knocked out tank
Why is it that every time my vehicles are in the most minor of artillery barrages they get KOed and yet Mike can sit out 2 modules for 6 minutes and yet be fine!?
Yet again my plan is essentially good but flawed in the details
It is just my bad luck that because Mike happened to be attacking in the south he can take advantage of it.My right hand vehicles are just visible from the south hill and Mike just happens to have moved a tank there last turn so is able to take flank shots. It was due to my oversight that I have taken heavy casualties this turn but I think I can also blame bad luck!
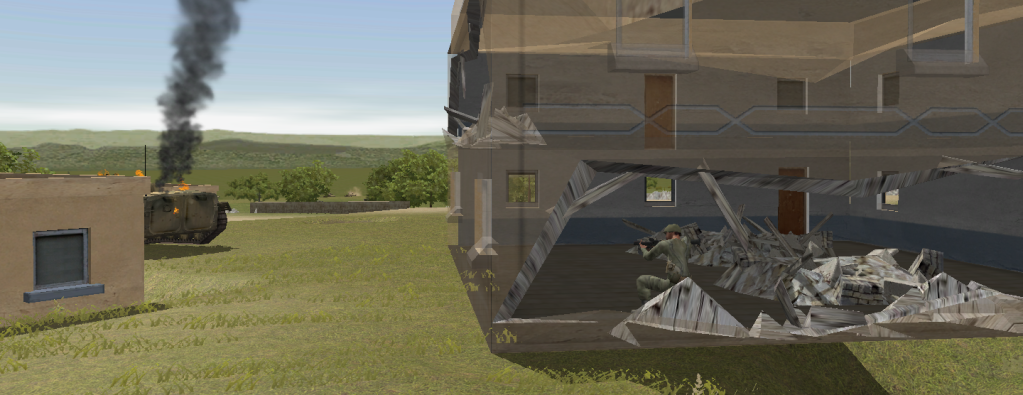
A defender fights from the ruins of HILLFARM
Still, there is no turning back now, I will use smoke to cover my left hand group and bunch up my tanks to get 2 guns on the first target they see. On the right I will push forward and left to get out of the field of fire of that tank, I will probably lose another vehicle though!
Things are not looking good...
-
Yeah, I did my first round based on the stuff you posted, checked against what I could find off google. Thanks for that info. Unfortunately estimates seem to vary wildly so it is nice to get another source, especially one which I believe to be a pretty respectable one.
Pity about the challenger info. I suppose I could venture into the realms of wild speculation to get some sort of number up there
. At the end of the day Im not trying to claim any of the information in the guide is accurate! I might have to write a disclaimer or something... -
You know the BMP-1 has an autoloader right?
-
gibsonm - In the end I used that as my prmary source, it seemed to be the most reliable place to get info. I corroborated where I could of course. I had forgotten that it included ammunition penetration levels though. I will have to check that part out again.
I have updated the guide since and I will release a new version soon. I am still short of that information on the enhanced Challenger 2 though.
-
1. If an ATGM hits a building, the occupents are going to be pretty badly hurt. The warhead on a Kornet is the equivilant of 10kg of TNT! If the kornet team were well trained and in cover, they might well be able to get a shot off. I would expect the MG to supress them but the game is unpredictable.
2. It was probably just a fluke - my RPG guys tend to die before they get a shot off! Having said that, an RPG would really ruin your day if it hit you so I would advise trying to concentrate your firepower more to suppress the enemy faster. That would apply to question 1 too. Even western forces are not invulnerable so make sure your troops can support each other quickly, especially in MOUT!
 I must have killed at least 10 or 12 of his guys for the loss of 6 of my own, and now his BMPs are driving into an RPG team I put to cover my back!
 Read below
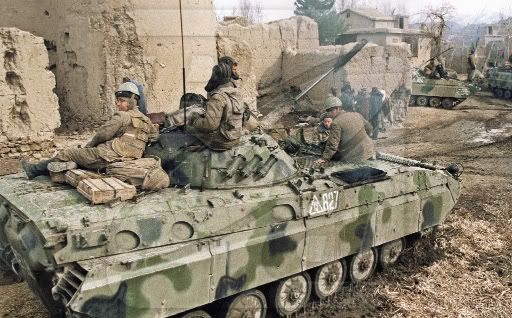

AAR: 3:10 to Yuma (spoilers)
in Combat Mission Shock Force 1
Posted
I enjoyed that a lot - lots of great screenshots!
It must be said that you seem to have played very differently to me. I managed to get all my guys into the compound safely due to the fact that I just put pedal to the metal and didn't hang around.
On the other hand, my cordon around the police station rapidly shrunk as I took a LOT of casualties from RPG teams - how did you avoid that?
Its a fun mission, I might play it again some day!