

birdstrike
-
Posts
1,100 -
Joined
-
Last visited
Posts posted by birdstrike
-
-
Don't know if it will happen, but Claymores would be quite an interesting tool to have. Sort of like an AP equivalent to IEDs.
-
Found this in another thread:
Now, I' curious. Ever since 1.0, I haven't managed to locate any mines using engineers so far, unless the first went off.Originally posted by JP76er:Edited to add: I just need the mine field help on this scenario. Others I have played with engineer squads, I can locate the mines.

JP76er or anyone else who's been sucessful in finding them, would you be so kind as to enlighten me?
Any help would be appreciated.

-
The mod will replace the US uniforms and vehicles.
We will have to wait for the Euro modules to be released before we can do something like a UN vs. US scenario. (personally, I'd like to do something in the lines of "Shattered Union" - if anyone has heard of that short-lived game).
If you really want to have US and UN together in a scenario, you could install only some of the vehicle textures, for example for the UN strykers and leave the M1s and M2s in US camo, but this is not possible for the infantry uniforms. It's either or here.
Or, of course we need a Syria to UN retexture.

-
A small update:
turn 51 now. Town is secured now. I'm combing the mosque for the last few remaining enemies units.
The attack on the mosque was very cool. I like the design of the compound.
I used the SF teams to attack from 3 sides, blasting through the walls. One remarkable situation was when a squad was moving up a stairway when suddenly the first guy was shot by a sniper hiding in the floor above, who in turn got killed by the rest of the squad. Looked almost like in a movie Just a thought, but if you ever want to release a "light" version of the map, I think the attack on the city and the mosque would make for a very cool down-sized scenario.
btw to give an impression of the intensity of the fight, here's an aftermath picture of the road where B CO was ambushed:
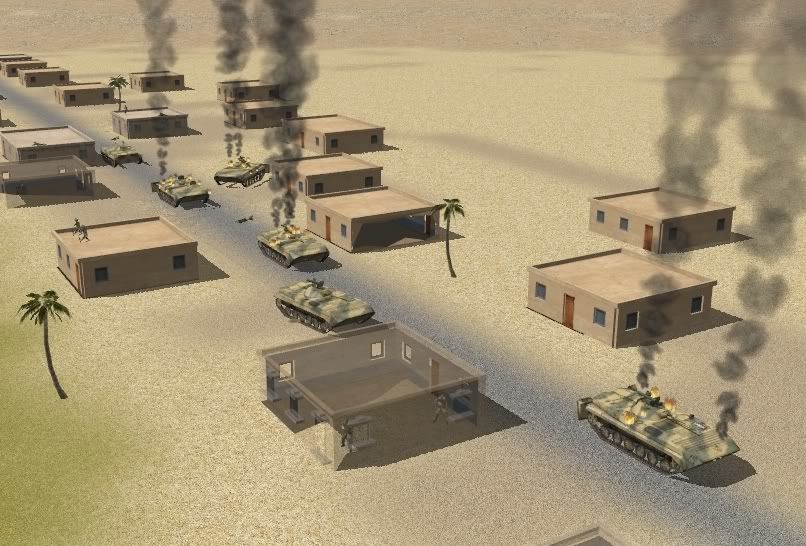
-
Yes, I bet it's a LOS related problem. They don't see the enemy, therefore they won't attack it. Strange thing in my particular case was that my unit (a sniper team) was actually kneeling behind a low wall and still couldn't see beyond it.
I believe the reason for this issue is the new "3 level" LOS routine we got in 1.06.
While it works great in any other case, it has a negative effect on units behind a low wall.
I guess the best thing to solve it would be to have prone units either "peek" over the wall/trench from time to time, or by using an exception to the usual LOS rules to simulate this behavior, for example by enabling them to "look through" the wall if they are right behind it.
We'll see in 1.08 how BF solves it.
-
There's an LOS issue with units behind walls (which should be adressed in the next patch) - maybe this issue also affects units in trenches?
-
-
A small correction: after selecting the movement command, it's a LEFT-click on the vehicle, then a right-click to confirm the order (unless you're left-handed?)
-
I'm now at turn 37 and things are really working out nice now.
--- SPOILERS AHEAD---
.
.
.
.
.
.
.
.
.
.
.
I decided to take a more offensive approach this time and wanted to reduce the downtime caused by the artillery delays. Therefore I used almost all the artillery for pre-planned strikes all over town, except for the mosque and the financial district. Most of it seemed to be rather ineffective, though.
Nevertheless, it caused enough supression that I managed to capture the southern bridge with A Company in only around 15 turns taking only a few losses.
Then I tried to move B CO around the western path directly to the norhtern bridge, but ran right into the ambush along the way. (One of the areas I had not covered by the artillery strike in the beginning). B CO took very high losses, about 2/3 of their BMPs and almost 2 platoons along with it. Enemy fire was incoming from almost everywhere, and I started to hit each anything with as much firepower as I had left.
Since I was not willing to take any further risks, I took the financial district under heavy fire as enemy units showed up. I set up MG posts and a BMP to keep a constant supressive fire on the buildings as I maneuvered the remants of B CO to the northern bridge and continued to push into town with A CO from the south.
(The buildings are still standing but a wall or two are missing, I hope I will not get too much penalty for that in the end.)
It was quite a desperate fight, but I managed to secure the area and could push on to the norhtern bridge, where I lost 2 more BMPs, but took the bridge without many infantry losses.
A CO was able to move north into the financial district without much opposition. (The engineers were quite handy here.) I lost only 1 BMP and a couple of infantry. Having left most of the BMPs and bringing along 2 T-65s helped alot to deal quickly with any opposition.

By turn 30 I had the town more or less under control except for the mosque compound which I'm currently tackling using the Special Forces which have just arrived.
While the SF is attacking the mosuqe, I'm planning to regroup A CO and move them to the southern village while the remants of B CO will secure the city and assist the SF.
Up to now, the scenario plays out very good. I'm confident that a decisive attack will give the player enough time to finish the map. Enemy resistance is quite effective, but not impossible to overcome. The city fighting was intense in some cases, frustrating in others (as it should be
). Close cooperation of infantry and armor paid off which tells me the map works as it should.The east river ambush was an important lesson. At first I thought that there might be too many enemy units there, but I it was exactly as it should be. While it was a disaster and could have probably been avoided by a more careful approach, I was satisfied that despite the costs it gave me a big tactical advantage and helped me to avoid further losses with A CO. And it certainly was a thrilling incident.
-
The ATGM is a Saxhorn, it needs about 1 min to setup and has a minimum range of 40m. It's no Javelin, but it can be useful (and is so much more satisfying
).(EDIT: IIRC you have to deploy the weapon. Maybe that's the reason why it did not setup?)
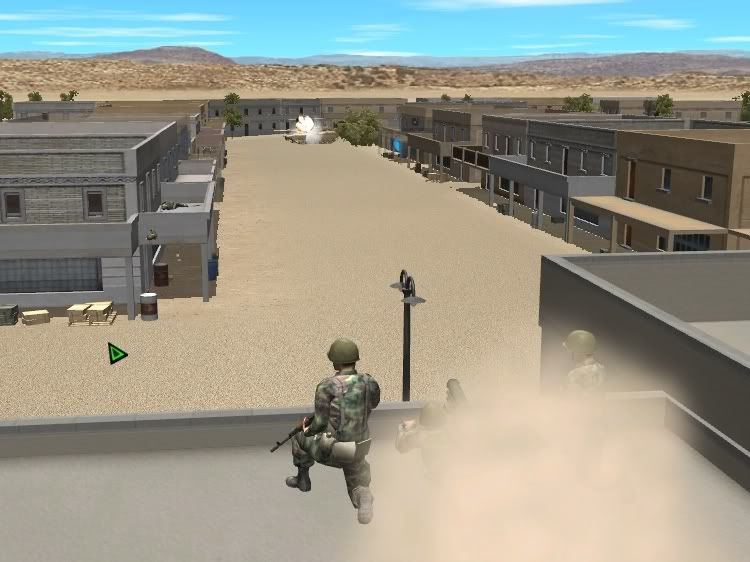
If you check out the lower left picture on the preview above, that's a missile hit.
Here's a larger view:
[ March 20, 2008, 07:10 AM: Message edited by: birdstrike ]
-
Okay, bad timing, I see you already noticed the last two issues yourself.
-
Thanks, looking off the map really helped.
I used to look at an empty spot on the map, but that didn't really increase FPS.
Leaving the 3rd company out possibly also helped. It also makes the things less confusing at the beginning.
Things are going ALOT smoother now. Already reached the southern bridge with 2 BMP losses and a couple of infantry casualties. (I got a little impatient
). I couple of things I noticed:
There suddenly appeared a red bunker in the south west corner of the staging area.
And some UAZ's assigned to Special Forces reinforcements are already on the map (they can drive around with an invisible crew
) -
Yes, that's one of the best kept secrets of this game. Some little enlightenment from BF would come in handy.
-
Thanks.
And before someone asks... sorry, but no horses.
-
I'd say that depends on the woman...Originally posted by JohnO:I disagree with Seabee and birdstrike, its drink first then woman and then eat
-
I had had started WEGO in the previous version, but again, around 30 minutes into the battle, as soon as I reach the city with my first company the game almost comes to a standstill. During turn calculation, the timer skips 5 seconds and during review the units make little jumps instead of moving fluently. I guess it's not so much the graphics than the LOS calculations.
I will try again with the new version. Maybe I can play around with the graphics settings to get this to work.
Adding a second spotter is a good idea. I lost mine and was just thinking "darn, it would be good to have another one around."
Nevertheless, the first 30 minutes played out quite well.
---POSSIBLE SPOILERS---
I took it carefully, using the recon platoon and later the tanks to detect exposed enemy positions and neutralize them (I had quite some time while waiting for the artillery to arrive). I set up ATGM positions on the mountain south of the city to deal with the tanks on the far ridge, which worked quite well (nice placement of the sniper by btw
). -
Cool. I wanted to make a mission with this unit but scrapped it. Really looking forward to this one.
Though I disagree with Seabee, priorities are first women, then eating, drinking, then all the rest.
-
I gave the map a quick test run in RT. But framerate became unplayable after 30 minutes. My poor rig had reached its limit when the city fighting began. Will stick to WEGO now.
But I liked what I've seen so far. Will keep you updated.
Btw. there is a lone UAZ south of the main army in the staging area, you might want to check this.
-
-
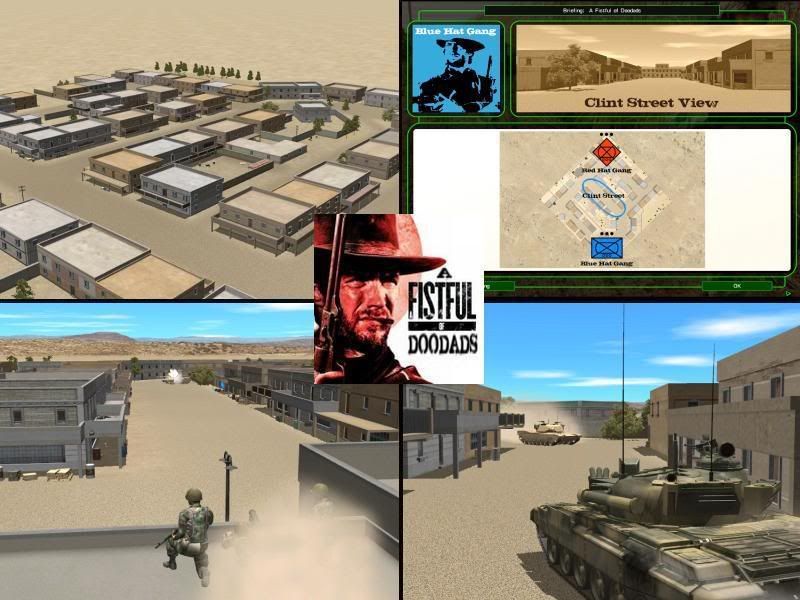
Here's a small meeting engagement "Al Huqf" Style. 2 Player or either side vs. AI. 1 Platoon and 2 AFVs for each side. "Western flavored".
Not for the faint of heart. The scenario can play out very fast and bloody. Lots of balconies and big windows. It's well possible most troops won't survive more than 5 minutes.
So dig out that Ennio Morricone CD and get it at the CM General Store.
-
I'll give it a shot.
The size is perhaps a little intimidating
I'd say put it up for DL. I'm sure more people will try it out once it's available.
-
I don't see this as much of a problem neither. But then again I play exclusively RT, and I see it can be more confusing in WEGO when plotting complex movements with numerous units. Still, maybe better to leave it the way it is and have vehicle-launched missiles get their own fire-command.
-
Thanks for the feedback and the comments on the briefing.
I use the structure of the old CMx1 briefings. So no credit to me.
Actually one of the reasons I put the M1 in originally, was because I got so careless after repeated playtesting, I needed something around in the end to avert a total defeat
The practical use of it really depends on how the fight plays out before. I decided to keep it, if just as a token of appreciation for the player who's come this far.
-
That's some really awesome stuff.
I like the 3rd one from above with the pickup and the dead combatant. It looks quite intense.
And also the the one with the Abrams and the taxi. It looks somewhat gritty. Very nice.
Thanks alot for sharing.


AI plan questions
in Combat Mission Shock Force 1
Posted
Agree that we need more AI groups and a way to force units to setup in buidlings.
Maybe by giving the current settings for the floor a "must setup in building" parameter while adding a new "outside" setting to the existing ones, so to tell the AI when not to use a building?