

metalbrew
-
Posts
310 -
Joined
-
Last visited
Posts posted by metalbrew
-
-
I believe this is slightly wrong. When squad members move ahead of the unit icon, it's true that they cannot spot for the squad unless they are in the same action spot as the unit icon. The enemy however also has no chance to spot the advanced squad members (assuming they're way in front of their unit icon) because the enemy has no LoS to the unit icon.Originally posted by thewood:I still think the problem is that some squad members move way beyond the squad's center and thus move past the corner, or whatever cover they were supposed to stop at. When they do this, they are not allowed to spot for the rest of the squad, but can get killed.
The problem arises that when the unit icon finally gains LoS to the enemy and now the advance squad members are very far away cover and artificially exposed. This often creates the situation that the squad didn't notice the enemy laying 10 feet away, in the open, right around the corner, until they've fatally moved too far past the corner.
This is consistent with the assault command. If you watch this command closely, you'll see the unit icon floats roughly between the two split teams. I've done some testing and seems that the advanced team does no spotting until the rear team begins to move forward (and this makes the unit icon also advance). When the unit icon finally reaches the advanced team's action spot, then they have a chance to see an enemy 10 feet away.
In one comical example, the advance team moved into a building occupied by an enemy squad. The rear team had some weird problems and refused to move (I think it was a bug, they just stayed permanently split from the advanced team). The advanced team stayed in the building for 5 minutes on the same floor right next to the enemy and never spotted them since the unit icon was floating halfway between the teams roughly 20m away.
I believe that until a unit's 'location' is comprised of every action spot it's members occupy (instead of the single action spot the unit icon occupies), this will continue to happen indefinitely.
-
I really don't think this is an issue of trying to spot and failing. I believe the squad has 0% chance to spot until such time that the unit icon (the blue floating icon about these troops) has entered an action square that can "see" the enemy. That's what I was alluding to above, members of a squad can get ahead of their squadmates but this has no effect on spotting.Originally posted by The_Capt:You can see the same thing in CMSF. You have an enemy squad who has a level of cover no doubt broken down into a mathmatical value. This value is checked againt the value of the spotting capability of the friendly squad. Dice are rolled and eventually everyone is spotted.
Units are represented as individual boots and eyeballs, but the game engine doesn't even roll the dice so-to-speak for LoS unless the preconditions for LoS are met. Once the preconditions are met (the unit icons must be in an action square that can see one another) then the game does an addition check to see if individual SPC Johnson can see any of the enemy units. The units are able to spread out across multiple action squares but the only action square that has any bearing on what they spot is the one their unit icon is floating in.
I hope I'm making that clear enough. Individual soldiers only spot once the whole unit has a chance to see the enemy.
-
I played around even more with the same vignette. Instead of mimicking The_Capt's movements, I tried 3 different things. My goal was to find a way to either outright defeat the ambushers or find a more consistent way to break contact. I tried swinging wider around the corner, moving with assault, and stopping short of the corner. Swinging wide and moving with assault didn't change the outcome much, generally both of these techniques on a 4 game average got more of my units killed. Stopping short of the corner was more successful that the original tactic outlined by The_Capt but 1 out of 4 times it still went really bad for the squad. Just like my previous example, I plotted my waypoints, saved the game, and each time through I played with the exact same waypoints and observed how things 4 different times (each time was different). I played Elite WeGo.
Shortstop
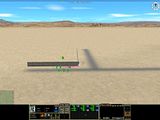
I simply took the exact same waypoints used in Slaughter 1 and 2 and moved the final hunt waypoint back a bit. I felt that this would hopefully still allow the enemy to be spotted but hopefully further from the corner. Units spot better while stationary. This worked the best of what I tried, I still took casualties but 1 really big change happened in all of my tests, when the hunt command canceled the closest action point chosen was always behind the wall. This is what I think really makes the difference, you have to have a way to break initial contact consistently.
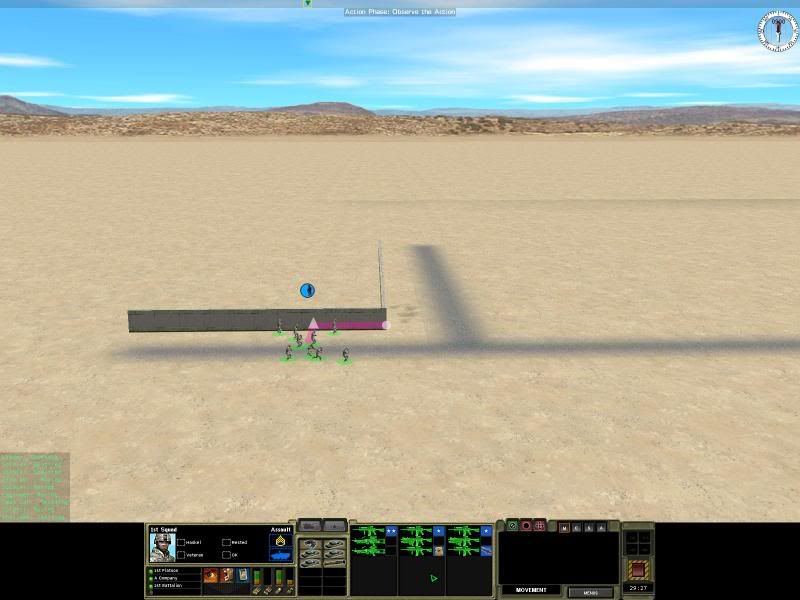
Visible is the shorter movement path with the final waypoint being ~8m from the corner.
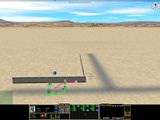
Still no enemy spotted, but hopefully they units will be stopping soon and won't get mowed down.
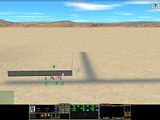
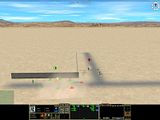
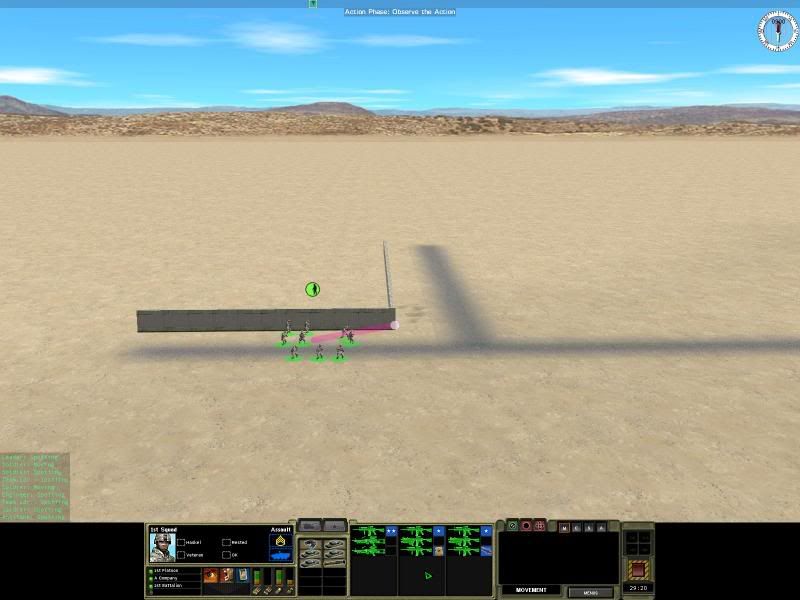
Enemy spotted, hunt canceled automatically, and the fast movement order was placed on the nearest action spot but at least it was behind cover.
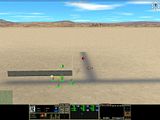
The beginning of turn 2. I supplemented the fast movement order with a quick movement order and the troops withdrew. This is about the best you can expect when guessing where arbitrary action point logic takes the troops.
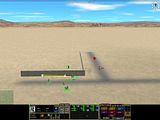
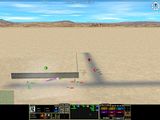
It wasn't all peaches and creme. This was taken right at the point of contact with the shorter waypoint chosen. There were 2 instant casualties, just clack-clack-poof and they were gone. Notice how far forward the units had advanced. I wonder how the exact placement of the waypoint matters in regard to where troops will stop. In this example my guys overran the waypoint by a few meters.
Here's 5 guys down. They were savaged despite having conservative orders that worked well the other 75% of the time.
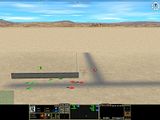
At turn 2, I gave the squad a quick movement order to break contact, instead they canceled the waypoint and laid in the dirt (luckily out of enemy LoS). On turn 3 I issued the same quick movement order and they had regained enough composure to move.
I think stopping short worked better, despite the fatal example. The key point is that by stopping the troops well away from the unsecured open area so I tricked the dubious action square system into picking a more favorable location to rally my squad. If the hunt command didn't incur the penalty of having the arbitrary waypoint assigned to it or if they waypoint given was in cover, this wouldn't be needed. It's not a perfect solution and it's very mission and situation specific. What if the enemy wasn't right at the funnel of the corner? I'm not sure I'd have gotten a spot on them by stopping short. Under game conditions, I guess I take my chances and try to set myself up for breaking towards cover.
Another phenomenon regarding the action square system I'm noticing: All members of a unit (i.e. all soldiers in a squad) only seem to be able to be in 1 action square. If the soldiers in the squad spread out across 2 action squares, I think it's creating really unrealistic LoS conditions because as far as the game is concerned the units are in whatever square the unit icon is in. When the squad is spread across 2 squares, the game initially computes LoS based where ever the unit icon is located. If enemy unit icons have LoS to each other's action squares only then does the game do a calculation to determine what each individual soldier sees. Perhaps sometimes this has favorable results for the player, but I always seem to be crippled by it. In Slaughter 2 there were 3 soldiers ahead of the squad.

I believe these 3 soldiers were in a different action square from the rest of their squadmates (and the unit icon). So even though these units were in a position to see the enemy, the game wouldn't do the LoS calculations until the unit icon was in a square capable of seeing the enemy. I believe this is the true nuts n' bolts behind LoS abstraction as ranted about elsewhere. LoS is abstracted because even though you see 9 pairs of boots, the LoS system is designed around the paradigm that units are only in 1 action square at a time.
How is this game ever going to be viewed as a simulation when 3 pairs of eyes moving cautiously around a corner fail to notice the enemy 10 feet away in the dirt until their unit icon's location catches up to the 3 soldiers? It's so artificial, so contrived, and it ruins the fun and immersion of the game to think about things like invisible action squares.
-
Slaughter 2
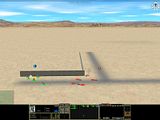
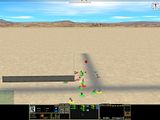
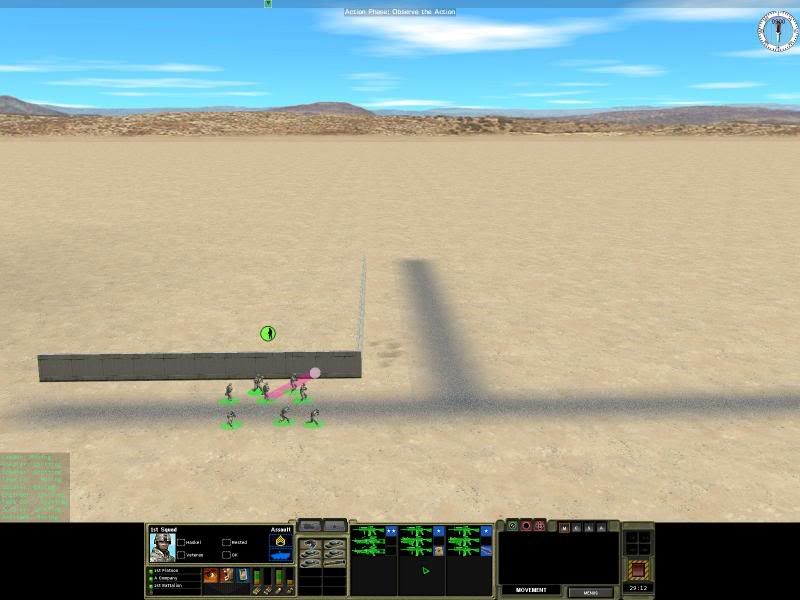
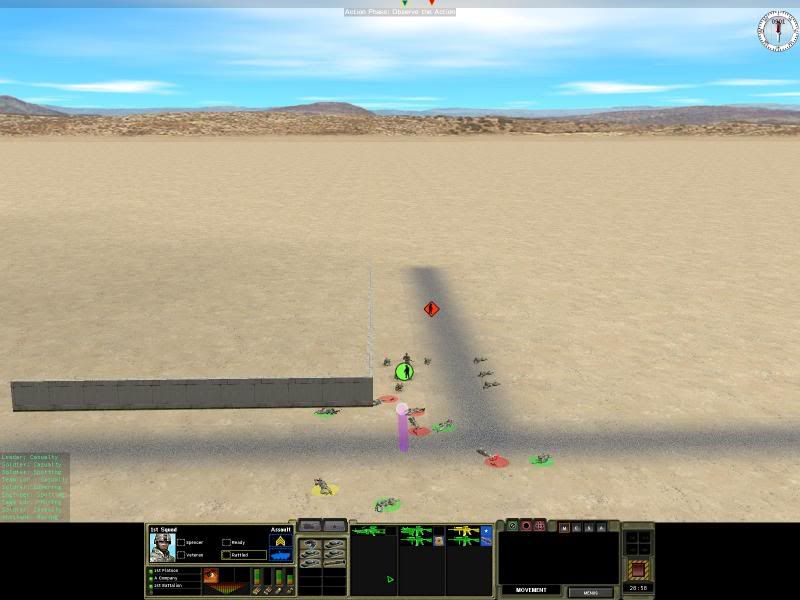
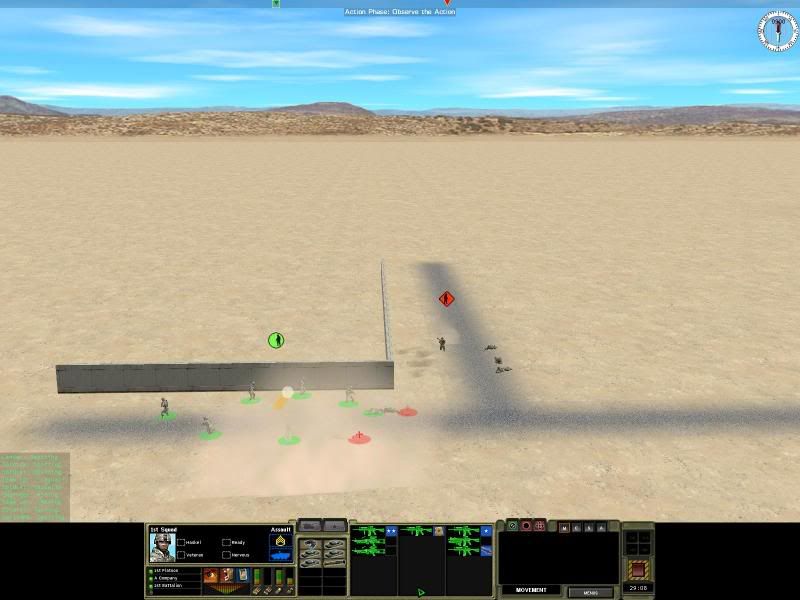
We join the squad after reaching the first hunt waypoint, they're nearing the corner. This one turns out really bad.
Maybe they're safe after all, 3 squad members moving under the hunt command have eyeballs around the corner no enemy to be seen. This is why they joined up, another easy rout in the desert.
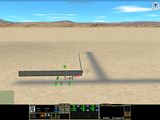
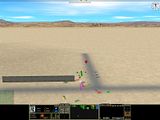
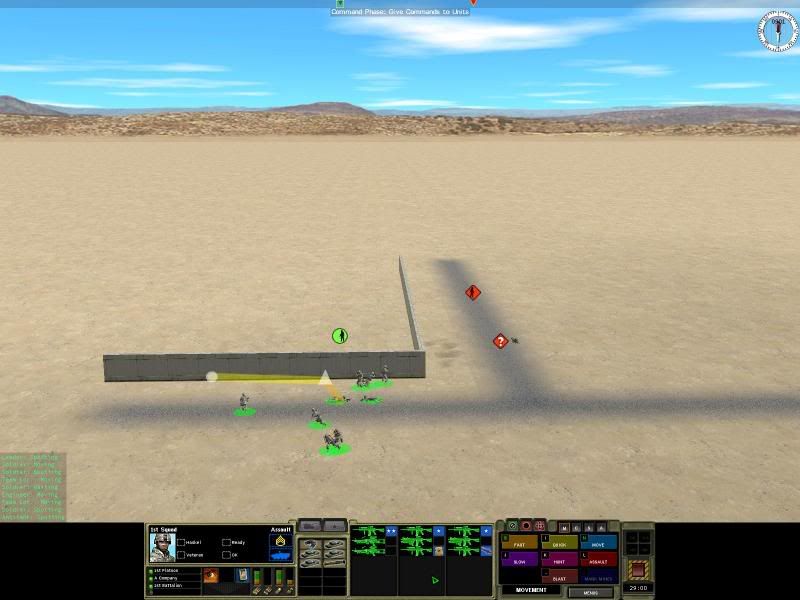
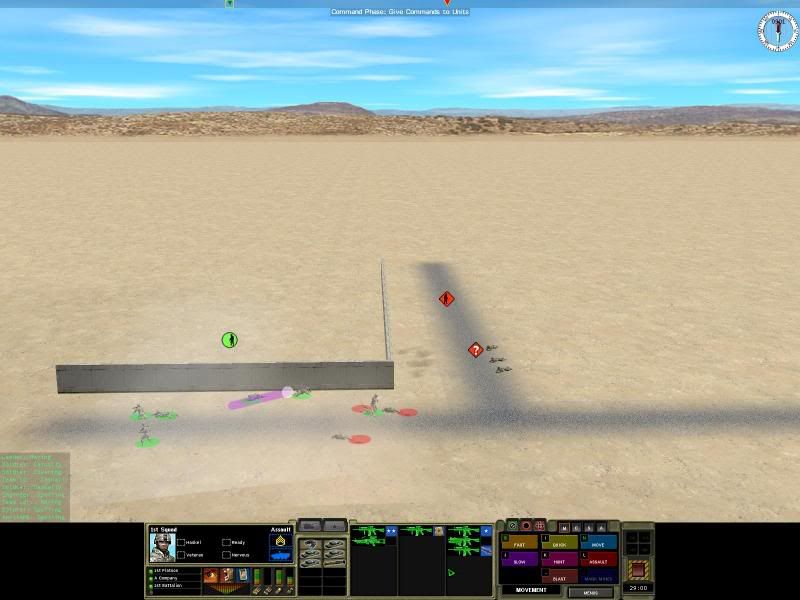
Oh wait, there's the enemy squad, laying in plain view in the dirt. Sheesh, Specialist Johnson, if we live through this you're never going on point again. You are clearly blind. Taking fire, 2 casualties taken and some wounded. Take note of where the quick waypoint is located. It's on the closest action square closer to the enemy and not behind any cover.
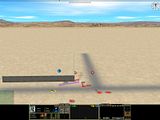
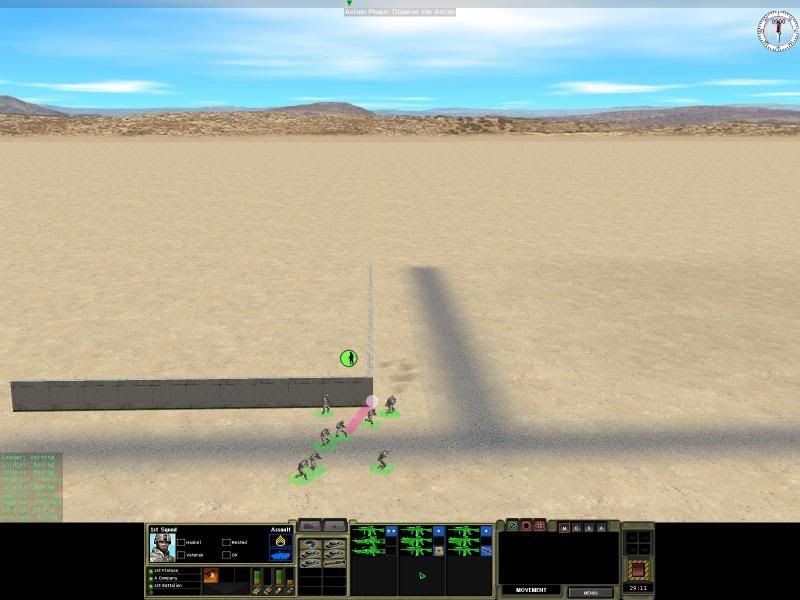
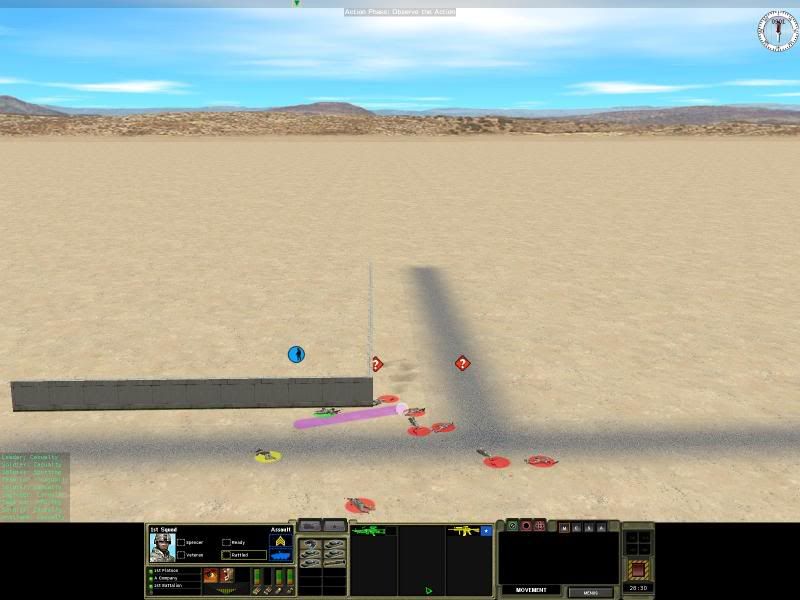
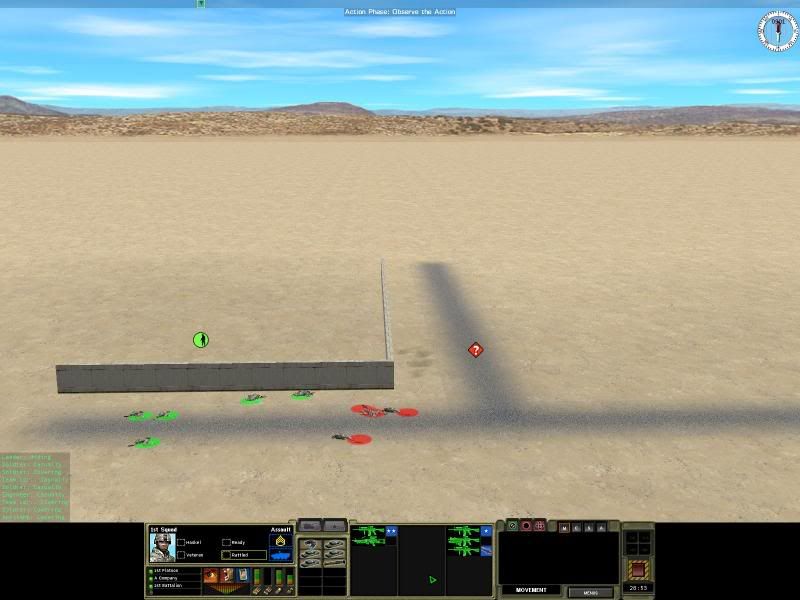
Awe crap, we are so screwed. Mom is going to get the telegram. There are 4 casualties and wounded. The waypoint has changed to slow movement and they're on their way toward death assuming the exertion of crawling doesn't kill them first.
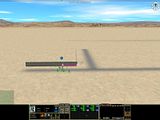
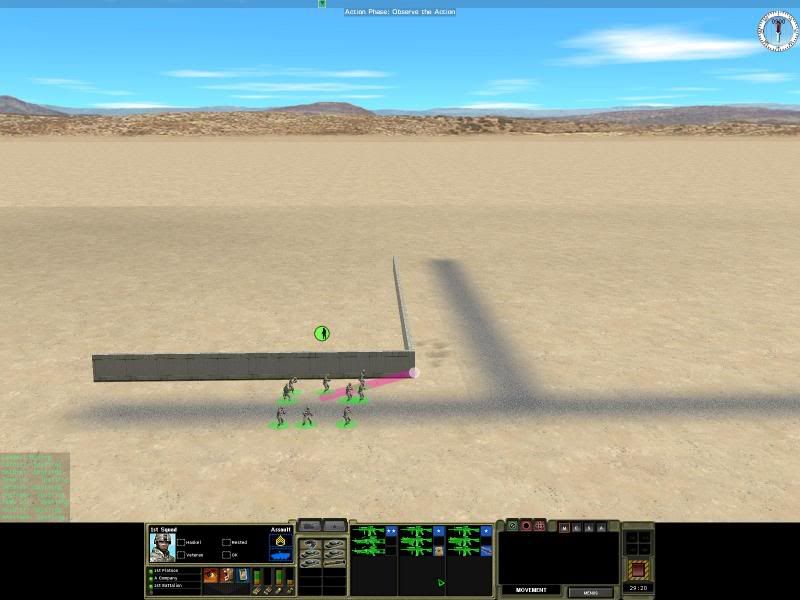
On turn 2 the remaining 2 soldiers broke contact. There were 7 casualties and wounded. Although the slow waypoint still directed the survivors towards the enemy, they chose to crawl in the opposite direction. The waypoint doesn't always indicate what direction the squad will travel, especially when shaken. This squad was wiped out.
Aftermath
Sorry for being such a smartass, I got a little carried away as I'm wont to do. I'm disappointed that at many times, the action square aspect of engine results in coinflip or diceroll for survival. Perhaps once the game can be reskinned with a ground mod will be available to highlight the center of action squares, at very least it would help a player judge where their monkeys are going to favor moving when movement commands are canceled. It seems stopping in place just isn't an option, the units persevere to reach these artificial points on the map above all else. Better still would be smarter cover choices based on the tactical environment.
-
Corners
I played through this vignette 4 times. Of the 4 times, 2 times played similar to The_Capt's example. The other 2 times the squad was slaughtered to various degrees. I didn't preserve my screencaps from the successes, they pretty much looked like The_Capt's.
Before I get into the slaughters, I have a gripe about the 2 successes I witnessed. When the units break contact while moving under the hunt command, they're not really breaking contact. That is to say, they are not moving away from the enemy with a purpose. What I'm observing is what many people have observed when canceling a movement order, the game assigns a waypoint to the nearest action square. Now, if the nearest action square is behind cover you could call that breaking contact. What it equally likely is that the nearest action square is closer to the enemy and the friendlies will move towards the enemy and (possibly) further into the open. I still do not see the behavior I think any trained squad would try to execute under fire. What I believe I'm seeing is a coinflip or a dice roll, skill and knowledge of the game cannot overcome some of the TacAI weaknesses.
Onto the slaughters. To quote 007, "Strict rules of golf, Goldfinger". I played Elite WeGo and if given the chance at the end of the turn I tried to save my troops by breaking contact behind the wall.
Slaughter 1
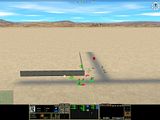
The squad is almost through it's first hunt waypoint, no enemy spotted and no fire taken.
Still plugging along, nothing spotted no fire taken.
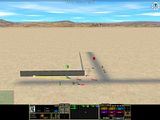
OK, the action begins. They've taken an RPG hit and RPK fire. Visible is the hunt command has canceled and a quick move waypoint has been created to the nearest action point.
The squad continues to receive fire after failing to react quickly to the enemy. The waypoint has now switched to slow movement, which will result in the crawl of death.
This is the aftermath, 15 seconds left in turn 2. There are 4 casualties and the squad is more or less useless for the next 10 minutes while they recover and regroup. Even after regrouping, losing 4 of 9 member is a huge blow. I don't believe a single enemy was wounded or killed.
-
First, I didn't see any link to your scenario or I'd run this drill myself.Originally posted by The_Capt:I just ran through the same scenario using WEGO and the L-hunt system above, same waypoints et al. My troops spotted the enemy and pulled back to cover getting only one slightly wounded in the process.
Second, while playing WeGo, when your troops rounded the corner how many seconds of gametime elapsed until the end of the turn? I think the amount of autonomous time is critical given the current TacAI, you must minimize the time your troops think (or lack of think) for themselves.
If you contrive an example where the troops round the corner in the first 5 seconds of the turn, and they engage in 55 seconds of fighting before you can pull them back, they will fair much worse. This is main due to a stationary ambusher firing at the moving troops who won't defend themselves until they've made the TacAI decision to stop.
-
These tactics are contingent on breaking initial contact. The TacAI is way too braindead to survive 60 seconds during WeGo play.
There is no form of movement that will drop or seek cover when needed. Hunt does not do this. Every other form of movement is 100% fatal if you make contact with the enemy while between waypoints.
Troops need to be given waypoints every 10-15m if you want them to move and survive in WeGo play, because troops pause at each waypoint and will return fire while stationary. It's a crutch to do this and I don't particularly like it, but it's better than 100% death while moving during WeGo. Assault is worthless in MOUT because the overwatch team lags 50m behind the lead force and rarely can influence the fight because they don't have the angle. Another useful trick is to do you best to plan movements so you just begin to enter the open area with 5-10 seconds left in the turn, this allows the player to manually break contact on the next orders phase.
So again, the above tactic may work while playing realtime play, but playing WeGo your squad will die 9/10 coming around the corner because you're not able to command them to break contact. If you use lots of waypoints near the corner you're likely to get spot while stationary and return fire (even then you're in a fair fight and who wants a fair fight?). If you time the moment you come around the corner to fall around 50-55 seconds into a turn, you may be able to break contact with your next orders phase.
It would be great if assault behavior changed to 5-10m bounding movements or hunt worked properly. I'd go as far as to say hunt should behave like CMx1 and CM:SF needs a move to contact command added (which is what hunt is currently).
-
I could perhaps see this having bearing. I was moving across flat hard ground offroad with a 'fast' move order. I realize that even though ground is flat and hard the ride isn't road-like but hey, the Stryker is an 8 wheeled offroad vehicle.Originally posted by birdstrike:But I think I remember BF saying the quality of the ride would somehow be considered for mounted troops. Not sure if that was meant by that.
Couldn't be, not in this situation. No LoS to the enemy (other side of map with a city blocking) and no enemy marksmen on the map.Originally posted by birdstrike:You sure it wasn't a sniper picking off your airguards? (is that what these two guys riding unbuttoned in the back are called?)
-
I was playing Al Hawl as the US forces and was driving pretty fast across the open areas near the setup zone. I noticed that a few of the units riding in my Strykers went to yellow health status. These Strykers didn't come under fire. There was no smoke popped near these vehicles either.
The only thing that makes sense is they were tossed around during rough driving. But I don't want to guess what might have caused this. Why did these unit's (3 or so out of a company) health turn to yellow?
-
My take on this is to just be honest with the player and don't worry so much about the immersion. I'd rather know via the briefing what the victory condition are than having to load up every scenario into the editor to check for myself. Many (many!) scenarios have poorly written briefings that play on the author's vanity but do very little to help the player know what they need to accomplish (the ridiculous phaseline Cowboys, Steelers, Raiders battle in the campaign comes to mind). Nothing wrecks immersion more than unclear goals or breaking out to the editor to see what's required.Originally posted by George Mc:So any suggestions how the designer can get around this and still give the player an idea of what constartints they are in but maintain that immersion factor?
While the soapbox will still support me, I'd also like to ask that if a battle penalizes me for ammo consumption at least do me the favor of an explanation. For example: "In addition to taking the objectives you must be prepared to defend the possession for several hours while awaiting resupply. Failure to preserve adequate ammo levels to fight off a counterattack puts this operation in jeopardy. If your forces ammo levels drop to 15% you will be ordered to withdraw rather than risk being overrun."
-
Are we solely talking about playing against the AI?
Against the AI it's best to put all 3 Bradleys into warp speed towards the left side of the map. There's a small shelf on that side with perfect cover. There is no place on the right hand side that cannot be fired upon by the left AT-4C.
During setup I grab the Javelins and disembark all troops. On the first turn I leave my infantry stationary. Whether you can race all 3 Bradleys to the left side quickly enough is a coin flip. Usually 1 Bradley will get hit and the infantry will suppress and kill the AT-4Cs. Then move all infantry to the left killing any enemy infantry as you go with Javelin strikes.
With infantry, work your way up the left hill while killing the 73mm on the right side as you go. Crest the hill and kill the left side 73mm.
Pull all infantry to safety and roll the Bradleys forward killing the remaining infantry and machine guns. I've finished the map against the AI with no casualties although I think the map is somewhat of a gimmick since regardless of skill you can't really guarantee all 3 Bradleys will survive. I guess that's red's saving grace really - it can usually count on 1 Bradley kill unless they have really bad luck.
If red can achieve 1 Bradley kill and cause 30% casualties then they can eek out a minor win/defeat. Blue has 23 men, red only has to kill 7 men to get 300 points. The Bradley kill is worth 300 as well. This is a scenario that would really shine if their were exit zones. Red should win if they kill 7 men and knock out a Bradley assuming they could exit. This is a letter perfect hit and run opportunity. As it stands, red must stand and fight and it's not a very tough scenario once you've played it a few times.
Against a human, the red force is better off putting all of their eggs into one basket on red's left side. Fight a reverse slope defense on the rocky area. There's a small divot on red's back right hand corner that you can hide an AT-4C team in. If you begin to get flanked by infantry, give a manual targeting order with the AT-4Cs and that will immolate the would be flankers. Good luck, I think red is destined to lose the fight against a human with a bit of knowledge of this map. Even a strong red defender really only has 1 place to fight an effective defense.
-
Are you doing all of your troubleshooting and support for an older ForceWare version? I believe 162.18 is the current non-beta version.Originally posted by Battlefront.com:Here is the set we're interested to hear about:
Driver version: 7.15.11.5818 (April 12, 2007)
ForceWare version: 158.18
-
This isn't always true. I often find that while selecting an enemy unit I don't always have LoS to this enemy from my own highlighted units. What I believe is actually happening is by clicking on the enemy unit I'm able to see which of my own troops the enemy has LoS to. If my guess is good then that's a bug.Originally posted by sgtgoody (esq):If you click on the enemy icon all of your units that can see it will be highlighted. I just realized this the other night.
-
HEAT and HE are different rounds. Firing HE at Strykers would have a fair chance of damaging it (with an eventual kill) while HEAT would be a very quick kill.
-
I believe 162.18 is the current non-beta driver. Why the older driver?Originally posted by Battlefront.com:ForceWare version: 158.18
-
That's just a theory at this point. If I feel the need to grab Javelins I grab them and split off my AT team. The AT team of 2 men is able to carry their normal combat load plus the addition 92 pounds of Javelin (CLU plus 3x tubes) and run as well as the standard infantry without tiring. Each AT member must be carrying 90 pound loads at that point.Originally posted by Darkmath:I've read from BFC that a unit with extra ammo/ or Javelin would tire faster.
The game info says this shouldn't work well but it does.
-
-
You can see all your troops in Elite mode, not sure why you're concerned about that in particular. You see all your troops, but the troops themselves don't know where each other are unless they spot them. This means friendly fire can happen.
Also in Elite you get less information about the enemy once you've spotted them. The artillery arrival times are longer as well.
There's an opponent finder forum on this site. My email is in my profile if you'd like to start a game.
-
Since the Syrian artillery is now restricted to FO units only, the scenario is a bit broken. As least until ParaBellum has a chance to add some FOs and test it a bit.
If you're playing v1.03 I'd hold off on Wadi al Bugger until the FOs are added.
-
Hi Para, is it finished yet?
-
A lot of the scenarios included with CM:SF are now slightly broken now though. Allah's Fist comes to mind. There's 3 Syrian 120mm mortar missions that can't be called down by any of the on map units because none are FOs. I agree with restricting the artillery control due to Syrian training procedures, but I'd like to see BFC update their included and supported scenarios so that they function fully.Originally posted by Battlefront.com:Correct. The ability for non Syrian FO units to call in artillery fire was a bug. They use the old Soviet centralized system and nobody gets the sort of training necessary to call in fire excepted for the specialized FOs. So combine restrictive doctrine, with limited training, and poor C2... you get pretty limited artillery usage.
Scenario authors can fix this by including FOs in their scenarios.
Can BFC look through the scenarios included with the game and rework (add some FOs as needed) the affected ones so that the Syrians are able to call in arty? Perhaps in a future patch?
-
Most folks were aware of your reported problem in v1.02. It seems that some people are still experiencing this in v1.03.Originally posted by IsleOfMule:I've had that problem, but in a different situation, with 1.02, see http://www.battlefront.com/discuss/ultimatebb.php?ubb=get_topic;f=70;t=000334
Do you have a pause order pending on your stryker ?
-
Firing the 12.7mm has a good chance of killing an exposed tank commander. Smoke wouldn't activate quick enough to do any good and many times firing smoke self-kills the vehicle anyway (bug). Moving out of LoS is the only real chance for the Stryker. I think the behavior to fire at the T72 is correct and I also believe as time passes the self-preservation will improve to include retreating vehicles against unbeatable threats.
I don't think you've picked a good example for a "hold fire" order.
-
So the only Syrian units that can call in artillery are FOs now? That's going to break some of the battles (Chechen village and Wadi al Bugger come to mind) that's I've enjoyed.
Since I'm midway through some PBEM games I'm holding off applying the patch. If anyone has feedback on Syrian arty, please share so I know what to expect.


Surviving Urban Ops #1- long post
in CMSF Strategy and Tactics Forum
Posted
Double post