

LemuelG
-
Posts
327 -
Joined
-
Last visited
Posts posted by LemuelG
-
-
This might be good against the AI, But against any real human with some sence, that building will be area fired on as long as he is moving units towards it and until someone clears it.
You claimed hiding was no good (not due to the actions of another human, but the UnitAI), but it is. An intelligent player using suppressive fire against you has nowt to do with it.
You're just as wrong about buildings offering no protection, they do - some good (modular types), some horrid (barn types). None will save you from an enemy with fire-superiority.
-
Also, I believe Hiding is a waste of time. Troops in structures disclose their location by firing.
I have experienced it differently - I've got a scenario in which there are some Germans holding a two-story modular - inevitably they get pushed out of it by heavy fire, then I have them crawl back in from an unseen approach and 'hide' on arrival, it works - they can get in undetected and lace-up any ammo and weapons from the casualties and set up another ambush. I'll filter teams into position, 'slow' 'hiding', until I have a good amount set-up then they get un-hidden all at once when I want to open-fire.
-
Did you switch to the alternate setup? I found 'relative' unintuitive and foreign. I suppose it might work better for RT players, but that's not me.
Michael
Yes! Definately, 100x yes. It took all of five minutes of play - I could have clawed my own eyes out, I couldn't believe what I was seeing... my supposedly 'hunting' tank regurgitating it's crew into the teeth of an HMG. Worst idea ever; seriously!
Whoever has that one on their conscience owes themselves a slap on the wrist. Testers should have put their feet down... surely no-one out there thought that was a good default setup?
I will admit that there are a few occasions when I sorely miss the basic levels of polish which have been neglected here - little things - when I'm in the editor naming some guys, I assumed that I could maneuver my cursor inside the display with the arrow keys - like every other modern application in existence; wrongo (and no, it's not hard to code at all, this is laziness). You choose a scenario, instead of quickly loading the briefing and giving you an 'out' to the title-screen if you choose not to play, it loads the whole shebang, it takes minutes, and there's no way to change your mind.
There's definately room to improve usability, my gripes have ZERO to do with gameplay though (unless you're stuck with 'relative' keys and accidentally dismount all your tanks).
-
The 'relative' hotkeys are all kinds of suck.
Otherwise fine.
-
I can't help but agree quite strongly with the general sentiment - I played this hot-seat with my (noob) flatmate and gave him Ami 'cause I thought they'd have more guys and firepower - I almost felt ashamed at the hiding he got, I definately felt like I got dealt all the cards.
The German is basically handed 100% of the objectives from the start; the American is given parity, next-to-no support and asked to assault across the river, in the dark, into the teeth of hull-down Panthers and StuG - it's quite impossible against a competent player. Had I known I certainly would've played US.
I actually thought it was a bit crooked - and then one of my StuGs blew-away a Honey while it (my StuG) was fast-moving across a field, and that was the last straw

-
Just a thought on the scenario design, since I always greatly prefer historical ones...
How about just picking one several-hour slice of the real battles over the causeway, and making that the scenario? It might be more manageable than trying to either create the whole massive multi-day thing, or distorting the forces and situation so much that it becomes a fictional battle on a historical map.
I know what you mean... I have thought over it, and decided on 'semi-historical'.
The reality is a four-hour battle with 500 paras vs. no more than 50 Germans... it's barely worth playing as US, and 100% un-winnable as the Germans - to me, that is hardly even worth loading up, let alone spending my free time creating.
If and when I make a 3-day campaign for A co. and their defence of the bridge then there will be an uncompromisingly historical version - the battle for the manoire takes on new meaning when the US player must keep in mind his ability to defend the bridge later on - in that context woefully inadequate defences are less fatal to the fun, but in a stand-alone scenario it renders the whole exercise boring.
This scenario is a throwback to the knock-down, drag-out head-to-head RT battles of Close Combat I used to love to play so much, I want it to be like that - the Merderet will flow red.
This is not to say I've disregarded the historiography - just massaged it a bit. Maybe it is folly - but I'd rather people played it and said "that was fun" than "that was an interesting history lesson". For what it's worth, it would be quite hard to prove there weren't that many Germans there that morning

-
Here's a view up the causeway:

I agonized over this, the road is raised slightly so anyone using it is clearly visible above the low bocage - it's purpose is to create small 'ditches' for the cowerers to crawl into; there are patches of bocage+tree serving to break up LOS and provide some modest protection from grazing fire - the road is a death-trap, to be sure.
Here's what I've got for the western side of the flood-plain:

Landmarks of interest are highlighted. It's in a 'pre-alpha' state, unfinished - but that's pretty much everything you could need for any La Fiere scenario, and a few more. In the north of the flooded region you can see the rail embankment, from here a slightly submerged road runs to Timmes' orchard:

I'd like to do another D-Day scenario here, once I figure out just what went on. Hill 30 is another location of interest to me.
I still can't help but tinker with the Manoire De La Fiere scenario every time I open it up, but it's more-or-less in 'beta' state. Needs a bit more play, I'll do a little bit more tinkering and put it on MegaUpload for anyone who wants to try it. I'd really like some feedback on reasonable victory conditions.
I want to be clear - this is not exactly a historical scenario, this idea was scotched early on as terminally dull - too many paras, too few Germans, too long - this is after all, a game. I have endeavored to replicate the tactical situation that did exist though. I'd like to have a historical version - but in a campaign which also covers the defence of the causeway over the next couple of days.
So, there are more Germans (if they had the guys to lose several hundreds trying to re-take the bridge in the next couple of days, they had the guys to defend the bridge properly in the first place - this bungling sealed the fate of the Cotentin), there is a full company supported by part of an HMG platoon; there are less Americans (there are still roving pick-up bands of paras entering the fray alongside A co., but they are greatly limited); the time-frame is compressed to 70 minutes (this gives a chance for a reasonably careful and co-ordinated American approach, without being too long for the Germans). At one point, the Germans had mortars - but this wasn't a part of the tactical reality of the situation, so they're out. The paras consist of A co. (it's platoons are bought up to 3-squads each by adding some squads from the non-existant B co. to the roster, it's ugly - but I will have 3-squads per platoon, no guff), elements of C co., most of 1/505 HQ co. will show up at some point, some 507 troopers under captain Shwartzwelder, and a platoon of engineers with a 57mm AT gun; it's a lot of guys, and co-ordinating your assets is, appropriately, a big hassle for the American player.
The aim is for the scenario to be playable any way you want, there's only one AI plan each side; ideally I'd say play it real-time head-to-head, US side has an advantage in WeGo in more easily being able to co-ordinate himself, Germans may have seconds to react to mortaring and will suffer if they can't displace their guys immediately.
-
I wanna thank everyone for their gracious compliments - I put lots of effort into this, and for my rookie map I'm satisfied with the results so far.
This scenario will be centered on A co. 1/505 and their attack on the manor on the morning of D-Day, extending the map to the western edge of the swamp to Cauquigny isn't necessary.
I'm still debating internally about whether I should go ahead and stage the German cross-causeway counters with P.IVs instead of waiting for some French tanks which may never come; I'm not sure it would matter too much, maybe there'll just be less of them.

A view of the manor orchards - the topography around there is plain crazy, I've done my best; modest dirt-tracks in reality have become fully-fledged roads in my map, I felt their tactical importance warranted it.

The manor building, from the rear - as you can see it's a combo of three different buildings - I agonized over this endlessly... how to properly represent this building?:
In the end, I've got something I'm happy with - the buildings are all connected, there is an attic and a walled-in basement only accessible from inside; in reality the paras had to use bazookas and shoot up at the Germans inside through the floorboards, and that's more-or-less how it works in-game with this set-up. Opinions welcome - have I been too free with my design of the manor?

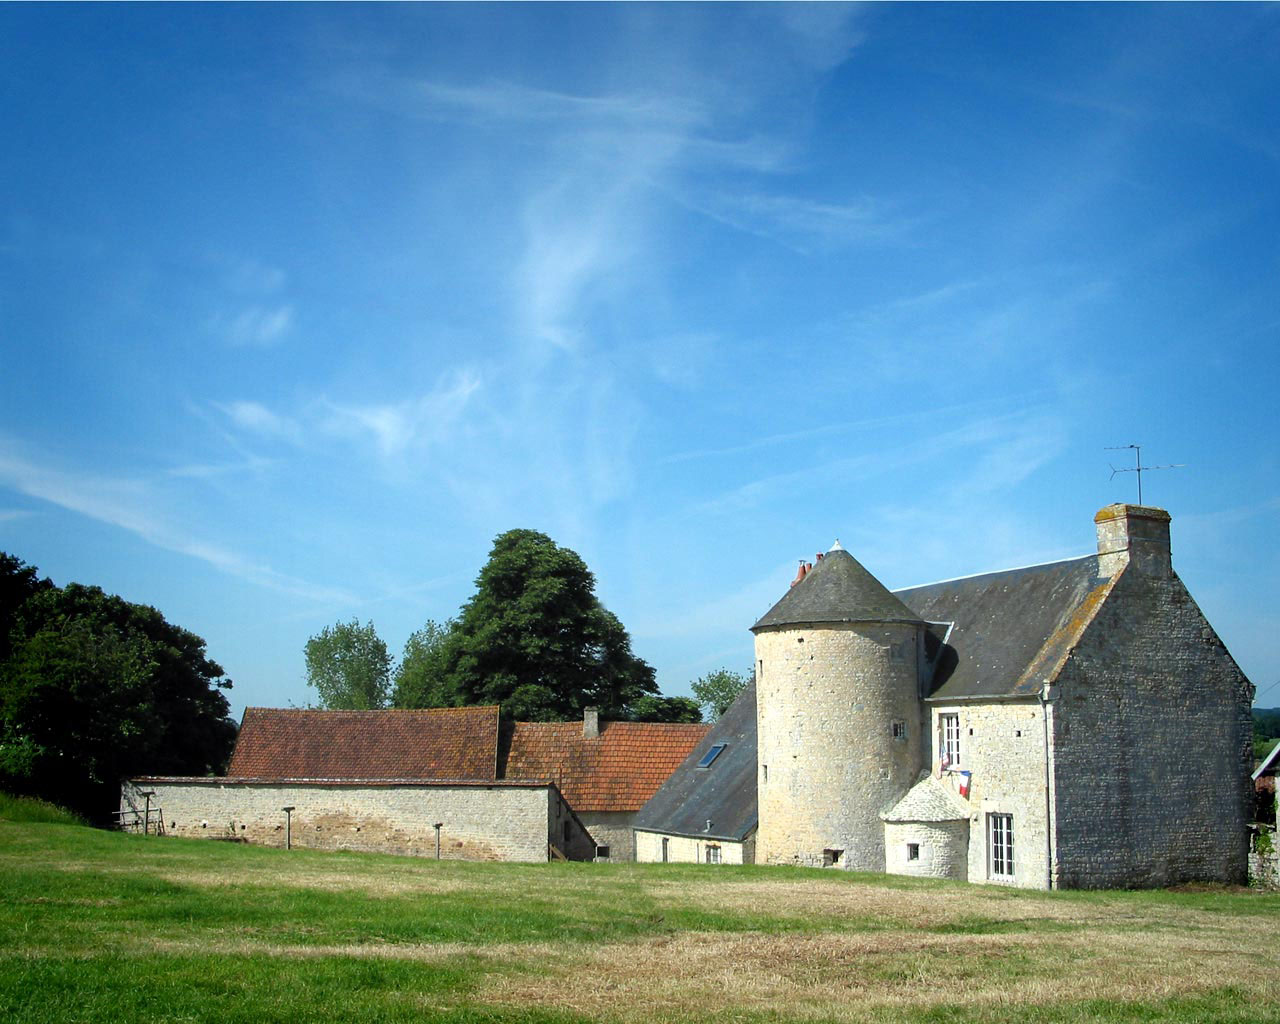
From the front. The wall in the bottom left of the screen is the famous wall behind which the glidermen launched their June 9th assault across the causeway. By that stage German howitzers had stoved-in the front of the manor completely.
I have design-philosophy issues - I'm worried that as a stand-alone battle there is not enough incentive for the US side to be careful with it's forces (you don't have to worry about beating-off several battalion-sized attacks over the causeway in the next few days) and that the Germans do not have adequate forces to defend themselves properly - in reality they didn't manage to get any battalion-level support into the fray until late afternoon on D-Day, well after the time-frame available to this battle.
I'm sorely tempted to just throw uncompromising historical accuracy to the wind and assume the Germans were competent enough to adequately defend such a vital location, they lost hundreds of guys and most of their strength in tanks in the area trying to recapture it in the next few days. A weapons company in support of the defenders could have made a dramatic difference; exact numbers of Germans at the bridge are uncertain, but I estimate no more than a very weak rifle company (60-70 guys max). No German officers were captured or found among the dead, so they either escaped somehow or were never there. There were at least two HMGs positioned on the causeway behind the bridge.
Anyway, it's more-or-less ready to go, there is an AI plan for the US which beats a static defence every time, so hopefully it's pretty playable as either side, or even head-to-head... in fact it's my desire for a decent head-to-head battle which drives me to give the Germans some (very limited) mortars.
I'll get something ready and release for testing to anyone who cares to play.
-
Hey - it's not out yet! Actually I'm loathe to release it 'officially' without the proper para OOB I successfully lobbied for earlier on; I also have a much bigger master-map which stretches from La Fiere to the outskirts of Amfreville - it includes Le Motey, Les Heutes, Timmes' Orchard and Chateau de Amfreville (Grey castle); I've even mapped a large area of swamp and the rail embankment crossing it toward the north - so I can do the night-time attack over the sunken road by the glidermen.
Do you find that the units handle the pathfinding OK over the bridge/causeway and through the flooded areas (except of course the river itself)?Sure, if I learned anything about this experience it's that pathfinding in this game is terrific: http://www.youtube.com/watch?v=-qj9u2JWOE4
A little video I made of an AI jeep because it really amused and pleased me for some reason - i.e. it was incredibly competent.
But back to your question - even when the river is only deep-ford, troops still go to extreme lengths to use the road and bridge - this is from testing on the large map, and guys asked to travel from one side to the other; they can be encouraged to enter the swamp when there is a road tile underneath the water - which there is often was in reality; if they taking a lot of heat, particularly on the causeway they don't mind bugging-out into the water - and hilariously, when they lie down they are totally submerged. And if they are ordered into the swamp, they'll do it - it's slow and tiring stuff though, and everyone can see you.
-
This is the first campaign that I chose to play. Is it just my bad luck that I chose the most difficult and frustrating campaign, or are they all this way?
I didn't progress past the first mission and started Montbourg, no regrets - it was a blast.
I'm thinking of starting this lot again; fortunately I have a horrific short-term memory, so all the spoilers go in one ear and out the other, err kinda.
-
You will note that in these tests, all were done in single shot mode.
That's why I first gave the figures I found from full-auto bursts, recorded by the military, during the war; when someone expressed skepticism I used those pre-war manufacturer's figures to show what comes from a rest test, and how superior the groupings were when not fired in auto-bursts.
-

Looking down the hill, past the bridge. About 50m up the road to your right, lies general Gavin's foxhole, still there today.
You share the view of the engineers who manned the 57mm gun positioned there; there is a gentle bend just after the bridge on the causeway, but in this 45-degree angled world we play it is just an ugly kink to limit the view of those on the hill down the causeway.

A view of the swamp on the southern side of the manor, troops can ford it, but the route the river runs is still impassable. I discovered a single marsh-tile planted in shallow/deep ford displays just as some swamp-grass poking out of the water (so awesome!); hopefully one can follow the river by lack of grasses in the water where it runs.
I have to cut this short, but I'll return with pics of what I did with the manor building itself (in the absence of having a whopping castle's-tower stuck onto it's rear).
Some reading I did:
The definitive account of the battle, from someone present.
Fascinating unit-history of the 505PIR, tasked with taking St Mere Eglise and the Merderet crossings on D-Day.
That one's different - the account of a French girl who lived on the edge of the flooded area. The book gave the whole battle and area a totally new dimension to me, more personal and intimate - you'd either like it or not, I guess.
-

La Fiere bridge and manor - note: for complex reasons the map has been rotated somewhat, the top of the map is more like north-east in reality - the master-map is about ten times as big and there was only one way I was gonna fit it all in the way I wanted without wasting space.

From on-high, I couldn't resist a Close Combat-like landmark on the road leading off the map.
Compare it to a aerial photo taken in '47:

It was a weird format and the program I re-sized it with left a whopping watermark - but I hope you can see the resemblance. For shame, I can't remember how I got that photo - someone on the forum made a sweet thread with step-by-step directions (little help?).

Looking at the bridge and manor complex from the north (east). The building nearest the bridge today is a B&B - it was my good fortune that the road leading past the manor and over the bridge is covered by Google Street - go have a look around: http://maps.google.co.nz/maps/place?cid=6397615695765638423&q=la+fiere&hl=en&ved=0CBwQ-gswAA&sa=X&ei=FPM_TvLJNvCKmQWHve33AQ&sig2=LfHCddhfecuMyGPNrelshw
It's much like it was then, except with fewer orchards.

Looking up the hill, in the direction of the beaches. Today on that hill-side field stands the Iron Mike statue, with a marvelous view of almost the whole Merderet valley.
-
I wonder what the criterion is, I don't profess to know well exactly what these weapons are capable of, that's why I hit the books - I guess it's possible not much thought went into the 'effective range' numbers. I don't like the idea of my guys not shooting at targets because they're kinda far away - have a crack, that's why I moved you there.
Where's Steve?
Is he on holiday or something?
-
Sounds suspiciously like a scenario
-
But if it's a team armed with mostly or exclusively MP40s, and an enemy has spotted them and taken them under fire at 250m, then ideally they should be more inclined to shoot back, even if it's difficult to get the rounds on-target at that range, since the alternative is not shooting back at all.
That's right... personally I don't much care what they do, as long as they shoot at targets to the best of their ability, if he's 300m away, might as well shoot - even if they don't die it'll add to suppression, and the faster the enemy is suppressed the faster they can be out-maneuvered and destroyed (or the faster one can withdraw in safety).
I think, maybe a good solution would be implementation of a status-toggle, for SMG-ers at least: 'suppress' or 'effect'. Occasionally you need to pour it on, sometimes you want to keep your powder dry.
-
Fortunately, neither of the above figures seems to have anything to do with in-game behavior. I haven't tested the exact ranges, but even 1.01 patch, Thompson gunners seem happy to use their SMGs out to something over 100m, which is fine with me.
Honestly, as far as the range at which soldiers will shoot an SMG or not, things seem about right now on 1.01. In 1.00, my primary issue was SMG gunners using their SMGs very liberally at ranges over 200m, which seemed a bit much to me, especially since the ammo carried for the SMG is often rather limited.
Good point on the ammo, they don't have much on-hand, and are usually the first to run out.
I did some casual testing, just to observe - 2 MP40s vs 2 Thompsons, at 110m and 220m (with a valley in between to observe ballistics better), they are definately less enthusiastic at 220m - battles could run for 8-9 minutes without decisive results and Americans running out of ammo first, .45 rounds drop like a stone at around 200m, 9mm seems to have a flatter trajectory; at 110m they fire much more rapidly, results are always decisive within a few minutes, one way or another (life/death in ranged battle seems to be pure luck), no notable differences in ballistics at the shorter range.
At 200m they will engage, they can kill, but they are certainly less willing the further away they are, basically ,meaning they fire much much slower. Exact rates not calculated.
-
I only played the first scenario so far, I felt kinda burned... there's so many guys, and so little reason for them to all be there at once - couldn't they have been at least pre-deployed in some manner? I probably spent ten times as long in setup as I did fighting the battle, which amounted to driving a couple of Honeys up the road with a rifle platoon in support, mortaring the treeline along the way.
It would have been fun with less troops, as it was it grated on me when I realized I'd spent a great deal of time (I'm compulsive like that - just gimme guys and I'll set 'em up like so many plastic figurines) arranging and planning and 80% of them didn't fire a shot in anger. Since we are leveling criticism, might as well add time-burglary to rap-sheet.
Conspiracy bonus: It's almost as if you're given a surfeit of forces on a wee-little map in the hope you'll screw it up and they'll all die so you suffer later on (it's not like you need them to win)

-
The weapon was clamped to a jig. A real heavy jig. No way that could be achieved hand-held. Surely?
No way to tell. I suspect not though - more precise testing gives much better numbers than seen above, here's a pre-war source:
Tests indicate that accuracy and penetration is very good, even at the longer ranges. A few feet from the muzzle the 230 grain bullet, tested on 3/4-inch yellow pine boards spaced one inch apart, ran 6 3/4 boards. At 100 yards it would plough through six boards; at 200 yards through 5 1/4; at 300 yards, 4 1/2; at the 400 mark through four boards, and at 500 yards it would still stumble through 3 3/4 [Page 1107] boards¾sufficient to cause very unpleasant sensations in the body of a victim.The accuracy of the sub-machine gun is decidedly interesting. File records of the Auto-Ordnance firm indicate that in a Mann rest test fired at Hartford, Conn., May 2, 1921, the mean radius using a Remington Standard 230 grain bullet at 100 yards ran 1.89 inches. At 200 yards mean radius was 4.92 inches; at 300 yards 7.63 inches at 400 yards it increased to 18.31; while at 500 yards it jumped to 20.45 inches. Accordingly, one can assume that the accuracy of the more or less spent bullets is quite uncontrolled at the longer ranges. This writer suggests that the effective range of the weapon is under 300 yards.
At 200 yards,, using the gun from the sitting position, I experienced no difficulty in placing deliberate fire in "killing" portions of the standard Colt Police Pistol "silhouette" target. It is safe to state that an officer could readily "get his man" at that range. which is well out of normal revolver range.
Further factory figures of Mann rest tests fired at 200 yards on June 10, 1922, include six lots of ammunition, commercial and Government. One lot of war ammunition showed an extreme vertical deviation of 37.6 inches as compared with 18.04 inches average for the other five lots. Even with this poor lot included, the tests show an average extreme horizontal deviation of 15.9 inches; extreme vertical average of 21.3 inches; and an average mean radius of 5.8 inches.
The writer fired several hundred rounds of ammunition at the various short ranges using the inverted "T" target and aiming at the converging point where the vertical meets the horizontal line. One 5 shot group of slow untimed fire at 100 yards, prone, center to center of extreme bullet holes, measured 2 1/2 inches horizontal and 2 1/4 inches vertical.
Fifteen shots, prone, at 75 yards, time 9 3/4 seconds, measured 4 1/4 inches horizontal and 3 3/4 inches vertical. One shot went wild, however, and was two inches from the main group.
Still another prone group fired from 60 yards consisted of 9 shots in 25 seconds, and gave a group measuring just two inches center to center of widest holes.
At fifty yards, prone, five shots fired in 6 1/2 seconds ran 2 3/4 inches horizontal by 1 1/2 inches, vertical. These groups were among the best for the given ranges, but compare favorably with the other firing results. [Page 1108]
In this respect. it is well to note that the horizontal deviation indicates a personal error, as all machine rest firings show that the cartridge fires mostly vertical groups.
All target firing for accuracy as conducted by the writer was carried out with the fire control ]ever set at "single," i.e., the mechanism was set to discharge but one cartridge at each separate Pull and release of the trigger. Furthermore, this writer is convinced that the arm should be fired in this manner at all times except in case of hip fire where bursts would be more effective in controlling a not, or in spraying a speeding gangsters' car to prevent escape.
-
Shift and C
Just C for me? And yeah... sorry, I can't think of why I didn't say so originally
(edit) I use alternative hotkeys file... another thing to mention

-
As has already been mentioned by YankeeDog, nobody is disputing that a hit by a 9mm bullet at a range of over 100 metres would kill or wound.
I think maybe I mis-understood the thread (derailments aside), I thought at least some of the posters in here felt that way. If I'm wrong, my bad and let's move on. And thanks for the generous offer.
If I have a problem it is with the 'effective ranges' quoted here and in the manual, I think they sound utterly bogus. Every source* I can find provides much more generous figures.
*not Wikipedia
Contemporary military accuracy tests are interesting, and belie the oft-repeated stories that the Thompson was useless at long range or when fired on fully automatic. British tests at RSAF Enfield showed that at 50 yards (46m) using a 50-round drum, a group 3 x 6in (7.6 x 15.2cm) was made; at 100 yards (91m) it was 14 x 10in (35.5 x 25.4cm); and at 300 yards (274m) the group was 25 x 29in (63.5 x 73.6cm). Guns were fired on full-automatic mode, but in bursts.Firing at extreme ranges of 500 yards (457m) achieved groups covering 24 x 46in (61 x 116.8cm). At 100–150 yards (91–137m) a man-sized target could be hit regularly, although, as the author can attest, at longer ranges there is
a distinct time-lag between the sound of the gunshot and the ‘thump’ of the bullet striking the target! Bearing in mind that the Thompson is firing a pistol cartridge, such performance is surprisingly good.
THE THOMPSON SUBMACHINE GUN
From Prohibition Chicago to World War II
Martin Pegler
Basically, more-or-less triple the 'effective range' of the Thompson. I have found much more generous numbers, but not in full-auto bursts.
Similairly, contemporary allied sources make the MP40 as having an 'effective range' of 200 yards; and I found out the MP40 is sited to 200m.
No need to limit willingness of SMG-ers to open-fire at >100m. That's all I'll say about that particular idea.
-
The single biggest improvement I made to performance of my game was finding the 'widescreen' hotkey by accident. It took months. If you haven't tried it, and you have a widescreen display, do it now. Lord only knows why it is not defaulted when a 16:9 resolution is selected, pretty poor form.
-
I should have thought with those numbers the document must be open to serious question. I would suggest a closer reading of the paper.
Why? Because it doesn't agree with you? It's not the primary document, but it's source is official War Office documents from '44, and it's rather more impressive than any evidence offered to the contrary so far.
Whatever you take from that, it ought not to be: this gun can't kill at ranges >100m. Obviously it can. I used to figure those numbers just meant that when the enemy was was over that range you'd be best served by switching to single-shot mode.
Any evidence that critics of in-game SMG behaviour can provide to back-up their assertions is welcome.
UK citizens are can verify the data themselves: http://www.nationalarchives.gov.uk/catalogue/displaycataloguedetails.asp?CATID=2449019&CATLN=6&accessmethod=5
I'd love to see a primary copy personally.
-
I loaded it up on 'warrior' and all teams have 4 minute delays, as expected. Must be bug? What setting are you playing on?


82nd and 101st Airborne camo painted uniforms Mods
in CM Normandy Maps and Mods
Posted
Not trying to be quarrelsome.. but do you have proof of that? First I ever heard of it.