

A Canadian Cat
-
Posts
16,501 -
Joined
-
Last visited
-
Days Won
55
Posts posted by A Canadian Cat
-
-
Ian, where is your recon? Your flank protection? I worry about the scramble in reaction to the Churchill... I hope that doesn't come to tears for you.
Those stugs and the Panthers were / are the flank protection for the infantry and additional stugs moving on the town. My problem is he positioned his Churchill in the perfect place half the AFVs have no LOF to its location and the other half were facing at a angle from where he was. I was not fussing with recon there because I thought I had the field and treeline covered and I am not planning on going that way.
Big mistake
Plus, he is positioning his tanks perfectly. In past engagements my opponent had been careless about tanks in trees while I have been careful and it has payed dividends for me. Looks like he learned from his past mistakes.
Sadly there are tears on my end - update coming shortly - not good for me. Although we were laughing in a GTalk chat this morning because he was commenting on how bad the last turn was for him. I love this game - with both of us thinking the turn sucked. Lets hear it for incomplete information!
-
It's a good thing to do most of your ammo acquiring in the setup phase when you can move everything around to your heart's content.
I agree that is definitely the ideal time to do aquiring.
Later it can take a fair bit of time, especially if you have to do something like dismount a driver to get the team in ( to a small vehicle ).Another thing you can do with larger formations and small vehicles is split off a scout ream and acquire with them when they get back to their squad the amo is shared. I know that does not work for MG teams but helpful for squads getting amo from jeeps.
-
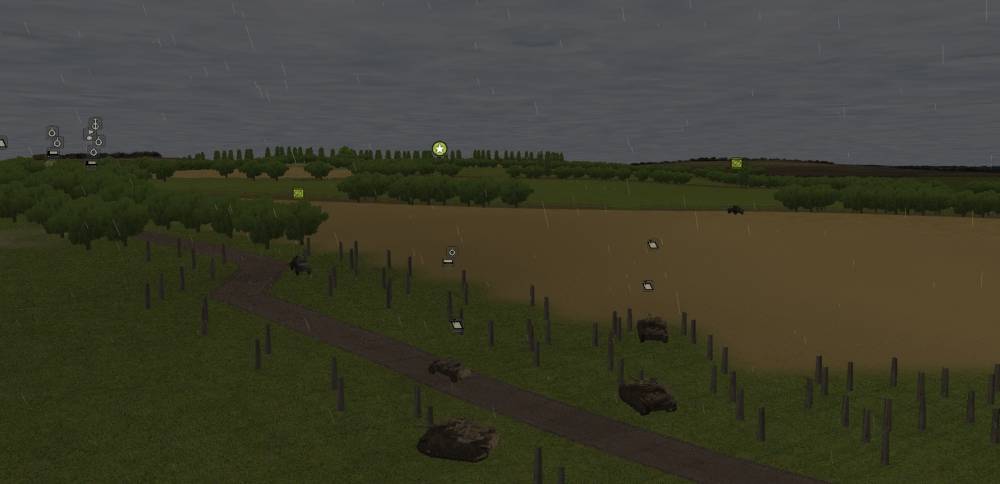
Elements of 1 Battery reposition to deal with the Churchill spotted this turn.
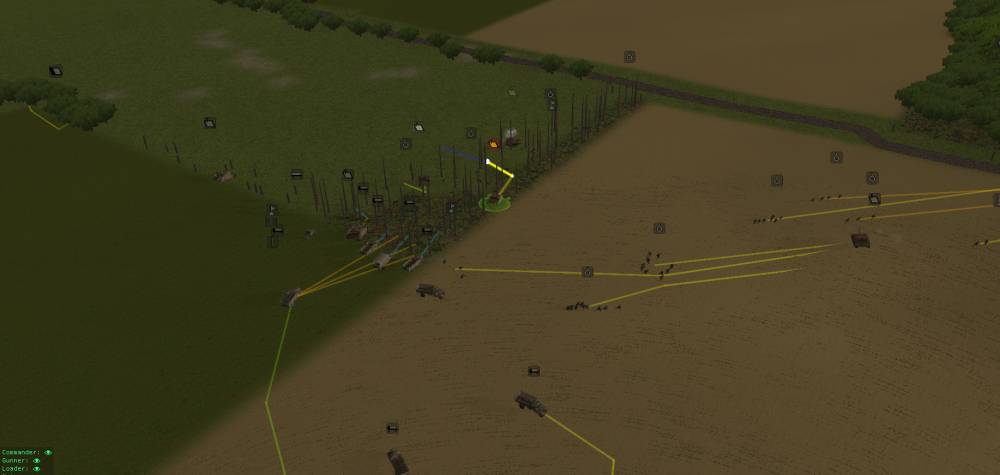
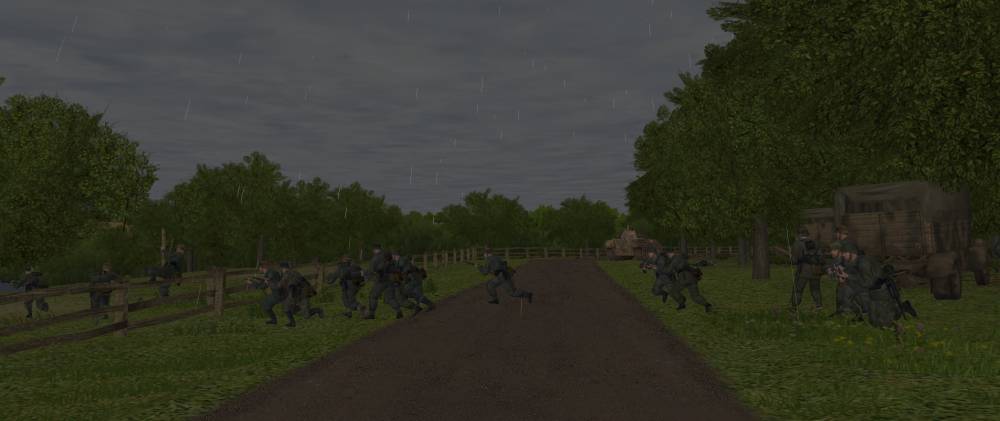
3 Battery scramble to deal with the infiltrating armoured cars. This is going to be a mad minute for these units. The additional soft vehicles that were heading there way have stopped on the road before they get into trouble as well.
Meanwhile 5 Company continues to deploy onto the hill.
-
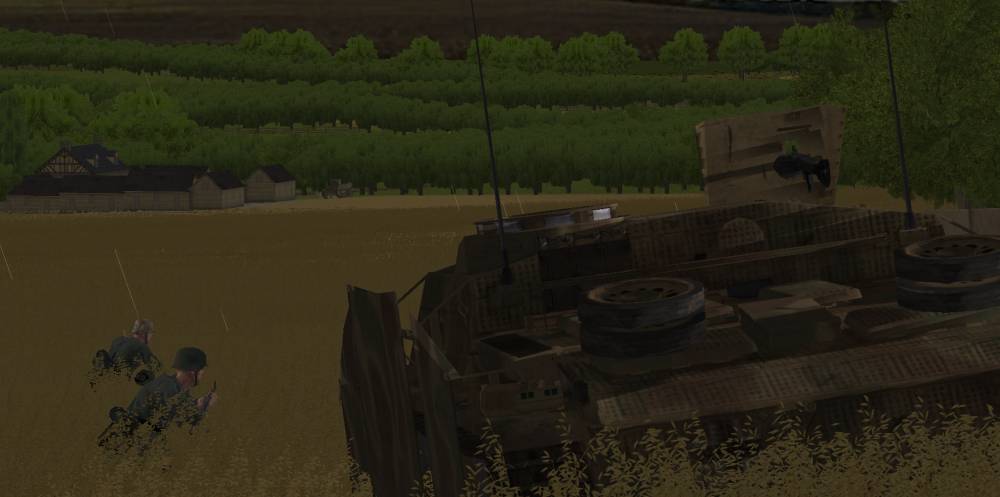
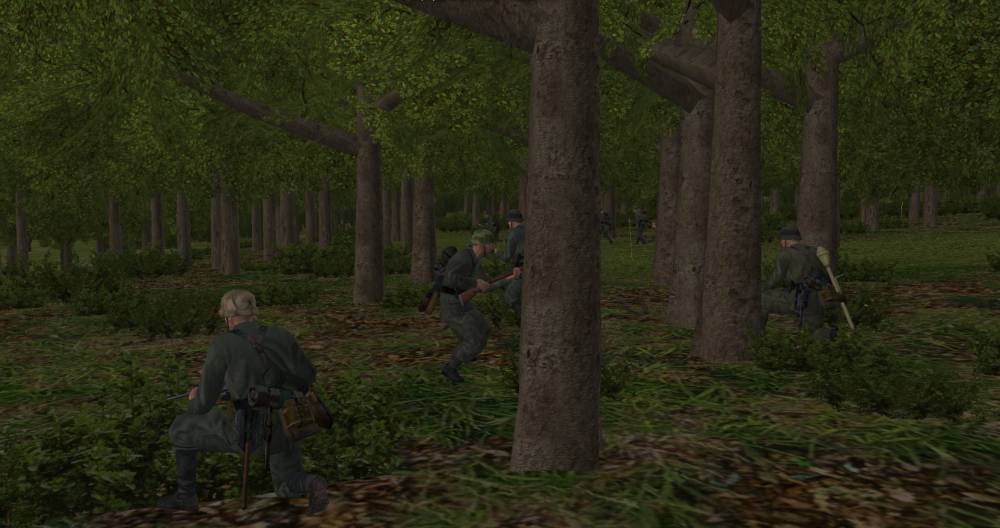
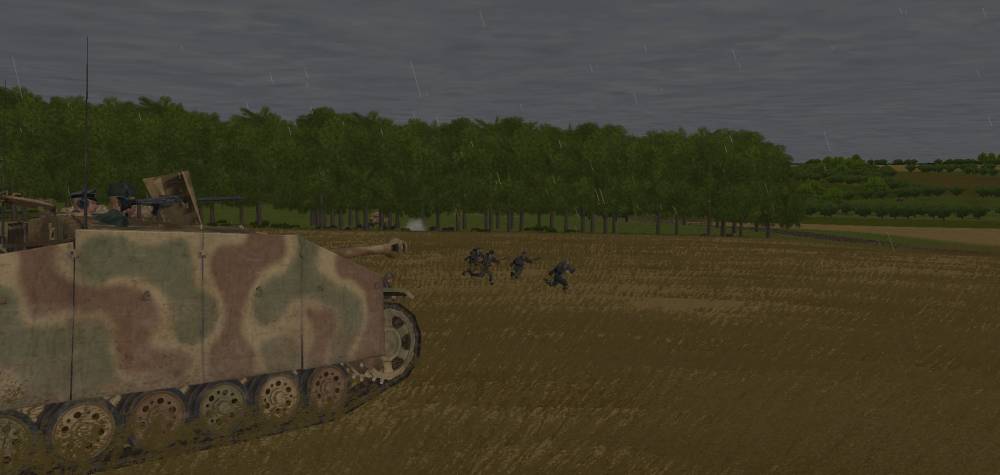
As 2 Platoon reaches their covering Stug a new Threat to 1 Company appears on the outskirts of town. A Stuart light tank. If the Stug where not there that Stuart would be free to chew on my infantry in the open. Hopefully with the Stug there he will not get that opportunity.
1 Platoon from 1 Company moves through the woods towards the town.

Meanwhile on the other side of the map 5 Company is doing much the same thing atop the hill.
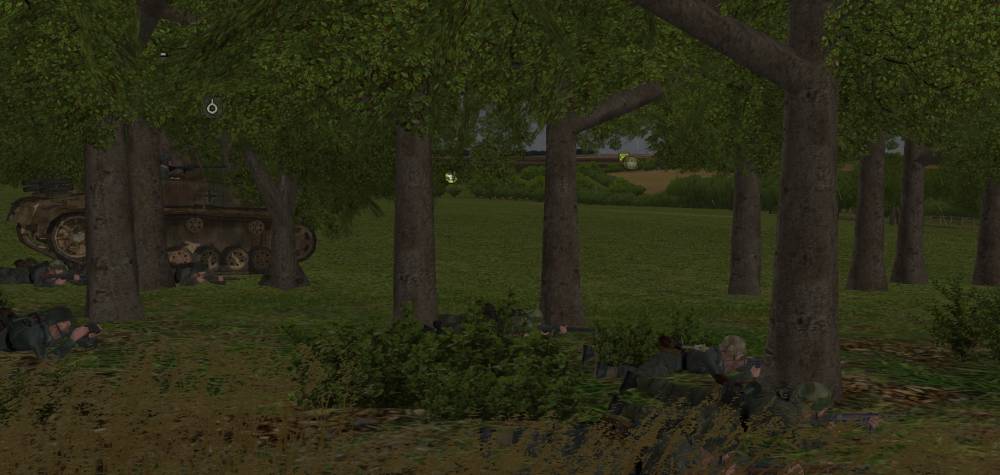
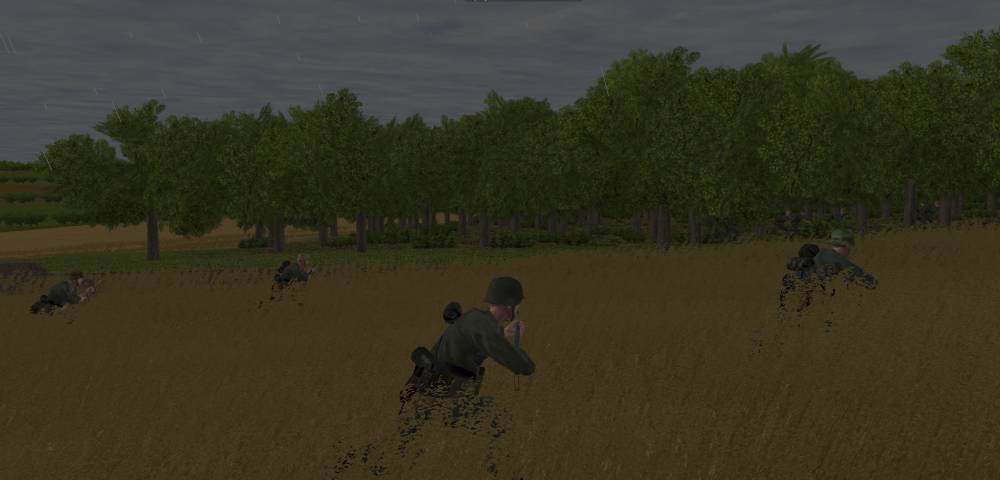
Right at the end of the minute 3 Battery and their supporting infantry get a big surprise! Enemy recon elements drive right into their lines. It seems that Carius's 3 Battery have failed to watch their flanks and an armoured car has managed to cross the open field and end up right between 1 platoon and 2 platoon just as their infantry support arrive.
-
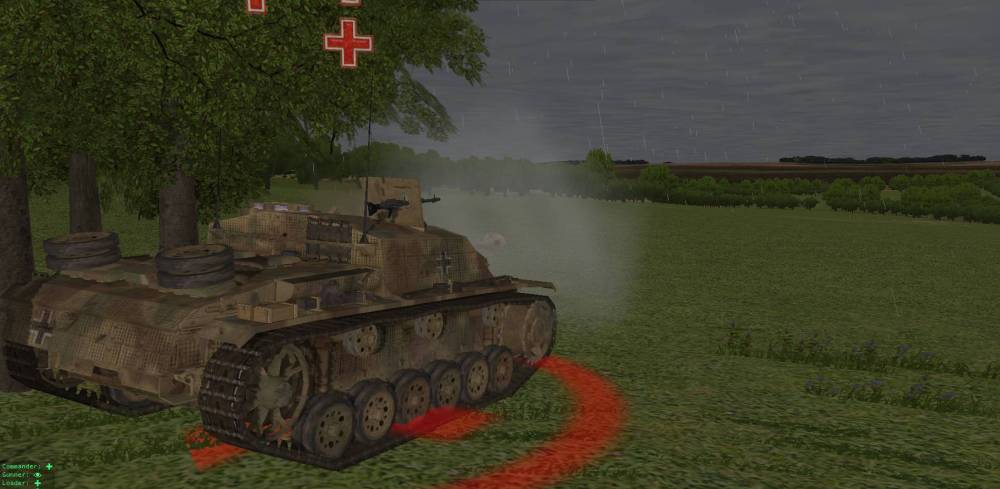
This turns out to be a tough turn. 1 Battery looses their first AFV and no other assault guns have a LOS to the attacking Churchill. The enemy tank is perfectly positioned to hit 1 Battery on one leg of the L shaped woods where they are positioned and the assault guns on the other leg, along with the Panther, do not have LOS to the Churchill's position.
Taking fire

Hit
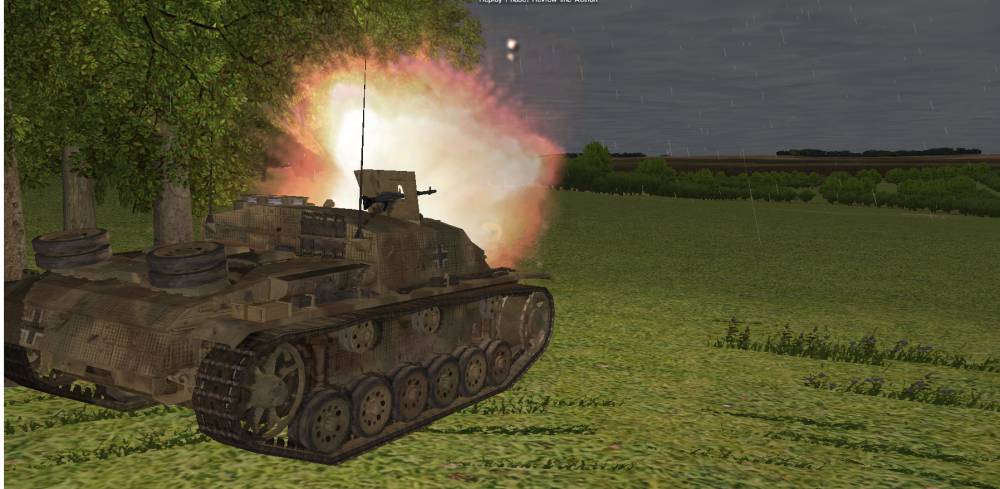
Destroyed
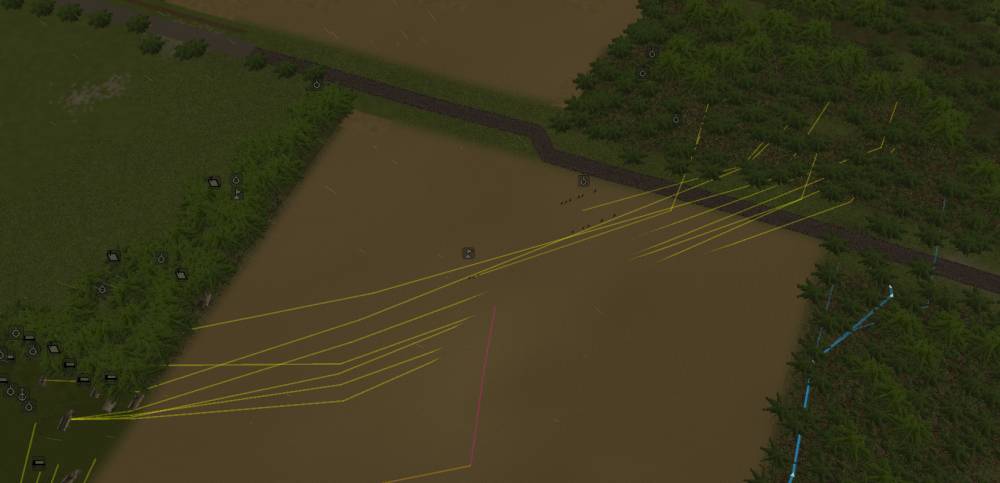
2 Platoon of 1 Company moves across the field covered by and assault gun from 1 Battery. 1 Platoon has already made the trip safely.
-
No unfortunately not. He's doing some nice work of creating an image but they are not from in game. You can hear em, but you can't see em.
Thank you for the clarification. I agree he has done a good job of adding the choppers into the video.
-
Not a chance, love the inital period of moving to contact and watching how events unfold.Not bored at all. I'm especially enjoying the overall layout of your strategy and unit positions. Naturally the on-the-ground action is the best part. Suspense is building as you search out the enemy.
Keep it going - this is great stuff.
Good, good, I was *not* thinking of stopping just noticing the different pace between the action in several of the ongoing AARs. Ever since playing Huzzar I discover that I enjoy recon and maneuver as much as the intense action.
I just watched the latest turn this morning and stuff started happening. 1Co is being hit on their left flank by a troop or more of Churhills and a recon force drove right into the middle of 3 Battery's position as their infantry teams started arriving at the end of the turn. All hell is going to break loose there next turn. Hopefully I can get my screen shots sorted out and my writeup done this evening.
-
Enjoying this. Just a thought -- those look like some long "Quick" segments for your infantry. Do you put in some pauses between segments? I'd worry about them getting tired at that pace. When I use "Quick" for leg infantry I try to keep segments no longer than 30m before adding at least a 5 sec pause, with periodic longer pauses to stop-look-listen-and-rest. (No wonder my pixeltruppen like me so much -- they may die, but at least they die refreshed...)
No, I do not worry about long stretches of quick moves for my guys. I tend to keep my Fast moves short - across the street. Certainly never longer than 100m. But with quick, I will plot great long multi way point moves with. But what I will do is only let them go until they are Tiring and then start adding 30 or 45s pauses at the way points and if they hit Tired then I pause for longer 1:15 or so at times. Or I cancel their moves and just quick to cover and stay until they are rested.
The above applies during move to contact. Once my guys are where I want them they get rest and short bounding moves at quick or hunt as needed to pressure the enemy.
-
When Normandy Upgrade v2.0 comes out you will have overlays so it's worth waiting!
For certain. I tried to create a map in CMBN fro a real place. Several frustrating hours with little to show for it later - I gave up. I am more than half way through a map in CMFI (if my PBEM partners would just slow down a bit:-). I have spent many hours - most of which were actually enjoyable. I have a nice looking map with the basic elevations done and the farms and forest for about half. So, still lost of work to do but I find my self looking forward to it.
I would defiantly wait for 2.0 to arrive for CMBN.
-
Question for those of you that have played shock force. I segment 7 at about time mark 13:40 or so there is a scene where the helicopter is firing on the Iranians. Is that straight out of CMSF? In other words can you see the attack helicopters firing at their ground targets? I have only played CMBN where you can only see the rounds coming in not the source air craft.
Also, earlier, in that segment there are shots from the cock pit view flying over the battle field. Again same question are those straight CMSF recordings?
-
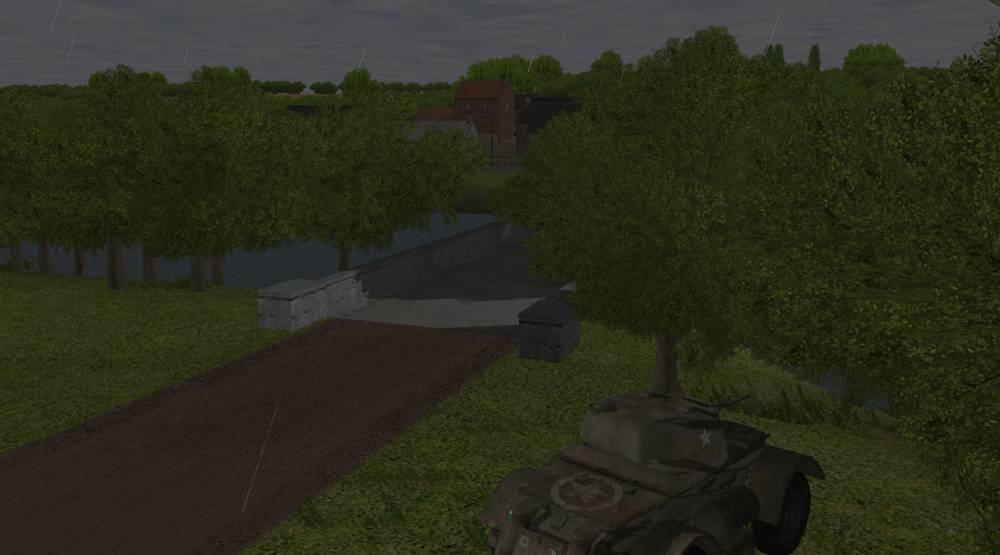
Very quiet turn. The Recon armoured car spotted at the end of the bridge backed away. So the panther that was sent to cover the bridge had nothing to see.
1 Platoon from 2 Company deploy to protect their convoy's flank. The have spotted no one as of yet.
Meanwhile the lead units of 1 Company spot a Churchill off in the distance.
Minute 1:49 Orders
Orders are similarly quiet. Mostly moving 1 Company closer to the town...

and 5 Company further into the woods.

-
Really great stuff Ian, I'm enjoying this immensely. How long do you spend on a turn?
I am glad to hear you are enjoying it. This DAR is certainly moving slower than the others on the forum right now so I was worried we were boring everyone:)
Each turn is taking me a little under an hour to play. It is quiet now. I expect it will take over an hour later once things start heating up.
The way I play is to watch the four areas of the map where things are happening starting with viewing from level 3 or 4 (so I can see the enemy positions and see what my guys spot). Then based on what I see I watch the turn from a few angles at ground level often locked on one of my units. If any fire is exchanged it gets some extra attention or sometimes I flip to watching my men from the enemy's position.
Right now the areas of the battle field I am watching are:
- 5 Company moving to the hill and deploying into the forest.
- 1 and 2 Company's convoy across the river.
- 1 Company's move from cover to cover towards the town
- The village with the road bridge objective where the enemy recon has been spotted.
- 5 Company moving to the hill and deploying into the forest.
-
if you have a lot of infantry to supress, best bring a long a support Churchill with a 95mm to scare away the pixelgrunts
Yes, the 95 is awesome in close support for infantry. I like the Churchill with the 95 more then the 105 Sherman - and I love the 105 Sherman:)
The Cromwell IV (75mm) and the VI (95mm CS) are very fast. Their speed translates into better opportunities to flank Panthers and hit their juicy side armour.When ever I have those guys at my disposal I am newly amazed at how fast they are. Lots of fun.
Of course the other thing to think about is the Firefly. Wow those guys are dangerous. I am currently fighting a battle now against an inordinate number of those guys and they are slicing and dicing my Panthers from the front. Damn I have to be way more careful.
-
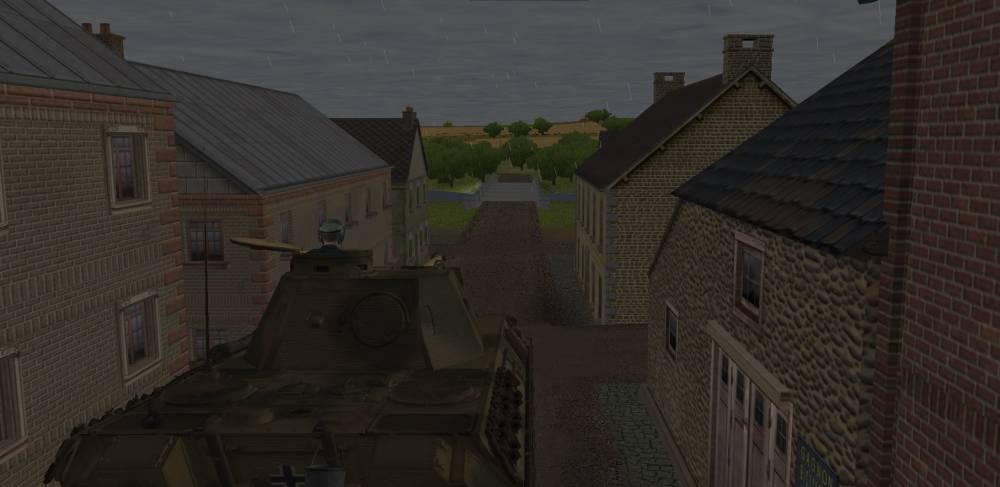
I need to block access to the village to his recon units. 3 Company is staying in the nearby orchard a little longer. So, for now I order a Panther to take up a position on the main street with a view of the bridge. That should keep any armoured cars from crossing into the village.
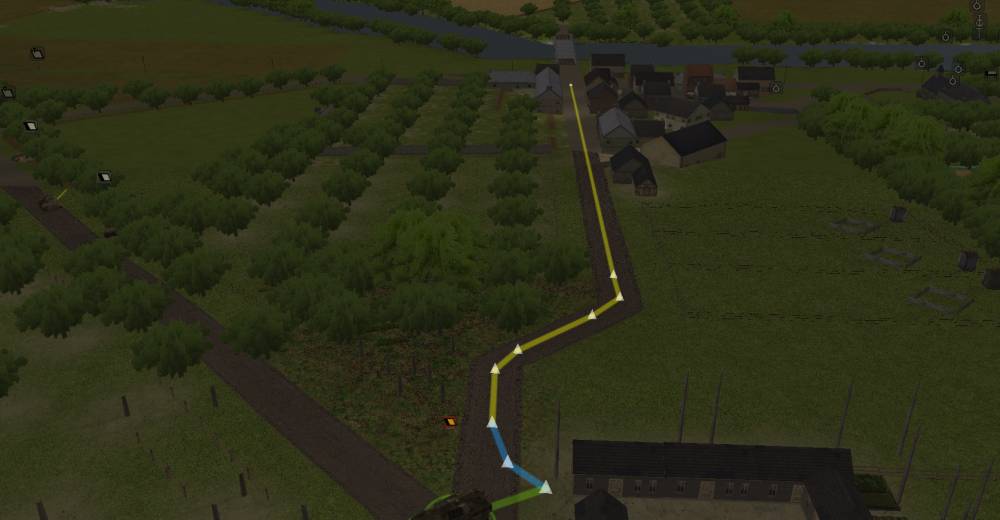
1 Company continues to move from one covered position to another.
And finally 5 company continues to deploy into the woods on the hill.
-
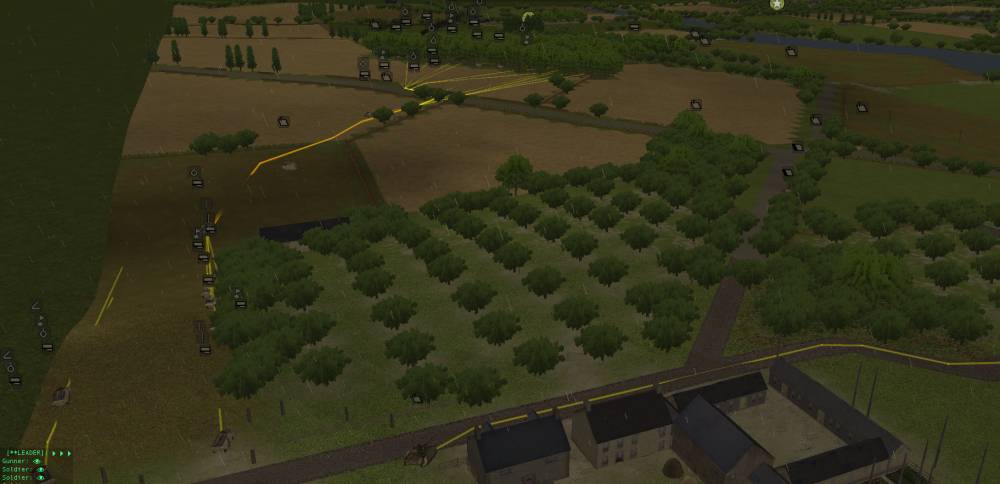
A little bit of action this turn. One of 2 Battery's Stugs is hit from an unknown source.
Eventually the assailant is identified as a Stag Hound on the far side of the bridge near the village. 3 Company's sniper takes a few shots but only manages to force the commander to button up. I thought 2 Battery had the approaches to the bridge covered better.
1 Company continues to advance towards town using the cover of the forest and the support of 1 Battery.
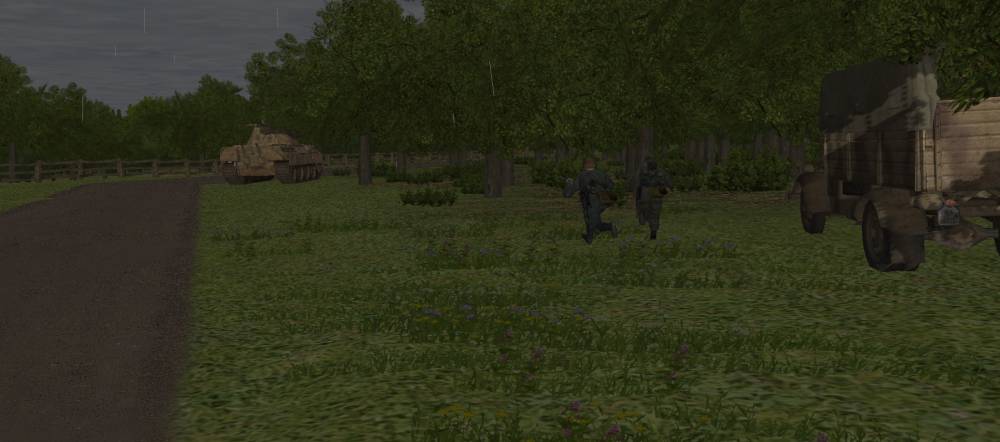
Meanwhile on their flank a Panther and a platoon from 2 Company take up positions to protect them.
-
<ship>Remember. If you lose, then it is GAME OVER. Next thing is a grave for you. Or a hole for your burned-out remains. A Purple Heart for your parents. Bye, bye girls, parties, family, mother. Bye, bye LIFE!!! <snip>
When you put it like that is a wonder that any of these pixeltroops follow any of our orders.
Well said.
-
I gotta admit reading this particular thread gave me a pretty good chuckle. It's also imho pretty spot on from both sides. It is annoying when the troops you command don't do exactly what you think they should or were ordered to do. On the flip side no commander on this planet EVER has had troops so under their control that they did every single thing they were ordered to do to the letter. They'd have to be something like Cylons or Terminators for that effect. Ok, scratch Terminator....even he got all full of drama and went against programming iirc.

+1 to that. And if you watch closely there are plenty of times when not following your orders are precisely the *right* thing for your troops to have done. I have seen guys that were ordered to cross the street in a relatively safe (or so I thought) part of the battle field come under fire from a previously unknown enemy and turn around and head back to cover. If they had followed my orders precisely they would all be dead. We often forget to remember those moments when something bad like the OP reported happens.
-
Another approach might be to not split your squads,
I usually operate in a compromise way in this regard - at least for large battles. When my infantry are moving to contact the squads stay together. Once contact is closer then I split some squads to allow for some forward elements - still not all of them. Then once the pointy end hit something then I start splitting squads as they move to take action / cover. This way I am not herding three times the number of cats right from the start and only take the added pain of more units to manage gradually as needed.
-
The best way to play for me, is I divide the battlefield into sectors <snip> or by hotspots involving various firefights. I start at one spot on the map view the turn, go to another spot do the same and so on and so forth. I rarely have ever missed anything. And if something cool happens well, then I watch it from many angles!
Totally the way I play big battles too. I have that large 20 000 point "quick" battle DAR going here "http://www.battlefront.com/community/showthread.php?t=105660" that battle is still very much in the recon and move to contact phase but it will get more interesting soon I am sure. But even now that is exactly how I am playing it. There are four separate actions on the go right now. Two are very quiet but there is a bit of fire exchanged between recon elements. Plus a third is looking like contact is imminent. In that battle I have over two battalions of units (check out the thread to see the force composition - do not want to give too much away to my opponent here). It does take an hour or so to play a turn with all those units.
If you divide the battle into chunks you can handle it with a bit of patience. I have also arranged things so that two of my current PBEM games are platoon sized or less to help compensate for the time I need to spend on the big one.

-
<snip>I had a tank trying to take a shot at the top part of a building where some AI were spotted but the game kept insisting that I didn't have good LOS. I obviously positioned my camera to match that of the tank and I clearly had a shot. <snip>
Yes, this can be an annoying limitation that comes from the game design using action squares. For area fire you have to aim at the centre of the action square. If you cannot see the centre of the action square you cannot shot. If the tank can see the enemy in the window of the top floor then the can fire at the enemy but once they duck or leave the building you can no longer area fire at the very same spot you were just shooting at.
Sigh.
I personally run into this most often when fighting in an urban setting. It is frustrating when you cannot use your tanks to suppress suspected enemy positions in buildings down the street.
My third point is related to issuing commands. Aside from playing in realtime, is there a way to give a unit a move and target order in the same turn if the original position of the attacking unit didn't have a clear LOS? As an example, I had a few men in position behind a building. Obviously no LOS to the target. I wanted to lay down some suppression fire with this unit of men but it takes 2 turns to pull that off. <snip>You can issue move orders to several way points and then select each way point and add pauses and target commands to each. That is the mechanism to allow you to give complex orders. For your example issue a move order to a location where you can target the area you want. Select that way point. Add a pause to that way point (press the pause button multiple times to increase the length of the pause) then with the way point still selected pick a target command to the location you want the unit to shoot. Then deselect the way point and add additional movement commands as needed to get your guys to cover again.
I would avoid using the cover arc for this since you don't know what is out there. If you know you want to fire at a suspected enemy position use the target command if you just want to watch an area and shoot if they spot an enemy, use the face command to point your guys in the right direction. Using both the face command and the target command the AI will usually switch to shoot at a spotted enemy that appears close by. However if you have a target arc set and an enemy is spotted outside the arc the AI will most likely *not* shoot at the enemy.
-
See? It is possible to dig in during a CM scenario

Yep - but I don't think I would like to share a crater with this guy though.
I found it! The reason I could not find the screen shot of the huge crater left by an exploding Priest was because it was not a screen shot at all. I recorded a movie:
Now that's dug in.
-
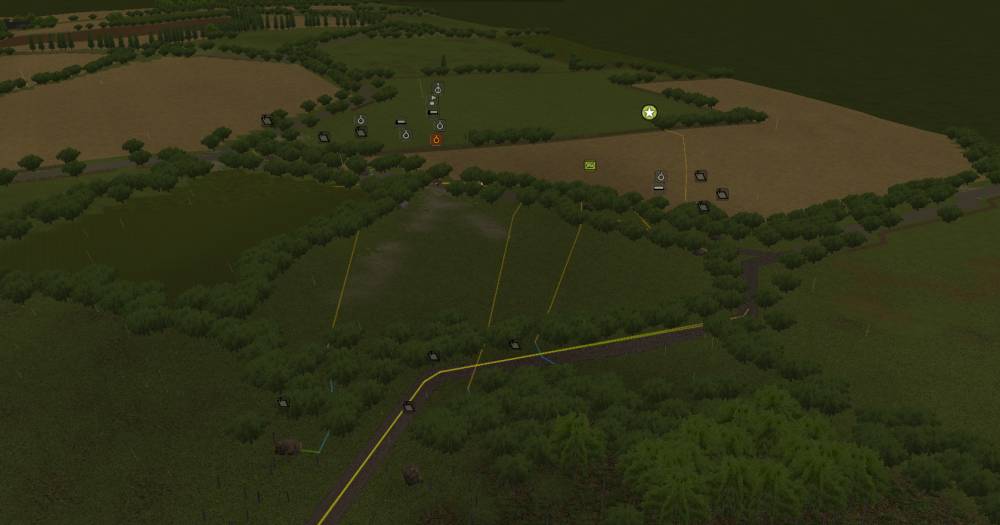
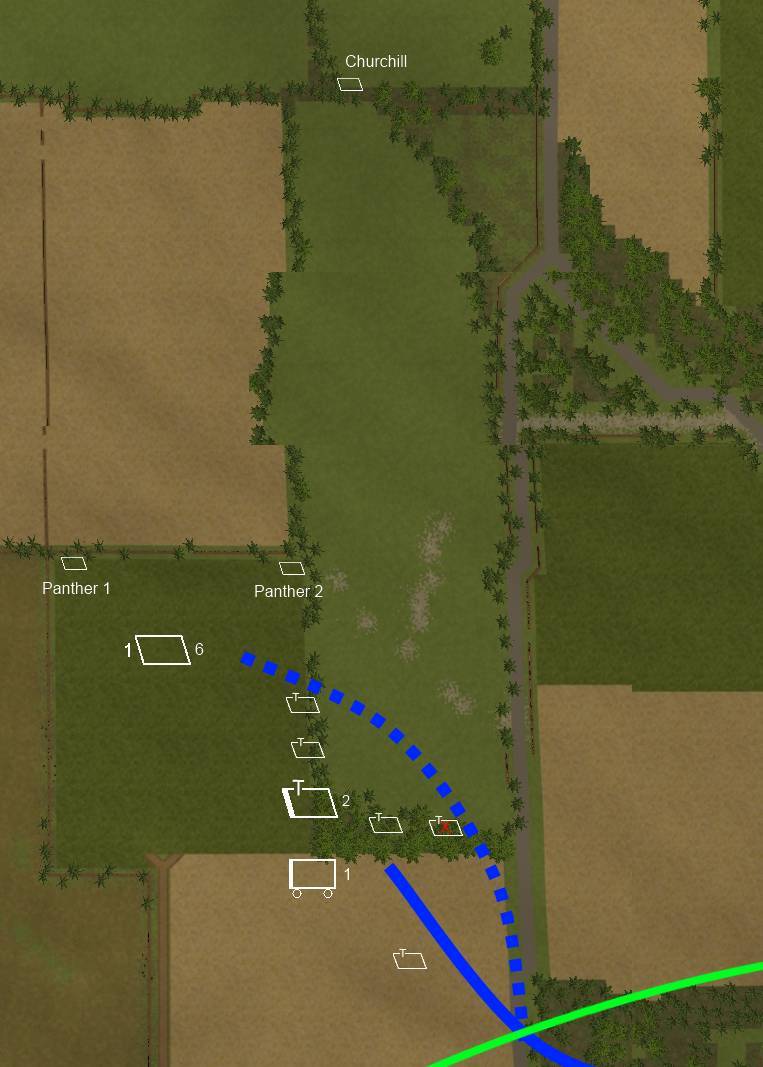
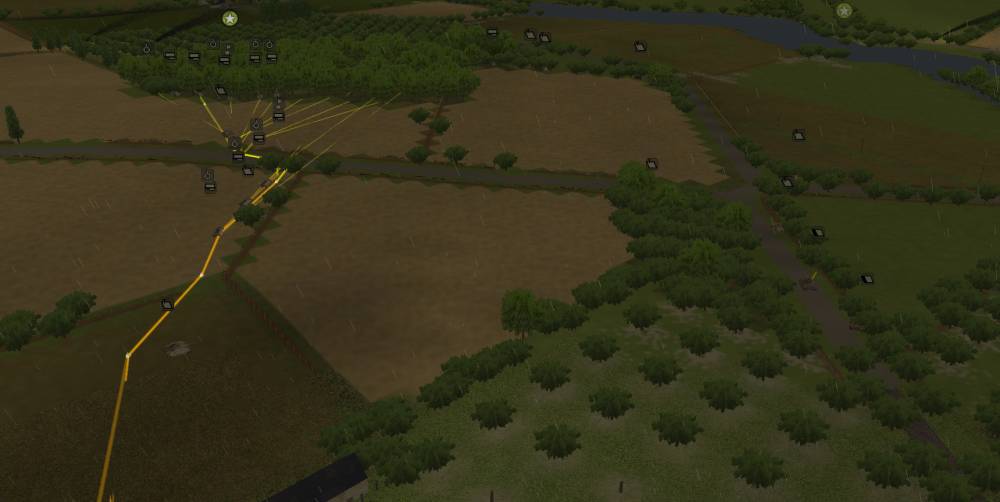
Here is the overall position after 10min. Friendly force symbols in white with defensive positions in blue. Known enemy positions in red. Key terrain is marked in green. Right now I do not have much real intelligence on the enemy's force composition part from there is a sizable armor force with some recon elements leading the way. It looks like the British have moved into the main town quite quickly and are holding the high ground to the north as well as scouting the river area and bridge crossings.
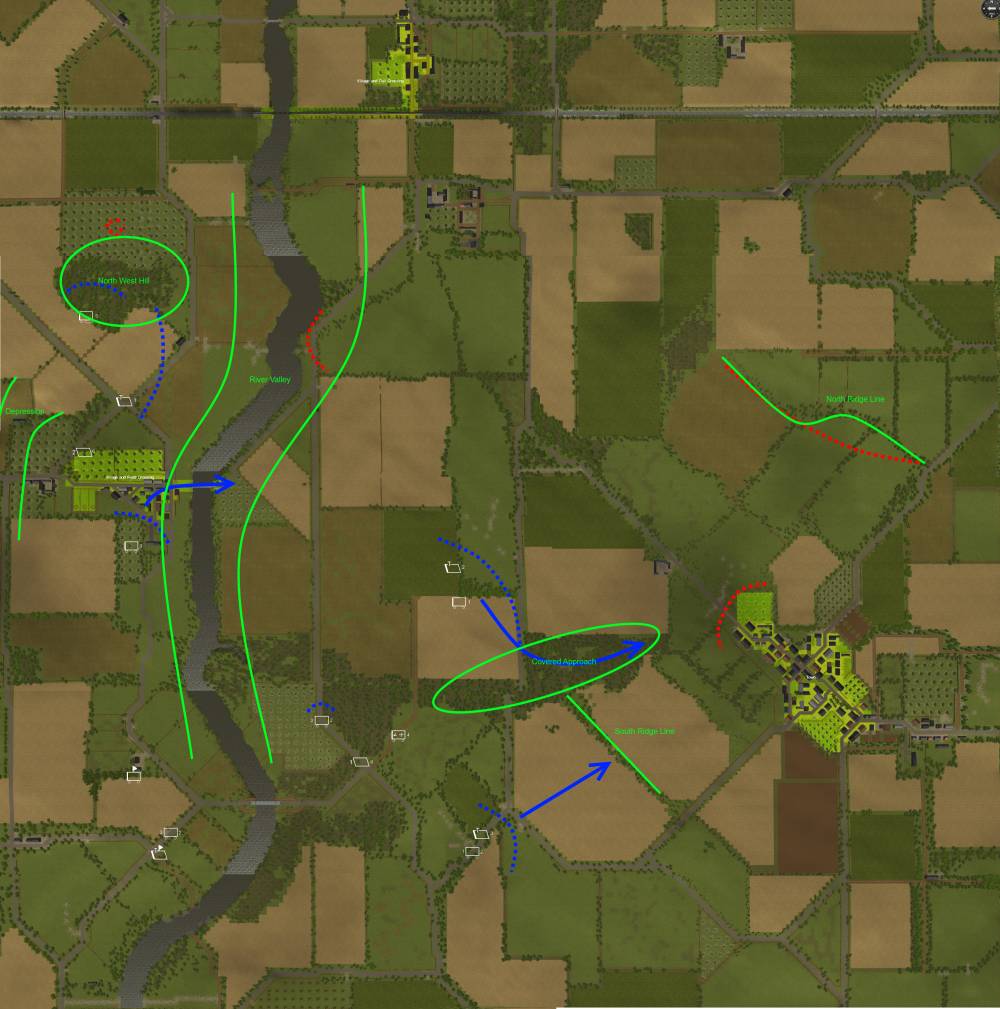
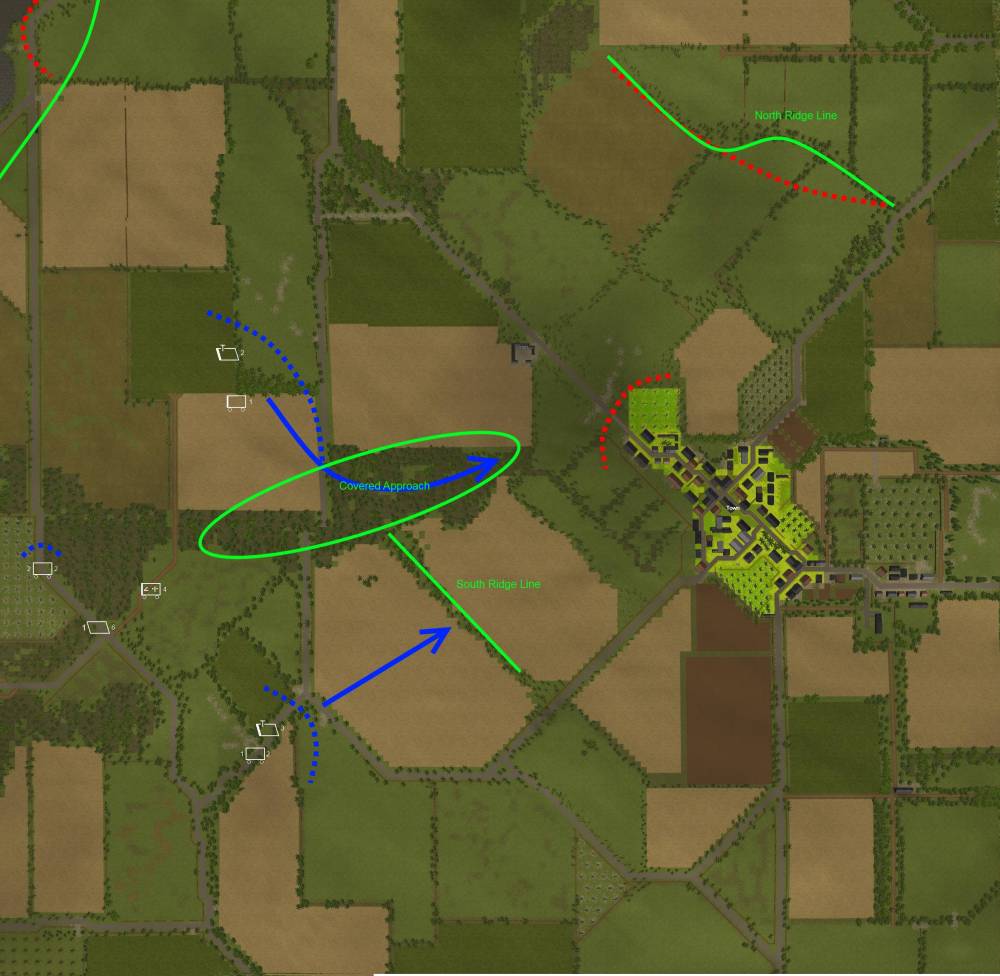
The approach to the town is proceeding well. Given that we know the enemy has positions in the town I see no need to rush. My plan is to have elements of 3 Battery to move to the South ridge line and get into an over watch position of the town. Meanwhile 1 Battery and 1 Company will use the woods to approach closer to the town. Once I see what I am up against I can plan some artillery and the final assault. 2 Company will provide flanking protect for 1 Company.
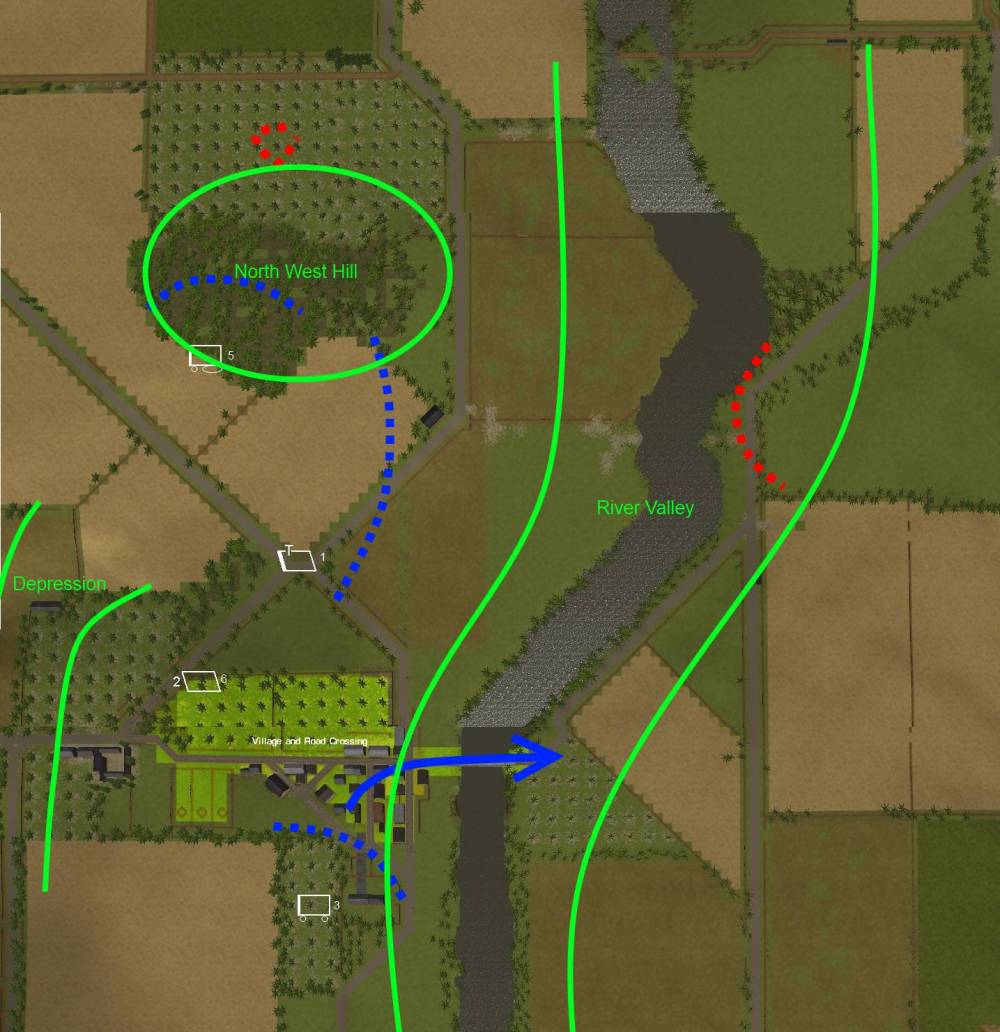
5 Company and 3 Company will occupy and hold the village with the road crossing and the hill that overlooks it. 3 Company will cross the river with support from the platoon of panthers and establish a bridge head. Again no real rush here I suspect that artillery will begin to fall shortly and I want to see where it falls before moving into obvious targets.
-
You really do want to sweep the area to make sure there are no hold outs especially in HTH play.
And if you captured it with any kind of time left sweep it again. And if you find you have some more spare time later - sweep it again

-
I have a strong dislike for Priests appearing in QB ME's, myself. StuGs vs Priests should not be considered 'balanced' forces at all.
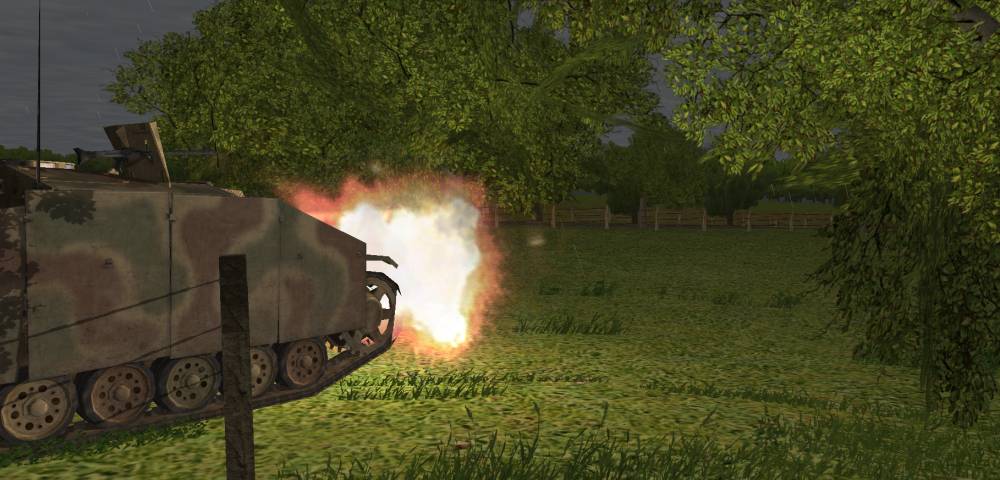
Me too. But the do make a nice big hole in the ground when you hit them just right. I thought I had a screen shot of that but I cannot find it. But I did find a nice big explosion from CMAK. At the 58s mark my AT gun scores a hit


Axis Side - 20 000 point Quick Battle DAR
in Combat Mission Battle for Normandy
Posted
Oh and it gets even worse. I started with 21 screen shots and a 1 min movie from last turn. Oh man. I will work on my update after work and hopefully be able to post it this evening.