

souldierz
-
Posts
362 -
Joined
-
Last visited
Posts posted by souldierz
-
-
I can't say I agree with their comment either.Might have been disappointing to whoever wrote the comment, but for me I was thrilled and amazed when I came across this game.Oh well can't please em all and opinions are like you know what, everyone's got one.

As for the pic, I don't think BFC would be holding back on us.They wouldn't dare give us half a bone and someone else the other half, would they?

-
Sounds like the misidentify would be a cool feature to have.It is realistic and friendly fire is a result of it as well as fooling the commander on what the real threat is,plenty of proof for that in the real world, but I have no experience with this in previous CM titles and not sure how it effects game play.
In CMSF my air support sometimes has a real identification problem.Ive had Cobras do gun runs on my tanks and infantry.I would sit there in amazement and watch as an Abrams or Challenger or even Infantry gets pelted accurately by Cobra cannon fire as he mistakes them for enemy.I also had a few air strikes that targeted and destroyed some Humvee's in other missions and they weren't even close to the zone where air support was requested to hit.
In Iron mode the enemies suspected path will be followed by a ? icon if they are not fully Identified or seen.For one enemy squad on the move 3 separate ? icons can appear on the route they took leaving you to think there might be more enemy teams there, instead of just the one.From my experience, the second one of the enemy appear on the map, the type of squad can be known(MG,Rifle,C2,Recon and so on), but it's not known on how many enemies are in the squad, nor does all the enemy in that squad show up in plain view on the map.In some cases a heavy ? icon can appear over a building and also have a ? icon appear behind it and the info given would make you believe there's enemy there, but in some case's the building is empty because the enemy left.
The only misidentify of enemy I see in CMSF is possibly Misidentifying the enemy location if they are on the move and friendly fire from support assets.I would support fully the feature of being unable to detect what kind of infantry it is until you get closer to them.As it stands now I can ID a Artillery Spotter from far out and immediately understand what the threat is,which makes me take action right away against that specific enemy.Unless it was very obvious like a man sitting on a stone with binos and a radio or a sniper rifle,I think it should be harder to tell what type of unit it is.
-
One feature I think would be good to have is a time selection on area fire like the pause button.Let's say some enemy shoots at you from a building or you suspect a building has enemy in it,you then tell a team of infantry or a vehicle to lay area fire on this building for 30sec or 1 minute or however long u see fit.When the time is up then they automatically stop the area fire, leaving you free to pay attention somewhere else.
There's been many situations playing real-time where I lost track of who was area firing, due to all the forces on map and then after when I found who was shooting they would be low on ammo.I think it would get ride of some of the micro managing aspect of telling them to area fire then cease area fire while your trying to do something else with other forces on another part of the map or even getting ready to get troops to assault the building being fired on.Could be optional, you don't necessarily need to put a time limit on it every time you area fire, but it would be extremely helpful.On the plus side it is a realistic feature to my knowledge, because commanders do tell some vehicle crew to lay area fire on a building for X amount of minutes for whatever the reason.
I have no idea of the code or work required, but would this feature sound possible or acceptable?
-
I never saw one for Blue, but you better believe I have the Faces of Syria mod.Fantastic work, it makes the Syrians come alive.
I too would love to see the same thing done with the blue forces.Maybe someone can tell us if they are working on it.It would be another great mod for download that would help immerse the game even more.
-
I was trying to free up some space and the pictures in my previous post have been accidentally deleted for good.I cannot bring them back and no longer have them on my computer.Yet another lesson learned by trial and error.

SPOILER...................................SPOILER.........................................SPOILER
Finished the 5th mission Aleppo By Night.
At first when I saw the map I thought this was going to be an Urban nightmare,but it ended up being quite fun to play and I ended up playing it twice to try two different plans of approach.The first time the Brits spread out in a line from one end(North) of the map to the other(South).The Pioneers were the center of the formation, the Jackals were parked and scouts took the top floors to guard the area.The British Inf then moved from one building to the next in a line formation and the snipers and javs occupied the top floors with C2 teams at times.Everything was going good, but time was ticking down fast.While trying to preserve the Brit forces as much as possible I made it near the British Embassy, but seeing how tough the resistance was in that area, I knew there was no way I was going to solve this mission in this very dense area with the little time left and if I rushed it would have been a needless blood bath.
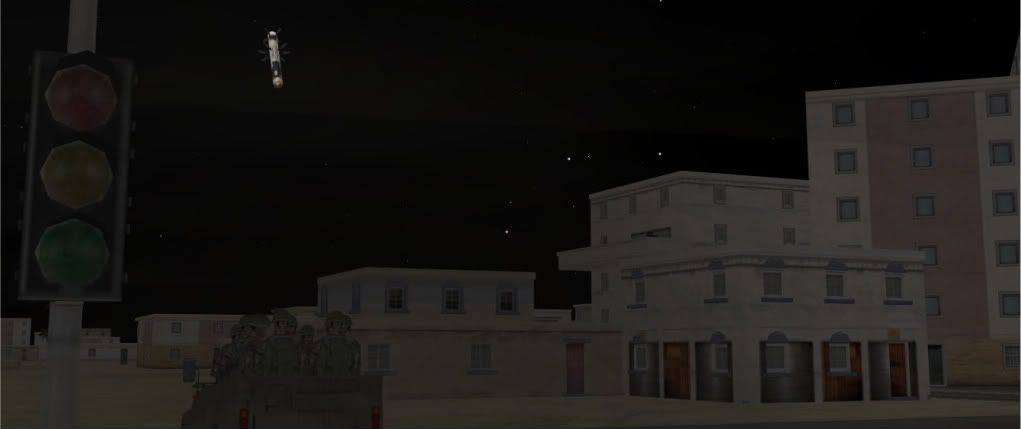
Picture below is a UAZ full of Syrian special forces and above them is a Javelin missile that has its eye locked on them.At that moment I suspect when they looked up, they all shared in the same thought, if they even saw it.
I then restarted and tried the mission again,Second time playing though ended up being a blood bath anyways,because this time I decided to move very aggressively up the 2 roads where the Brits start and move like a convoy at a faster pace.When under fire I would try to pin and assault the enemy position with a Brits team while still moving forward as best as can be done.This method ended up being very costly and men were shot easily in Jackals and others fell on the street.Despite Brits going down, it gave it a cinematic feel when on the ground level watching them react as bullets whizzed by their heads.It was also impressive to watch, because the Brits being Elite and simulating SAS troops were hitting the enemy very quickly and precise, knocking and pinning them down in a matter of seconds and then simultaneously one team would assault and clear the room fiercely killing the majority of the enemy team.Cobras did gun runs and then as the Brits on the North road got closer with the British Embassy a Fierce fight broke out.All the Brits were then moved to the top floors in the major buildings and tried to soften the enemy from there.The Brits moving on the South Road were held up and took casualties and were not able to meet up with the other forces near the British Embassy.The Brits who moved in on the North road managed to break through into the British Embassy, but also took heavy casualties due to the rush to get it.With about 4mins and 16sec left the Syrians surrendered.I don't think I found the hostages,no message told me I did and I'm not sure if I killed the enemy target Biological Bob(Good name made me chuckle lol),I think I did though.
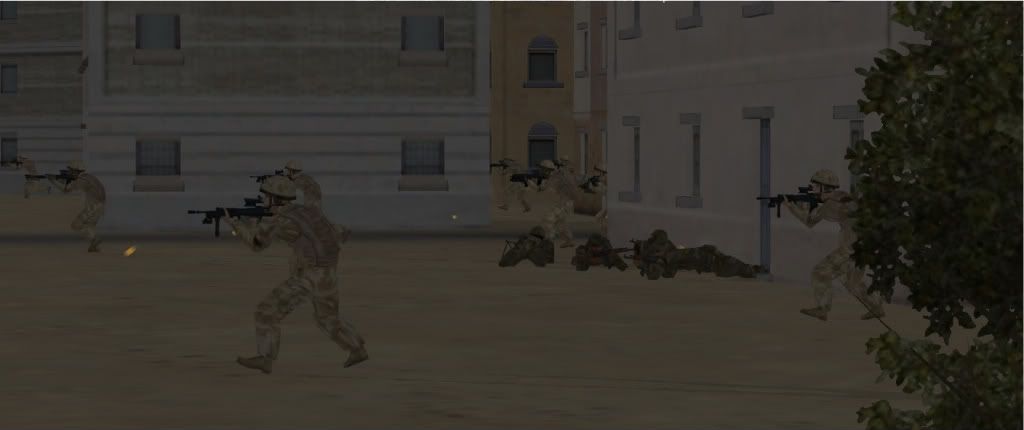
Picture below is British Infantry walking past a Syrian team hiding behind a house.You'd think that at least one Brit would have looked left or right, but they moved on and the Syrians soon realized they were completely surrounded by Brits and opened fire.
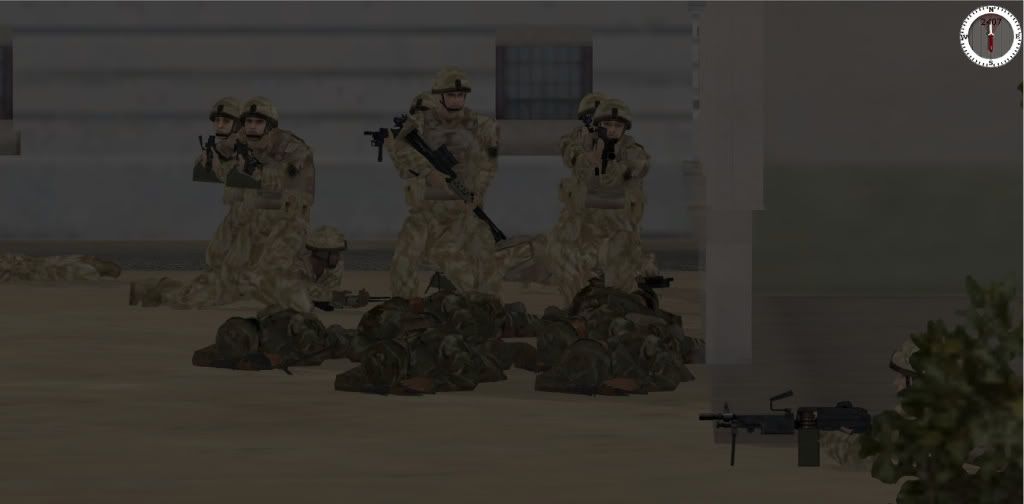
Picture below is the end result of that scene in the picture above.Another Brits team came around the corner and fast and ferociously gunned down the Syrian team before they could shoot any other Brits.
There's not much I would change, but since it is a very dense urban area simulating a downtown scene in a major city, I would definitely give the player more time to complete this mission.I managed to complete it by rushing my forces, but it was costly.Another 15-30mins might be enough time and still have the effect of rushing the player,but also allowing him enough time to move in a fashion that will allow him to preserve his forces.When enemy gather in one spot they form fierce resistance, those firefights took time to resolve without taking heavy casualties.
The high rise firefights were a treat to watch and became extremely intense at the British Embassy.That building was fortified well and was hard to get at,there was some real tough resistance there and the games biggest firefight happened there.
The Jackals I found to be out of place in this mission.After a while I just didn't use them, because they were to soft of a target for the Urban environment(no cover at all for the men in them),maybe a different vehicle could be used or some jackals replaced.
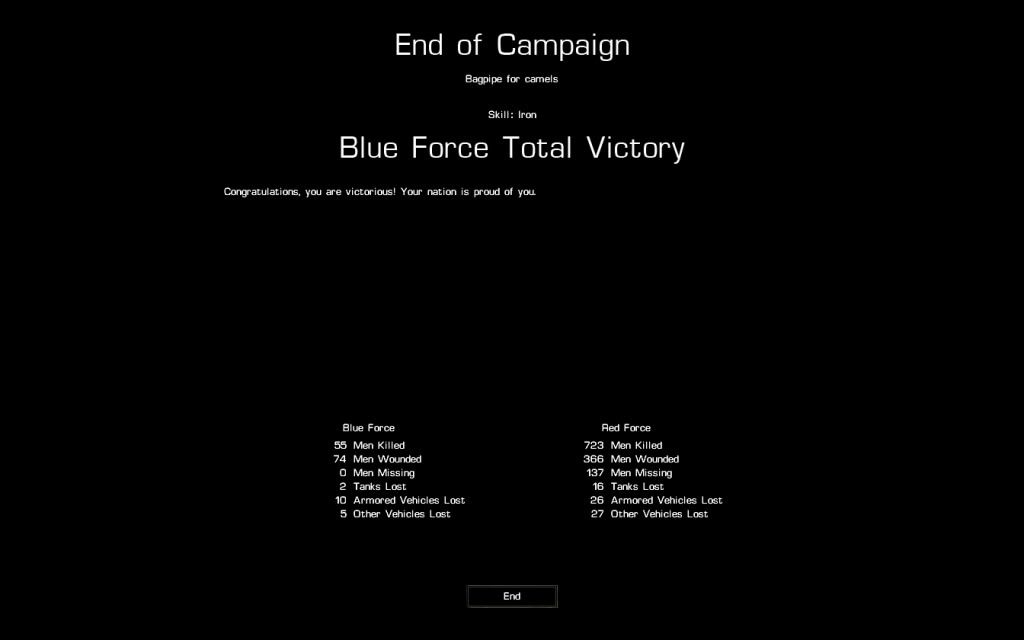
The Campaign is now finished and The last mission ended up being costly because I did it fast and sloppy.That gave me the majority of deaths and an ugly mortality rate for this campaign run.Here is the final results,cant say I like that number much and I hope others can accomplish this campaign with a lower fatality rate when the final version is released.Says the Nation is proud of me,but with that 55 and 74 casualty number, I feel like a casualty myself.
I enjoyed playing this campaign.It offered beautiful maps and a variety of tactical play and was well worth the playing time.With a few improvements and when its in its final version, I think people all over the world will enjoy playing this campaign as I did .Great Work Bardosy and thanks for the Campaign game, it was also fun typing up the events that took place.
-
Played the mission and I really liked the coalition idea and thought it fit well in the game.Played out well and made a good simulation of combining the 2 different forces on the same side.I think it would also be interesting to play this Coalition set up with the Brits, Marines and Army teamed up with Syrian Army(Airborn units;)) against a Militia force on a fair size map.
SPOILER
I had a very hard time finding good spots for the TOW's.The enemy would be to close and the risk to high to use it most of the time.Also judged by the shots I managed to get them to fire,it took a risky amount of time and they all missed their targets.I don't think they could hit the side of a barn on that day.Since every shot missed and they themselves narrowly avoided a few rpgs and missile hits they were left to hold behind cover until things really simmered down,which they never did.
Picture below is a LAV AT TOW missile that never hits its target.

I was really enjoying this mission.I liked how the BMPs came racing in and dropping off reinforcements near the beginning.That rush was well done under the cover of heavy MG's and Rpg's.It made it hard for me to get at the enemy and hit them while they were moving to their positions.I kept all of the Marine vehicles North spread out on the highway area facing South behind cover.The Marines positioned themselves on Hill 193.They were just 1 tile shy from being on a ridge line on Hill 193, so whenever a individual Marine would kneel on one knee,he would get a view on enemy positions and take some shots from time to time while avoiding heavy enemy fire especially enemy vehicle fire.From there Cobras were constantly called in and the Marines waited along the Hill 193 trees.
Picture below is a Marine MG gunner who positioned himself perfectly behind a fallen tree,From there he was the only one in the squad shooting and remained undetected as he fired on targets of opportunity.

The SLA Syrian friendly forces I kept on the West side of the area of operation behind the highway going South.As they came in as reinforcements I stretched them out along the west end and then had them hook in just South of objective 1.
Everything up to this point was fine.When enemy reinforcements arrived at the South East forest area,I was caught off guard,They appeared suddenly and took a few shots at some SLA forces scouting the area.I managed to get 3 SLA tanks South of objective one and ambush the big reinforcement force that arrived wiping them all out as they exited the South East forest area.What a spectacular show that was as the SLA fired at the side of the appearing enemy vehicles.
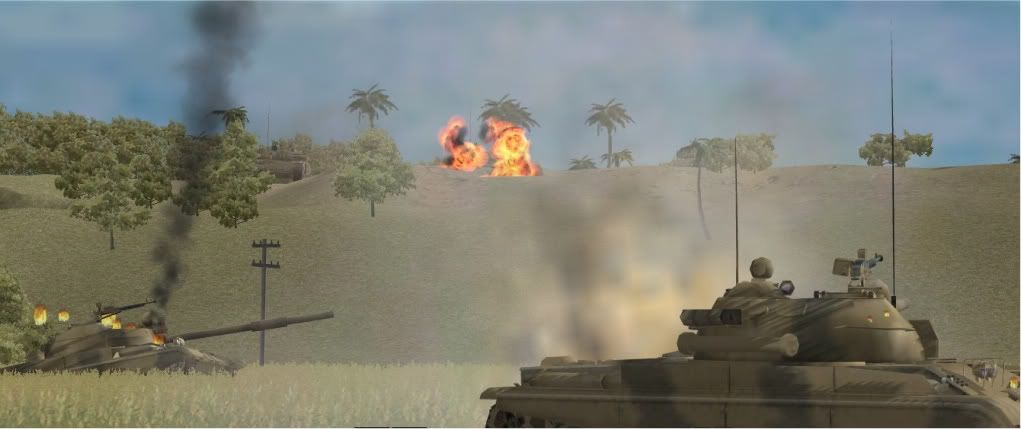
Picture below is the SLA Friendly forces tanks ambushing the enemy reinforcements as they came out of the forest.SLA tanks have the high ground and that fire is the cannon blast from an allied T72 who just hit the other t72 in the field on the bottom right.
I thought the ambush played out well for me, but this SLA push to the South ended up being disastrous for me in the end.I must be on a bad streak with missions that spawn enemy on my forces.As I was trying to surround the Cherry point hill and after securing the highway and moving forces near Objective 1, T72s spawned behind the Highway going South and completely wiped out all SLA vehicles with its rear blitz.Some SLA forces were practically killed at point blank range when the enemy tanks appeared.After that it seemed like enemy also spawned on the edge of the Cherry point hill and all enemy armour began to rush to it.From this point, SLA forces got their butt's kicked by that move and suffered heavy casualties.I was also experiencing heavy lag that would not go away.
I could understand the reinforcements appearing in the North West,but I feel mission makers should maybe put enemy at the enemy reinforcement zones to hold the player back so they don't wander in the zone and get enemies spawned on them.Especially if enemy are appearing late in the game and the player almost dominates the map, or tell the player in the briefing where the enemy reinforcement area is so he can avoid putting troops there.
In the end there was about 20mins or so left in the game, but due to the lag not getting any better and seeing t72s all over the Cherry hill and also knowing there's a large amount of enemy in there, I felt I had to end the game,because it became somewhat unplayable and I doubt i would have cleared the hill in 20 minutes with out getting everyone killed in a lag storm.Hopefully I can upgrade some Computer parts so lag doesn't get in the way anymore when I play a few games.I never moved forces on the outside Objectives before hitting the ceasefire and enemy occupied the Cherry hill so this resulted in a Major defeat.
I liked the map and the little details like the trees laying on the ground and sandbags near trenched areas.I also liked how Cherry Point was shaped. I would have liked to put this at 4hrs so I could surround the entire Cherry hill and clear it out while trying to maintain few casualties.Don't know why, but surrounding hills and mountains to later pound it with whatever heavy weapons are available is very fun.I would have loved to have moved the 50 cals,Mks and TOW's around to hit enemy positions on the hill at a steady rate.All in all, besides the tanks spawning on my forces and slicing through them as well as the heavy lag in the end,this is a good tough mission and I really liked the Idea behind it.
-
Very nice.This site is getting bookmarked.DoubleThanks:)
-
The Canadians alert level starts at "Don't worry, be happy".
Then it switch's to "it's the Conservatives fault".
Then after it will be raised very quickly to "it was the Liberals fault".
After much debate in the House of Commons and after a public Inquiry that never really solves anything, it will then be raised to the "lets see what the Americans are going to do" level.
After another useless debate and a threat of another pointless election and more wasted tax dollars and with more glory talk about taking a leadership role, the terrorist level will finally be raised to "Let the Americans handle it".
This process will be washed, rinsed and repeated many times in that exact order until the threat just goes away or we decide to declare ourselves as terrorists and war criminals because an Afghan slapped a Taliban.
-
It would be nice to see some new Syrian type troops.Not sure on any official say if new ones would be included, but i think it would be nice if the Syrians got mortar teams like the Brits.
-
The Syrian tanks spawning on the other side of the M5 highway sounds like a good idea.That area seemed tough and will probably hold the player back long enough for tanks to appear.It also cuts the LOS on the Syrian tanks so a stealthy entrance to the battle field can be achieved.
Sounds good on the troop level being lowered, think it would be best.The mass blitz was still fun to do, but very heavy on the computer and could result in a swift victory or Syrian surrender.
The artillery could probably be reduced as well.It is an urban area with people living in it so giving the player a lot of Fire support could result in a massive artillery barrage on urban areas.I found good use for it against the Syrian forces assaulting the North flank, but after wards I had no real use for it and decided to use it all at once on the East end of the map on the urban area.I mainly did that to see a big artillery show and to see if I could pound the Syrians into a surrender.:DIn this campaign i can tell you that the Brits are not going to win any hearts and minds by using all this firepower on Syrian cities, especially when the civilian density is moderate or close to moderate(can't think of the other terms right now) but then again it is a full out war between Nations.
Maybe give the player 1 Artillery support piece with 2 mortar support pieces.So if the player wants to call in smoke cover or hit a trench area he can use the mortars support.If he wants to level a building he could use the Artillery support.So a total of 3 fire support assets,2 being mortars and 1 being Artillery.Maybe give both mortar support to the player right away and then delay the Artillery piece for when reinforcements come.The delay could simulate the time that's needed for the Artillery piece to deploy itself off map or you can give it to the player straight away simulating they already deployed.
-
Thanks Ron!
So if I'm I reading it right the Allies also managed to get at the South East of La Carillon and were also able to move on the South East or South flank of that heavy dug in L shaped German defense formation guarding against La Carillon.It says both German flanks of that hard defended area were hit ,so eventually the German forces who were tasked at guarding the flanks were defeated and that forced the Germans to pull out, because they were now vulnerable in that area.By the looks of it, that was their hardest defense area so when that became compromised the whole German defense plan for that area became compromised, forcing them to fall back and form a new plan on new land.If you ask me from the little I know now about this battle, the Allies seemed to have been very smart on solving the puzzle and dealing with this intelligent Defensive threat and the Germans were smart for Guarding their west flank, but it never really helped guard the flanks of the main hard dug defense line,it was mostly to prevent a complete envelope of their positions.Those casualties were high for that one day in that one area of fighting.All this mention of hardcore weaponry makes you understand a little more the level of violence that took place.The amount of people who died in that operation must have been many.
I seem to be full of questions today, so can anyone also name who were the German and Allied Commanders in charge of this assault and defense?
-
Nicely done!
I'm going to read further into this battle to understand what happened.By the looks of the map,La Petite Ferme(The Little Farm)seemed to be the tip of the spear for the German defense and it seems like it took the Allied Inf Divisions a couple of days to capture it.The 13th and 14th of July lines must have been a really hard and fierce firefight also.Seems like the Germans set up a good defensive depth using the water ways as a natural barrier to guard their lines and looked like they were set up expecting the main attack to come from the North, while also expecting an Allied forces flanking move from the West.
Just looking at the map it seems like on the 13th of July line, the Allied Inf divisions captured and held the two towns La Mare and Le Carillon that are located on both sides of the German defense.Doesn't seem like the Germans had positions in Le Carillon, but it looks like they sure covered the town well with a lot of AT's and MG's in a big L shaped firing position that's set up around Le Carillon.Seems like the Germans defense was set up in anticipation and hopes of the Allies taking Le Carillon and then keeping them pinned there with very heavy fire.Must have been another nasty and fierce firefight with the Germans across the water way as well as the ones Dug in with heavy weapons to the East from Le Carillon.I can't imaging the Allied forces pushing past Le Carillon, that defense looks tight and very well guarded in that area using natural barriers to halt any assault.
Capturing the area of La Mare seemed to help the Allies a great deal, because it seems like now the Allied Infantry forces have managed to shape their own L formation on the Germans defending the North.With the fall of the German lines defending the North, it looks like the Allied forces can now hit the rear and flanks of the German L defensive position that's got eyes on Le Carillon and giving it hell.The 14th of July assault line I suspect folded and collapsed the well placed Germans and freed up Le Carillon from all that heavy fire.From there the Germans might have been unorganized after the fall back and after the main defensive perimeters were taken and decided to pull out to prepare another gauntlet of death for the advancing Allied Inf Divisions.Also it seems like the Allies avoided any assault over the water ways except for the La petite Ferme(The Little Farm)area where the water ways were mined and the Allies had no choice , but to deal with it.
I could be wrong, but that's what i see when looking at the map.God only knows as well as the men who were there on how much of a hell those men went through on both sides and I can only vaguely imaging their pain and sorrow and how the fighting played out.Anyone know of the casualty count of a result of that battle?
-
Glad you posted this.I'm not to clear on this battle, does anyone know from where the allies attacked from?I could only guess they attacked from the North,West or North West and also is there an Allied attack plan or picture for this certain area to view as well?
Guess I'll have to dive into the links provided to search for the answers.
Don't suppose you guy's will hand me a Military diploma after I read all your links.Feels like I earned one.Just kidding, no need to break out an exam:D.
One other thing, Its not on the legend but the markings ==== I presume are dirt roads?
-
Finished the 4th mission- Aleppo Suburb
SPOILER........................................................ SPOILER
If I could sum this mission up and the tactic used in one word, it would be Blitzkrieg.
The British had a very overwhelming force and with all the British troops on screen my computer was lagging.I really didn't need any Infantry for this map, because of all the vehicle firepower, but regardless of that, Infantry is always needed.All those Challenger tanks might have even done the job themselves alone.I guess this mission was to simulate a full out hard core British Invasion and I think it would be impossible to lose.
In this mission again some Syrian uncon forces appeared on the left side of the map (North) near the Brit forces leading to another vehicle getting hit with multiple RPGs as soon the Syrians spawned.The Syrian forces that Spawned South in the bush area were killed quickly and I just moved some Brit forces from there.There was so many British forces that they practically flooded the map.When the Syrian tanks spawned on the M5 highway they to fired immediately from close range and were able to get the drop on some vehicles with troops mounted in them, resulting in the majority of casualties.I can't say I'm a fan of these enemy who spawn close to the players forces and cause heavy damage.In reality the Brits would have seen all these Syrian reinforcements coming from way out (especially the Syrian tanks on the highway), but since they only appear at the edge of the map it can give the Syrians a unrealistic advantage of surprise.

Being that there was so many British forces I simply formed battle lines, one behind the other.The center and right flank(South) were made up of 4 battle lines.The first line was all Challenger tanks.The second line was all Scimitar vehicles.The third line was 2 mounted Platoons and the forth line was mounted C2's,FO's,Snipers and some Javelin.The Center and right flank(South) stretched from the main road going into Aleppo to the Canal.
The left flank(North) was made up in 3 lines.First line being Warrior vehicles(No troops in them).The second line was 2 mounted Platoons and the third line was mounted Pioneer Platoon.The left flank(north) was all that was North of the main road going into Aleppo.
Picture below is how the British formation was at one point during the mission.

Some enemy tried to assault up the Left flank(North), but were hit hard by artillery and mortars as well as all kinds British vehicle fire near the opening moments.Picture below is of them being hit hard by Artillery and Mortars.

From this set up the Challenger tanks lead the assault and Blitzed forward phase by phase until they were just past the road leading to the Spot to M5 objective.2 Warriors and recce squad swept the canal, but the Challengers previously took out the Syrians located in the Canal.The Ur Plaza was not assaulted, but kept under siege.Figured I would try and make enemy surrender instead of storming it, because the Plaza seemed very tough and well fortified.Took a long time to kill some enemy in there,they had good cover on second floor in the second row of buildings and withstood a lot of punishment.Same with other objectives.The objectives would be besieged but not assaulted.The original plan was for each Platoon to eventually take one objective each that would be surrounded by British forces, but due to the rapid advance the Platoons were put on hold for assaulting,in hopes of an enemy surrender.One Platoon however took the South West compound.
I figured with all this fire support and air support i would call it all near the Provincial buildings area, but One Cobra was ordered to hammer anything it sees on the South of M5 highway as well as one Artillery support asset.The Syrians really took a British pounding.
Picture below is the Air and Fire support assets striking the Provincial government buildings area under the watch of the Challenger tanks.

After the huge artillery and air support strikes and after the Syrian tanks emerged on the M5 highway taking out some British vehicles and the troops mounted in them (a fight that lasted probably less then a minute before Syrian tanks were destroyed, but i think they managed to get 2-3 shots off each), the Challengers then rolled out to occupy and control the M5 highway.Another Challenger tank was taken out and shortly after the Syrians surrendered with 33 minutes and 46 sec left.
This mission could probably be done with a platoon of tanks and possibly 4 platoons with 1 engineer platoon.Some Jav and snipers could also come in handy as well as some Scout's and some of the Scimitar vehicles.There must be another way again in this mission to somehow effectively get those Syrian reinforcements on the map without spawning very close to the player.Those t72's spawned and hit me good.They are responsible for all my casualties except for maybe one tank and two Warrior's.One warrior was hit point blank by the spawning Uncon teams.I understand the need to simulate the enemy flanking the player and it's good sometimes to see Syrian tanks emerge and try to hit the flank on some mission's, but there's also something that doesn't seem quite right when they do.It's like they got a cloaking device or something(no I'm not a Trekie, or whatever you wanna call Star Trek fanatics) and then they appear in front of your very eyes all guns blazing.
To conclude, roaming across that map in one massive force was pretty cool,but fairly easy despite my casualty count.I never pulled a massive Blitzkrieg move like that before in CMSF so the experience for me was one that was well excepted.I mostly enjoy any mission people throw together so I don't want to be to critical with them, but with that said the more detail and realistic, the better.Whatever the situation be, or no matter how the mission is made, I will roll with it and use what's given.If this was to simulate a massive British invasion then I guess you could keep it how it is.If you would like to give the player more of a challenge then I would suggest taking some Brits out of the map.For some people I think handling all those Brits could be a nightmare.As in most cases though, I enjoyed playing your mission and have no real conflict with it except the ill spawned Syrians who make my Brits think they are fighting against the Predator.
-
It is hard to know how effective a current air campaign would be since so much depends on who is on the other side.
There is a RAND study which discusses various assumptions about how effective a 2020 air campaign could be.
http://www.defenseindustrydaily.com/files/2008_RAND_Pacific_View_Air_Combat_Briefing.pdf
It deals mostly with the air-to-air aspect, but makes interesting observations about air power since ww2.
I saw a documentary about a massive air war simulation/compitition that Military organizations from all over the world participated in.In it was a very big variety of planes and some if not most of the enemy were using SU's against the NATO type planes.It was the most Impressive air show I have ever seen and it simulated Air to Air combat and Air to ground combat in real time.There were Many, many, many planes of all kinds including all that are being used today.They even had the big AWACS and refuel planes and they were all airborn about the same time.I think it was to simulate a huge air invasion deep into enemy lands.The plan was for the NATO planes to clear the skies from SU's so the fighter bombers can hit the land targets and all was under the command of the AWACS who saw all and knew all.
Seeing those A-10s do strafing runs and bomb runs as a group and then flying away while deploying mass amounts of flares was spectacular to say the least.Very beautiful to watch,but also very violently deadly and my jaw was on the ground the hole time at this incredible display of air power.
The Air to Air combat was no disappointment either.It was basically everyone against the Su's.Modern air combat is one hell of a sight to see.Flares were taking up most of the space in the sky and at times it almost seemed like every one was flying around in a grid of gold dust or shinning stars.It was like a huge spider web of flares was formed and the planes fought amongst each other like a pack of wolves staying close to their lead in the web of smoke and flares,squads of planes were zig zagging in every way. It Looked so disorganized and chaotic as it was unfolding, but oddly enough it also looked so thorough and well executed when those planes were lopping around and attacking in formations.It was like well managed chaos or an well organized mess to phrase it differently.
This was all done on a grand scale and at the end of the day the NATO type planes won over the SU's and bombed their targets. I'm fairly positive it was designed to be a lop sided battle anyway.At the end some pilots were chewed up a bit by superiors due to them breaking a distance barrier between them and another plane and they were also chatting about the new SU's handling.I think this was like an All star game where all the top ACE pilots from all over the world were invited, so it was probably one time only for some pilots.
That was the only time I ever seen what it would look like if there was an all out Air battle between super powers.Just Amazing to watch, especially when the sky was filled with flares.It really gave it a futuristic feel and is definitely in a category of it's own.To sum it all up it was like a big battle in a snow globe and all the snow was flares.I can imaging how confusing it would be for a missile trying to hit it's target.
-
This is it! Lock and Load! The decisive battle is about to take place and it's gonna be thunderous!
-
Well that was tough.
That's the first mission I came across that lasted more then 4hrs.I almost completed it to, just another 30mins LOL.Knowing what I know now I might be able to complete it under 4hrs(of coarse it would be like that for any mission), but I think It would be next to impossible to finish the mission with the original time limit.The troops get exhausted quickly and take a while to recover.They ended up walking everywhere to save breath and could only quick run from one building to the next, if they were close.Maybe someone else with a faster and different strategy could have gotten better results, but for me personally this mission took a lot of time.The fatigue of the Brits dictated the pace of the mission and If I pushed harder I probably could have covered more ground, but would have took heavy casualties that might have made me lose.
When a Brits team were fully rested and then ordered to Quick run across the eastern field from the starting area to the Central Store House, they made it to about 135 meters before they started to walk(that's close to about halfway across the Eastern Field going West).Another squad that was full endurance with rested status was ordered to Fast run across the same field same direction.They made in 20 meters before switching to quick run,then in quick run mode they made it another 100m before they started to walk, giving them a total of 120 meters under the Fast run command.I don't know how much time it took for them to recover, but it was a lot.Well over 5 minutes I believe,maybe even well past 10 mins and they would gas out quickly when ordered to run again.It was rare that the Brits made it back up to the rested status, so almost every 30-50 meters or so they would get very tired and exhausted if they ran.When the sun went down it didn't seem like it had any effect on the troops either.
SPOILER
Ammo was slim to none at the end of it.Some squads were completely dry while others were down to their last rounds.I spent most of the ammo clearing those high walled compounds.I had to go in guns blazing even if the buildings turned out to be empty, I found that the enemy would be waiting to ambush the Brits in most of the building they stepped foot in so I didn't want to take any chances and laid down a lot of area fire.Even the heavy MG's and 40mm grenade launchers were out of ammo by the end of the mission.The Cobra runs did knock some buildings down and there was a bit of damage in various spots of the city.Most damage was outside the preserve zones,but 3 buildings near the Central Block were destroyed.

That heat was unbearable for the Brits and that was seen in the first few meters they traveled.2nd Platoon walked South on the dirt road with 2 jackals to the main road near the South orchard.From there the 2 Jackals secured the crossroads area setting up a checkpoint while 2nd Platoon walked west up the road towards the Central Store House.2 Sections went up the south side of the road to keep an eye on the South orchard to make sure they didn't get flanked and 1 Section and HQ moved up the North side.2nd Platoon was tasked with moving to and clearing the Central Store House.When that was achieved, 3rd Platoon and Command units would move to that location and half the snipers and FO's, MG's and 40mm Grenade launchers would set up on the roofs.The other half would set up on the South Orchard banks beside the main road just in front of the Central Storage House.
Cobras would be constantly called in to do gun runs while the British forces moved and also a couple bombs were dropped by fixed wing support.2 bombs completely missed their targets and landed harmlessly in the open.
1st Platoon with 1 Section of Pioneers would walk all the way to the South end of the South Orchard from the start area.From there they would walk West in column formation in an attempt to avoid mines to close proximity of the garage near the South bridge named Sable and get locked into a firefight.The pioneers suffered a casualty but all Syrian forces in the garage buildings would be shot down.1st Platoon would then secure the Garage area near the South bridge named Sable and hold after another brief fire fight with forces on the other side of river West of them.
2nd and 3rd Platoon then moved from the Central Store House along the main road with the 40mmGL,Sniper,MG's and FO teams that were positioned on the Central Storage House rooftops.They then crossed into the South Orchard under smoke cover from C2 mortars and proceeded to walk to the West end of the South Orchard and set up a wide front by the South Orchards West end banks.From there 1st, 2nd and 3rd Platoon now had a front line from South to North along the river inside the South Orchard with heavy weapons supporting them.A heavy bomb was previously called in on the Tool Sheds located near the North bridge named Ermine and destroyed the middle house with a fantastic explosion.Enemy still remained in the the 2 remaining Tool Shed houses and a Fierce firefight broke out with them as well as with enemy forces located just on the other side of the bridge Ermine.The British had overwhelming firepower pouring into the Tool Sheds and shot the enemy located in the Tool Sheds as they tried to flee.The enemy firing from the other side of the bridge has been neutralized also.The Brits at this point have now cleared the whole East side of the 2 bridges.
The Brits were ordered to suppress any suspected targets on the other side of the river and also to lay down smoke cover, so that a couple Utility vehicles under the lead of a Jackal from the crossroad area were able to drive down the dirt road in the South orchard and not be shot at.They made it successfully and from this point all heavy weapons as well as Sniper teams, Scout teams and FO teams would move and set up positions along the West end of the South orchard.That now frees up 1st,2nd and 3rd platoon to move and resupply so they could cross over the river to the west near the South bridge Sable, with the assault Pioneers following behind.
The way the Brits moved forward from here, was by using platoon bounding over watch.One Platoon would move to secure the buildings leading west up the hill or a specific piece of terrain, another Platoon while they rested in place would provid over watch as best they can and then they would proceed to secure the next set of buildings or piece of terrain while the other Platoons rested.I tried to use the leap frog tactic in order to rest the troops as best I can while trying to maintain a steady assault.Sometimes it worked and men gained their breath,but sometimes it didn't.Most of the time the Brits were switching between tired and exhausted status and were in constant firefights as they moved.
When The British Platoons secured the South end of the area of operation, the same Bounding over watch tactic was used to clear out the compounds as the Brits shifted North.Some cases men were to tired to run across the open and had to walk, as they walked 1 or 2 British troops were shot.Clearing the compounds and houses became a very tedious and violent task.A few more British troops would get shot and then the clearing of compounds were stepped up a notch and became very aggressive.
The British assault was moving fairly rapid in the close urban environments due to the necessity of assaulting enemies located very close to the Brits positions as they moved.Walls were demolished by the Pioneers and Platoons would look to secure the compounds as quick as possible.Most enemy were found in awkward angles and waiting to ambush, so some fire fights were hard to finish quickly.Eventually the Syrian forces would get pushed back as the Brits moved forward.After a hard paced firefight and as progress was being made to secure the Central Block and Mosque area, time ran out.The Brits were Exhausted and dangerously low on ammo.If the game were to continue and if victory were to be achieved, another ammo run would have been needed as well as a much deserved rest.
The picture below is the end of mission and whats left of enemy on map.The enemy C2 and fireteam near the North bridge were about to be killed by Cobra rockets.Don't know why I didn't call it in sooner.

The victory points were as follows,
British Forces
West block-0pts
Central block- 0pts
South Block- 50pts
Preserve Mosque- 50pts
Preserve School- 25pts(There was no damage to the school that could be seen, but there was a lot of grenades used to clear the area and also some AT launchers were used,think that's where i lost pts)
Preserve Hospital- 25pts
Enemy Casualties- 0pts
The Syrians got 50 pts for the West Block and 31 pts for enemy casualties.
Great Mission and map Paper Tiger, but I think common thought would be that a tweak might be needed because of fatigue.I found this mission to be a big challenge, because of the troop exhaustion.I suspect that the v1.21 patch has busted this mission in certain ways.Walking those troops around was a different experience that required a lot of time and gave no room for error, but I doubt that how it turned out now was the experience originally intended.I could see how this could be a frustrating mission to solve.This is by far the longest mission I ever played on CMSF.Even with the grueling task of moving while exhausted and constantly on the edge of losing ammo, I can honestly say I very much liked this mission.Very hard task to complete.At times I wondered if I was moving to slow and if there were areas I could have used time better, but over all It went fairly well and I felt I proceeded the best I could under the circumstances.If anyone gets good results with the way the mission is now,post it, I would love to know how you did it and where I could have done better.Now I'm gonna go back and read what other people did in this forum:).I only read a few post's, because I didn't want to spoil the mission by knowing what to expect.
I'm very tired myself at this point and could be missing out on some key details of the mission that might want to be known,so if any further details want to be known about what the experiences of the mission were, go ahead and ask and I'll do my best to answer.
-
I don't know why I never noticed that.That is cool.
-
I should really have a look at this one again sometime soon as the v1.21 patch will have made it more difficult to complete in the allocated time. Let me know how you get on souldierz.
Will do Paper Tiger.
It took me a little over an hour if not more to get my men close to the river safely while neutralizing contacts on the way.Most are completely exhausted and I cannot push further.When the troops are tired it makes it very tough and time consuming to adjust plans.Men get tired fast so when I proceed I got to make sure it's the best move, because retracing your steps or going back is not an option with that heat.So far I secured the one side of the river from hostiles and only took one casualty.The sun is continuing to go down and it's becoming dark.When it get's dark or a little darker, I think that's when I will push past the bridges or just use the one.
I was unwise and used up my mortar asset and can no longer call in smoke for support to cross the bridge, so I'm kind of stumped right now on how I will proceed.Those men tire quickly and without smoke to cover their movements they might end up gassing out while running across the bridge and get picked off.The smoke rounds for the C2 mortar teams is also low, but I managed to get some supply trucks up near the men by the river.No easy task and along the way I was praying an ATGM wouldn't take it out or I would be screwed for ammo.
This mission is a huge challenge.Its an endurance and logistics nightmare(and by all means that's why I like it even more).The Player has all the elements against him, but might be able to take advantage of the up coming darkness to close and clear out the city without wasting to much time by getting bogged down by the enemy in the distance.Think I found a mission that will last me close to 4hrs.I'm close, if not past the 2 hour mark now, but I suspect things to move more quickly at night and in town.Closing with the river was real tough and slow and the troops take a while to catch their breath to move on.Also calling In air support to clean out some enemy positions so I can move up supplies and troops proved to be time consuming as well.I also can't forget the enemy arty either.
So far I'm loving the mission in every way,It's a real head scratcher and brain burner.The Syrians have an advantage in all aspects and every move has to be a calculated step to bring me closer to the objectives.I think this is the first mission I come across that the greater distance between the two armies is favored by the Syrians and not the Brits.If any1 said playing the blue side was easy,they obviously did not play this mission.Good work and well done and I wouldn't change a thing but the original time.:cool:
I got a quick questions though.
With the sun going down and night time starting to emerge,will my troops still get exhausted quickly or will the the night time help cool them off and them keep their endurance up?
If they still remain extremely tired,then I will start to worry about the progression of this mission.It will prove to be very hard, but I'll try to finish the mission no matter what.I will post results and what I did when I'm finished.
-
Now I fully understand the meaning of the title.Bit of a sarcastic tittle:).
That heat is really getting to those troops.So far I had to walk them everywhere.I had to laugh, because at one point I ordered a Platoon to assault across a field and I turned the camera away for 10 seconds, When I turned back the whole Platoon switched orders on me and was walking normally through the field and I could have swore I saw one of the pixel troops flip me the bird, and then hear him say "It's bloody hot down here and you want me to run across that miserable field in this gear?Are you bloody mad man!?Screw that! I don't care how many times you push that freaking button, I'm walking,Wanker!":D
That map is as beautiful as it is tough.This mission is gonna be a real hard fight against the elements as well as against the enemy while trying to preserve the urban areas.I'm happy I increased the time limit to 4 hrs, think I'm gonna need it.
The song title '96 degrees in the shade' comes to mind when playing this mission:cool:.
Edit-Oh and where the hell is that bloody spotter(don't tell me) lol.He's gonna make my troops die of exhaustion more then anything else, but he's getting more and more accurate as the mission proceeds and my troops keep getting more and more tired.The math of the situation is not looking good:eek:.
-
Here's the link for the Brits one, Sept 09
http://www.battlefront.com/index.php?option=com_remository&Itemid=314&func=fileinfo&id=482
-
Well in that case, here's my ticket to get on the praise train.Great mission.I played as blue and planned to revisit it playing as red.I nicknamed this one farm hopping and I to really enjoyed this mission and thought it was well done.Let me know how you proceed with the Blue force.
-
Well then nice design Afreu, the river and hills with the crops were well molded together.
Wiggum,
I downloaded the Nato icons for all Mods,But those yellow icons you see in the Picture with GAME OVER on it are a result off me brightening the picture.They don't look like that in game, they look like the red ones you see in the other pics.To show the bodies of the last stand scene near that compound, I had to brighten the picture to day time, because it was night time and to dark to see the bodies.So basically those yellow icons don't exist, it's just an illusion.
-
Love the quotes Paper Tiger, sums it up right there
.I love all kinds war games from ancient to modern, but due to the lack of good tactical modern war games I have been very happy that I found CMSF.If BFC keeps a good focus on both World War Eras and Modern eras, then they got themselves a happy costumer.Shocking to say you never see a world war 1 game.People often say it would be boring, but me I believe the total opposite.


Area fire time suggestion.
in Combat Mission Shock Force 1
Posted
The suggestions mentioned seem like a good work around and I'll give it a try.I'll try ordering both vehicles and Infantry separately to area fire on a location then pause for 45 sec or so,then order them to move slow on the exact terrain tile they are already on with a face command in the direction they were shooting.
That might be the little trick I was looking for, but I seemed to have overlooked it.Thanks for the tips, I'll give what you all mentioned a try:)