

souldierz
-
Posts
362 -
Joined
-
Last visited
Posts posted by souldierz
-
-
Bardosy,
I have all mods so I'm set for whatever forces you put in.
With the 3rd mission the position of the uncon guys sound good, but I still would recommend maybe giving the Syrian forces in the houses by the mine and RPG or and a Sniper.They never took 1 shot at me the last game and there was no real need to attack that area.Also you have a point on the ATGMs, as just a suggestion, maybe have some heavy machine gun crews move and try to set up facing the town instead of ATGMs.Receiving heavy MG fire from a distance could be good at harassing the player.It's not to heavy from far, but yet not to soft either.The ATGMS where they are now, I'm not sure if they will get the player, but who knows, maybe some unlucky player will run into that trap.

On the 2nd mission it's good to hear the wide front part.I think that might be better and it will keep the Syrians from clustering and forming a nice juicy target for an air strike.What I was mostly suggesting on that 1 is to maybe have the Syrians move and set up a defensive perimeter on the forest edge near the city as well.I think it would create a spectacular shoot out between the city and the forest.Also I forget the directions now, but maybe put an ATGM and MG at the top of the big hill located below the second city near the big open area, above to where you have 2 ATGMs already in the open covering the big open spot(right side of map).One of those buggers managed to get a shot off on some troops, but were quickly and easily killed after wards.
I'm not trying to be a Montgomery by dominating your plans:), but these few things I think would be in the Syrians best interest at defending from the Brits.No biggie or love lost if you chose not to include them, your the general for the Syrians so you decide whats best for their defense.Also it's probably best I don't know, because I probably will replay the final version of the campaign later on down the road when it's all said and done and changed.
I was looking at the 4th mission and studying it a bit and have yet to play it.Congratulations on another gem of a map,very good looking and well done.So many windows and buildings for the Syrians to hold up in and also some clear LOS spots to see a good distance.There's also a lot of room to move around on the map.Seems like many different ways to approach this one and that map is really luring me in, it looks like this is going to be a very good and interesting mission.

-
Well no matter how much rust you got, the briefing still shined in my eyes as professional.Maybe I'm just to easy going:)
For the wall breach's, what I did was exactly what you described, except I had 1 team from the squads demo the holes in the wall and move to the side.The other teams that had no demo moved up close to the hole in the wall and area fired to get the enemy heads down.Then they were moved closer simultaneously to the holes in the wall to throw grenades and then assault.The enemy AT team on a roof fired a few burst's and just missed the right ear of a couple Rangers moving in.
EDIT-Maybe put more baddies in the inner compound then the outer, so they don't surrender when the baddies are almost wiped out in the outer compound.I could be mistaken, but if there's a certain % of baddies who get killed then the others will surrender.Try to find the balance and make it so the inner compound is the one that triggers the surrender.Someone else might have better details on that, but if you beafed up the inner compound a bit maybe they will stand and fight for a longer period.Just a thought.
On top of that if it's a made up situation, then maybe you could create a map that revolves around the compound.Make roads and bush areas, maybe a stream or small houses near by with hills and so on.Just another thought:).
-
Maybe the accuracy was off for the first few grenades, not every soldier has the accuracy of Randy Johnson the baseball pitcher:).
For now it seems like the grenades are thrown in an area rather then specifically in the building,but for me what I usually see is what I typed.After a while more grenades are thrown and more accurately leading to multiple, ferocious explosions that decimate most enemy.Ive often heard the screams of the enemy come out of the building grenades were being thrown into.
In order to fully assault the houses properly, I think BFC would need to put in some kind of Breach,Bang and Clear tactic or code for the troops to execute on their own.I'm no coder and i very much doubt that would take little time to put in the game like a small tweak or so.But for the most part I'm able to do what we both described without much problems.I find It still works well.
Maybe someone else see's it differently and maybe BFC could be looking into it,I don't know.They got a lot on their plate as is by the looks of things,and I think the team is few in number so you can't expect every detail to be well implemented in short time and dead on accurate,even though their goal is to be as accurate as possible and us admirers of their work will constantly push for that because we love what they created and believe it to be one of the most realistic tactical battle simulators that's well in our price range, we still gotta give them some breathing space and let some things slide for now:).
-
To be honest I don't think it's much of a problem .I do the same thing at times for example,a platoon takes fire from a house.I split the squad to form an assault team.Assault team moves to flank the house on its side while the remainder are firing on the house's front.When the assault team gets close i have the others hold fire.The assault team positions themselves beside the building against it and I order them to area fire in it.They lob grenades and for me the first grenades land everywhere.They are thrown in the building, outside of it,sometimes it seems to hit the roof.The second wave of grenades are usually more accurate I find and land in the building together clustered.It's never completely wiped the enemy out, but it has killed many and pinned down others for the men to get in and clear with out to much resistance.
Maybe tell them to hold 10 seconds and see what happens?
-
If I remember correctly, this is the one with the marshland in the middle with farms and a Hamlet as land marks and an objective named big smoke for US?
-
I havent noticed that.But i noticed If you use all your general rounds then you wont be able to use smoke,it will say empty.Because of that I try to leave a little bit of ammo left for the Arty so I can call in smoke later, but it's tough to judge how much ammo will be used when fire support is requested.
Edit- now that i think about it,your right, i think even when i had a little general ammo left and i called in the smoke rounds,the general ammo did deplete itself and i was left with an Empty arty asset.Maybe it's the spotting rounds?
I have no idea if BFC are looking to change that.
-
The original plan I wanted to do was secure the dirt road crossing with 1 plt on the South and the recon guys on the North like I did, but have the convoy Marines run back over the crossing to the South side of the River.I wanted to bring them back to that small village near the river bank where I would have moved my vehicles up to form a small FOB to bring their ordeal to an end.Then I would have all Platoon's rearm except the 1 guarding the main bridge and cross over and clear the North side of the river, each assign to their own task and area.Time was ticking away so I had to move quickly to get at the Ambush area and left the Convoy Marines where they were.Moving the Convoy Marines to the South side of river might have been a waste of time and to dangerous now that I think about it, but then again maybe not.That little situation got me thinking about all kinds of different ways to secure and get those troubled soldiers across the river safely.
That map I find was very well done.Was it based on a real life location or did you just make it up yourself?
-
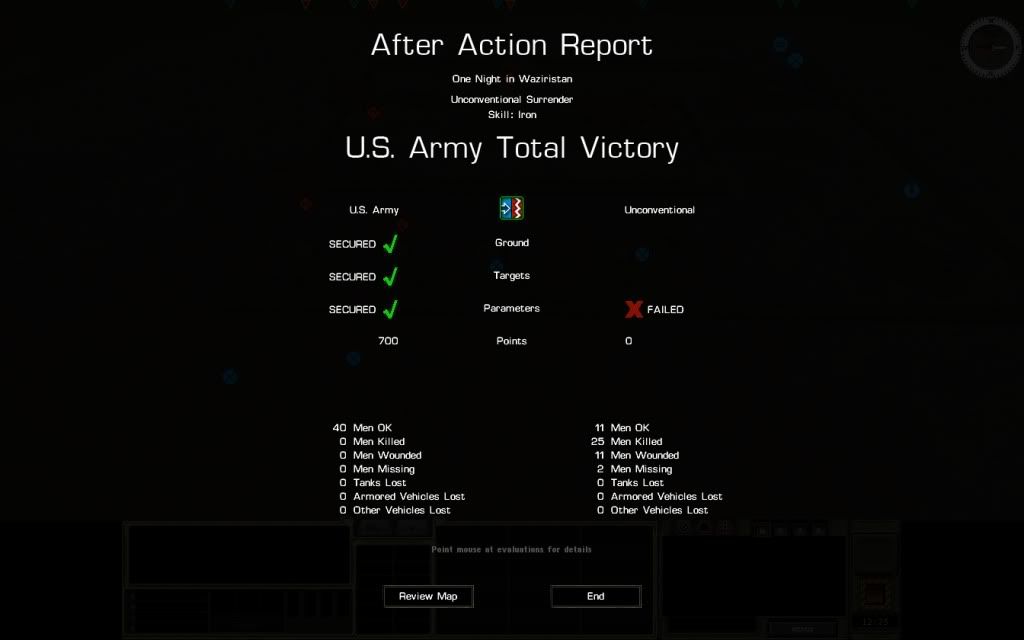
Finished the mission - One Night in Waziristan
SPOILER
I found the Briefing to very well done.Grade A stuff and clear as a whistle and very professional like.Good job.

Nice quick raid.The Red forces never had a chance.The second they popped up the Rangers knocked em down with precision, plus area fire just decimated them.Had lots of M203s so the rangers were able to constantly shoot them into the buildings where the enemy were.ATs made quick work of the enemy on rooftops.A compound in the middle of nowhere was a bad choice those Muj made lol.They surrendered before I even got most of my forces in the compound.Guess they figure out they had Crack US Rangers outside their door when the fireworks started going off and they decided It would be better to surrender.
The Raid was done by 3rd Platoon(2nd Lieutenant Mack). North West was 3rdPlt HQ(2ndLieutenant Mack) who quick moved behind 2nd squad(Staff Sergeant McIntire) as he shifted East with bounding over watch(assault) to the the North of the compound.As they shifted enemies appeared on some rooftops and were neutralized on the move by 2nd squad(Staff Sergeant McIntire).2nd Squad then split into 3 teams and advanced South to the wall of the Compound and blew 3 holes in the North compound wall behind 2 houses.From there the 3 teams approached each hole and threw grenades into the compound and with the help of 3rdPlt HQ(2ndLieutenant Mack) both houses were simultaneously rushed and the Rangers cleared both houses swiftly putting down any threats.They then continued to lay area fire on roof tops and houses where enemy were discovered.

Simultaneously, 1stsquad(Staff Sergeant Flaim) was located North East of the compound and shifted West using bounding over watch.They also identified enemies on the roof tops a shot them down.Also North East was 4thsqd Ateam MG(Staff Sergeant Mannering) where they remained and laid down area fire on the roof top of the North east house in compound where a sniper was spotted.After 3rdPlt HQ(2ndLieutenant Mack) and 2nd squad(Staff Sergeant McIntire) secured the two houses North West in the compound,1st squad(Staff Sergeant Flaim) then moved South and breached a hole in the North wall behind the North East house in compound.From there they quickly threw grenades an rushed the North East house in the compound quickly putting down any threats and clearing the house.They also continued to area fire on suspected enemies on roof tops and in houses.4thsqd Ateam MG(Staff Sergeant Mannering) then moved to take up positions in the same house so 1st squad(Staff Sergeant Flaim) could pull out and meet up with 3rd squad(Staff Sergeant Springer) and then breach and assault through the East wall of the compound to clear the East houses in the compound.

Also simultaneously,3rd squad(Staff Sergeant Springer) who was located South West, shifted East then North using bounding over watch.They moved to position themselves on the East of the compound.The 4th squad Bteam MG( Specialist Rapier) shifted East to remain at the South of the compound where they could get good LOS with the 2 outpost houses.By time 3rd squad(Staff Sergeant Springer) got east of the compound the other Plts had already breached and cleared their objectives.3rd squad(Staff Sergeant Springer) rallied with 1st squad(Staff Sergeant Flaim) where they both split into assault teams.They breached the East wall by creating 4 holes.As each team was approaching, throwing grenades and clearing out the East houses in the compound, the enemy surrendered with 12 minutes and 25 sec left on the clock.

Ali Hasan Ibn-Mohammad Sharef,codename Gryphon, has been captured alive by 3rd Platoon( 2nd Lieutenant Mack) form A Company/1st Battalion/75th Rangers,along with 11 other men including his veteran bodyguard force.Do to the quick raid, intelligence has been found and gathered before it could be hidden or destroyed.It appears that 2 men managed to slip away out of the compound, but the Rangers found and got what they were looking for.Mission Accomplished.
-
Yep, I'd love to see a Mod for every Nation as well.Hmm.. maybe a CMSF World War 3 game would be better.Multiple Nations of the Modern era fighting grand a decisive battles on different continents across the world.I'd buy it in a heart beat lol.
-
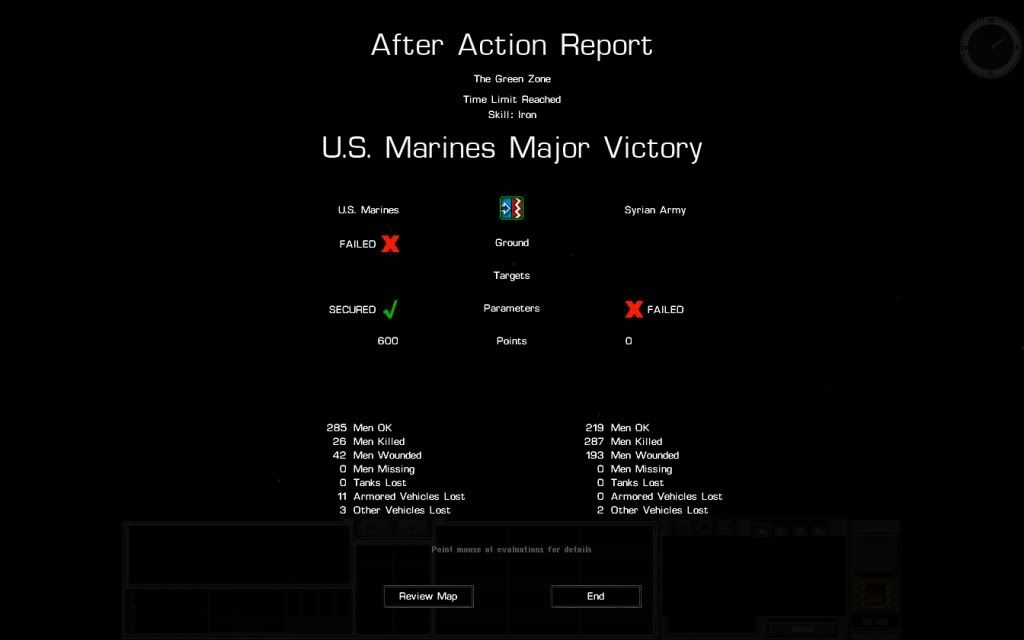
I replayed your mission and figured I would see how far I could proceed knowing that this mission was a little to heavy for my computer.At times the whole thing turned to a slide show for me and making sense of what was happening was kind of hard, but it didn't last the whole game, only when the reinforcements for both sides arrived and the slide show would eventually simmer down a bit after wards.It was still a bit laggy on the ground level, but when I zoomed out and looked at the map from an overhead view things became a lot better and I could understand and make sense of what was happening and could proceed on with the mission with a good frame rate.
I had to play in somewhat of an unorthodox style, because from an overhead view I could not get the Marines in proper cover when advancing with the reinforcements.I had to sacrifice cover a bit and rely on the Marines firepower to proceed.For the ambush part I played in detail on the ground and for the reinforcement defensive perimeter I also played in detail by zooming in and finding them good cover for the firefight.The break out to the ambush was done with me relying purely on Marine Platoon fire power and less so on cover because zooming in to find spots got laggy and I did not want to pause constantly and I really wanted to finish this mission.
If my computer could handle this mission better, I would have increased the time limit to 4hrs and give it a real serious try in completing it.This was a tough mission and ended up being an all out infantry battle, pure chaos with explosions and tracer fire lighting up the scene as day turned to night.Very tense moments and aggressive firefights that made for a grand battle that I know i would have enjoyed further with out the lag part, but enough about the lag, I was still able to proceed and keep on playing.This mission kind of reminded me of the Movie 'When We Were Soldiers' when the reinforcements were in a defensive perimeter.All out firefight amongst the vegetation.
SPOILER
First couple of times I played the ambush part and did not proceed.This time I started over and proceeded on to the end.The first time playing the Ambush scene was a very intense fight and was great eye candy.Got very close and personal and the Marines would defend the ditch, holding back the Syrians with every little bit of ammo they could find.At one point it turned into a sinister volleyball match where both sides would not fire but hurl grenades at each other over and across the main road.Eventually the Marines would run out of ammo and get chased out of the ambush area.
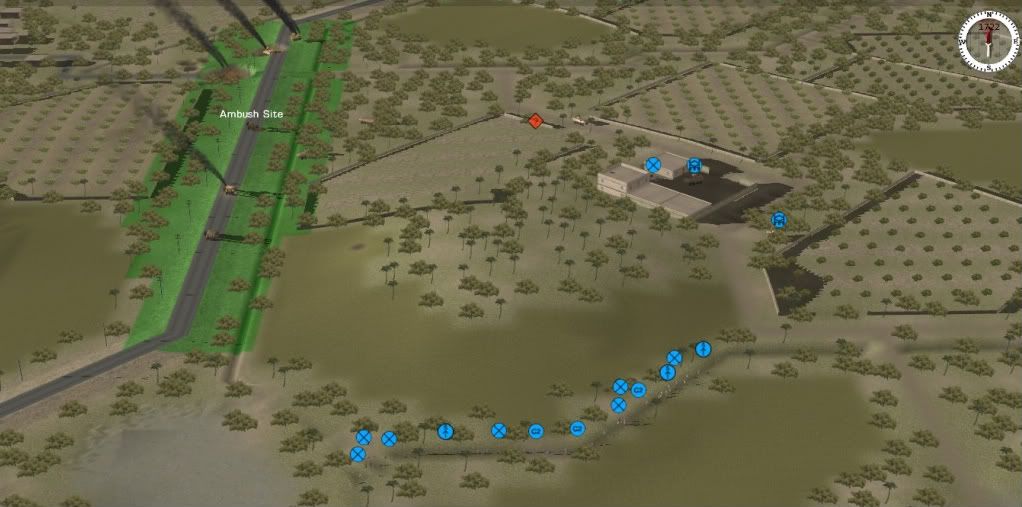
This time around I figured I would try to avoid the eye candy of the tense firefight for the ambush area and try to get the Marines who were ambushed out of the kill zone and to set up another defensive zone.After grabbing all available ammo from the vehicles the Marines ran fast into the ditch to the East beside the road and deployed smoke.The humvee's crew bailed on the spot on the road and the crew took cover in the ditch also.One LAV ATGM was immobilized and the crew was ordered to bail out and run to the ditch where all other forces will be forming a tight compact line in the ditch beside the road.The LAV's that were mobile were ordered to deploy smoke and move fast and take up positions in the bush area East of the road but just short of the intersection staying close to the Marines in the ditch.The command LAV was hit and the crew bailed and rallied with the others and another LAV took out a suicide VBIED near the intersection.When all Ambushed forces were together in a compact line formation in the ditch,they then proceeded South down the ditch in a leap frog fashion and then moved to to set up a defensive perimeter in a ditch near the dirt road river crossing.There they were able to use a small hill to the North to mask the enemies view on them while they held ground and anything that came over the hill or near it was in short range and shot down quickly by the Marines.The LAV's I tired to mobilize in a column on the road east of the ambush area that went past the walled compound.They continued to get bogged down and the last LAV caught an RPG while stuck.The crew bailed and the vehicles with the crew were forced to quickly clear out the walled in compound east of the ambush area while under fire from many angles.The LAV ATGM crew parked in the compound and eventually bailed out so the crew could hold the buildings.The other LAV moved around the corner to see if he can protect the flanks of the Marines in the trench and the now cut off crew men holding in the walled in compound.RPG's and bullets are flying all over the place and Cobra cannon fire is repeatedly and constantly called in at the Ambush area and around it to help support the Marines.At this point the hopes of uniting the crew and vehicles with the Marines in the ditch are slim due to hostile and friendly fire.
picture below is the Convoy Marines Defensive perimeter
Friendly fire happened fairly often in this mission.Not once,not twice, but three times in a row there was a mistaken in identity and one of the Cobras engaged the ditch the Marines were located in and defending, resulting in a significant amount of casualties.Later on in the mission more casualties will happen as a result of blue on blue fire.Here's some examples.A mortar strike missed its marked landing short and hitting some Marines,Explosions as well as rocket fire from the Cobras will have hit the Marines.A LAV missed his shot hitting the wall in front of the Marines causing more casualties.And various things would also hit the Marines from the massive air strikes.
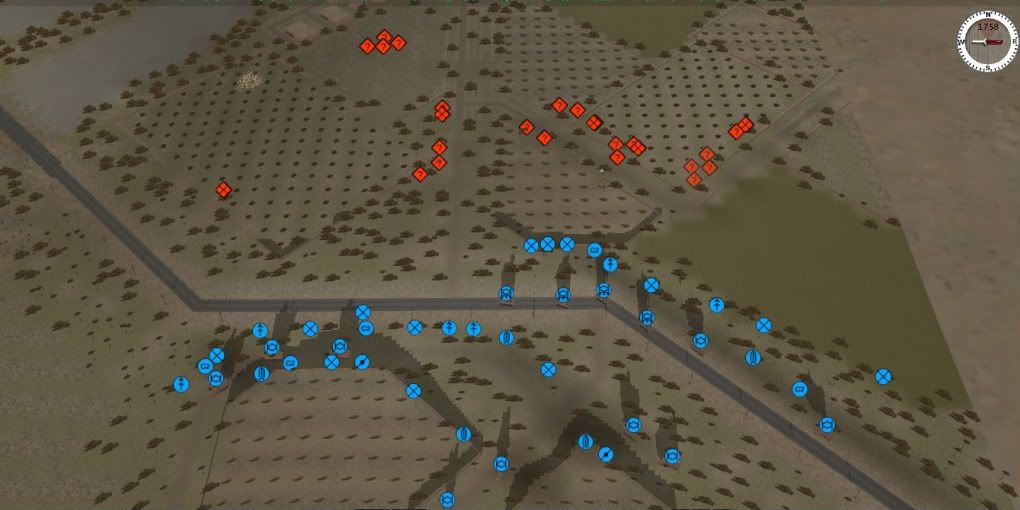
Things settled down and the Cobras continued to provide cannon fire support for the Marines who were ambushed.At this point the reinforcements arrived.The marines who came in as reinforcements starting taking fire and a defensive perimeter was formed.The firefight that soon broke out was unexpected and nothing shy of being a full out battle.The Syrian's were pouring out of every bush and tree line and the fire rate of RPG's and bullets being shot by both sides amounted to pure chaos and a very tense teeth grinding fight.The reinforcement Marines are now locked into a very gritty and heart pounding battle and the Syrian forces seemed determined to overwhelm and close with the Marines while trying to flank heavily by the North near the main bridge.Mortars were now available and the Cobras were ordered to shift support over to the Reinforcing Marines.Some vehicles are taking hits, but most are in a safe areas and the Marines are in the safety of irrigation ditch's as well as low walls, but due to the shear high level of violence and resistance, some Marines will have fallen from time to time.60mm mortar was used to strike in a general and linear fashion North to South on the crop lands to prevent the Syrian rush.I had 2 120mm(I think it was 120mm) mortar support,so they were used to strike the same crop lands but using an area airburst personnel strike to catch the Syrians behind the 60mm strike.Cobra cannon and rockets continue to be requested and used as well.Explosions and tracer fire were dominating the map and the battle continued to rage on with extreme violence while the support was called in again and again.The 60mm general strike hitting the crop land sounded like a good idea at first until i realized i just gave the Syrians fox holes in bush lands.Some became hard to route out as a result of that, but eventually the massive aggressive and relentless Syrian assault was subdued and halted.Not before taking some heavy casualties,due to enemy and friendly fire.
Picture below is the Reinforcement Marines defensive perimeter and the major battle is about to really take place
Over at the walled in compound where the crew members were holding, things started to really heat up and one of the most Heroic last stands took place with the crew trying to hold at all costs.The other LAV was taken out and the crew of that LAV did not survive and the Syrians were now trying to flood inside the compound.They grenaded and disabled the ATGM LAV and the crew was now trapped inside the building with no way out.The Syrians tried to get at them from the entrance as well as through a hole in the wall that was knocked down.The crew frantically was shooting and repelling the Syrians from the bottom floor with everything they could find out of every window they could get to.At times some Syrians were shot down right outside the door and windows, but due to the superior number of them pouring into the compound relentlessly, the crew members eventually ran out of all types of ammo and could do nothing but watch the Syrians approach them inside the building.The crew tried to evade them, but they were all gunned down and the walled compound was now crowded with Syrian troops.A massive air strike was called in to flatten the area.Normally I would never, ever, call in an air strike on top of downed troops and I really did not want to, but reluctantly I did and will never try to do again.
Picture below is the last stand area,made picture brighter so you could see bodies,there's many more bodies in the rumble but cant see to well
Once again things started to simmer down a bit as the sky was changing colors from day to night and stars could now be seen emerging in view(very cool).Some Marines were tasked to move out of the defensive perimeter and to finish off whatever enemy are now scattered before them in the crop lands.Corpses are everywhere.The tempo has now shifted and the reinforcing Marines can now break out of their defensive stance and become offensive and move to sweep and clear the South side of the River.The only reinforcements to come from C company was 2nd Platoon and they were tasked with securing and holding positions in the bush's at the south end of the main bridge.From across the bridge, there they would engage enemies and help relieve the Convoy Marines of hostiles trying to move or set up on their west flank near Ambush area.All other reinforcement Marines were from B company and they moved as follows.1st Platoon moved in a double line formation,with MG's, AT's and C2 forming the second line while the 3 main heavy Plt teams formed the first line.They were tasked to move and clear the village area East of the main road on the South side of the river near it's bank.3rd Platoon moved in the same double line formation and would move beside with 1st platoon securing 1st platoons South flank as they advanced.2nd Platoon was tasked with moving and securing the houses on the South East high ground in the area of operation.They also moved in a 2 line formation with Jav and FO teams attached to their second line.1st platoon cleared the village area and moved on to secure the dirt road river crossing with 3rd platoon still supporting on the South flank and the scouts followed behind them.2nd Platoon started receiving incoming mortar fire and the lines became split.the 1st line was able to proceed but the second line was held up and had to wait for the enemy mortars to stop.After they continued towards the South East houses on the high ground and 2nd Platoon cleared the area and had the first line keep pushing to clear North of their location down hill.1st platoon secured the South end of the dirt road river crossing and the Scouts crossed and secured the North end of the dirt road river crossing.3rd platoon then crossed the river and secure the West flank of the Convoy Marines, while 1st platoon also crossed securing the East flank of the Convoy Marines.From this point 1st platoon along with the Scouts pushed to secure the Ambush area.They got into the area and were half way through, but time ran out and the game was over.
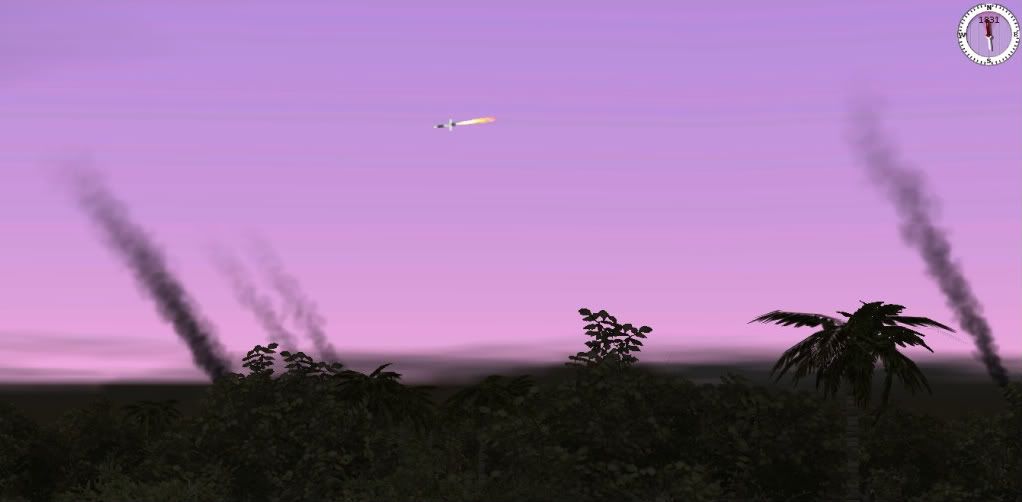
Picture below is something the Marines heard flying over their heads at some point during the mission
Time ran out and it gave me points for securing the Friendly and enemy casualties conditions.The Syrians did not accomplish this and got 0 points.It said I failed in capturing the ambush area.I had a lot more friendly forces there then the enemy, but the enemy did still remain in the Ambush area so i got no points for that.
If i had a good computer, i really would have liked the hard fast paced action that this mission provided.Overall I did like the mission.Its not to often i play a very hard fought, all out battle like that.A real slug fest and very tough.When the game ended and i saw the enemy that were still on the map,my jaw dropped.The whole North side of the River still needed to be cleaned out.Very good fight and if the player does not hold well against both ambush's on both Marine locations then i would say this mission will be very tough and frustrating to accomplish.This mission was a good lesson on force preservation against a superior numbered foe.
-
I also experienced having a bad batch of Javelins a few times.The crew wouldn't have been able to hit the Swiss Alps if they were 500 meters from it:), missiles were constantly flying and who knows where they landed, Probably in Turkey somewhere.Others would fail quickly and land danger close to the men that shot it.I saw 3 Jav missiles in a row fail and leave big craters just in front the troops.:eek:
I also experienced some tough vehicles that seemed to have withstood some impacts from the Javelins, but i have yet to see a Javelin missile bounce or get deflected away.That's kinda cool despite the fact the danger is still active.
-
The one thing that I have to admit that I come to like about the time limit at certain times(not all), is the pressure it creates to keep moving, it's war not a vacation.It reminds me of a situation where you'd have the top General constantly ordering the Commander to keep moving and pushing forward,slug it out if you have to.You can practically hear the words ring out in your head.
I usually try to get in one battle every day or other day or whenever possible afterwards,so when I play I want to try and study and then put down the perfect strategy to accomplish the mission in it's given perimeters, also I don't like to fight the same battle twice unless there's different AI plans,so I want to get it right the first time.I get more enjoyment out of not knowing how the battle will play out.
Before starting a mission I take time to read the briefing to fully understand the conditions, objectives and 2 main things.1 being what my forces are and when they arrive,2 being what the enemy forces are.After(or in some cases trying to) understanding what my forces are,I then take time to study the map for a while looking at all its terrain from all angles and where my forces would move to.From there I try to visualize a plan of execution for platoon movements and also visualize where to place vehicles.I play this out in my head a couple times over as a rough draft for the overall strategy.I learned that even though this is a computer game, I find it so well done that it makes me have to approach this professionally if I want good results and I like that fact.
Even take time to plot and plan a rough draft strategy for the first half of the map and then maybe improvise for the second half.I learned that in order to avoid the pressure of time by constantly wondering what the battles going to be like 10 minutes from now and will I have enough time to make it to the line at the end, just proceed with the plan regardless of the time.If you make it you make it, if you don't you don't,but try to make sure you got enough objectives to secure a win.Avoid at all cost's rushing the men around at the last seconds.I think anyone who plays this game will learn that lesson fairly quickly when they realize that's where the most casualties go down.Most of the time by doing this, I finish most mission's with 5 or so minutes left.The mission designer's are usually fairly accurate and some times all that would have been needed was an extra 5-10 minutes.Some things manage to slow you down and making up for lost time can be tough.If you cannot make all objectives then your plan was not well formed and a better one can be created,so get back to the drawing board and rethink the approach.
I put most missions to 4hrs(except for the the ones posted on forum and would like feedback)as a guarantee that the game won't stop when I got a compound or neighborhood surrounded, or the enemy has got a small pocket of resistance left that I would like to resolve, but most of the time a surrender comes before you get every enemy.I still try to keep a good pace and not doodle around because I have 4hrs to do what like, but having that option made me enjoy playing and completing some very good missions.
-
John Kettler,I have no idea where to start lol.Looks like I'll need to dedicate more then a day to absorb all that good info.I find a lot of good facts from the things you post and I'm happy to see and check on anything you find and post about strategies and tactics as well as real life stories.By time your done with feeding me all these links and info I'll be a military genius
.OK OK, maybe not a genius, but a little smarter:).CMSF class has been dismissed, and here's your reading homework for the week.When the the CMSF Normandy test comes, you won't have any excuses on not being prepared:).Good Stuff John Kettler, bookmarking for future reading:cool:.
-
Bardosy,
(This could be a SPOILER)
I was thinking about those Syrian irregular reinforcements and after much thought, I concluded to myself that it may be best not to make any Syrians suddenly appear in the city at any time in any place.When it comes down to it, the player can be anywhere at anytime in the city and the probability that the Syrian irregulars would spawn on British troops is very high.I understand that you might want to simulate it as a bunch of people rallying together to catch the envading forces off guard and to fight them in the city,I would probably want to do the same(that or get the hell out of Dodge would be the better choice), but I would not decide to make my intentions known or shoot or even form up a squad when there's practically a whole British Company outside my door and around every corner and practically in every window.
However I do think it might be good to place those insurgents on the South end of the city like you said, but not in the factory.What was concerning me as I stretched my lines out towards the South was hitting fierce resistance in the southern houses.If you put them in the houses west of the factory and on the south end of the city for the beginning of the game(where exactly is up to you), I think it would be reasonable and they still would be able to catch the British player off guard.The civilian density was modest so Uncon units should be tougher to spot.It could also prevent the player from having a easy run to the factory if he chooses to assault it from the West.
It's not really what I would like to suggest i think the previous plan mentioned above would be a lot better, But If they are forced to come in as reinforcements then maybe a good spot for them could be at the houses just west of the surface mine area.The troops that are currently there had no RPG's so there was nothing they could do against tanks or vehicles.Those men might need another assignment if the uncons take over,but if not I'd suggest you give the current forces a couple RPG's and or maybe a sniper.I suspected men there but they never fired a shot when I played.
The other thing I remembered was the pleasant surprise i got when i knocked down a wall at the mine area and got the drop on 2 ATGM teams.They both had there backs to the challenger when he approached the gap in the wall.The ATGM's never had a chance and i think it would be best if you could find them a position that will allow them to get eyes on the city area.The 5 Challenger's were left unchallenged when they set up positions on the outside of the city and I think some ATGM's will make the player think twice about putting men in the upper floors as well as placing the tanks out of the city.
I also agree with Paper Tigers statements.I try to adapt and use whatever forces is giving at the time and I find that to be part of the challenge also, but to give the player the correct forces at the correct time with the proper settings to proceed with the mission is a reality I would like to see and start with.I make due with what is, but I would do what Paper Tiger has suggested.Makes it more realistic when commanding the units:).
With it all said and done, It's all up to you on how the Syrian defense is established.You set them up and I'll knock them down, gladly:D.
-
I slugged it out with the lag and had a good and detailed report finished about how I proceeded with the mission,but... and I'm not kidding, my Firefox explorer froze on me 2 seconds before I hit the post reply button.Everything that I took time to type was lost and I'm very agitated right now because of that.If the cosmic joker played a joke on me and thought that was funny, I'd like to punch him right in the nose as hard as I can for that.It's really nothing to get to angry at, but WOW, what a frustrating feeling you get when that happens.
Anyways, when I get a chance I'll try to type it all back up and post it.I'm going to try and make it a point to post up the outcome and tactics used for all of those who post a mission on the forums and would like feedback.Lot's of you guys put time into making missions and I have fun playing them and I really enjoy this game, so ill try to put time in to throwimg back some feedback and outcomes when ever it's wanted.
-
What I normally do is, go in the editor and load a mission, then increase its time limit to 4hrs +15 min then save it.Now your able to play the mission with more then enough time to do what you wish.I to never liked the time limit either and i understand why its there, but i find 4 hrs to beat a mission is a good compromise and that's plenty of time to use.I have never yet had a mission that lasted for 4 hrs and I was free to take as much time as I saw fit to complete any mission.Increasing it to 4hrs will help you get the full enjoyment of a mission.
-
Well i might as well pop a few questions to see who has the answers.I know the game is somewhat down the road and I'll wait for previews to see what was added, but i can't resist in asking this since there is a thread up,
Will the vehicles be able to knock down or breach walls?
and also
Will there be an increase in map size?
-
Hope the snow's not too deep over there.
Its not bad lol,especially when the snowplow comes by clearing the streets and leaves a 3 foot linear mound of snow at the end of the driveway you just shoveled:mad:.
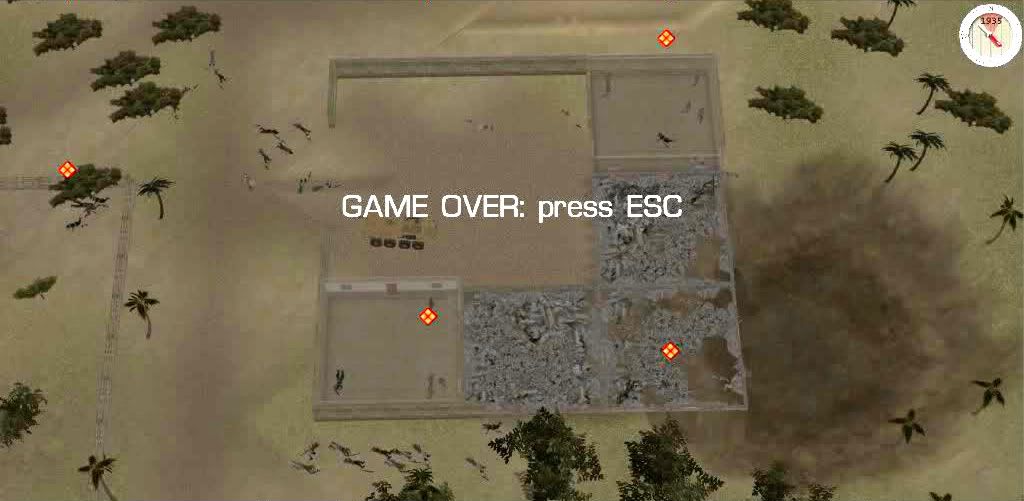
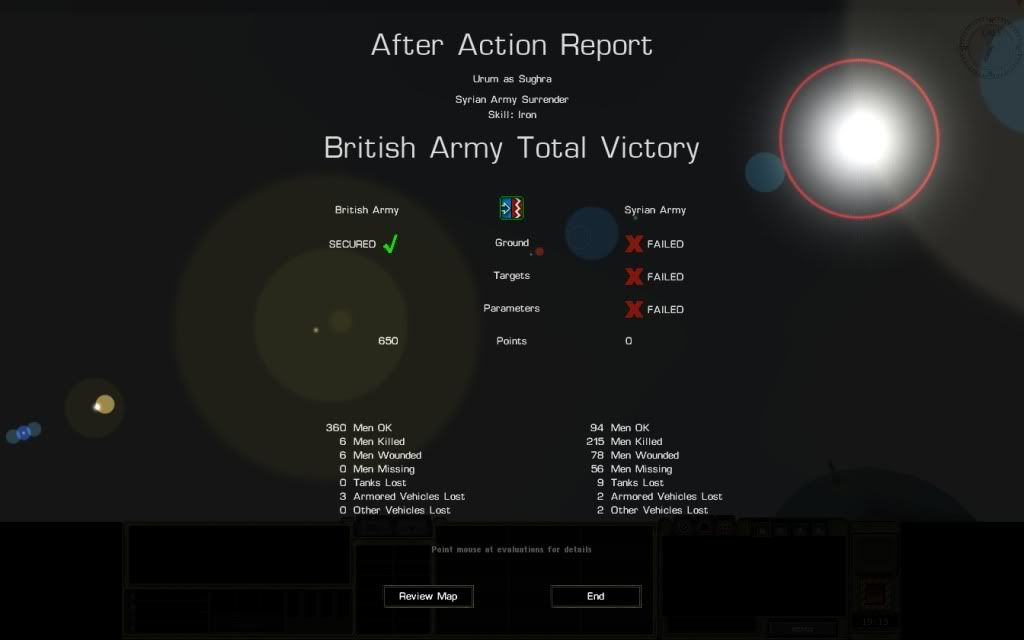
Finished the 3rd Mission- Urum As Sughra
SPOILER
2 vehicles destroyed and 1 was badly damaged.
There's not to much i would change about this mission except 1 thing that i'll mention later.I really liked this mission as well and thought it to be a great map.It was just on the edge of being to laggy, but luckily it was just a little lag and it got better in very short time as the game proceeded, it was still playable and still enjoyable.
I have no idea where to start in describing how it all went down, so many things took place and I like how the mission played out.The enemy Infantry in the city would withdraw to the houses behind them if things got to hot, leaving me to constantly have to fight almost every single house, eventually pushing the enemy out of the houses and then eventually out of the city and into open areas where they got cut down as they tried to flee.It was a very impressive urban fight and as the enemy withdrew from some of their positions, they ended up rallying at the same areas with some other Syrian forces forming a tough pocket of resistance inside the city.
To get a foothold on the city I called in Mortar smoke and found that I didn't have much of a choice and had to also deploy vehicle smoke.The mission started with the Brits practically in the city and i knew an RPG would hit me right off the bat as soon as i hit the GO button.8th Platoon and 9th platoon were tasked to get a foot hold in the city by setting up positions in the houses in front of the reinforcement area and also to secure the area for Brit reinforcements, so the reinforcements wouldn't take fire when they came into the area of operation.As they were setting up, an RPG took out 1 of the warrior vehicles.The crew was fine and the house got leveled in retaliation.The plan was to secure the whole West side of the city before pushing East.As each platoon and reinforcements came onto the map.They were used to stretch out the British lines to the South along the West end of town.The line formation when all infantry reinforcements arrived was in this order, from North to South along the west end of the City in the houses,it went 8th Platoon and 9th Platoon securing the Northern flank in houses,7th Platoon and 2nd Platoon securing the line formations center in houses, 3rd Platoon and 1st platoon securing the South flank in houses.From these positions, all platoons were tasked to push East from their positions with the help of vehicles and to halt at the east side of the city holding and securing the main road that's formed like a wedge.So from a line formation at the West end of the city,the Brits moved East through the city and then halt in a Wedge formation as the city is designed.
8th platoon and 9th platoon didn't have to push far, but got their share of action by securing a foothold on the city and by constantly engaging enemies trying to rush across the North East field.When i saw Syrian troops trying to rush across the field North of the Regional police, i called Mortars to do a linear strike against the trench they were running to.Air support was also called in to target anything around the regional police area and to target and level the regional police buildings wiping most of it off the map.Those Syrian troops in the field North of regional police area were caught near the trench and massacred by the mortars and also by the 2 air strikes that targeted them.Near the trench there were around 35 or so Syrian corpses as a result of the mortars and air strikes.
In the city as the firefight raged on, the Syrian forces would do something I found to be very cool and I got to give much praise to BFC for putting in the squad withdraw feature when they are under heavy fire.
When enemies were spotted in the buildings I used the vehicles to lay down area fire on the house, on whatever floor that was needed.When my vehicles stopped to reload, most of the time the enemy slipped out the back door and what would amaze me is the fact that I would go into many buildings and there would be little to no bodies.In some cases it played out like this.I would area fire on a building for a while then hold fire thinking the enemy is dead or gone, but some weren't gone,It would seem like the enemy would finish doing buddy aid on their comrades since they weren't under fire,then get up and take a shot.I then would hit the building hard with vehicle fire again.Vehicle would reload and enemies would slip out the back as it reloaded.When my forces finally got to some of these buildings that had fierce resistance, there were no bodies to be found.Some of the Syrian bodies could be seen on the streets but hardly ever in the buildings.
Most of the enemy withdrew to the South of the Market spot and just East of the Summer Palace.In that area East of the Summer Palace the Syrians put up the most resistance and at one point I had a lot of Syrians trapped in a couple buildings and I tried to form a V shape formation to catch them so i didn't need to constantly chase them through the city, but I was unsuccessful and some managed to slip back towards the East end objective running through a hail of gunfire.
After much Urban fighting and after 1st Platoon secured the factory and the pioneers secured and held the Summer Palace,British forces continued to advanced East through the city and most of the enemy had now been pushed right out of the city itself.Some tried to escape by pulling back through the bush's beside the road near the East end objective, but that's where all Syrian city forces met their end.Some ran into the open and were gunned down while others held their ground and fought from the bush's.Eventually they were also gunned down and completely wiped out.The city was now under British Control with about 40+ minutes left on the clock.
At this point I got the Challenger tanks to form a line (more of a broken line) in front of the city near houses and they proceeded to pick of armour and inf that came in view.I also had snipers,FO and Jav teams act as buddy teams and had them holding top floors of various buildings to get a clear view and shot at any vehicle and inf moving to the city.After hitting and suspecting that all Syrian tanks were destroyed and the Syrian assault was dealt a severe blow, I organized a final push with the Challenger tanks and 1st Platoon.I had 1st Platoon mounted and ready to follow and sweep all buildings in the East area of operation behind the Challengers as they pushed forward, but then the Syrians Surrendered when my challenger tanks were close to them with 19 minutes and 13 seconds left.
I would rate this mission as great, but there is one part in the mission that I did not like one bit.I love the mission as is and think its another spectacular map that I enjoyed tremendously, but I have to say I did not like the Syrian reinforcements that appeared onto the map in the North end of the city near the water surrounded by a small wall(a fountain I presume).I had Warrior vehicles there covering the area and out of nowhere,what seemed to be a Syrian Platoon had just appeared 20-30 meters away from my vehicles launching 2 RPGs simultaneously at my Warrior vehicles the second they appeared.One was destroyed and gave me a further 6 maybe 7 casualties because I had a C2 squad in the vehicle with the crew and no one got out.After a brief exchange of gunfire that Syrian Platoon was wiped out.I think those Syrian forces should appear somewhere else and then try to make there way to that location.Plus on top of that just a few minutes earlier, I had a sniper team at that very location, but then moved them somewhere else before the Syrians reinforcements spawned.I think it's kind of silly to have the enemy spawn on top of your troops or 30 meters away, so I feel that should be changed.I understand your going for an element of surprise, but it doesn't seem or feel right the way it is.
Besides that red reinforcement hick up,I can honestly say you did a great job and I am personally really enjoying this British Campaign you created.Your maps are well done, very well done, in my opinion,I'll also post the results for the other 2 remaining missions when I complete them.
Edit:On another note, the civilian density was marked as moderate.Thinking back on the action I can't help but feel that there would have been many civilian casualties as a result of this assault.I don't think the British would have come out of this one winning any hearts and minds, but rather losing a lot of support.They won the battle, but I'm sure the collateral damage would have been to high resulting in the unravel of their victory and public opinion.
Here's a pic of the Syrian army that was left on the field after the battle.The Infantry near the regional police area took a beating and have no more then 2 men in their squads and are injured and taking fire.The Syrian teams you see near the one Challenger Tank at the mine area had no RPGs and are the only full strength forces, as well as the squads in the building in the mine area, but they were about to get destroyed by the Challenger tank.
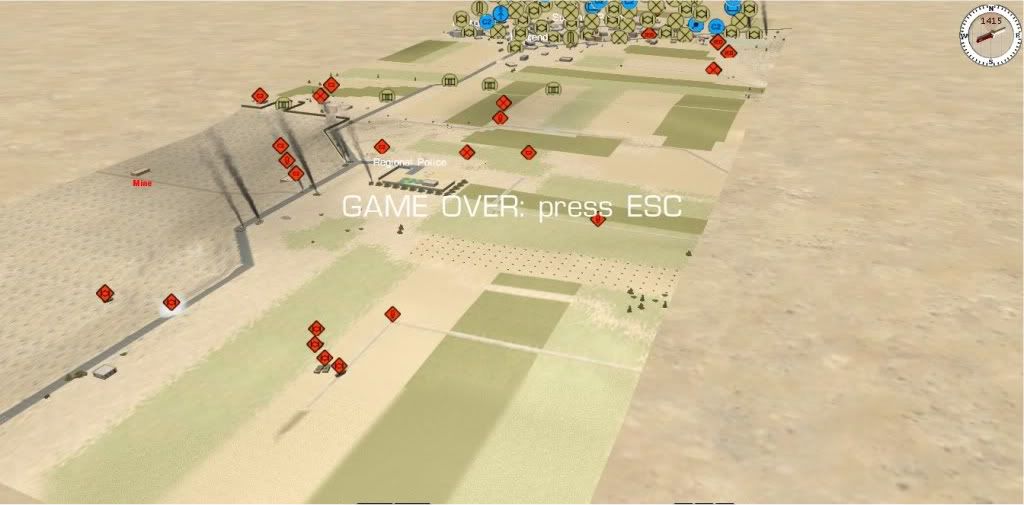
This is a pic of the 35 or so Syrians who got caught by mortars and air strikes.
-
Might as well throw this in here.
-
I also played this scenario over as red.I set up an ambush spot in the buildings around the Center building.Kept my RPG team facing a road where i suspected the Bradley to come.The ambush worked great at first and the American forces pulled back.I then used my BMP to take out the bottom floor wall of the center building so when American troops ran into it, they were easy to see.Did the same with the building beside it.It became very tough when the Americans opened fire because my Syrian squads would pull back or panic.The BMP and Bradley had a good go at each other.They both turned a corner at the same time and were shooting each other at about 30 meters away.Lucky for me RPGs helped out the BMP and destroyed the Bradley,but after my bmp crew was shaken,he pulled back and would not obey orders.Not a bad little firefight.Won that one this time but at a heavy price.Those Syrian men were very brittle.
-
Gibsonm,
I'm not a stubborn man so I'll take your point that it wouldn't work with vehicle deployed smoke.Besides how can I argue with your 28+ years of experience on operations,simply put, I won't.
The smoke the vehicles laid looked like 2 different types of smoke,one was white while the other was a sandy color.The sandy color one was the majority, where as i think only one vehicle laid the white smoke.It wasn't my intention at first and I thought it would have been to risky to call artillery smoke,because of possible friendly fire, but when i noticed the smoke being blown into the town perfectly from a vehicle, I figured why not take advantage and form a smoke cloud and follow it in. My troops were about 40-50meters behind the smoke as it was blown by the wind.I usually try to keep my pixel men out of heavy smoke.
I heard all kinds of stories in the use of smoke in war,but i'll take your word for it when it comes to this situation and vehicle smoke.
-
I always play Real time on Iron.
In the first mission the traffic jam was caused by the air strike I called in.Also with the combined forces of the the British troops and the vehicles on the edge, they had the advantage of using overwhelming firepower on the high ground.Brits vehicles were able to shoot Syrian vehicles as well as Syrians in the trench near the pine trees.Due to the superior advantage of firepower and high ground, the Syrians running near the road were decimated, the road was a kill zone.If the Syrians ran to take up positions on the high ground and avoided the road, they could have been able to put up more of a fight.Same with vehicles.As for the men who came assaulting through the bush area, i knew they were there because they came running out like mad men.I stayed in position mortared them heavily until i knew they were all killed.If some Syrian troops were to sneak up and hold near the edge of the Bush's, while others try to quick run in, i think it would give the player more of a fight.Even with that said i like how it played out, because for me it felt like the British advance was able to catch and unbalance the Syrian forces at the border.Kind of gives the impression that the Syrians were a little disorganized in meeting the threat but have managed to buy a little time to plan attacks and ambush's on the Brits advance further in the campaign.
In the second Mission i reported 1 of the loss of my Jackals wrong.The other was not hit by a Recoiless, but it was damaged by the artillery that the Syrians did attempt to call in on the hill.I dismounted the recce squad from the the Jackal and had them move to scout at the top of the hill(the one closest to the edge of map).The spotting Syrian rounds hit real close to my command unit located between the two hills.I moved him back and the second Spotting round hit right beside him again narrowly missing him.I thought the Syrian observer was directly targeting him so i Reversed him to hide behind the hill closest to the map.When the Syrian artillery began it was off map near the top of the hill.I moved my Recce squad away but later when i went to put them back in the Jackal that i dismounted and had hiding in the bush,i realized my men could not get in, I guess it was hit by artillery fragments, but remained intact and the status was shown as dismounted.Same with the Jackal crew who i suspect got shot, the vehicle looked fine but was unusable.
The second mission map I liked a lot, because you have forced the player to be very flexible and to use multiple methods and tactics as well as formations to proceed.It became a very diverse mission somewhat of an operation and i think could be an extraordinary task with an increased in time limit and ill try to explain why.
In this mission you have the elements of assaulting and capturing a well enough defended town, that requires a tactic on its own.You also have the Syrian counter attack on the town that requires the player to now defend it.You also have the part i was anticipating the most,running a convoy down a narrow road through thick forest where ambush's could be anywhere.Jungle tactics now come into play and i found it had potential of being a real nail bitter trying to move cautiously through that forest,it's a rare situation in CMSF and for a commander this becomes a real hard survival test.On top of that, there's the break out of the forest part where another small town is waiting for you to rapidly secure and aggressively try to smash through that ambush, another different situation of many that requires a different tactic.The recce guys with another Plt can also act as special ops and another form of tactics emerge, using them as a counter ambush and as ambush teams behind enemy lines as well as getting their eyes on the route and securing its flank from hostiles.
All these different situations force the player to constantly think of forming new ways to approach these threats.Lots of variety.What i think would have put up a hard fight, is possibly have Syrian forces take up positions at the forest's edge forming one big firing line under the concealment of bush's and behind the cover of trees.A deep defense so to speak where there's more Syrians in position behind the troops on the forest edge in order to support them and hamper British assaults.Still have some enemy assault the town with armour and vehicles as well as troops,that was good and caught me off guard, but the important part is to make the outer edge of the forest as a defensive zone for Syria, bogging down the British advance.Also have more men set up to take certain positions to ambush or assault specific spots inside the forest for when the British convoy come through.Corners and elevated spots as well as some downhill areas are ideal for that.Also what would prove tough would be to have Syrian forces on all high ground on map defending and denying the player his recon spots.This is Syrian homeland so they should be everywhere with mostly everything.
With all these factors to consider and the time it will take the player to resolve the firefight,reorganize, break out and resolve another firefight,reorganize,break out, resolve another firefight etc...the time limit will need to be increased dramatically to fully enjoy this gem of a map.This should be one hell of a slog of a map to get through hampering the player in all ways forcing him to constantly adapt unless your story for the campaign says otherwise.To fully go through this map and execute the tactics it will take a lot of time that will be dictated by the out come of the firefights, so the player should be given flexibility with the time hes got because hes going to need it with a tough multi layered/terrain defense in place.
My armoured column with the tanks managed to somewhat break out of the forest to the other side and my flanking Plt was also closing in on the last town.The Syrians managed to immobilize one of my tanks but they were getting shot down as quickly as they popped up.The mission was getting wrapped up and the Syrians who remained and were scattered in the last town were getting pounded, so the surrender wasn't to bad they were defeated,not sure what kind of victory i got.As for my casualties the number could have been drastically decreased, but the timer lite a fire under my butt causing me to be real impatient and running troops without care into areas i suspected of having enemy.Silly mistake that i will avoid next time.I'll just let the timer run out i really don't like losing troops on the back stretch of mission that's running out of seconds.
As for the smoke screen tactic, i think it was realistic and is probably and no doubt done in some situations from all eras in the field of war.Its similar to following the mist or fog or smoke from fires created to limit your foes vision and to close with the enemy.You could use it as defense to mask your withdrawal or you could use it as offense to mask your movement and surprise the enemy, its a double edged sword with no limits to it, its just not easy to control where smoke goes,but there are times when it could be exploited by a good military commander when he sees this rare opportunity.When i realized the smoke blew into town i thought it would be perfect to mask my assault.I ordered most of my vehicles to deploy it and then had my troops advance into the houses behind and under the cover of a massive smoke wall.The smoke started to clear up half way through the town but when it did my troops like ninjas were in positions in the houses with vehicles beside them,locked, loaded in good cohesive formation covering all angles and ready to shoot any target that appeared.Then i moved aggressively putting heavy fire into the houses as i advanced my men and vehicles.The fact i was able to get in the town a set up positions with out the enemy seeing me is what kept me on top and prepared for the unknown Syrian counter attack.
I feel like i just wrote an Essay so here is where i leave it.I'll try to finish off the campaign and try to give you more detailed reports on what was done and what happened.I'm enjoying it so far and there's no real negative feedback i could type,But i guess i should mention that you have spelling mistakes and some unclear sentences in your briefings lol.
-
He must be the British version of Rambo.That or it's 007 stealing the MK19 for his Audi.
Oh and great Mods M1A1TC, I use the majority of them.Excellent work:D
-
Well if your going to call artillery on a Mosque(to be honest i never do I always try to preserve them) or in some cases it could be a Palace that's big and practically fortified, you might want to use 155mm Howitzer. The Howitzers can destroy buildings quickly and damages all buildings it targets.If the building is not completely destroyed, the buildings walls will get knocked down and roofs will cave in making some floors unusable or exposed .Try different methods like hitting the second floor instead of the roof, making one side of the building heavily damaged and ready for collapse. As for the graphics, me personally i like watching buildings being reduced to ruble with artillery and air strike's.I think it puts on a very powerful show and buildings do get damaged.


It ain't half hot mum
in CMSF Strategy and Tactics Forum
Posted
This one sounds tough and interesting, I'm gonna give it a crack when I get the chance.