

noob
-
Posts
1,934 -
Joined
-
Last visited
Posts posted by noob
-
-
I have proposed to Kuderian that we instead use a set defense value of 4 for a unit that the defender doesn't want to fight in CM with its headcount unchanged.
Don't change the units defence value by a set amount, just quarter what it is already, this maintains the units unique identity.
Another thing, regarding assaults. As units in travel formation can assault in PzC we do allow this in CM as well. Units has to be in travel formation to assault over a bridge as an example. We do however severely restrict the deployment zone for an attacker/defender that is in travel formation. With the exception for attacking over a bridge.I agree, if PzC allows assaults in column, then it should be allowed in CM, but I would not only restrict the deployment zone, but I would not allow all the unit to come on in one turn.
So, for example, if three companies in column assaulted a hex, one company would be on the map in a restricted set up zone, and the other companies would arrive on the CM map as reinforcements, one company at a time, with one company arriving on the map in column 5 turns later, the last, 10 turns later. The same would be applied to vehicles, but platoons instead of companies.
-
@noob: thanks for posting that. I will reply in you rules thread.
Ok, looking forward to discussing it. Also, I think i'm warming to the idea of going back to using PzC morale as a soft factor, simply because it gives Isolation more impact, and, given that PzC morale drops automatically one level when units become Isolated, it shows that morale is not only affected by PzC fatigue levels.
-
As we have a rule that states that after a battle, 25% of WIA are returned (only perceived as very light wounds, and to encourage buddy aid)
If you get the 25% WIA recovery, even if you don't use buddy aid, then it does not encourage buddy aid

-
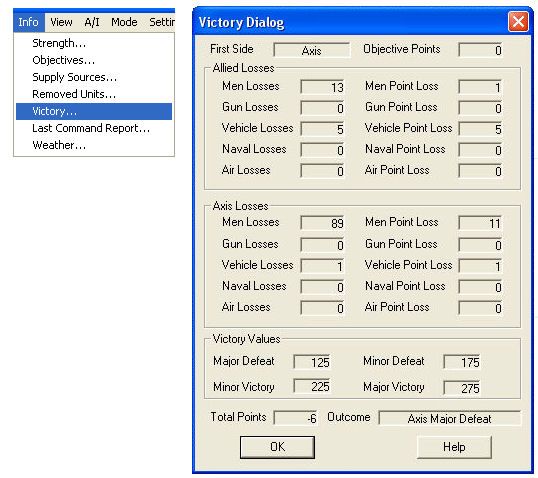
This is the current casualty list, and score for the game. I will regard a draw as a win for the Allies, so I cannot allow the Axis to get more than 224 points.
-
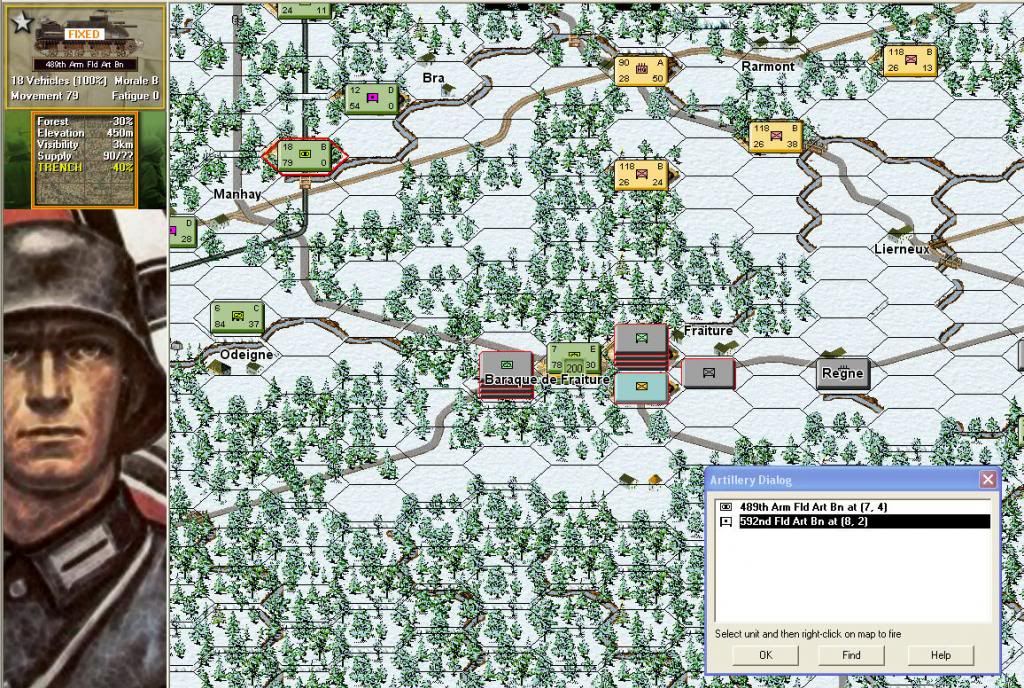
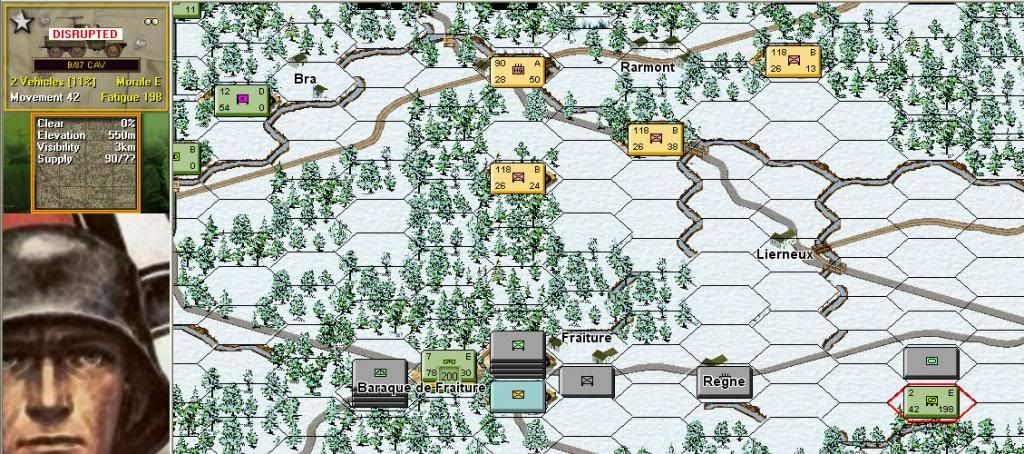
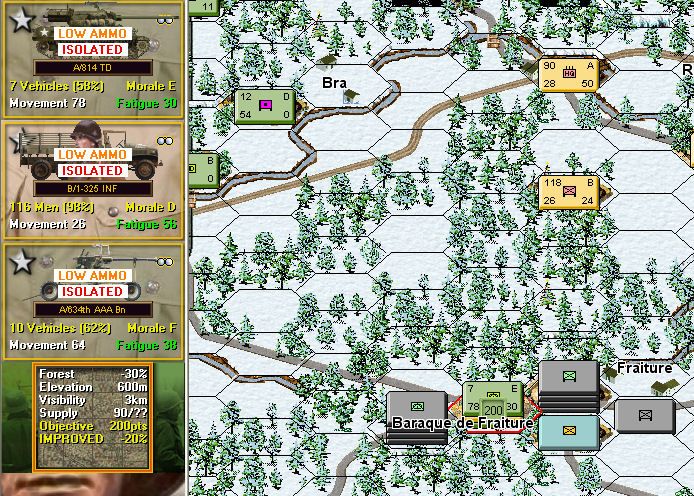
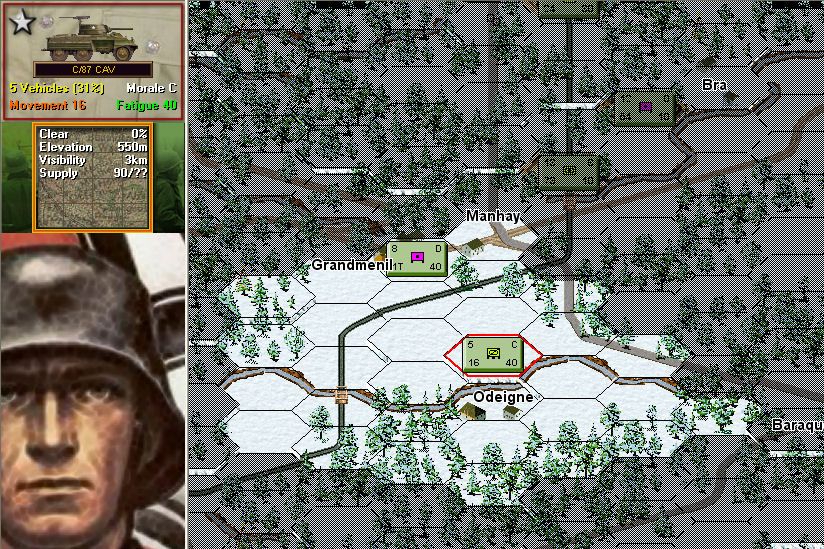
As most of my units are fixed, I will move the recon units and fire my artillery. I will need to rest my recon until they lose their disrupted status.

Now to fire off my artillery. I will be concentrating on the enemy units that are in travel mode, they will sustain more casualties.
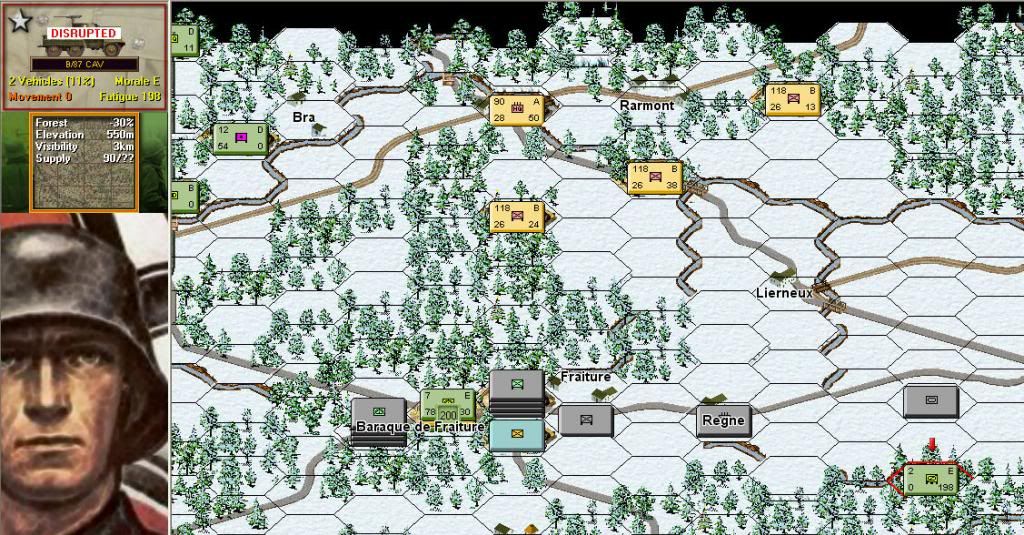
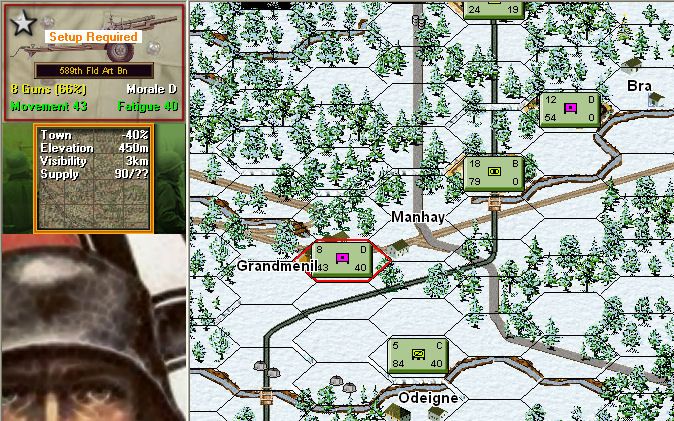
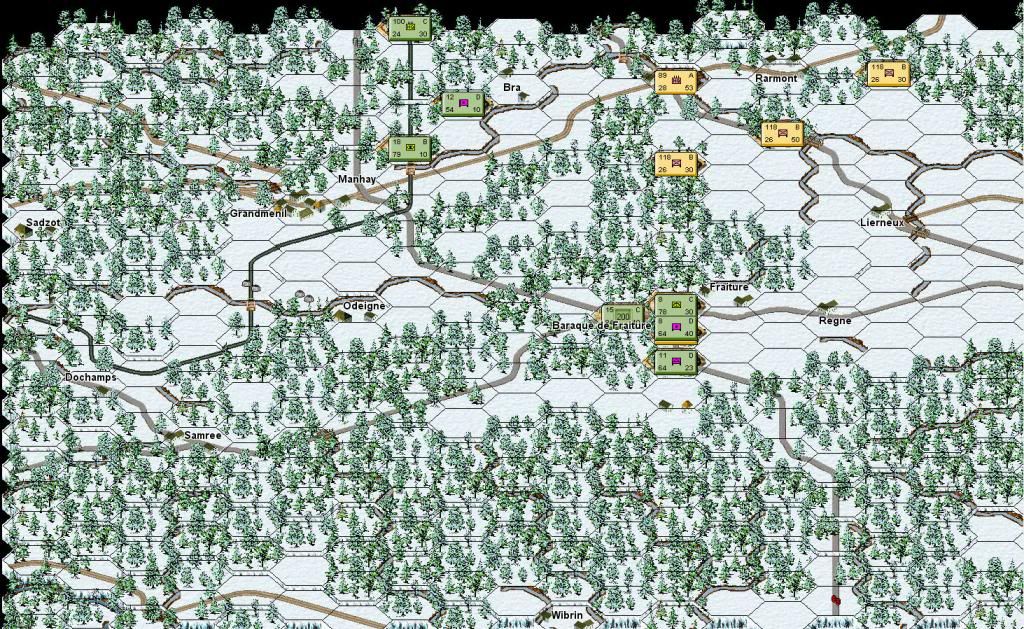
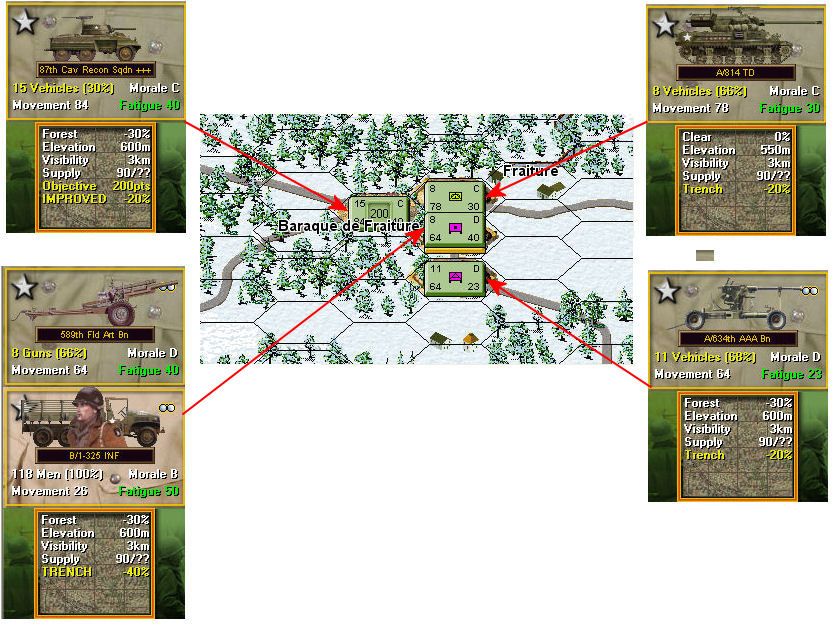
The pictures below show the enemy units thate are eligible artillery targets highlighted in red
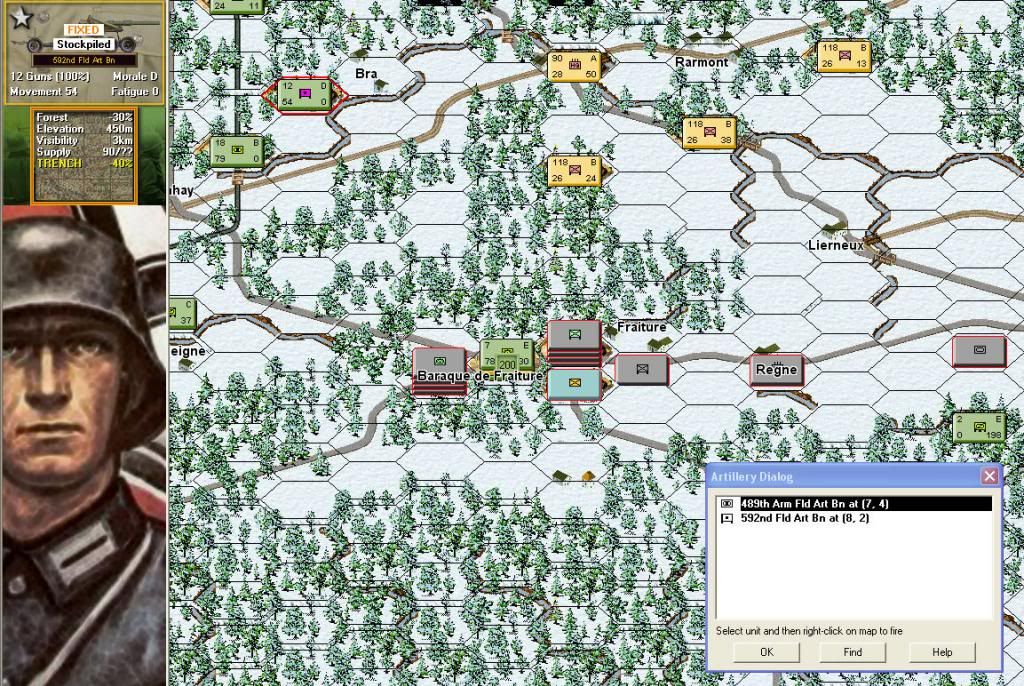
I concentrate all my artillery, and small arms fire, on the PzGD unit in travel mode, inflicting a total of over 40 casualties.
I target a PzIV unit in travel mode with my TG's, killing one tank.
-
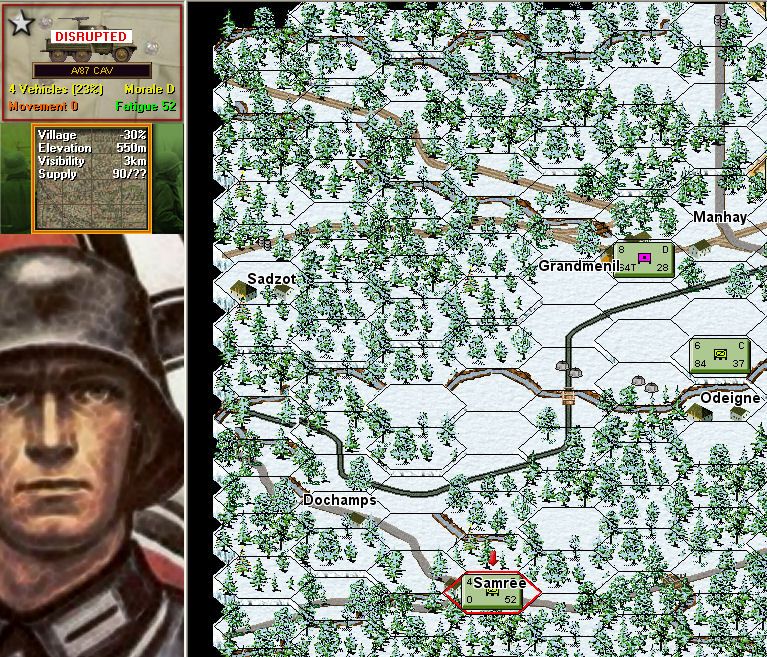
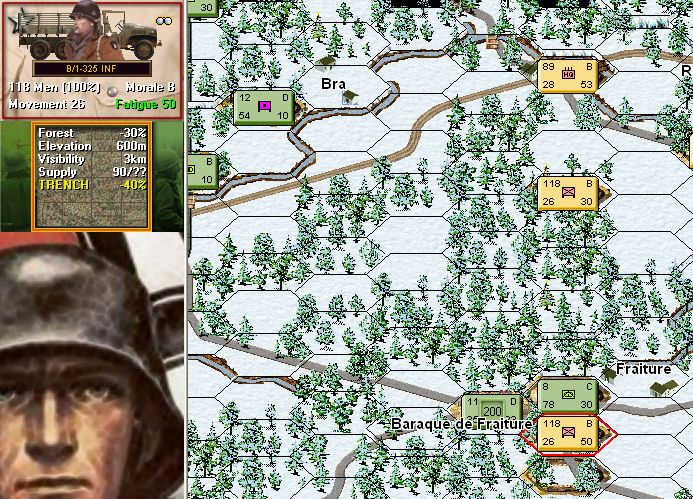
On my left, the recon unit was assaulted by Panthers, this is worrying if they are on the battlefield, however, their attack on my recon unit seems to have delayed them, hopefully denying them a chance to assault my VPL forces next turn.
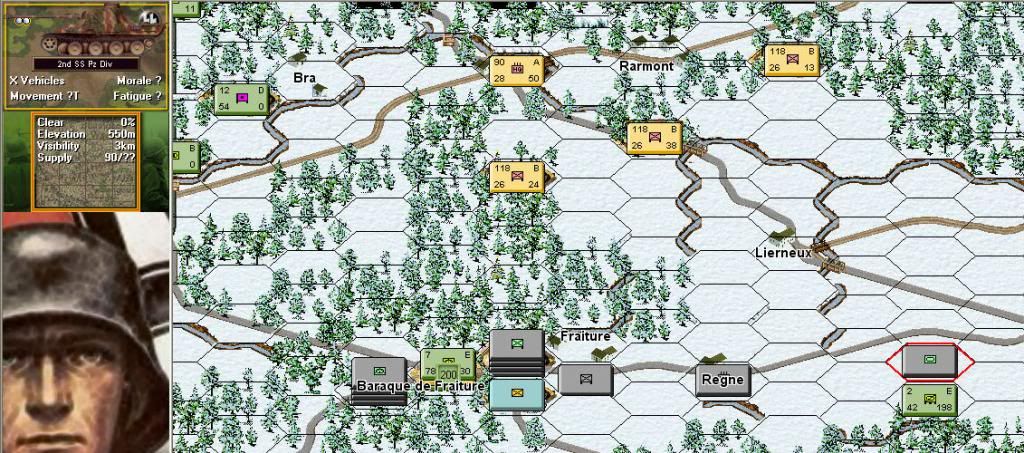
Also visible are a force of Pz Grenadiers, and a HQ unit.
-
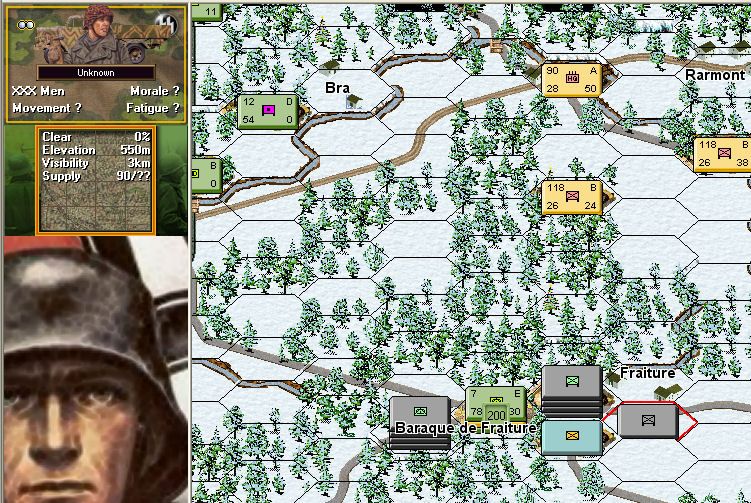
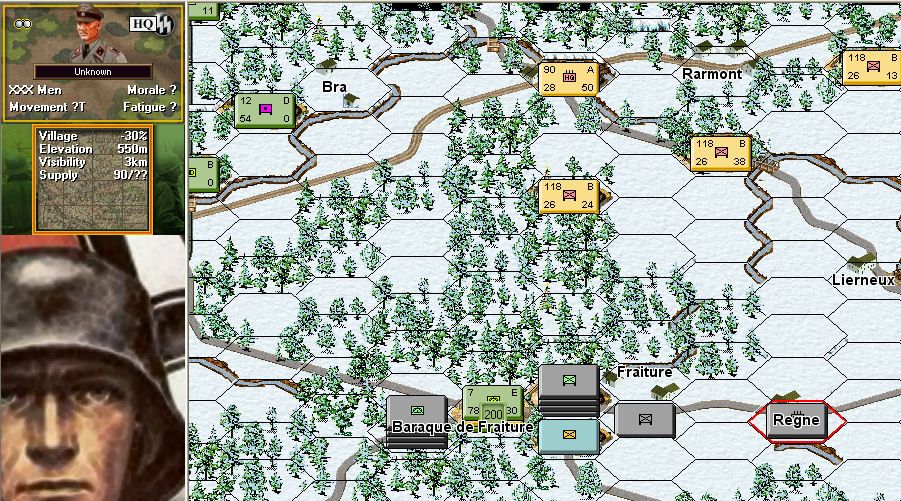
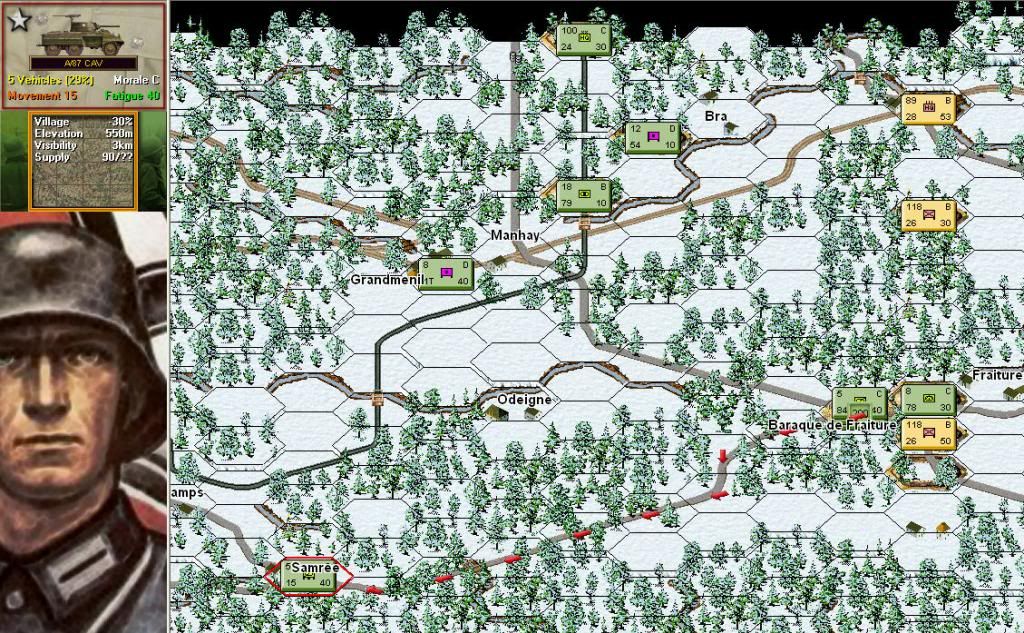
Allied Turn 03 (12:00 hours). The floodgates have opened this turn. My recon units have been brushed aside by the Axis armoured columns, and I am almost surrounded by enemy units. Looks like I will be fighting a mini Bastogne next turn.
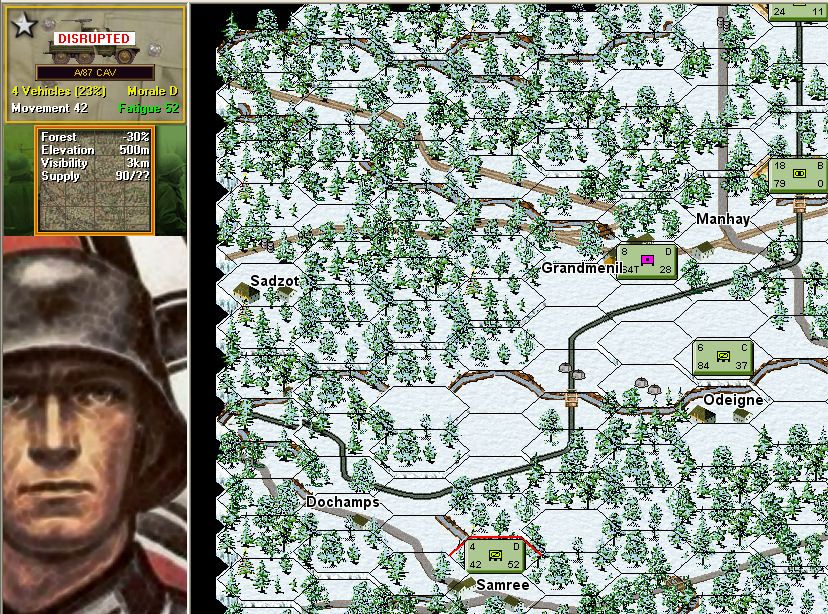
The Jagd Panzers that have appeared on my right were a nasty surprise. Their presence, along with the PzIV's, has Isolated my forces occupying the VP hex. I feel I have made a mistake here, as the recon unit that was sent to Samree could of been placed further back up the road, to occupy a forested hex, with a stream and bridge hex side between it and the enemy, giving it a much better chance of defending against the inevitable enemy PzC assaults. This could of possibly resulted in them delaying the Jagd Panzer column by at least one turn, thus allowing my forces to concentrate on the PzIV threat without being Isolated.
Isolation means that my supply line has been blocked by the enemy units zones of control: https://sites.google.com/site/cmpzch2hoperations/panzer-campaigns/pzc-zone-of-control/
The effects of this do not kick in until after the first CM battle:https://sites.google.com/site/cmpzch2hoperations/panzer-campaigns/pzc-supply
-
I just thought I would share something that happened in the CMPzC Bulge operation I am playing with Kohlenklau. I sent five Greyhounds down a road to a crossroads to give me an early warning of any enemy units approaching from a certain direction. The enemy showed up in strength, namely, a lot of Panthers and PzIV's. My opponent declared an assault on the Greyhounds, but, according to the CMPzC rules, the Panthers would of had to change formation to be eligible to assault (they were in travel mode) and fight a CM battle. But, even if the enemy armour had routed the Greyhounds in a CM battle, as one would expect, they could still not use the road, and continue their movement that turn. So inadvertantly my five greyhounds were acting as an effective blocker, and this is exploitable.
Therefore, I suggested that my my opponent use the PzC assault function to force the Greyhounds off the road, or destroy them. He tried this, and the results were problematic. So I decided to edit the Greyhounds defence value in the PzC OOB. It was 12, and I made it 3. When we ran the turn again, the results felt right. The Greyhounds could not withstand the assaults, and were brushed aside, allowing my opponents units to pass.
This got me thinking. To allow the use of the PzC assault function would be a great asset, so I am going to recommend editing all recon units in a CMPzC scenario by quartering their PzC defence values. That way, recon units cannot act as blockers.
One way to use it beyond just recon units would be to allow anyone that uses it, and gets a result that both players think doesn't feel right, to edit the defence values of the units that should lose, so they do lose in a way that does feel right. This method could be used if non recon units get caught on their own, like artillery for example.
-
I have modified the following page: https://sites.google.com/site/cmpzch2hoperations/panzer-campaigns/pzc-assault
The reason I have decided to use the PzC assault function in CMPzC is because in the CMPzC Crossroads Operation I am playing (see CMFI forum) a section of 5 M8 Greyhound scout cars blocked a substantial combined arms force, thus forcing a CM battle. The battle seemed far too one sided to warrant playing a CM battle, so we decided to use the PzC assault function. However, the results seemed way off what one would expect if the assault was performed using CM.
With that in mind, I decided to experiment with reducing the defence value of the Greyhounds, until the assault results represented a more realistic outcome. This was achieved by reducing the defence value of the Greyhounds from 12 to 3. Therefore, I would suggest players reduce their recon elements defence values by a factor of four. That way, recon units can be brushed aside if relatively insubstantial, thus saving time, and also stopping them being used as blockers.
In conclusion, I would recommend that anyone using the PzC assault function in a CMPzC game should agree with their opponent, that, if any results are problematic, the defence values of the defending units should be reduced, until a more realistic result is achieved. This can be done during the game, and will not corrupt the game file, so restarting the scenario is not necessary. I plan to experiment further with the PzC assault function, with a view to finding if I can reduce all units defence values by a set number, thus allowing me to edit the whole PzC OOB, and removing the need for players to do it themselves.
-
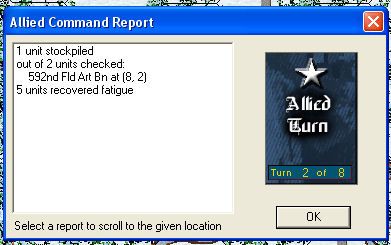
Now to start Allied Turn 02 (10:00 hours). First of all I read the Allied Command Report to get updates on my forces. You can see that some units recovered some fatigue. This can happen if the unit does not move or fire during a turn. Stockpiled relates to artillery, and means the stockpiled battery will be less likely to become low on ammo when PzC rolls its dice.
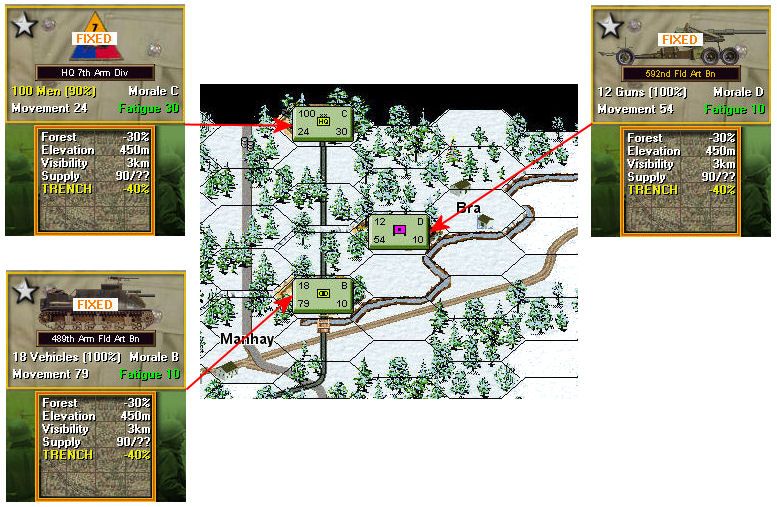
After watching the Axis battle replay, there are no visible enemy units.
[
Therefore, the only thing to do is to change the 389th Field Artillery Battery from travel to combat mode.
It will take one or two more turns for the battery to set up to be able to fire.
I will now send the PzC PBEM file to my opponent, to begin Axis Turn 03.
-
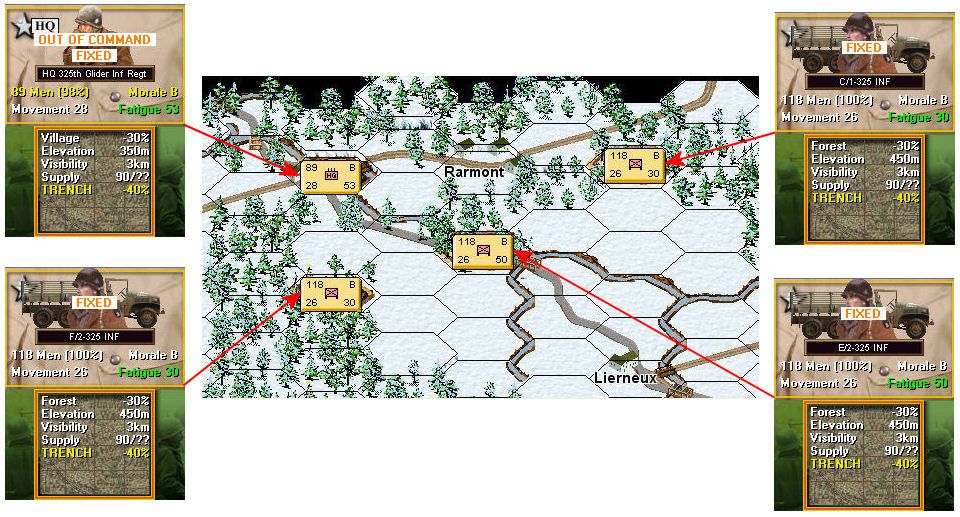
All the rest of my units are fixed, apart from an Infantry Company, and a Tank Destroyer Company. I decide that, given my limited forces, to concentrate them on the VP location and wait.
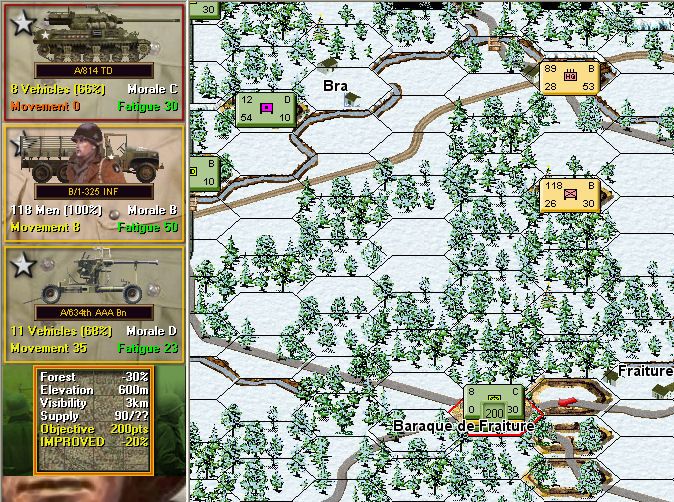
Below are the final positions of the Allied forces at the end of Allied Turn 01. I will now send the PzC PBEM file to my opponent to begin Axis Turn 02.
-
Once I activate the Visible Hex button, I can see the LOS of my recon units. I will now get an earlier warning of any enemy units arriving in the area.

-
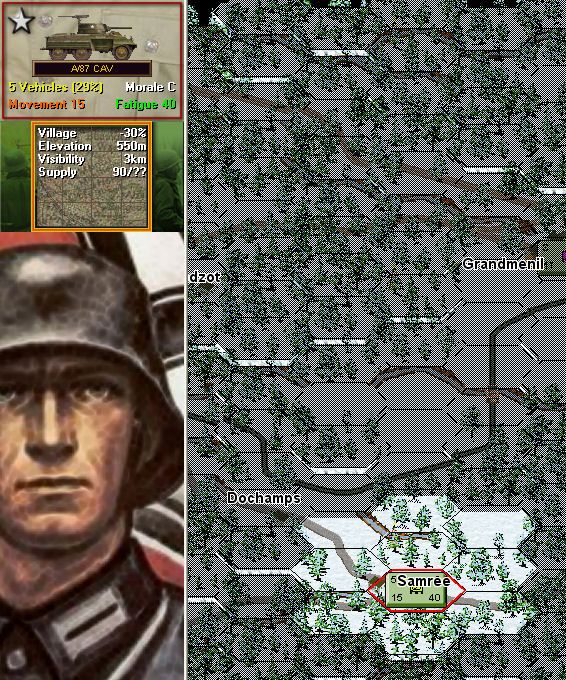
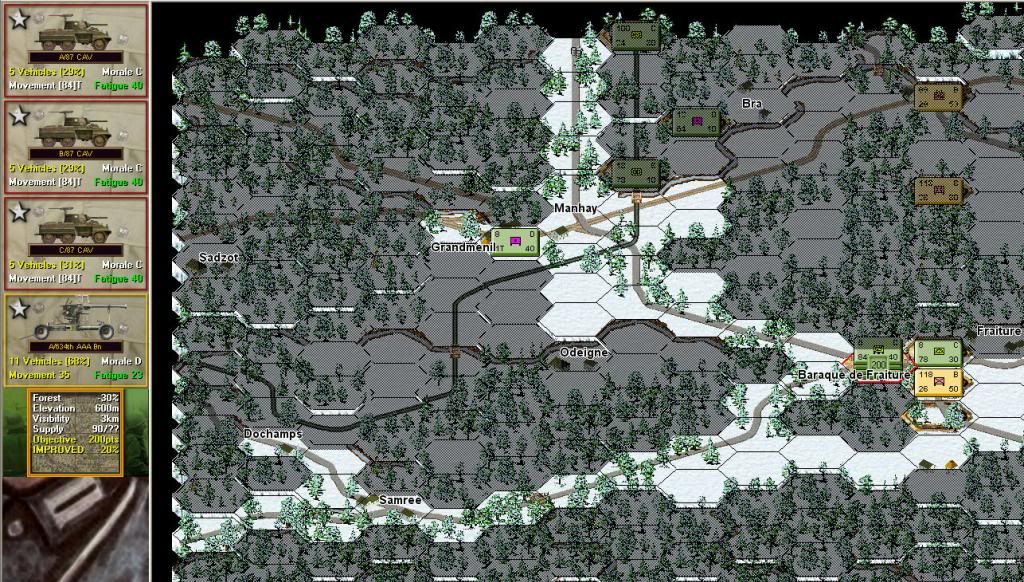
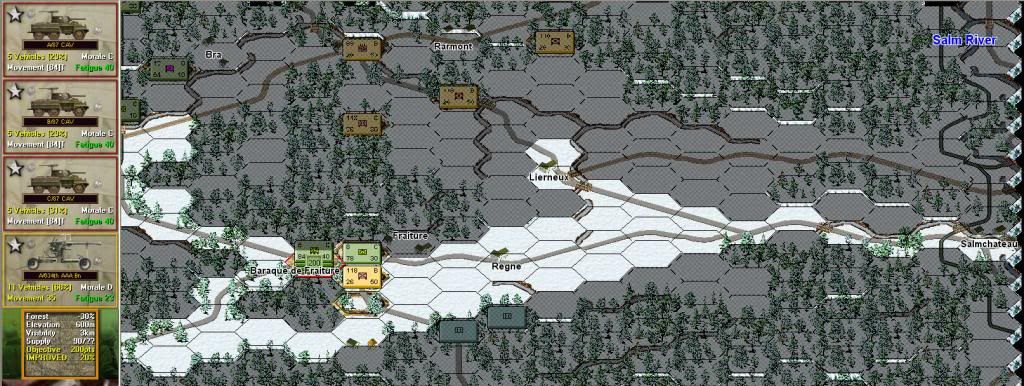
I need to get units to act in an early warning role, so I send three sections of five M8's in three different directions to take up positions where I am blind.
-
Good idea targeting that position with the mortar, and it's paid off. It's a pity they weren't directly under it when it hit, but it will certainly make them go elsewhere, buying more time for your troops to get closer.
-
Definitely the right decision - we have very limited opposition currently in Buron (afaik) and very substantial counterattack force possibly coming up. The Glens wouldn't thank Division for wasting substantial artillery assets on the assault when they may well be facing a powerful counter thrust by armour and panzer grenadiers
Also, even if there isn't an Axis CM battle to assault this hex after the Axis PzC turn, the artillery will perform automatic opportunity fire during the Axis PzC turn, if the enemy unit is spotted by a unit from the same organisation as the artillery.
-
I will now use the 15 x M8's of the 87th Cavalry Recon Squadron to recce possible enemy approach routes.
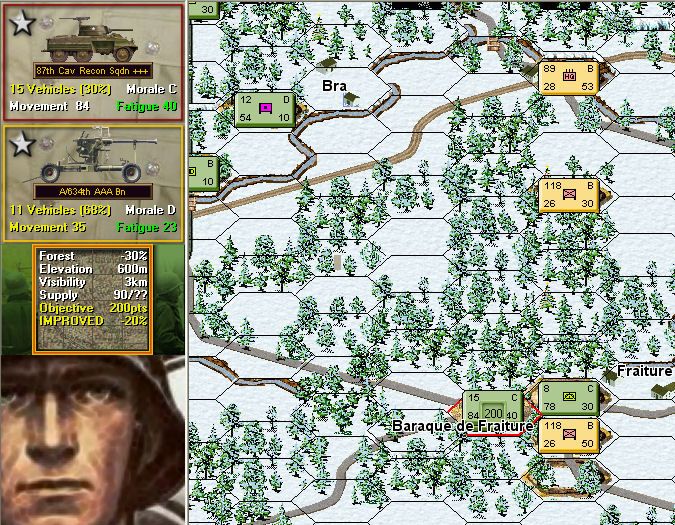
Because there are three plus symbols after the units name in the unit info box, it means it can be split into two or three separate units. Therefore, I split the unit into three sections of five vehicles, using the combine / breakdown function.
Then activate the buttons below to see where the units can move, and redeploy to.

-
I could of added the 24 guns of the 12th Canadian Field Regiment. They would of been present in 3 x 6 gun CM batteries. Each tube would have a maximum area fire circle diameter of 35m, therefore, a 6 gun battery would have a maximum area fire circle diameter of 210m, plus or minus 10%, = 230m. Therefore, an area of 700 x 230m could have been stonked at the start of the battle.
The reason I did not add these weapons is because a CM battery can be used in only one CM battle in a PzC turn, and if the Axis assault the hex during their PzC turn 01, I can add the artillery to that battle. The interesting thing will be if they don't, then I would of missed an opportunity to make this battle easier. Artillery allocation in CMPzC is a game within a game.
-
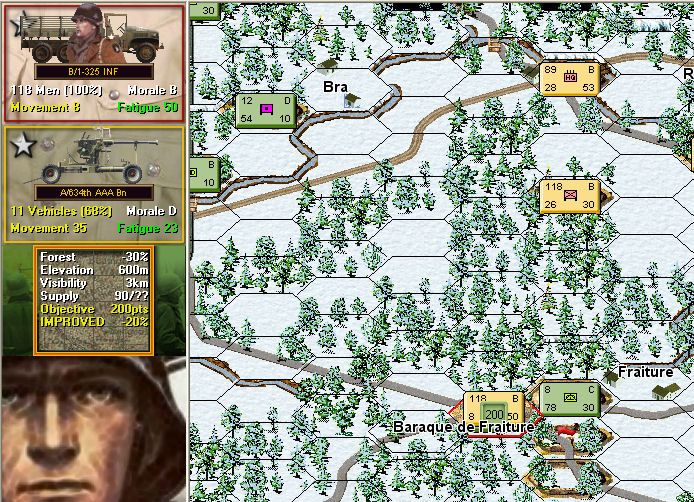
My first move is to move the AA guns away from the front line. I want to use these weapons as a last line of defence, so I will move them to occupy the victory point hex. Another reason I am moving them is to take advantage of the fortifications, as Improved in PzC is Foxholes in CM, and I would rather they use foxholes than trenches in the event of a CM battle.
Therefore, to see which hexes I can move, and redeploy the unit to, I activate the three buttons below. (The T in the units info box denotes travel mode, the brackets around the units movement cost denote that save movement cost has been actived, and the unshaded hexes are reachable)
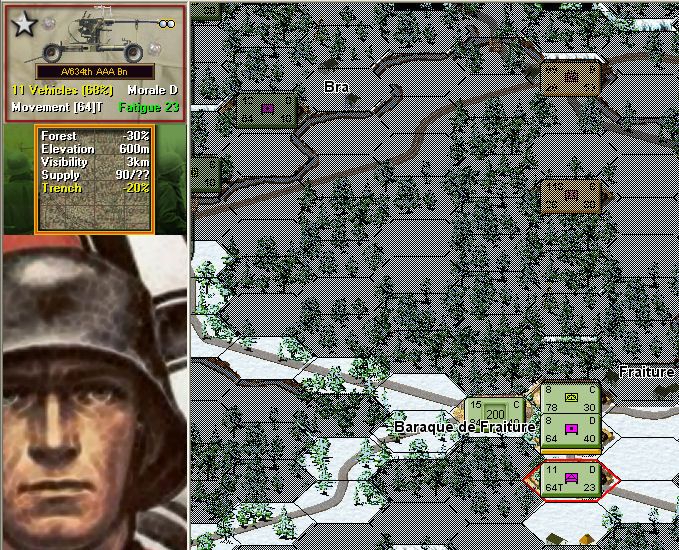
Therefore, I can move the AA guns to the desired hex, and change their formation from travel mode to combat mode.

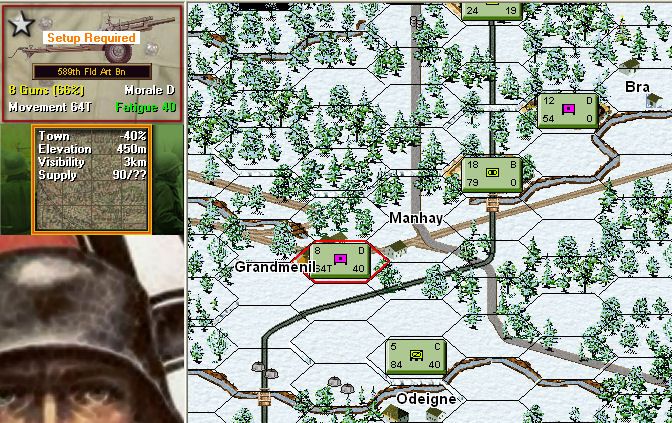
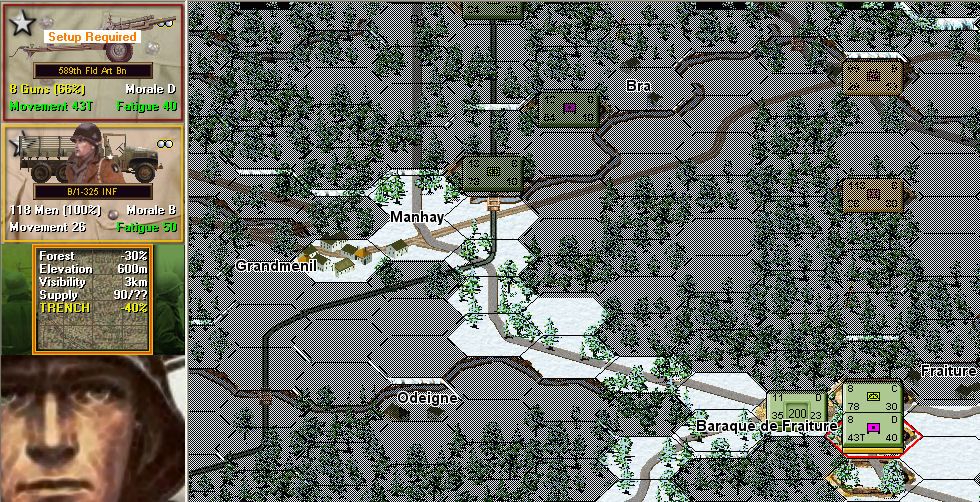
I also want to move the 589th Field Artillery Battery away from the front line. Because it has a maximum indirect fire range of 11 hexes, I decide to move it to the town of Grandmenil, where it will be in range to support the VP hex.
[
Unfortunately the objective was too far away to allow the battery to redeploy to combat mode, so I will have to do that during the next PzC turn. However, it should be operational by the time the VP hex is assaulted.
-
HaHaHa that was just a 5-5 test map.
Made it in 5 minutes after having 5 beers.
That's why we will be using pre made maps

We will be using maps from either scenarios, or quick battles, with modifications if necessary
-
This operation will demonstrate CMPzC being played as it was conceived, namely, as a way two players can play an umpireless H2H CM operation. My opponent is Kohlenklau, we will be playing both the PzC turns, the CM battles, and performing all necessary admin. We are playing the scenario #23_02_Crossroads_Alt.scn, using the game Panzer Campaigns Bulge '44, and Volcano Man's mods and optional rules. Because we are using CMFI, we have had to make some compromises with the units portrayed in the PzC scenario, namely, we are using PzGDr's instead of SS PzGDr's, and Parachute Infantry instead of Glider Infantry.
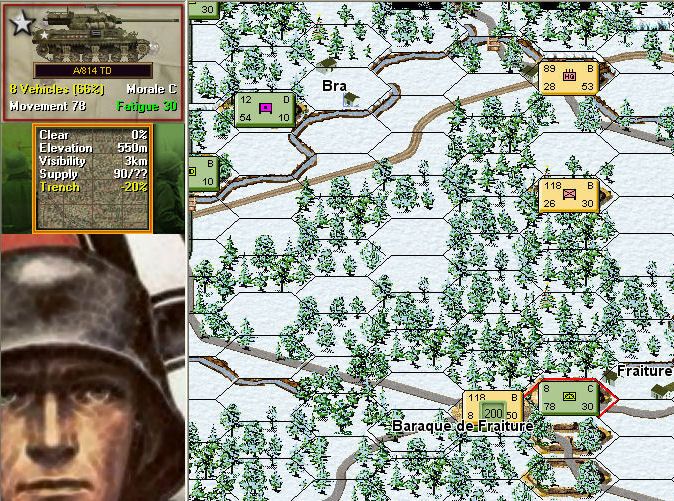
Baraque de Fraiture, 30Km north of Bastogne, Dec 23rd, 1944: This scenario is based on actual events that took place at a strategic crossroads on Highway N15 near Liege. Major Arthur C. Parker was commanding 3x105mm howitzers from the 589th Artillery Battalion of the 106th Infantry Division. On his own initiative he set up a defensive position and gathered stragglers and remnants of retreating units. They held the position for almost 3 days before a concerted effort of the elite 2nd SS Panzer Division defeated them! (copied from the game description). The PzC scenario will last 8 turns (each turn representing two hours per turn) and starts at 08:00 hours. There is one Victory Point Location located at Baraque de Fraiture, worth 200 points. The winner will be the side in possession of the VL at the end of the operation.
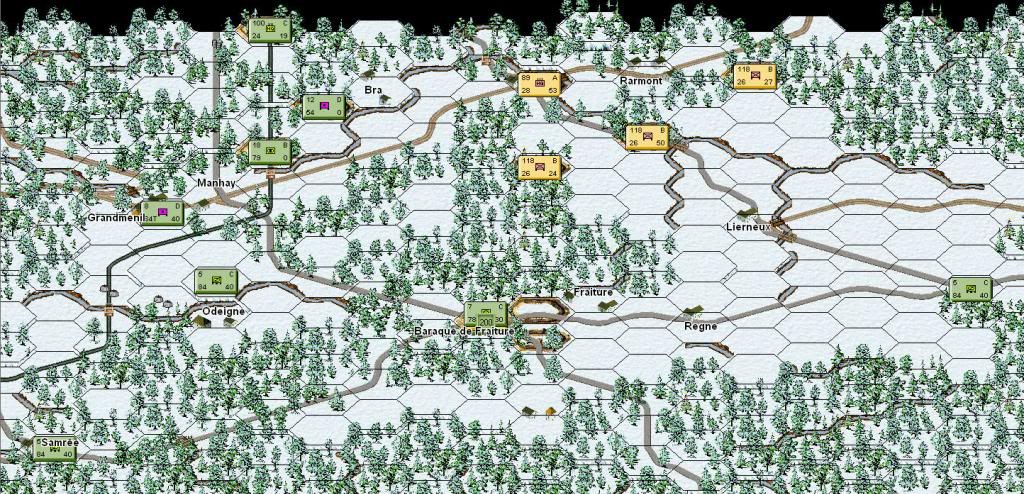
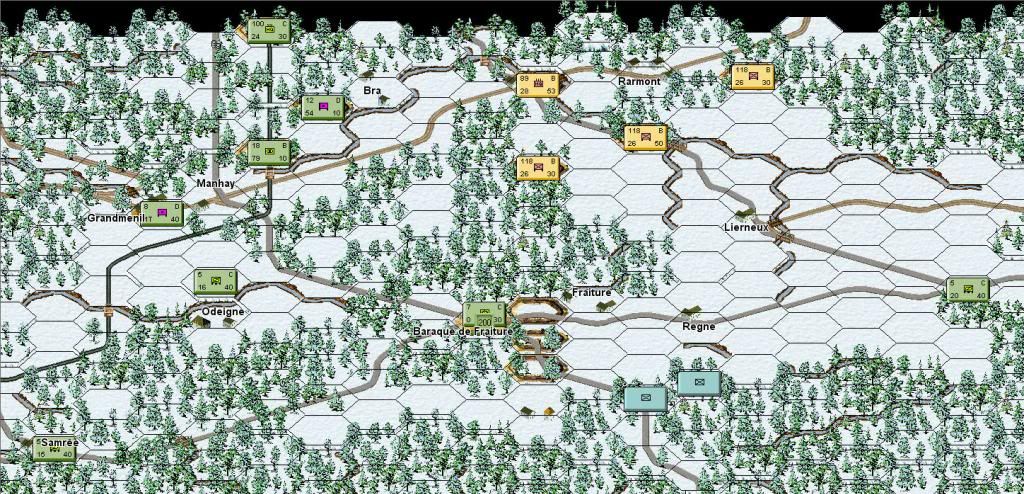
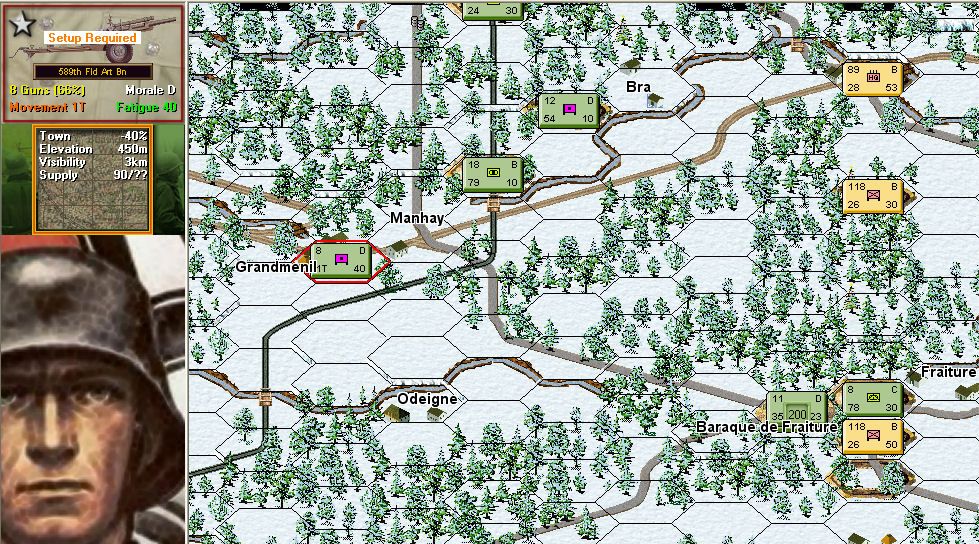
Below are pictures showing the operational area, and the starting deployment of the Allied forces.
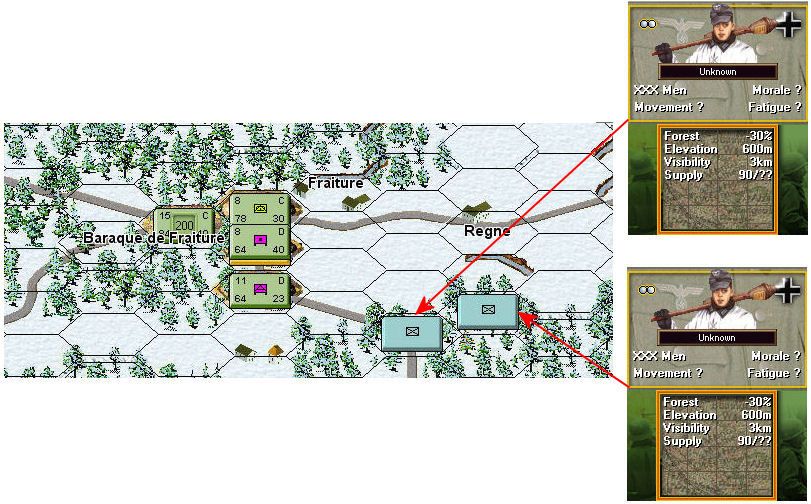
The picture below shows spotted enemy units after the Axis PzC turn.
I will now perform the first Allied PzC turn.
-
Not sure I said that.
Well, that was what I thought you were saying, however, if you didn't say that, and I cannot be bothered back tracking to find out, I apologise
Never meant it anyways. But english is not my first language so there is some room for confusion . Sorry about that.These things can happen, I'm just glad we have sorted out the confusion
-
They don't have to do it any time. They still get 25% of WIA back.
I thought that was what you meant, but I wasn't be sure until now. This explains why we have been at loggerheads, you confused the issue by saying that the manually applied 25% recovery of WIA made buddy aid more effective. However, that is not true, as the amount of troops that don't become KIA because of buddy aid is not effected at all by the manually applied 25% recovery rule. It is the total amount of WIA that is effected by the 25% rule.
-
Yes thats right.
If the 25% manual WIA recovery is available by just using buddy aid once, then that's hardly the best method for encouraging the use of buddy aid. Why not say you get 5% manually recovered WIA back every time you use buddy aid, up to a maximum of five times. That would encourage players to use buddy aid five more times than they would using your method.
-
Buddy aid effectivenes is not in the equation. The deduction of the WIA pool has to be done manually or there is no incentive for the player to conduct it other than to collect weapons and ammo. Weather a man is a KIA or WIA without this rule has no impact on the game at all.
Ok, so if I only use buddy aid once, on one man, in the whole of a CM battle, I would be eligible to manually get back 25% of my WIA ?


Allied AAR: A Route to Ribera or "A Bridge Too Far" (CMPzC)
in Combat Mission Fortress Italy
Posted
Telling players exactly how CM applies buddy aid usage to the WIA readout after a battle "might" encourage them to use it, but the 25% WIA recovery that you manually subtract from the WIA number does not encourage buddy aid, as that is given to players irrespective of whether they use buddy aid or not.
The only way the manual 25% WIA recovery could encourage buddy aid, would be if one could know if a player used it or not. Then, you could say that if you use it you get a reward, if you do not, you don't. Even better would be to know how many times a player uses it, then you could give a reward for every time it is used, i.e. 5% WIA back for one use of buddy aid. However, because the AAR screen does not indicate anything about buddy aid usage, one would have to rely on the honesty of the players when they claim their buddy aid bonuses. Of course, these rewards would all be on top of what CM gives you back for using buddy aid.