

A Canadian Cat
-
Posts
16,497 -
Joined
-
Last visited
-
Days Won
55
Posts posted by A Canadian Cat
-
-
Limited intel is far better in CMx2 than in CM1. Have you read the manual?
I am pretty sure he is talking about the information you get when you click on a contact icon. See the discussion in this thread:
http://www.battlefront.com/community/showpost.php?p=1307668&postcount=21
-
I was looking up the acronyms AAR and DAR on the net, and discovered that DAR is not listed as an official acronym, unlike AAR.
I think people just adapted AAR to DAR to make it clear they are writing as they go.
Either that or start using a search-engine-friendly term. AAR only has three letters (d'uh) so the forum engine won't find them :mad:I have stopped using forum search tool - just give it up and use Google instead I actually find stuff when I do that.
On Google (or in one of their search bars) you can type [ site:battlefront.com ] in front of your desired search terms (not including the []).
On top of that Google is cool with three letter words and allows you to use OR (|). So you can find all the AAR and DARs with this search string (again without the []):
[ site:battlefront.com AAR | DAR ]
Thusly http://www.google.com/search?q=site%3Abattlefront.com+AAR|DAR
-
I have three overlay bmp files I am using. One for details, one for the contour lines from 53m to 85m and one for the contour lines from 90m-120m. I had to split up the contour lines because the higher elevation layers pretty much whited out the lower elevation layers.

The detail overlay:

If you want to see my bounding box and overlay polygons here is the Google earth file that holds it all. It contains a folder called Sicily DZ with the places, lines and polygons I used to create my overlay images.
http://www.lesliesoftware.com/forforumposts/2012/SicilyDZ.kmz
-
I have to start by saying I love the map making enhancements in 2.0!!!
I am actually enjoying creating the contours and the farms. Having the overlay is a god send. I have been able to work for hours at a time and just beaver away without the context switching that I could not deal with. So far I have created the basic elevation and the road network. I have detailed two farms and the stream that runs through the map. I am working with a 1km by 1km map just to be sure that I have enough to tweak it later once I start playing with the actual units.
Here are a couple of screen shots:
The view from the stream up towards one of the farms.
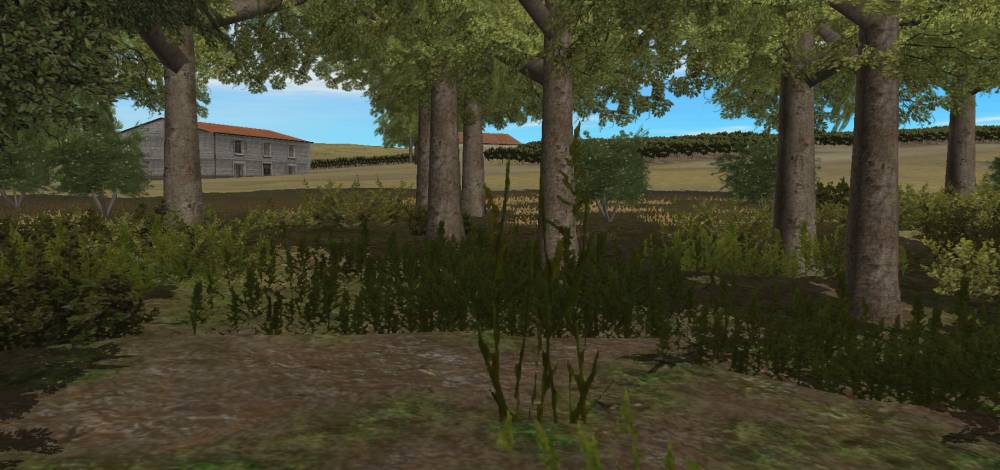
This is the view down the sloping open ground that will be the DZ. The only detail that has been done are the two farms and the stream you see still lots of work to do.
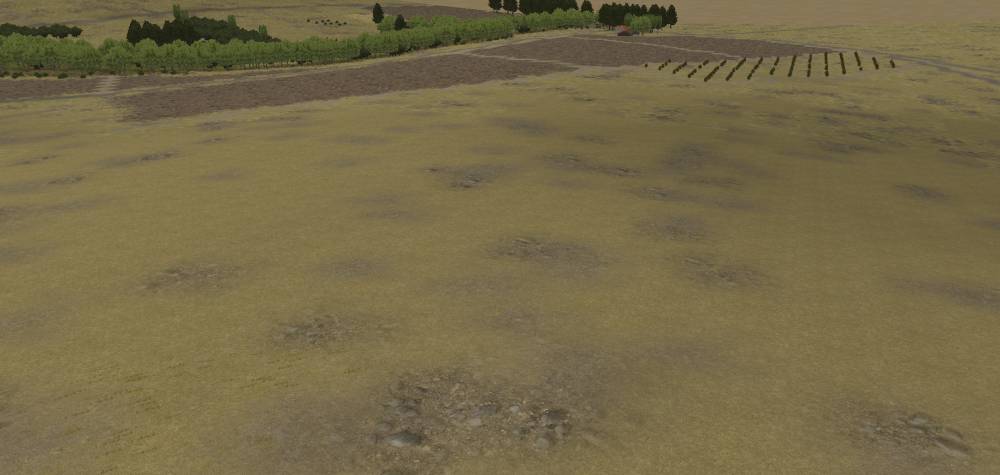
Hummm I think that orchard and vineyard need a little something more...
I am having fun creating this map - thanks BFC.
The road and wall drawing tool is also very helpful but it is no silver bullet. I used it to layout some of the segments of the road network but I still needed to learn how to create roads because it made a few odd decisions and short hops were pretty much never the way I wanted them.
-
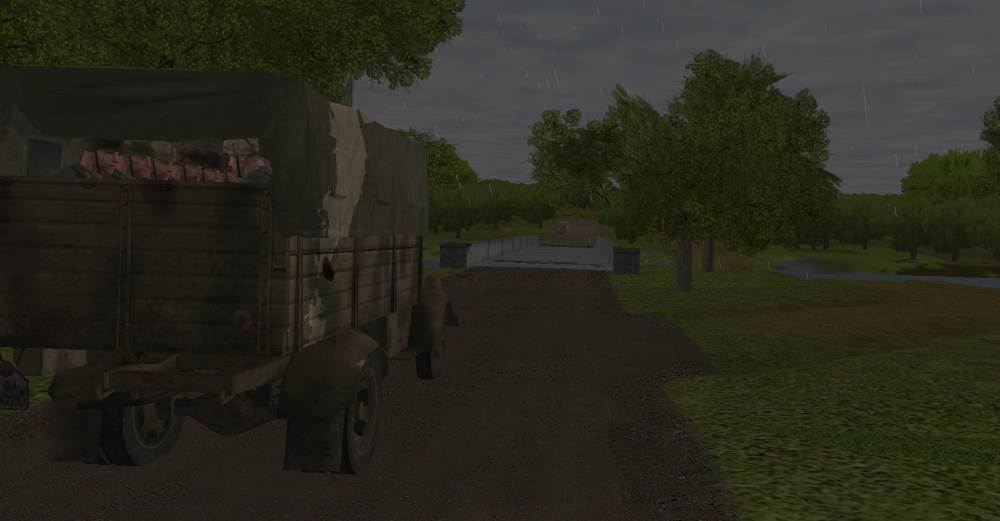
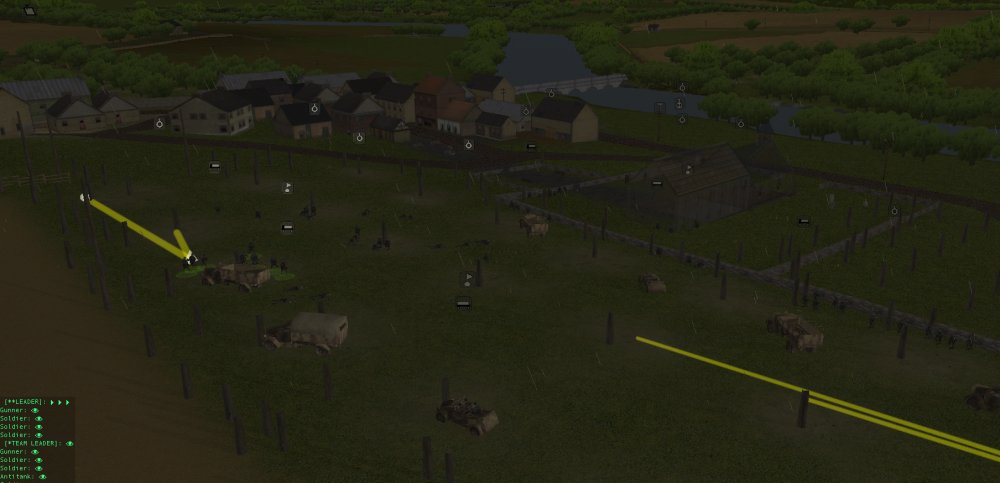
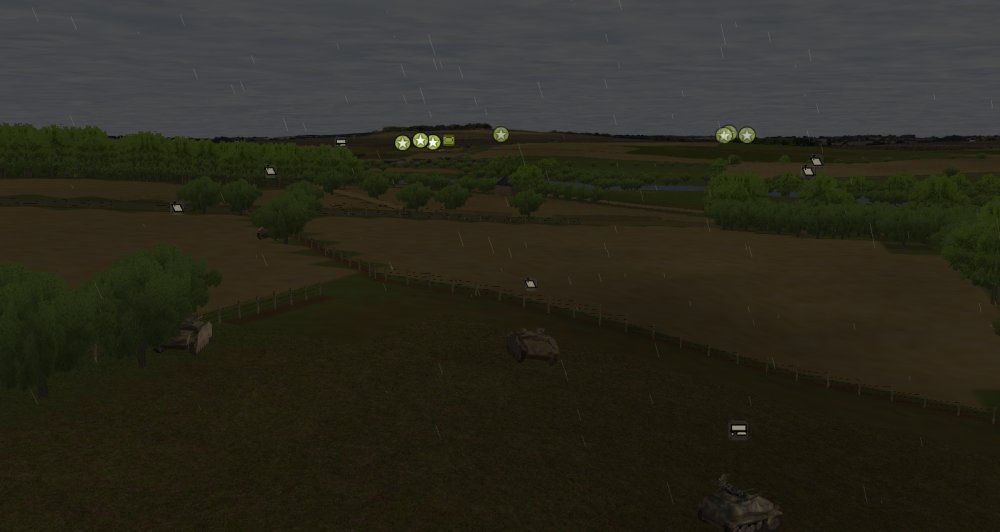
With the main bridge traffic situation sorted out the remaining soft vehicles get their marching orders. That will leave only one platoon of assault guns left to move out.
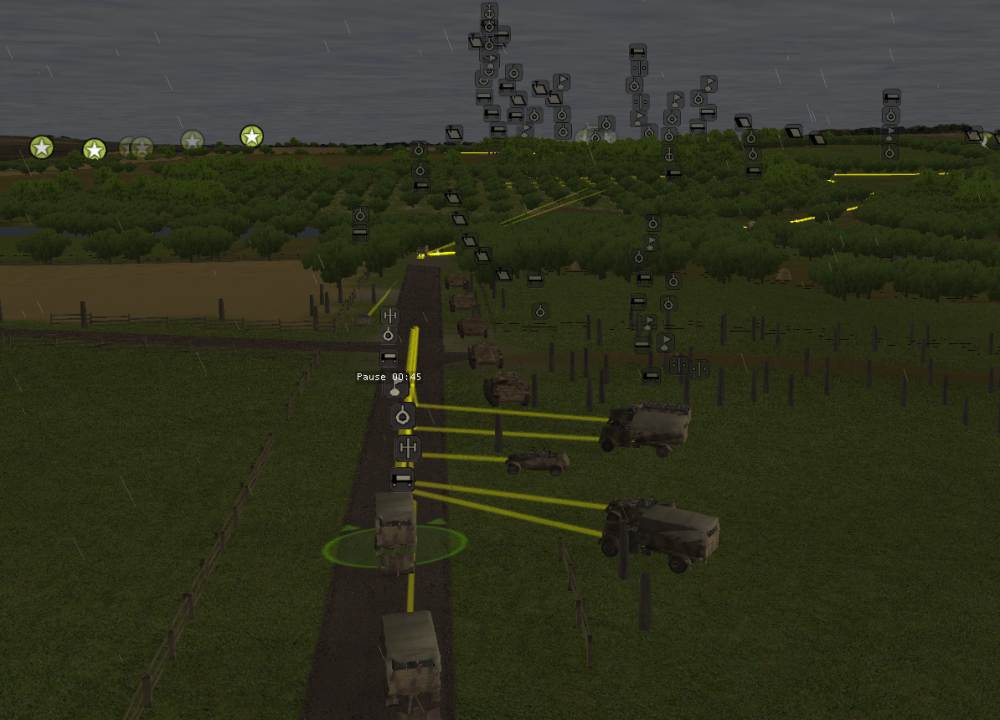
As instructed 2 Company's CO, Braunstein, gets 2 Platoon and the trailing Panther tank to divert to secure the left flank of the convoy.
Meanwhile the assault guns supporting 1 Company shift around to cover the spotted Stuart tank in the town while the infantry cross to the next tree line.
-
The traffic problems at the bridge are no sorted out but with the reported activity on that side of the river I am growing concerned that there is more on the other side of the road bridge objective than I originally barged for. Given that no one has started crossing that bridge yet; I contact 2 Company to inform them that they need to protect their left flank on the other side of the bridge. 2 Company's Braunstein is ordered to arrange for one platoon and a Panther tank to divert to secure the left flank of the convoy.
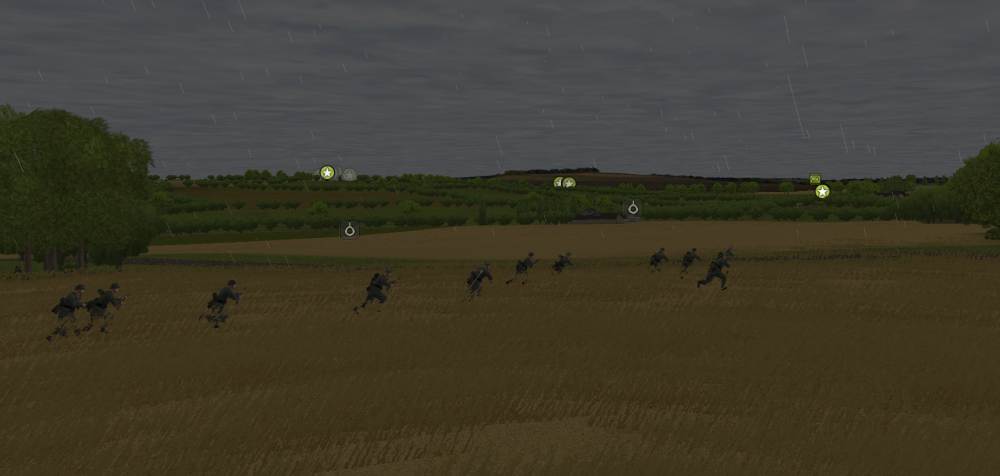
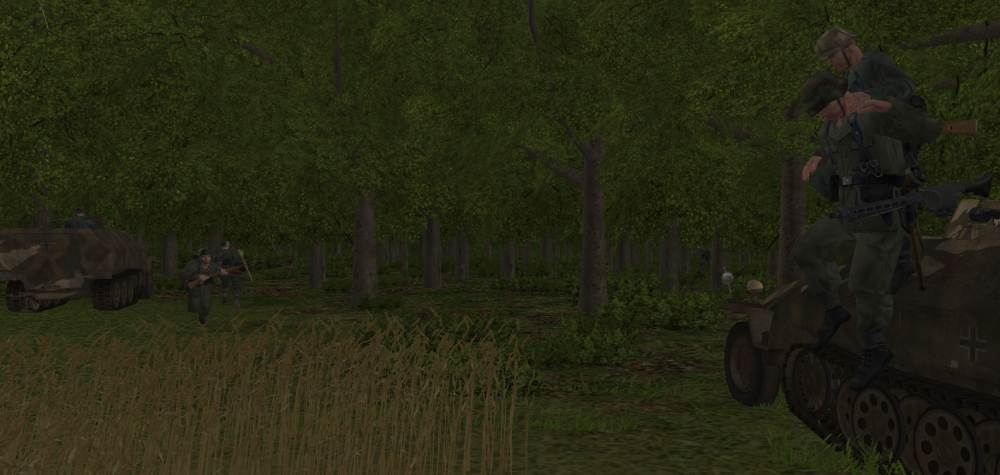
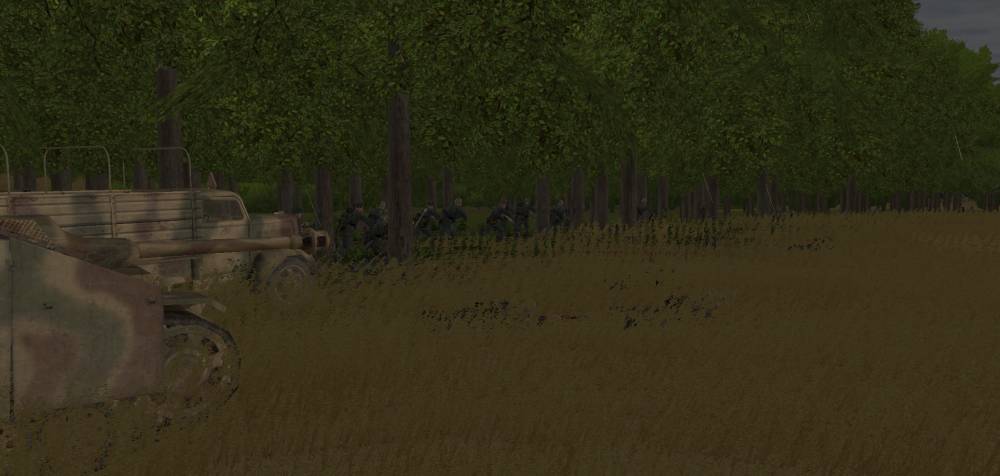
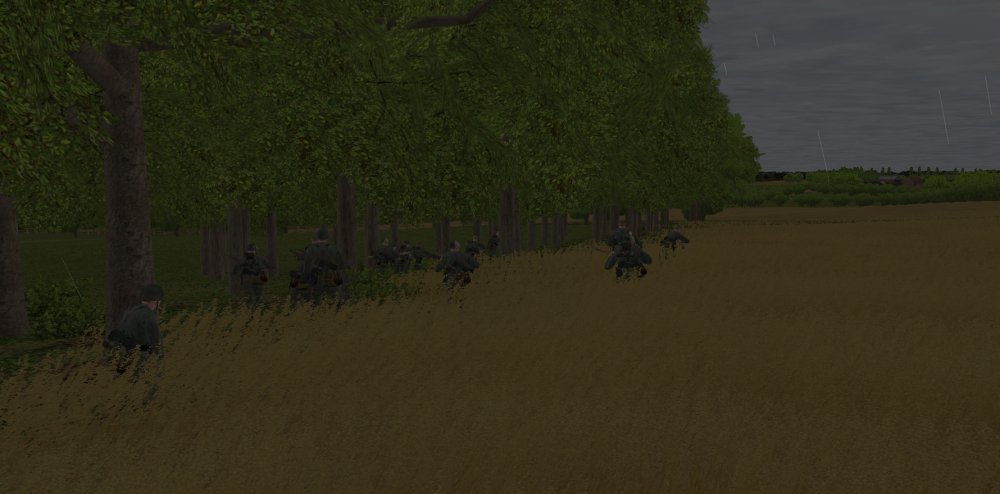
1 Company's lead platoon dash across a field between tree lines. They immediately report they have spotted a Stuart on the out skirts of the town. It does not appear to have spotted them however.
Meanwhile 5 Company gets some much needed support on their hill. If that Stuart tank makes an appearance 5 Company will be ready.
5 Company infantry deploy into the woods. Job one will be to find out where that Stuart tank is hiding.
-
5 Company needs more armor support so 1 Battery moves a platoon to cover 5 Company's hill.
Meanwhile towards the town; 1 Company heads from one treeline to the next.
-
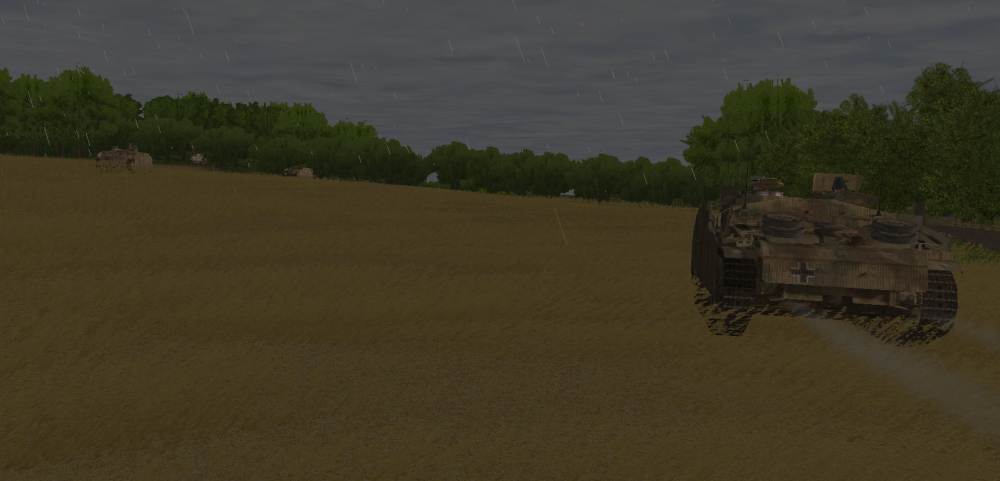
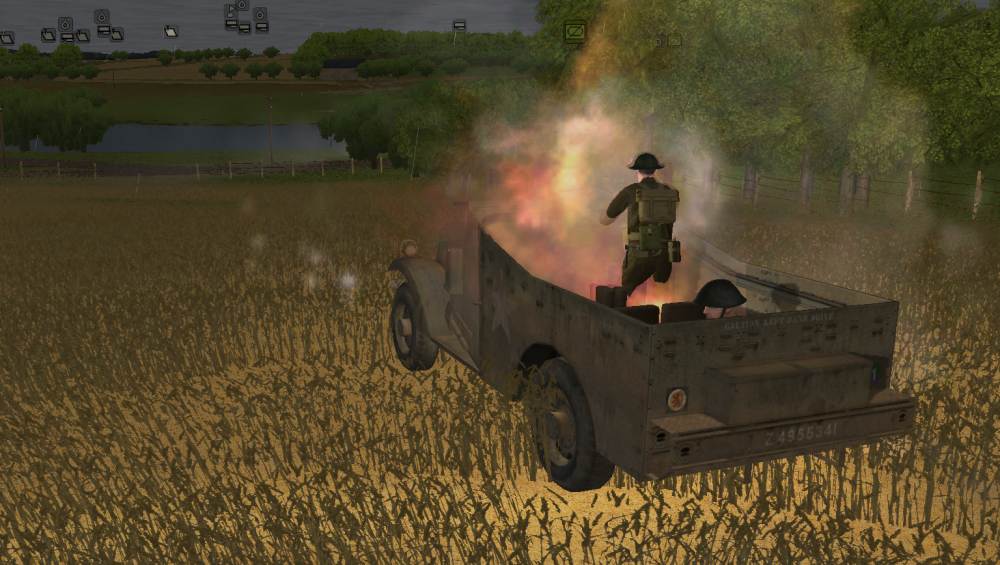
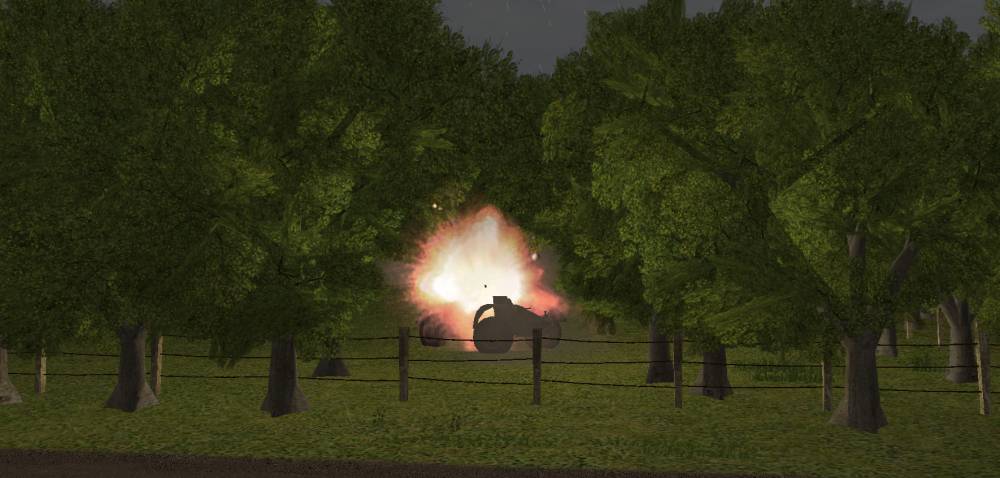
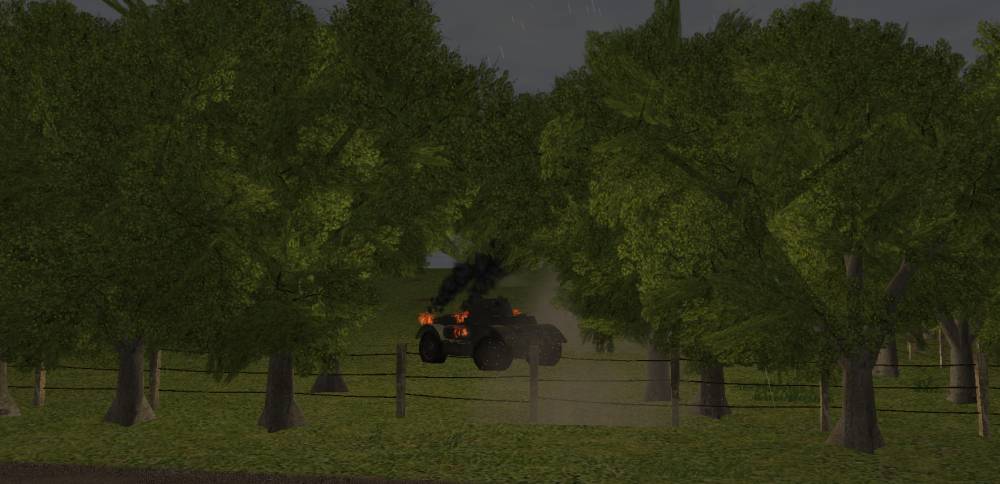
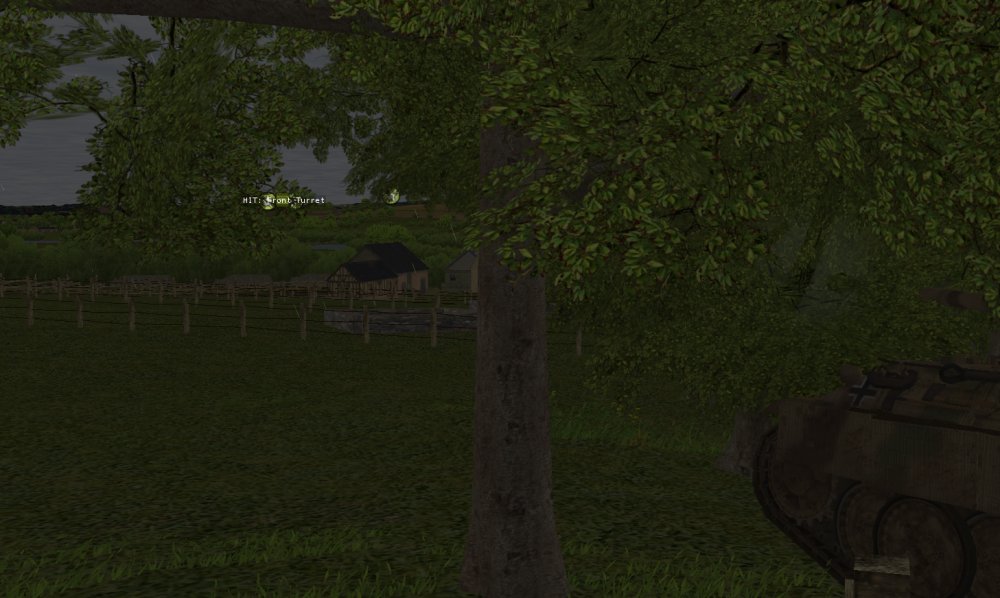
The Stugs that recently spotted and KO'ed the Staghound now report seeing a Scout car with personal inside. They engage.
It takes a couple of shots but they get it – direct hit.
The lead elements of 1 Company spot a Churchill tank on the edge of town from there positions in the tree line.
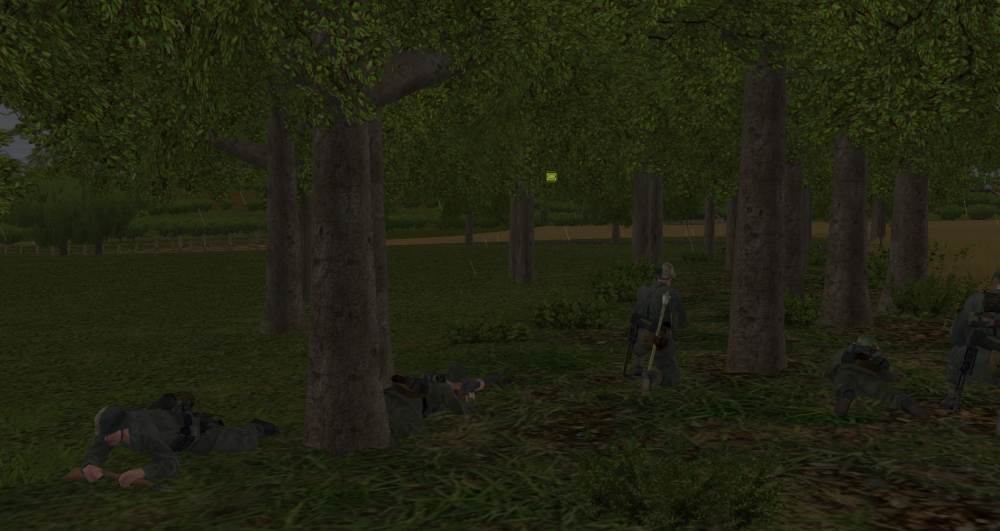
Taking the town will likely be a challenge.
Meanwhile on my side of the river 5 Company's recon half tracks come under fire. They barely manage to report back that a Stuart tank has destroyed one recon vehicle and engaged the other before contact is lost. Hochstadter reports that they were to far ahead to property be supported so no one in 5 Company really knows where the Stuart is. The best he can say is the enemy tank is on the rear slope of his company's forested hill top objective.
Stuart races between the recon half tracks taking out one...
and then the other...

-
LOL well you are going about it with the right idea in mind. The weaker his infantry, the more incentive he has to risk the Priest in direct fire support and the odds go up that maybe you will get a shooting opportunity.
+1 to that.
Work the problem (of the Sherman Priest Duo) as it comes. If one hangs back and the other moves forward look for opportunities to take out one of them. Distraction can work for you as well. I have on several occasions ordered infantry to fire on a buttoned up tank just so the tank would spot them and engage them. Knowing that I had an AT asset that could then get a side shot. Sometimes it goes off so well I don't loose anybody. Other times - well they got the tank but it cost me.
-
cool. Really hoping to see this work as I occasionally run into these moments on defense where I wonder should I try a little more risky offensive action and usually never get to try it.
This great to watch. I usually resist the urge to try this kind of thing - been burned a few times:)
@Tiresias this seems to be working well and on top of that you got some survivors for 2 Platoon and 4 Platoon out of harms way who can fight again. Brilliant. That Priest will be an challenging issue. The good news is if you can hit it hard enough it will go BOOM. I have seen those guys make a massive crater and takeout nearby infantry just from the secondary explosions.
-
Oh that is disappointing. I was hoping to use the target briefly command at the end of moment orders. I would use it like this: when moving a tank into a position to get eyes on an enemy that the tank has not spotted yet. I would like to area target briefly near to where a known enemy is at the end of of its movement so that the tank starts firing something before it spots the enemy. Right now I do this and manually clear the area target order at the next command phase. Which works OK. The only trouble is that the length of time they area fire is determined by how much time is left in the turn rather than a controlled time. I was hoping to use the target briefly command to make that better.
-
Still really just moving to contact – it is nice to see a sign of the enemy but it is going to take a while before this gets exciting.
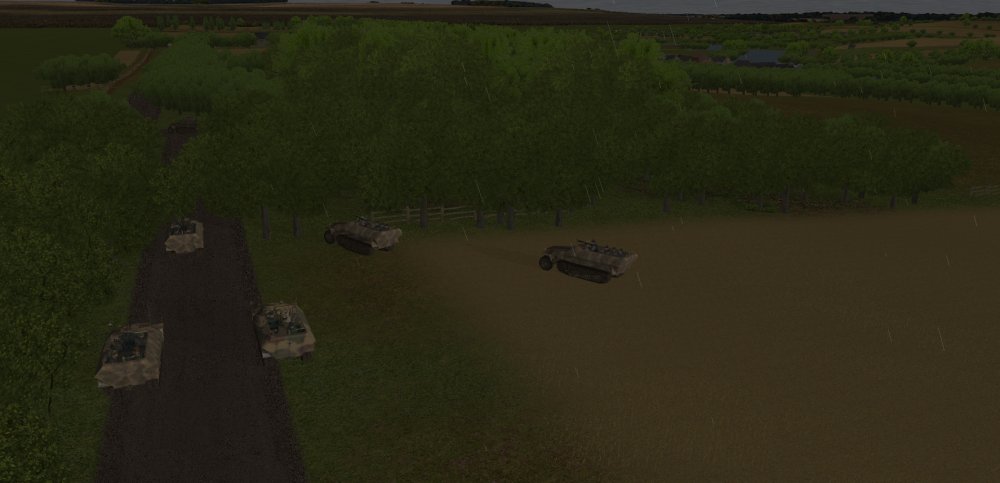
The last members of 5 Company are added to the convoy.
Plus I am able to add additional vehicles from 1 Company to the convoy going over the bridge plus get 2 Company ready near the road.

-
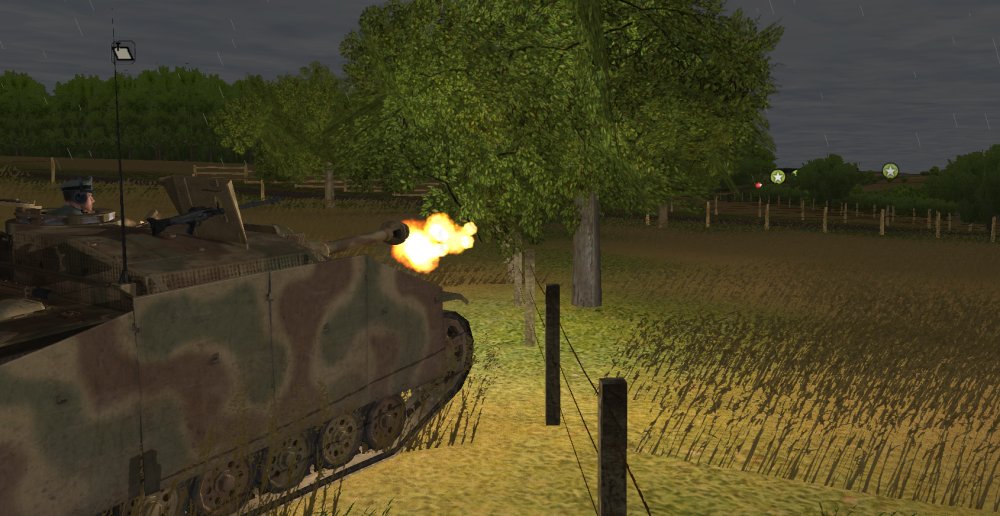
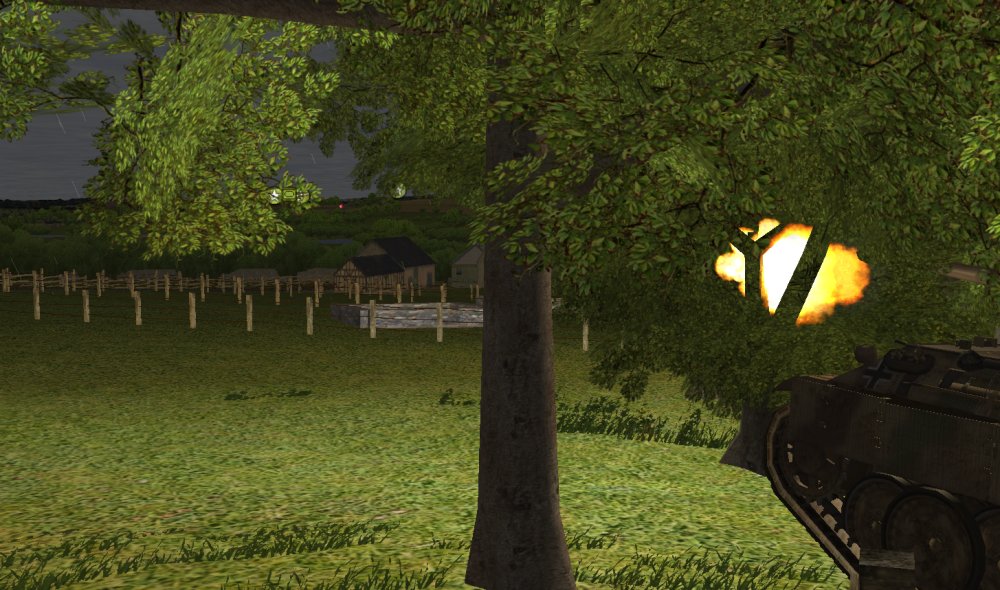
First blood goes to me! I love it when that happens. The newly repositioned Stug and two of his mates spot the Staghound and engage.
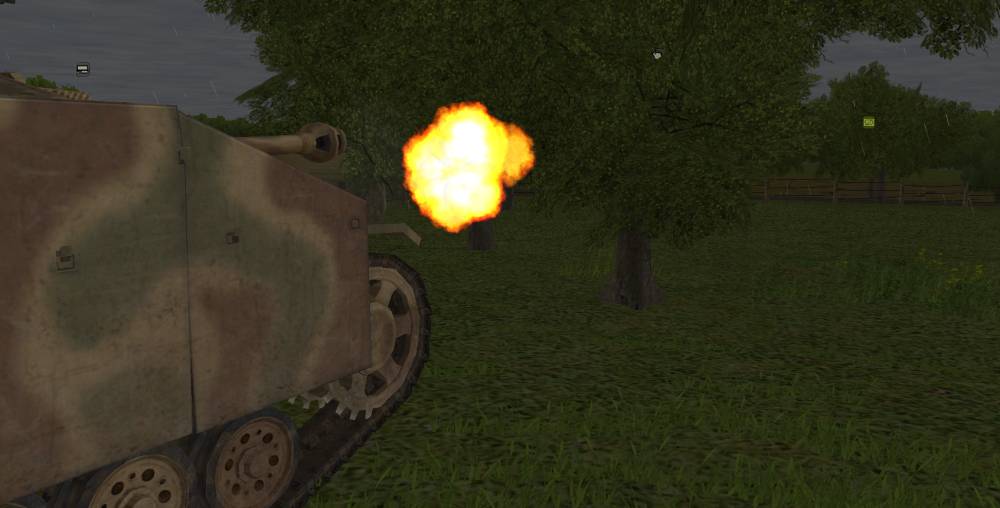
And hit...
Now you can see hot strong the wind is.
All in all three assault guns take aim at the armoured car at least two of the connect.
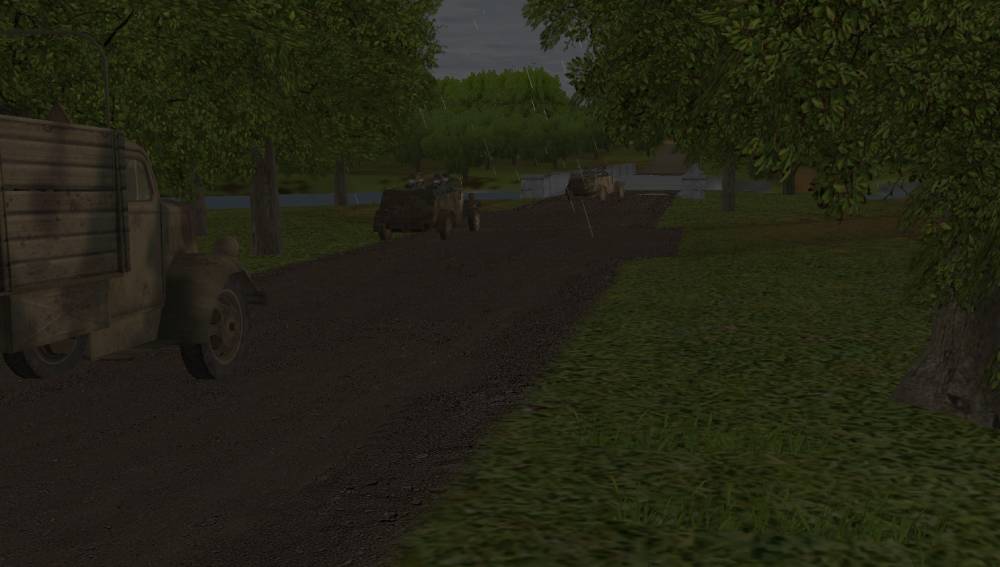
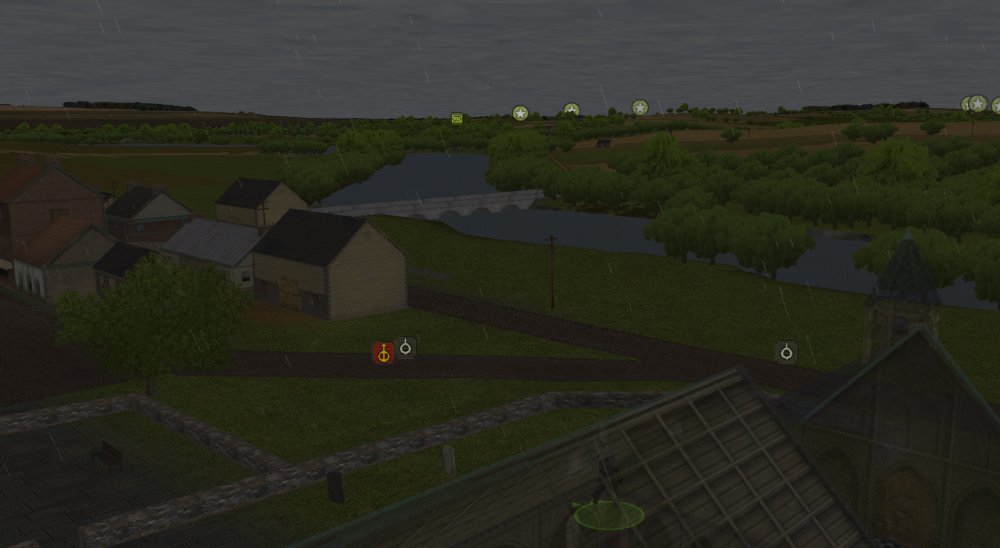
The traffic jam at the bridge is clearing up. Things are still going slowly but the jam is smaller now.
More of 2 Battery arrive to support the infantry as they take up positions in the tree line.
-
More moving to contact orders. More of 5 Company joins the convoy, more fixing of congestion at the bridge. One interesting thing; I thought that one Stug from 1 Battery should have spotted that Stag hound. When I checked his position with trees turned on I could see why the crew missed the armoured card.
Stug's visibility totally blocked by the low branches of the trees. I order him to back up and reposition next to the trees.
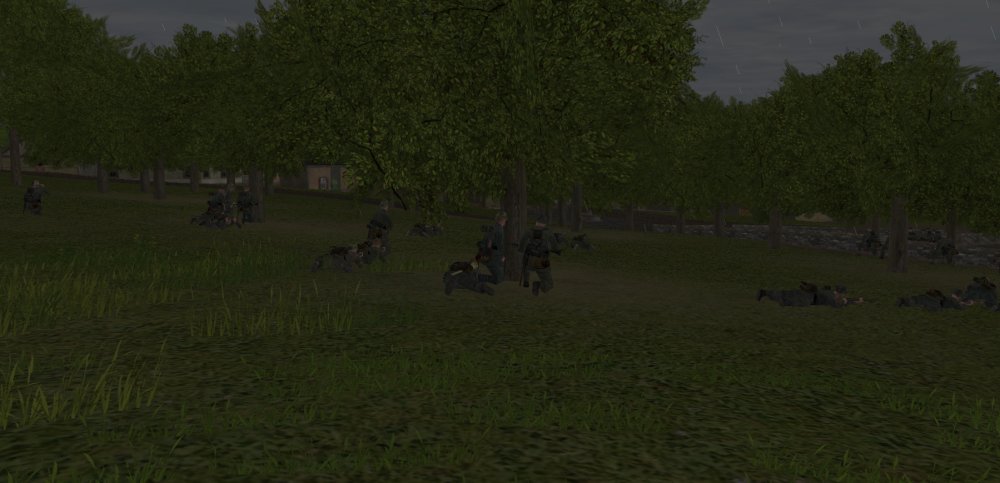
5 company under cover from members of 1 Battery make for their jump off point in the forest at the top of the hill.
More work to get 1 and 2 Company and 2 Battery over the bridge.
-
Not a lot of action this turn. My men are still moving to contact. Some of the enemy's recon forces are spotted but that is about it.
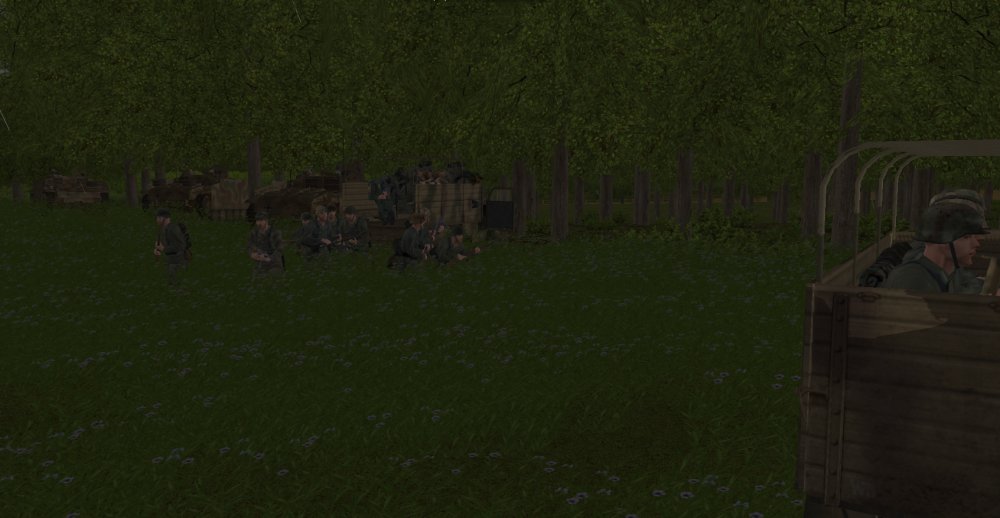
Members of 1 Company have dismounted and are taking up positions in the tree line.
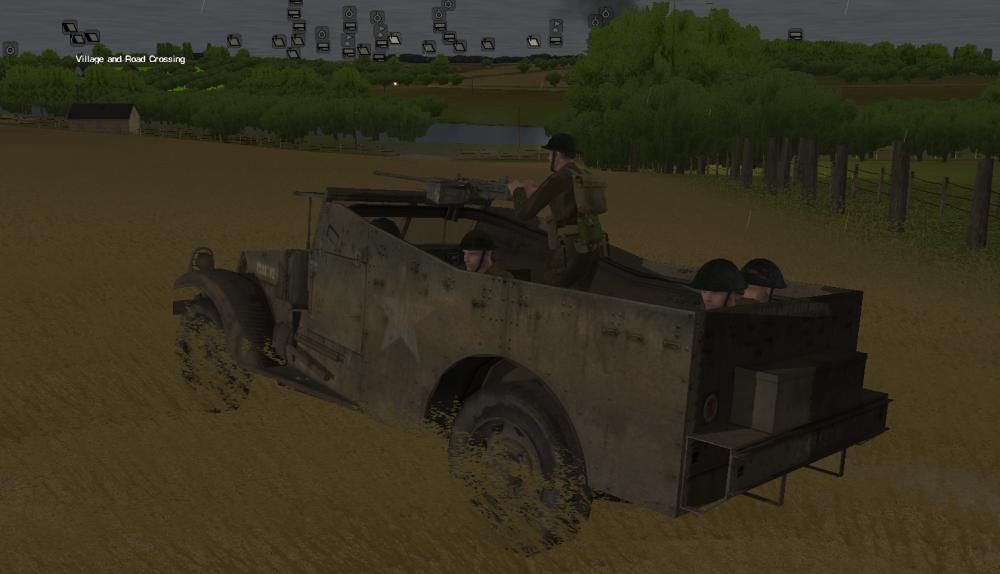
The sniper from 3 company has spotted a Staghound armoured car approaching the other side of the bridge.
More Half tracks from 5 Company join the convoy.
-
That would be nice. Has anyone noticed how buddy aid interacts with amo in 2.0? In CMBN if buddy aid retrieve a weapon all you get are the bullets in the clip even if the soldier receiving the aid had lots of amo.
-
<snip>
The alternative is to have 3 plt. stay at the road junction. In that scenario, the US advance would be splitting my remaining force in the middle in such a way as to give them plenty of room and concealment through which to move on the road junction at the leisure. In such a situation, both 1 and 3 plts. would find themselves embroiled in isolated firefights, which could each be undertaken at a time of my opponent's choosing and would have little bearing on the other's fortunes. Although I enjoy a cautious defence, I think this would reduce the Germans' role in the battle to a passive one after the fall of 2/4 plts' position. <snip>
I am enjoying your DAR thank you for it. Gutsy move counter attacking with 3 Platoon and keeping 2 and 4 Platoon on the hill. It will be interesting to see how it pans out.
Normally my advice would be to create a forward line of defense that I *plan* to abandon and use it to try to pin the initial enemy contact to try to get them under artillery fire. Then shortly after contact is made they withdraw to either joint the real defensive line or just to a second forward line depending on forces and the size of the map.
Your first contact went pretty well - enemy pinned and under artillery - well done. From personal experience I all to often to try to keep those forward guys in place too long. Sounds like you are doing the same:-) The remnants of 2 and 4 platoon could move back to the reverse sloop of their current hill. The idea being that once the enemy has blasted where your guys used to be and then take the hill they will want to come down the other side. When they do you have guys at the bottom to engage them as they crest meanwhile elements of 3 and 1 platoon also hit them from their positions. Is that possible? Can 3 hit targets on the back of the centre hill from their original planned positions at the junction? Can 1 platoon fire on the back slope of the centre hill from their positions? If so you can make that a nasty kill zone and win they day.
I am only offering that as an alternate possibility for you to consider - some future time perhaps. You clearly have chosen a plan and I am looking forward to see how it turns out.
-
This experiment certainly is enlightening, @poesel71. Thank you.
I think many of us knew that spotting calculations had to be happening in some kind of heart beat. Very interesting to see what this experiment shows.
Knowing this will probably change some of my decisions in game. Here are two examples that either were a result of this or could have turned out differently if the spotting calcs had landed differently.
It means that if you set a 10s pause on the shoot part of a set of shoot and scoot orders you are giving your tank at most two chances to spot the enemy but most of the time they will only get one chance. This happened to me just he other day I had a Sherman do a shoot and scoot with a 10s pause facing where I knew a Tiger tank was (that's why I did not go for longer than 10s). The Sherman saw nothing and backed away.
Note: not saying the outcome was not possible. The Sherman had not seem the Tiger before and to get to its shooting position it had to go uphill and crest plus there were a tree or two between them. So, I never though it was a sure thing.
For moving in and out of smoke this as serious ramifications because once your unit clears the smoke they can sit there blind for a long as 6s. This explains what happened to me just this morning. I had a Panther moving out of a smoke screen right next to where a Sherman Firefly was sitting. The Panther cleared the smoke and then sat there like an idiot for a long time (I did not time it) not even 10m from the Firefly. Finally the Panther spotted it and shot it. But the Firefly could have easily spotted the Panther 1s after it cleared the smoke and then it would have a 6s drop on the Panther. Yikes. It all depends on what which unit is on what schedule.
Note: again not saying this could not have happened. The Panther was in the smoke buttoned up and did not spot the Firefly earlier before the smoke was dropped. So real life could have turn out just like that.
-
<snip>So I spent quite a bit of time learning how to mix concrete and how to cure it.
Nice - my uncle was the big concrete guy in our family but I'll tell a story on myself.
 I was helping my now Father in Law build a covered bench in the back yard of his house. He wanted to make sure it was nice and stable. I said you need a concrete footing - I know concrete I'll do it for you. I was still a teenager and in engineering plus I had watched my uncle - I knew everything:-) We built it and it was great. A few days later I was thinking about just how much concrete I used and I did a little math. 750Kg of concrete for a covered bench. Talk about over kill. In my defense it never moved - until the next owners put in a pool. I am sure they were impressed when they went move the bench.
To this day in our family if someone is over doing something we just say "How much concrete are you using"?
-
You will have men die. That's what happens.
Some of you may die, but that's a sacrifice I am willing to make.
Lord Farquaad
But seriously: @DarkFib3r how did it play out? What plan did you pick and what happened?
-
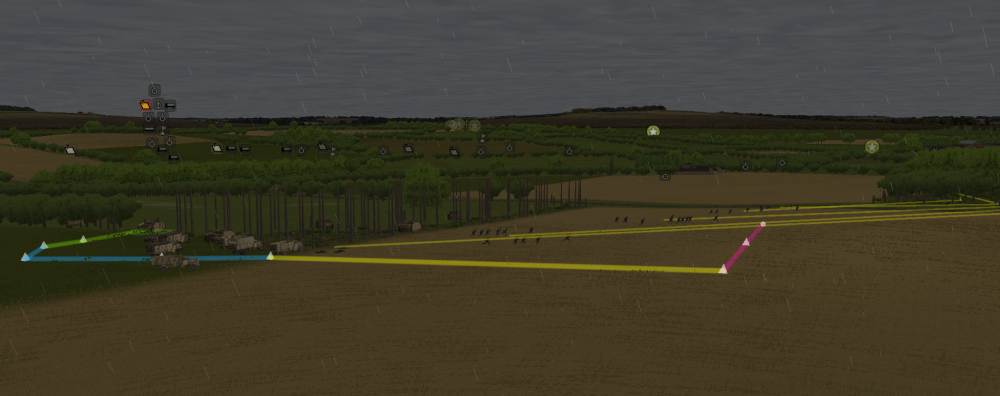
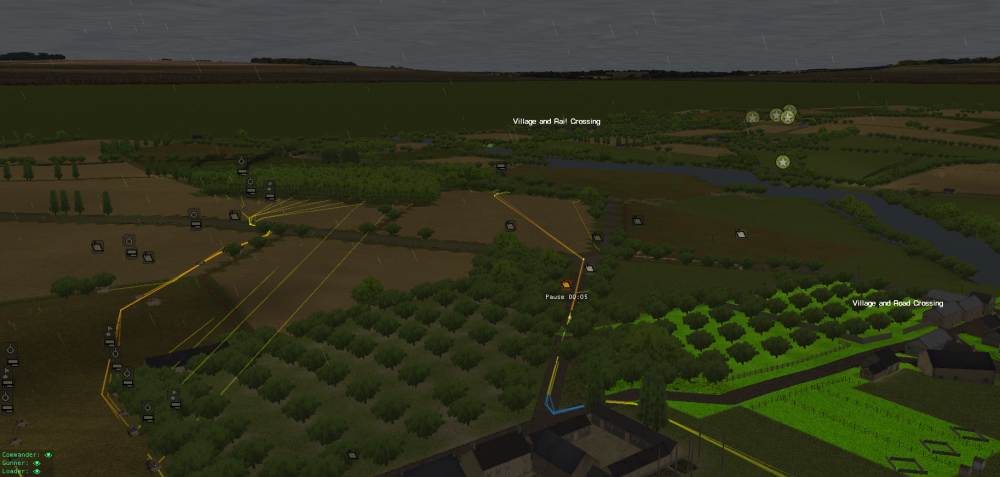
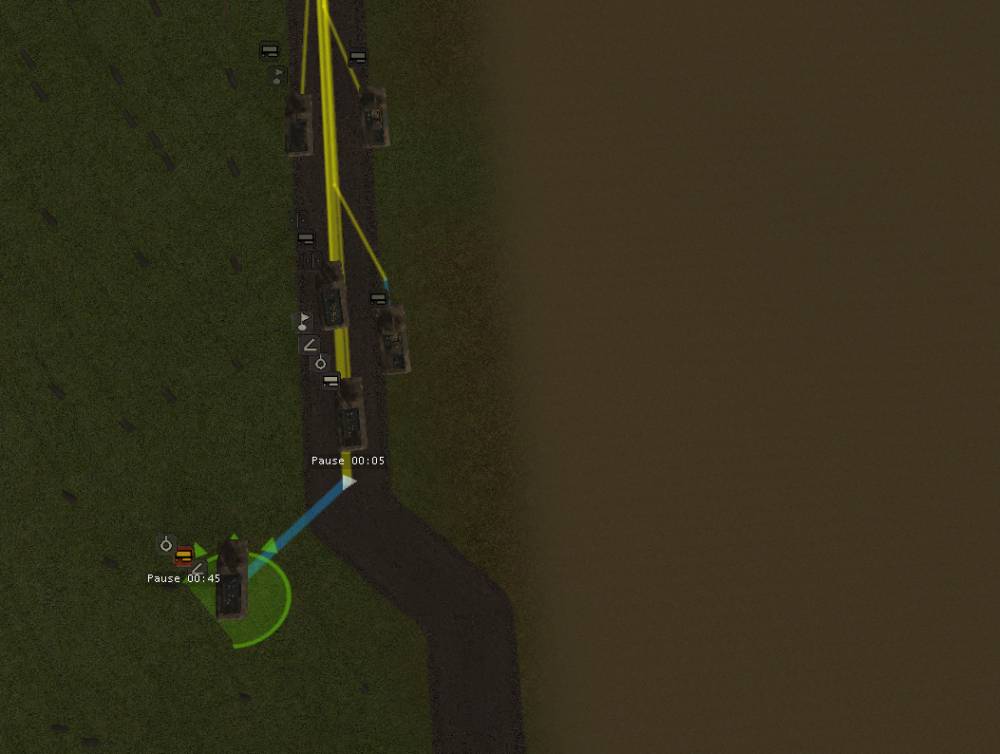
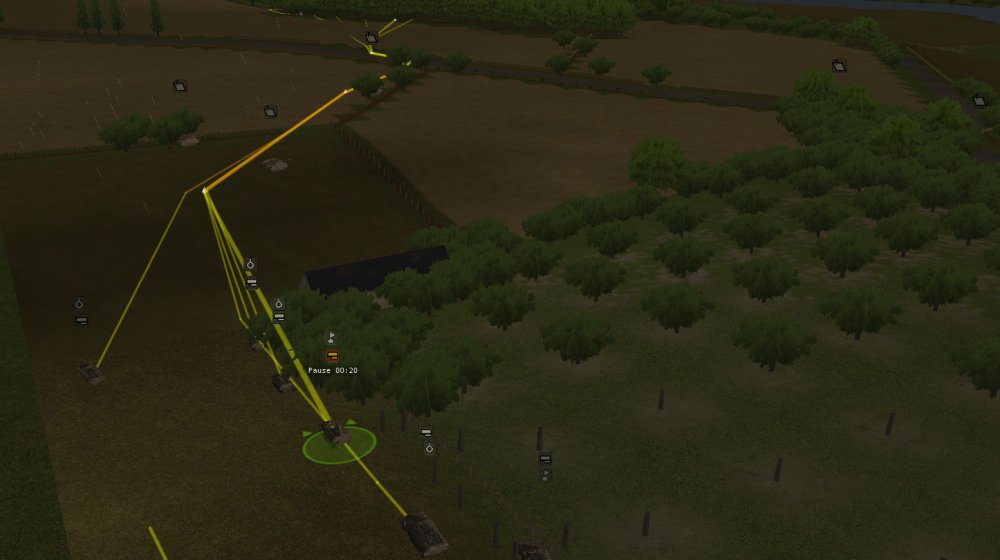
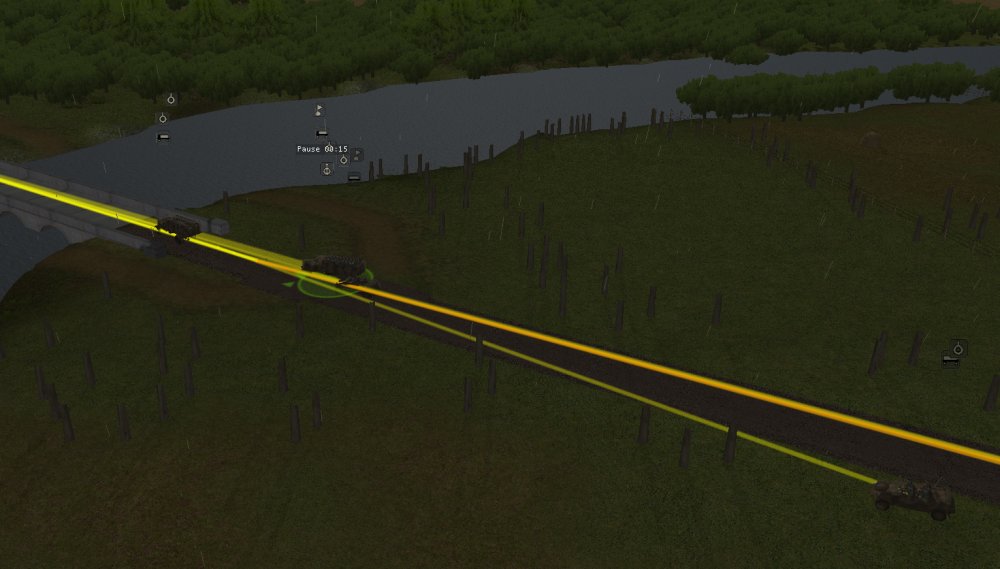
While plotting the moves for this turn I took some video of the convoys in action. Here are some thoughts on convoy management:
3 Battery moving with no issues
Traffic is clogging up near the bridge
Managing the traffic flow over the bridge
Managing 5 Company's convoy
I recorded follow up movies so you can see how these move orders played out. It will take me a while to produce them and put them up because I am going to play turns for a few days instead of play with video.
-
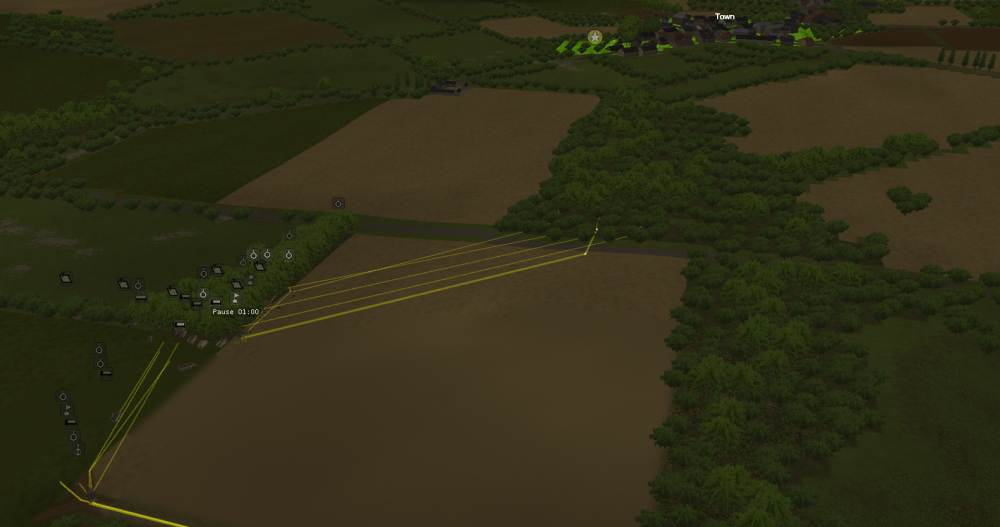
More of the same kind of orders – moving forward looking for the enemy along with some moving in convoy in safe areas. The bridge is still a bottle neck but the bunching up is getting better instead of worse.
5 Company's Recon elements move forward while 1 Battery protects them from the top of the hill. 5 Company itself is going to have to move through this area to get to the tree line so elements of 1 Battery will stay here to keep the enemy tanks from getting an opportunity to pick off 5 Company's half tracks.
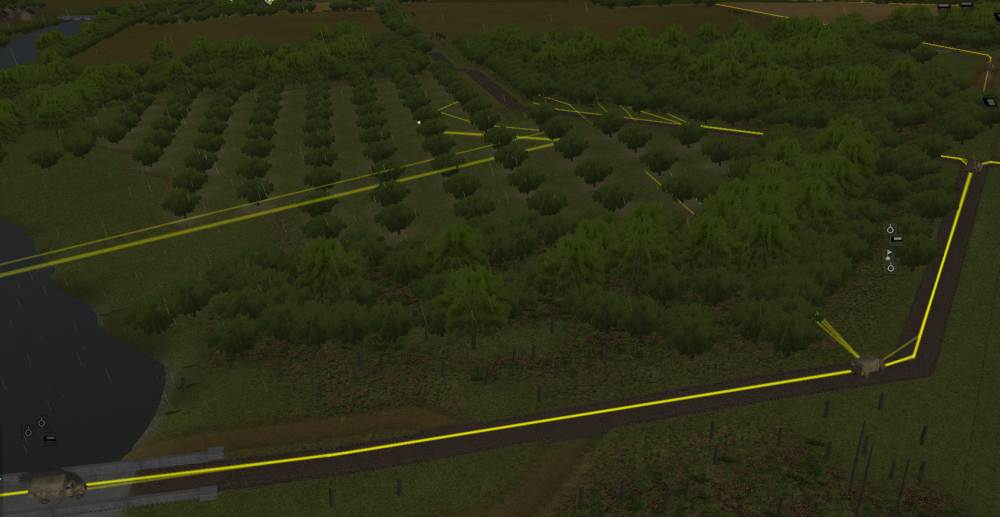
3 Company deploys into the orchard. They will stay here and observe the village – perhaps sending in scouts while I see if any artillery fall on the objective in the next few minutes.
Elements of 1 Company begin to deploy into the tree line near the town. The infantry will begin to scout forward from here towards the town.
3 Battery arriving at its staging area. I tweak their orders to better provide cover on my right flank and make sure they are in a good position should they be needed to support the assault on the town.
-
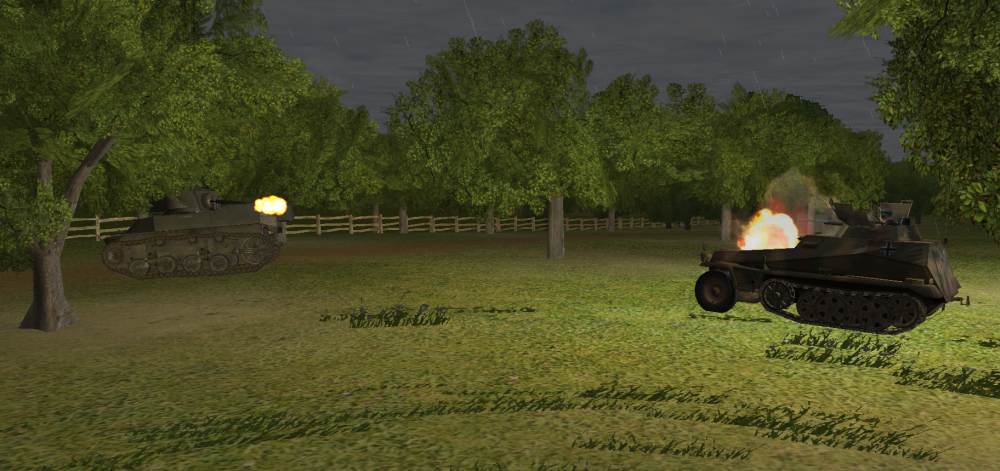
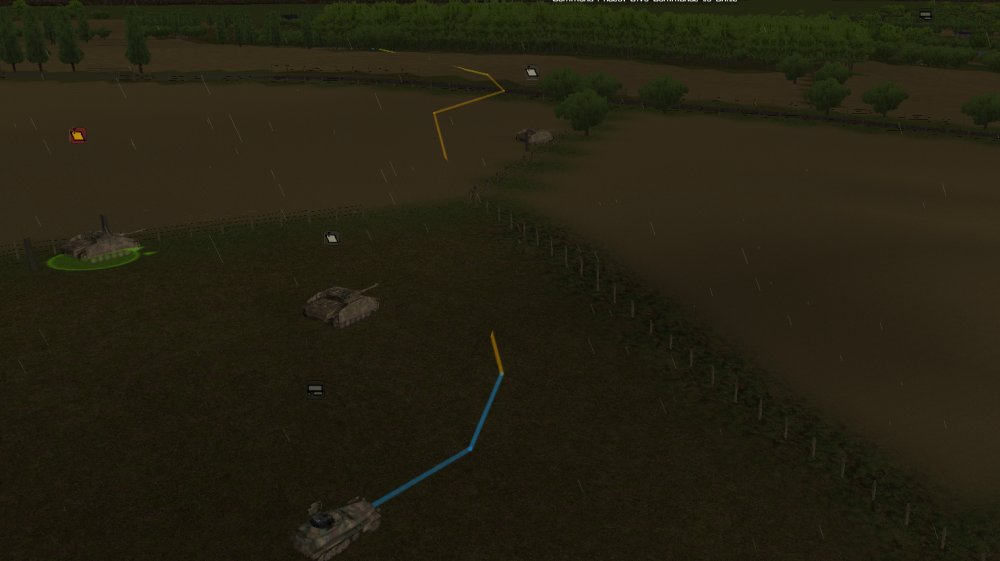
One of the Stugs from 1 Battery spots a Churchill tank on the other side of the valley (one of the Churchill tanks originally spotted by the Recon Half tracks and the Panther). Fires:
And Hits:
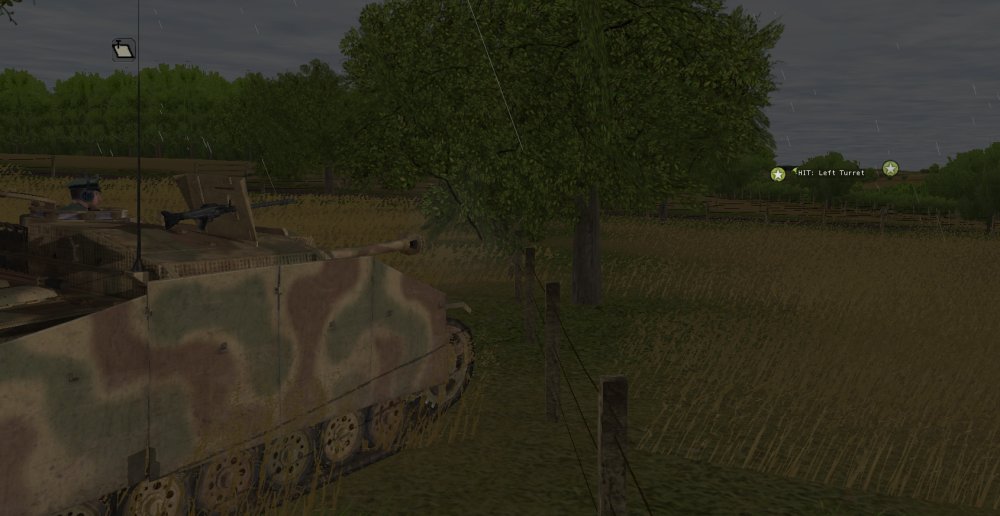
Mean while the Panther also fires at the same Churchill.
And hits...
I counted five hits on that Churchill tank's turret. No penetrations and the enemy tank moves out of view.
1 Company begins to deploy into the tree line near the town.
-
A few shots were fired this turn – by my side. Most of the turn was still moving into position to begin searching for first contact. On my left flank here is the lead positions of 1 Battery. 5 Company's recon Half tracks successfully extracted them selves and have been replaced by Stugs.
Near by 3 Company is deploying into the Orchard.
 I was helping my now Father in Law build a covered bench in the back yard of his house. He wanted to make sure it was nice and stable. I said you need a concrete footing - I know concrete I'll do it for you. I was still a teenager and in engineering plus I had watched my uncle - I knew everything:-) We built it and it was great. A few days later I was thinking about just how much concrete I used and I did a little math. 750Kg of concrete for a covered bench. Talk about over kill. In my defense it never moved - until the next owners put in a pool. I am sure they were impressed when they went move the bench.
A little confused on Italy v Normandy and engines
in Combat Mission Fortress Italy
Posted
Well, now we all know what that phrase means in one of your posts:)